●
<
RIT
> = DFE (direct frequency entry)
●
<
Tune Down
> = Tune Mode
●
<
Tune Up
> = Battery Voltage
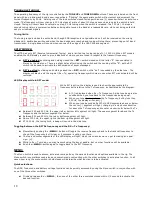
DFE Mode:
“DFE” is annunciated when mode is activated, [ - ] is displayed on LED
This mode allows you to enter a desired operating frequency using the paddle. This can be any frequency within the upper
and lower band edges currently in use. Simply use the paddle to enter the frequency numbers in Morse, starting with the
100 kHz digit and ending with the 100 Hz digit (four numbers total). The LED display will flash the number which has been
entered and the side tone will sound a beep. If a number is miss sent, a “?” will be annunciated and that digit must be re-
entered. When four digits have been entered, the rig will re-tune to that frequency. If the frequency entered is beyond the
tuning limits, DFE mode will simply terminate and the frequency will remain where it was.
NOTE:
●
DFE mode is not available if the rig is in Straight key mode.
●
DFE mode is not available when RIT is active.
●
DFE mode can be escaped by clicking the Menu switch at anytime before all 4 digits have been entered.
●
Some “Cut numbers” can be used. These are “T” = 0, “A” = 1, “U” = 2 “V” = 3, “N” = 9.
Tune Mode:
“T” is annunciated when mode is activated, “t” shown on display
NOTE
: Tune mode is not available if the rig is in Straight key mode.
This mode allows you to toggle the transmitter on and off using the paddle. This makes it easier to adjust a small antenna
tuner if two hands are required to operate it (One to hold it in place and one to turn knobs). This mode also allows you to
make power output measurements, which require a steady carrier for a few seconds in order to make an accurate reading.
●
If a constant carrier is not needed, it is better to send a string of Dots then use Tune mode for adjusting a tuner.
●
Toggle transmitter on: Tap the LEFT (DOT) paddle.
●
Toggle transmitter off: Tap RIGHT (DASH) paddle.
●
Exit Tune mode: Click
Menu
switch, “E” annunciated.
Battery Voltage:
This mode reads the input voltage to the board and then displays it on the LED display and annunciated in Morse. The
letter “B” is sent before the digits during Morse annunciate.
MENU switch only selected functions:
●
Frequency,
●
Keyer code speed (S)
●
keyer memory entry (M)
●
Digital transmit mode (D)
●
User preferences (P)
With the exception of Frequency, click and hold closed the Menu switch until the letter on the 7 segment display appears
and the Morse letter identifying the desired function has been annunciated by the side tone, then release the switch. The
switch must be released before the next letter in the menu sequence is annunciated to select the desired function.
Frequency readout:
●
Click and then release the <
MENU
>
switch will activate the frequency readout.
The default mode of readout is both a numerical readout, sequenced one digit at a time on the LED display, and
annunciated in Morse by the side tone. The 100 kHz, 10 kHz, 1 kHz and 100 Hz digits are indicated, in that order. MHz
digits are implied by the band in which the rig is currently operating on. A dash [ - ] on the display and an “R” in Morse
indicates the decimal point separating the 1 kHz digit from the 100 Hz digit. Zero's are sent as the cut number “T” in
Morse. Therefore, a frequency such as 7.0400 will be sent as T4TRT in Morse and seen as 040-0 on the display. It is
possible to set the rig to indicate the frequency only with the LED display.
S: Selecting Keyer code speed
“S” on the display
Keyer speed has a range of about 10 to 35 wpm. Initial power on speed is set to 20 wpm. Code speeds are selected in
19
Summary of Contents for Mountain Topper
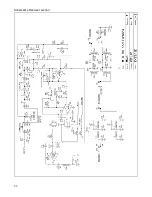
Page 22: ...Schematics Receiver section 22 ...
Page 23: ...CPU TRANSMITTER Sections 23 ...

