until it does. The sound level should be set a little above the minimum needed to get the response from the rig. If you do
not get the annunciation even with the volume turned all the way up, then there is likely a problem with the interface
board.
If you can not get the rig to respond to the “test” button, you may have to change some settings called “preamble and
postamble. These setting are found as a sub menu of the TRX Control menu, click the tab called “timing”. Setting the
preamble and postamble time to 500 ms should make it work.
Offset adjustment:
Below the ATS3/Manchester selection on the TXR Control screen, there is a field called “offset” and is set to 577 Hz. This
offset number will have to be adjusted to exactly match the offset in the MTR rig. There is likely to be some difference
between the exact transmit and receive frequencies fall due to the setting of the BFO trimmer and tolerances in the
capacitor values used in the audio filter.
In order to set the offset correctly, you need to set up a separate PSK31 station so that you can talk to yourself. Using
dummy loads instead of antennas, of course. Since your not actually transmitting on the air, you can use the default power
up frequency of the MTR on the band you happen to choose to use, though it is best to use one of the higher bands, as
this will compensate for any DDS calibration errors which are more pronounced on the higher bands. If your using a Pocket
PC (aka PDA) with the MTR, receiver audio is coupled into the PDA using its built in microphone. Place an earbud from the
phones jack of the MTR over the microphone slots on the PDA. If your using the Desktop program, you can jumper the
headphone output directly into the MIC jack on the PC.
1.
Set the marker on the Pocketdigi water fall to exactly 600 Hz. (tap the screen just above the frequency ruler)
2.
In the Channels sub menu, verify Pocketdigi is in BPSK31 mode and AFC is turned off
3.
Set the MTR to transmit by clicking on the lightning bolt to the right of CAT. Note that when transmitting, the side
tone reproduces the modulation tones and can be heard in the headphones.
4.
Find the ATS-3B signal with the other receiver and select the signal on the waterfall. Its AFC should also be turned
off.
5.
Return to receive mode on the Pocketdigi by clicking the lightning bolt again.
6.
Transmit a signal with the other rig.
7.
Check the frequency of where the other rig is transmitting at on the Pocketdigi water fall. Tune the transmit
frequency until it is centered at 600 Hz and note how far the frequency had to be changed to align it to 600 Hz.
8.
Add (if you had to tune down in frequency) or add (if you had to tune up in frequency) the difference between the
initial transmit frequency and final frequency to the offset value in the Pocketdigi set up menu. Tap on the number
and use the keyboard to change it. You will have to go through and exit the setup > Tx control menu each time
you need to change and then check the offset value
9.
Repeat steps 3 to 8 until both rigs are transmitting and receiving on the exact same frequency.
Now that the offset has been set, you can talk between your other rig and the MTR. Try sending the macros and try
different modulation modes.
Using the CAT function.
This function allows for setting the operating frequency of the rig.
Selecting CAT then [Frequency] will bring up a numeric keypad. Five digits must be entered. This allows setting of the
frequency to 1 kHz on 30, 20, 17 and 15 meters. For example, enter 14071 to go to 14.071,000 MHz. Once you enter the
frequency, tap on SET to transfer the information to the ATS-3B. It is possible to set the frequency of the rig outside of the
normal tuning limits of the rig. Doing this is not recommend.
Using Macros:
Some of the Marcos are not complete and are missing the return to receive statement $rx, so this will have to be added or
the rig will stay in transmit. Here is a list of the various macro commands which can be inserted into the text.
$$ - The letter '$'
${autocq:xx} - Start tx. After $rx macro, go to RX mode for xx seconds and then restart this macro again.
$tx - Push the TX button.
$rx - Switch to receive.
$mycall – Call sign as defined in preferences.
$myname - Name as defined in preferences.
$myqth - QTH as defined in preferences.
$myloc - Locater as defined in preferences.
$myemail - Email address as defined in preferences.
$time - Local time.
25
Summary of Contents for Mountain Topper
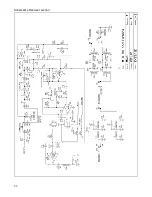
Page 22: ...Schematics Receiver section 22 ...
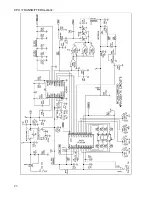
Page 23: ...CPU TRANSMITTER Sections 23 ...

