background image

13

Check point after installation

The wiring is connected properly to 
the power supply.

Pemeriksaan selepas pemasangan

Pendawaian bersambung secara 
betul kepada bekalan kuasa.

组装后的检验点

电线已正确地连接了电源线。

3

Check point after installation

The Canopy is securely screwed.

Pemeriksaan selepas pemasangan

组装后的检验点

Sengkuap diskru dengan betul.

罩盖牢固地拧紧。

4


Install the Blades


Memasang Bilah Kipas


安装扇翼

1

Remove the supplied Screw 

k

.

2

Assemble the Blade Assembly 

C


towards the Hook 

l

.

1

Tanggalkan Skru 

k

 yang dibekalkan.

2

Pasang Bilah Kipas 

C

 pada Cangkuk 

l

.

1

拆除配备螺丝


k

2

安装扇翼组件


C


对着挂钩


l


Install the Upper Canopy


Memasang Sengkuap Atas


安装上罩盖

How to install

Cara pemasangan

如何安装

1

Remove the Screws (2 pieces) 

i


from Upper Canopy 

A

.

2

Align and insert the Fixing Rib 

s

1

 of 

Upper Canopy 

A

 into the Slot 

s

2


of Motor Unit 

B

.

Check the gap 

j

 between the 

Upper Canopy 

A

 and ceiling is 

approximately 5 mm. After checking 
the gap, click it until the “click” 
sound is heard, and 

fi

 x the Screws 

i

 into the Upper Canopy 

A

 and 

tighten it.

1

拆除上罩盖


A


上的螺丝(

枚)

i

2

將上罩盖 

A

 對齊固定凸緣 

s

1


並插入发动机组件 

B

 的凹槽 

s

2

 。

檢查並確認上罩蓋 

A

 和天花板之間的

距離為 

5

 毫米。 

检查缺口后,单击它,按直至听到
“咔哒”一声,將螺丝 

i

 安装至

上罩盖 

A

 并锁紧。

1

Tanggalkan Skru (2 batang) 

i


daripada Sengkuap Atas


A

.

2

Selarikan dan masukkan Pelaras 
Tetap 

s

1

 bagi Sengkuap Atas 

A


kepada Slot 

s

2

 Unit Motor 

B

Selaraskan jarak 

j

 antara Sengkuap 

Atas 

A

 dengan Siling kira-kira 5 mm. 

Selepas memeriksa jarak, klipkannya 
sehingga mendengar bunyi “klik” dan 
pasangkan Skru 

i

 pada Sengkuap 

Atas 

A

 dengan ketat.


Attention:

• Do not assemble the Canopy in 

opposite direction.

Can cause abnormal noise.


Perhatian:

• Jangan pasang Sengkuap secara 

posisi terbalik.

Boleh menyebabkan bunyi luar biasa.


留意:

• 请勿将罩盖装反方向安装。

可引起异响。

l

C

C

1

k

2

Blade Safety Hanger / 
Penyangkut Keselamatan Bilah / 

扇翼安全悬杆

A

i

2

1

i

j

Approximately 5 mm or more/
Kira-kira 5 mm atau lebih/

大约为

 5 

毫米 或更

Ceiling / Siling / 

天花板

A

A

B

s

2

s

1

How to install

Cara pemasangan

如何安装

Summary of Contents for K14YZ

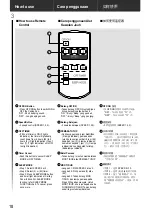
Page 1: ...nts KDK 6 7 8 9 10 15 16 19 Pencegahan keselamatan 4 5 Penyelenggaraan 8 Nama bahagian 9 Cara pemasangan 10 15 Cara penggunaan 16 19 Spesifikasi Muka belakang Kandungan Operating and Installation Inst...

Page 2: ...areas such as a gas cooker Can cause fire or electrical shock due to short circuit Do not install the Ceiling Fan near chemicals and alkali Can cause fire or electrical shock due to short circuit Do n...

Page 3: ...ng The mounting of the suspension system shall be performed by the manufacturer its service agent or suitably qualified persons Can cause injury if Ceiling Fan drops This product is for in house use o...

Page 4: ...Berhenti menggunakan Kipas Siling apabila mendapati apa apa keganjilan atau kegagalan berlaku dan putar Pemutus Litar Miniatur MCB kepada OFF Risiko asap kebakaran kejutan elektrik atau Kipas Siling t...

Page 5: ...rjatuh akibat goyangan Pemasangan sistem gantungan hendaklah dilakukan oleh pengilang ejen servis atau individu yang bertauliah Boleh menyebabkan kecederaan jika Kipas Siling terjatuh Produk ini adala...

Page 6: ...6 250 300 N cm 10 OFF MCB...

Page 7: ...7 2 5 1 6 15 Safety precautions Pencegahan keselamatan...

Page 8: ...an authorized dealer 5 When referring to an authorized dealer show these instructions to them so that maintenance will be done correctly 6 If the product is broken or damaged remove it from the ceili...

Page 9: ...Kipas K14XZ 4 Pemasangan Bilah Kipas K14YZ 5 D Penutup Hiasan 1 E Bateri AAA R03 LR03 2 F Alat Kawalan Jauh 1 G Set Pemegang Alat Kawalan Jauh 1 A 2 B 1 C K14XZ 4 K14YZ 5 D 1 E AAA R03 LR03 2 F 1 G 1...

Page 10: ...rops AMARAN Pastikan Cangkuk Siling boleh menanggung beban 10 kali ganda berat Kipas Siling Jangan tanggalkan Pengikat Kabel f dan Penutup Paip e Wayar Keselamatan mesti dipasang dengan betul pada Pai...

Page 11: ...e fixed on the Ceiling Hook The Safety Wire is looped to the Ceiling Hook and securely fixed to the Pipe Pemeriksaan selepas pemasangan Untuk langkah keselamatan pastikan semua Bolt dan Nat diketatkan...

Page 12: ...Sila rujuk gambarajah di bawah 2 3 4 1 WARNING Electrical wiring must be done by a qualified individual Can cause fire or electrical shock This product is not provided with a cord and plug or with oth...

Page 13: ...heck the gap j between the Upper Canopy A and ceiling is approximately 5 mm After checking the gap click it until the click sound is heard and fix the Screws i into the Upper Canopy A and tighten it 1...

Page 14: ...Bilah Kipas menggunakan 2 batang Skru Kilas pengetatan 250 300 N cm 3 C 3 4 k 2 250 300 N cm 1 D B D 2 WARNING Tighten the Blade Screws firmly using a screw driver 250 300 N cm Can cause injury if th...

Page 15: ...perbezaan 1 mm Kaedah pelarasan L W H 1 L L 1 AWAS Selepas pemasangan pastikan Kipas Siling tidak bergoyang berlebihan Boleh menyebabkan kecederaan jika Kipas Siling terjatuh 6 L W W 1 m H H 2 5 m 7 I...

Page 16: ...a Bateri sebelum membuang Alat Kawalan Jauh Jangka hayat Bateri adalah lebih kurang setahun untuk penggunaan normal Gantikan Bateri pada tempoh penggunaan masa yang sama dan hati hati agar Bateri tida...

Page 17: ...enerima produk boleh menjejaskan penghantaran isyarat Halangan seperti Dinding atau Kaca e di antara penerima produk dengan Alat Kawalan Jauh boleh menyebabkan kegagalan penghantaran isyarat 1 W 8 H 3...

Page 18: ...enggunaan Alat Kawalan Jauh 1 Butang OFF ON Tekan butang OFF ON untuk Kipas Siling berpusing atau berhenti ON Bunyi Beep yang pendek OFF Bunyi Beep yang panjang 3 PEMASA TUTUP Sekiranya pemasa 6 jam d...

Page 19: ...EEP MODE button to cancel Refer SLEEP MODE FUNCTION chart below How to use SLEEP MODE Cara penggunaan MOD TIDUR 5 Tekan butang MOD TIDUR Lampu petunjuk pada Kipas Siling akan berkelip mengikut baki ma...

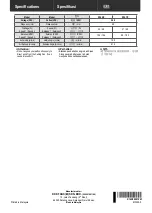
Page 20: ...ed 1 Speed 3 Kuasa W Kelajuan 1 Kelajuan 3 W 1 3 20 68 21 69 Rotation RPM Speed 1 Speed 3 Putaran RPM Kelajuan 1 Kelajuan 3 RPM 1 3 102 196 95 183 Air Velocity m min Halaju Angin m min m min 155 Air D...

Reviews: