56
Picture 56
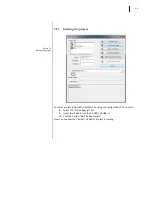
Debugging the project
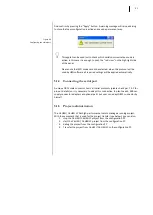
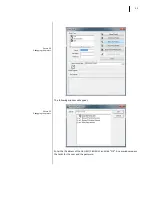
If the project is not protected, just click the "OK" button, otherwise enter the name
and password of a project user who has the rights to modify the project.
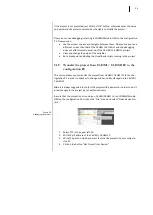
Now you can see debugging is starting in COMBIVIS studio HMI on the configuration
PC. Now you can:
see the project screens and navigate between them. Please note you see a
different screen than that of the C6 HMI / C6 HMI LC and the debugging
does not affect normal operation of the C6 HMI / C6 HMI LC project.
View and change the value of the variables
Set a breakpoint and debug the Visual Basic scripts running in the project
5.1.9
Transfer the project from C6 HMI / C6 HMI LC to the
configuration PC
This option allows you to transfer the project from C6 HMI / C6 HMI LC to the con-
figuration PC in order to check or to change and hence transfer again into C6 HMI /
C6 HMI LC.
Hint
: It is always suggested to protect the project with a password in order to don’t
allow changes to the project by not authorized users.
Be sure that the project is not running on C6 HMI/C6 HMI LC, run COMBIVIS studio
HMI on the configuration PC, click on the “File” menu and select “Open Device Pro-
ject…”
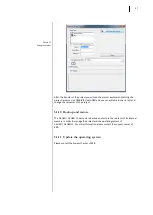
1.
Select TCP in the upper left list
2.
Write the IP address of the C6 HMI / C6 HMI LC
3.
Write the path on which you want to store the project on your configura-
tion PC
4.
Click on the button "Get Project from Device!”
Summary of Contents for C6 HMI LC
Page 1: ...Document Part Version 20125246 GBR 00 C6 HMI C6 HMI LC Instruction Manual COMBICONTROL...
Page 2: ...2...
Page 5: ...5 SECTION 1 1 Introductory Information...
Page 10: ...10 SECTION 2 2 Description...
Page 16: ...16 Figure 7 C6 HMI C6 HMI LC 8 4 rear view Aeration holes Mounting seal 1 2 1 2...
Page 25: ...25 SECTION 3 3 Installation and connection...
Page 42: ...42...
Page 43: ...43 SECTION 4 4 Commissioning the device...
Page 47: ...47...
Page 48: ...48 SECTION 5 5 Commissioning a project...
Page 67: ...67 SECTION 6 6 Maintenance...


