106
1.
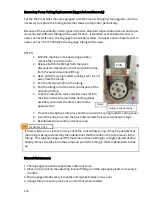
Unwind some cloth so there is free movement of the cushion roller.
2.
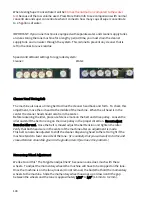
Check the Wind-Up Switches first by lifting the cushion roller up and holding it
against the stop bolts. The switches on both sides should clearly actuate before the
cushion lever screws hit the stops and there should be a small amount of over-travel
of the switch levers.
3.
Be certain that the switches on both sides are adjusted with the same amount of
over-travel. If there is no over-travel, loosen adjusting screw with an 11/32” wrench
and back the screw out until there is some over-travel of the switch lever. Tighten
the nut(s) and make sure the cushion roller moves up and down freely.
4.
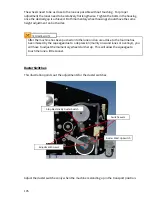
Check the Stop Machine By Duster Switches. The switches above the duster arm
pivots will stop the machine when the cushion roller falls off the tail plank.
Squeegee Blades
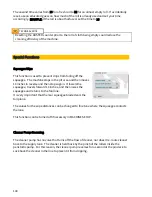
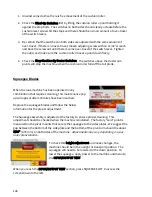
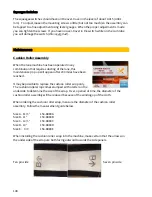
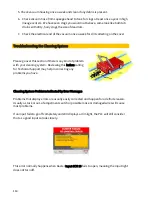
When the lane machine has been operated in any
combination that requires cleaning, this maintenance pop
up will appear after 100 miles have been reached.
Replace the squeegee blades and follow the below
information for the proper adjustment.
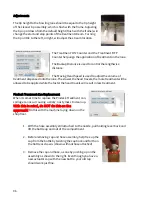
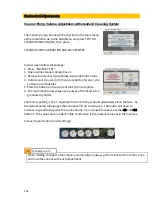
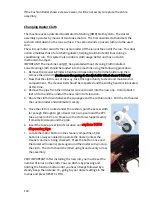
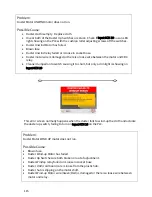
The Squeegee Assembly is adjusted at the factory to ensure proper cleaning. This
adjustment should be checked when the machine is installed. The factory "zero" point is
measured on the pivot mounts that secure the squeegee to the sides plates. We suggest the
gap between the bottom of the side plate and the bottom of the pivot arm should be about
3/16" (4.76 mm) on both sides of the machine.
Adjustments may vary depending on your
lane characteristics.
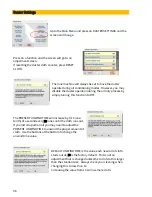
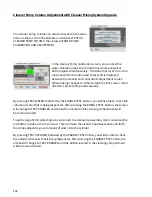
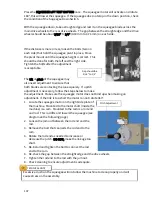
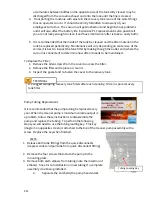
To check this height adjustment and make changes, the
machine should be in the upright or transport position. The
squeegee will need to be lowered to the down position. To
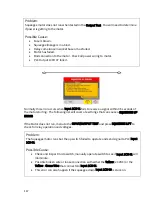
lower the squeegee, apply power to the machine and menu to
the INPUT/OUTPUT TEST.
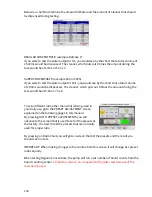
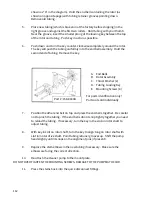
When you reach the INPUT/OUTPUT TEST section, press SQUEEGEE LIFT to access the
screen shown to the left.
Summary of Contents for FLEX 17-5701
Page 1: ...OPERATORS MANUAL Edition 03 18...
Page 2: ......
Page 12: ......
Page 16: ...4 Wah lah I did them the same...
Page 51: ...39...
Page 171: ...159...
Page 172: ...160 CHAPTER 7 Miscellaneous Parts Stickers and Decals...
Page 173: ...161...
Page 174: ...162...
Page 176: ...164...
Page 178: ......
Page 181: ......
Page 183: ......
Page 185: ......
Page 187: ...7 7...
Page 189: ......
Page 191: ......
Page 193: ......
Page 195: ......
Page 197: ......
Page 199: ...14 15 16 17 18 19 5 4 7 6 13 8 9 10 2 12 11 9 3 8 10 9 1 3 9 10 12...
Page 201: ......
Page 203: ......
Page 205: ...7 7...
Page 207: ......
Page 209: ......
Page 211: ......
Page 213: ......
Page 215: ...7 5 7...
Page 217: ......
Page 219: ......
Page 221: ......
Page 223: ......
Page 225: ......
Page 227: ...7 7...
Page 229: ......
Page 231: ......
Page 233: ...7...
Page 235: ......
Page 237: ......
Page 239: ...3 2 9...
Page 241: ......
Page 243: ......
Page 245: ......
Page 246: ...235...
Page 248: ...230...
Page 249: ...231...
Page 250: ...232...
Page 251: ...233...
Page 252: ...234...
Page 253: ...235...
Page 254: ...236...
Page 255: ...237...
Page 256: ...238...
Page 257: ...239...
Page 258: ...240...
Page 259: ...241...
Page 260: ...242...
Page 261: ...243...
Page 262: ...244...
Page 263: ...245...
Page 264: ...246...
Page 265: ...247...
Page 266: ...248...
Page 267: ...249...
Page 268: ...250...
Page 269: ...251...
Page 270: ...252...
Page 271: ...253...
Page 272: ...254...
Page 273: ...255...
Page 274: ...261...
Page 276: ...257...
Page 277: ...258...
Page 278: ...259...
Page 279: ...260...
Page 280: ...261...
Page 281: ...262...
Page 282: ...263...
Page 283: ...264...
Page 284: ...265...
Page 285: ...266...
Page 286: ...267...
Page 287: ...268...
Page 288: ...269...
Page 289: ...270...
Page 290: ...271...
Page 291: ...272...
Page 292: ...273...
Page 293: ...274...
Page 294: ...275...
Page 295: ...276...
Page 296: ...277...
Page 297: ...278...
Page 298: ...279...
Page 299: ...280...
Page 300: ...281...
Page 301: ...282...
Page 302: ...283...
Page 303: ...290...

