61
Oil Tip
Correct adjustment of the Oil Tip is very important and is a determining factor in applying a
consistent pattern.
This adjustment should be checked with the buffer brush running. To operate the brush,
go
to your test INPUT/OUTPUT screen and press the BUFFER MOTOR then press the button in
the center that says BUFFER TEST to turn on the motor. After making each position
adjustment you will also need to make sure the tip is as close to the drip pads as possible,
without touching them.
There are two adjustments that can be made to the oil tip.
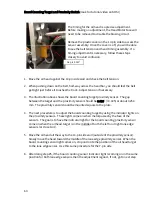
One adjustment is the height of the tip in relation to the Transfer Brush. The other is the
position of the tip front to back. Adjust the Oil Tip as close to the “V” as possible without
actually dispensing oil into the “V” area.
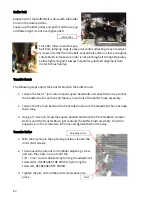
The oil tip height can be adjusted by loosening the set screw in the tip holder collar and
sliding the tip holder up or down. Re-tighten the set screw when desired height is achieved.
The oil tip pitch can be adjusted by using the set screws located in the front and back of the
Oil Head block assembly. The pitch should be set to dispense conditioner on the black
transfer brush (very close to the V) but not directly onto the blue buffer brush.
Timing Belts
There are 3 timing belts that operate in the conditioning system. Refer to the KOSI videos to
see if the below videos are available, to set the proper amount of tension required for each
belt.
1.
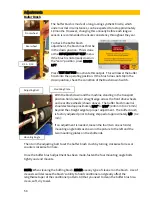
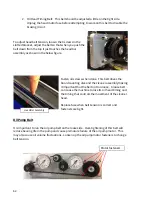
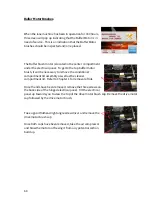
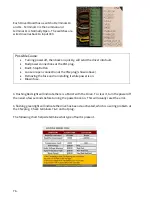
Buffer Belt: The machine has a belt idler roller that can
be positioned to maintain the proper tension. The belt
should have a fair amount of tension, but do not over
tighten. It also has an idler next to the buffer pulley to
keep the belt in the pulley cogs.
Mounting block fastener
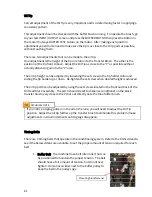
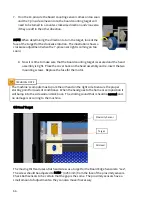
If you notice a zigzag pattern in the oil on the lane, you will need to adjust the Oil Tip
position. Adjust the oil tip further up the transfer brush to eliminate this problem (make
adjustments in small increments until zigzags disappear).
TECHNICAL NOTE
Summary of Contents for FLEX 17-5701
Page 1: ...OPERATORS MANUAL Edition 03 18...
Page 2: ......
Page 12: ......
Page 16: ...4 Wah lah I did them the same...
Page 51: ...39...
Page 171: ...159...
Page 172: ...160 CHAPTER 7 Miscellaneous Parts Stickers and Decals...
Page 173: ...161...
Page 174: ...162...
Page 176: ...164...
Page 178: ......
Page 181: ......
Page 183: ......
Page 185: ......
Page 187: ...7 7...
Page 189: ......
Page 191: ......
Page 193: ......
Page 195: ......
Page 197: ......
Page 199: ...14 15 16 17 18 19 5 4 7 6 13 8 9 10 2 12 11 9 3 8 10 9 1 3 9 10 12...
Page 201: ......
Page 203: ......
Page 205: ...7 7...
Page 207: ......
Page 209: ......
Page 211: ......
Page 213: ......
Page 215: ...7 5 7...
Page 217: ......
Page 219: ......
Page 221: ......
Page 223: ......
Page 225: ......
Page 227: ...7 7...
Page 229: ......
Page 231: ......
Page 233: ...7...
Page 235: ......
Page 237: ......
Page 239: ...3 2 9...
Page 241: ......
Page 243: ......
Page 245: ......
Page 246: ...235...
Page 248: ...230...
Page 249: ...231...
Page 250: ...232...
Page 251: ...233...
Page 252: ...234...
Page 253: ...235...
Page 254: ...236...
Page 255: ...237...
Page 256: ...238...
Page 257: ...239...
Page 258: ...240...
Page 259: ...241...
Page 260: ...242...
Page 261: ...243...
Page 262: ...244...
Page 263: ...245...
Page 264: ...246...
Page 265: ...247...
Page 266: ...248...
Page 267: ...249...
Page 268: ...250...
Page 269: ...251...
Page 270: ...252...
Page 271: ...253...
Page 272: ...254...
Page 273: ...255...
Page 274: ...261...
Page 276: ...257...
Page 277: ...258...
Page 278: ...259...
Page 279: ...260...
Page 280: ...261...
Page 281: ...262...
Page 282: ...263...
Page 283: ...264...
Page 284: ...265...
Page 285: ...266...
Page 286: ...267...
Page 287: ...268...
Page 288: ...269...
Page 289: ...270...
Page 290: ...271...
Page 291: ...272...
Page 292: ...273...
Page 293: ...274...
Page 294: ...275...
Page 295: ...276...
Page 296: ...277...
Page 297: ...278...
Page 298: ...279...
Page 299: ...280...
Page 300: ...281...
Page 301: ...282...
Page 302: ...283...
Page 303: ...290...

