FermZilla Tri-Conical 27L and 55L Instruction Manual
Page 5 of 13
www.KegLand.com.au
Last Updated 9/06/2023 8:44 AM
FermZilla 304 Stainless Steel Handles Assembly
1.
Insert a bolt into a hole of each of the handles.
2.
Screw a nut onto the bolt. Don’t tighten this nut yet.
3.
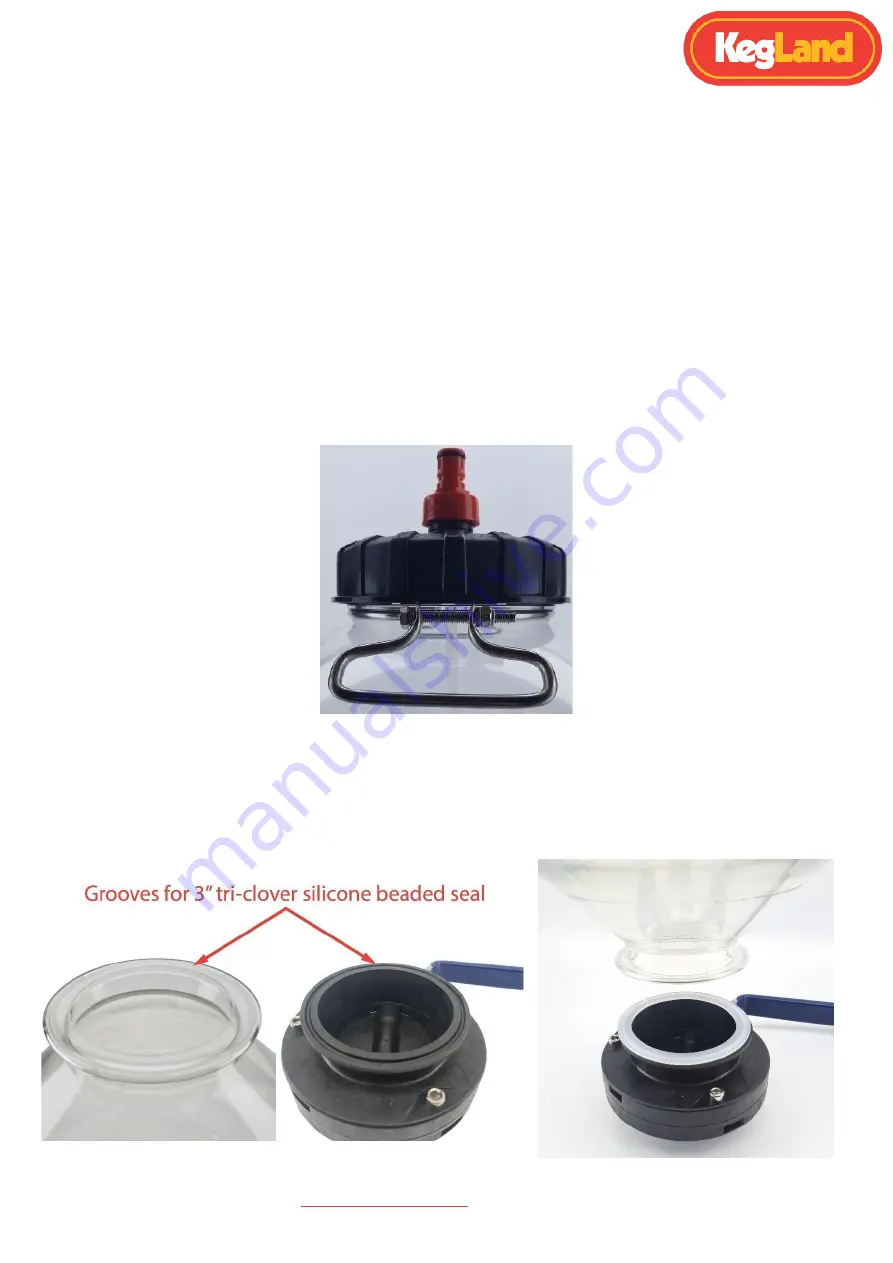
Place the handles around the collar of the FermZilla as shown in the image below.
4.
Insert the second bolt into the remaining holes on the handle and screw the remaining nut
onto this bolt.
5.
Tighten the two nuts while holding the bolts to prevent them from spinning. Do not
overtighten as it can warp the opening of the FermZilla. The handles should be able to freely
rotate around the neck of the FermZilla. If they cannot rotate then it is too tight.
NOTE: It is suggested to orientate the handle during assembly such that the exposed thread of the
bolt furthest away from you is oriented to the left so that when undoing the collar of the FermZilla it
reduces the risk of hitting
your hand on this exposed
thread of the bolt. This
orientation is shown to the
right.
FermZilla – Butterfly (Dump) Valve Assembly
Place the 3” tri-clover seal and butterfly valve onto the 3” tri-clover ferrule on the tank. Fasten the
butterfly valve in place onto the vessel using the 3” tri-clover 3-Piece clamp, ensuring that the seal is
seated in the groove on the butterfly valve and tank.
seal.


