T-GPS User Manual Version 1.2 | 36
7.3
Menu Set-up
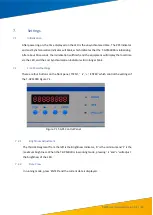
In running mode, pressing ‘ITEM’ and ‘ENTER’ together allows access to the set
-up menu. The
First LED position from the left gives the Menu option when the T-GPS3000 is under setting
mode. Pressing the ‘Item’ button once will increase the value by one. The meaning of each menu
option number is given in the following sections.
7.3.1
Set Pulses A, B, C and D
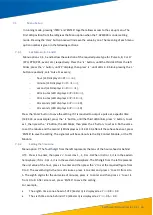
Menu options 3, 4, 5 and 6 allow the selection of the requi
red pulse type for ‘Pulse A, B, C or D’
(PPH, PPM, PPS, event, etc.) respectively. Press the ‘
‘ button, until the third LED from the left
blinks; press the ‘+’ button, until ‘P’ displays, then press’
‘, until LEDs 4
-
8 blink, pressing the ‘+’
button repe
atedly, sets ‘Pulse A’ as every;
−
hour (LED displays 3
□
P1
□□
□□
),
−
minute (LED displays 3
□
P
□
□
1
□□
),
−
second (LED displays 3
□
P
□
□□
□
1),
−
30 minutes (LED displays 3
□
P
□
30
□□
),
−
10 minutes (LED displays 3
□
P
□
10
□□
),
−
30 seconds (LED displays 3
□
P
□
□□
30),
−
10 seconds (LED displays 3
□
P
□
□□
10)
Press the
‘
Enter
’
button to save the setting. If it is required to output a pulse at a specific time
(14:21:33 as an example), press
the ‘
‘
button, until the third LED blinks, press
‘
+
’
button, to set
as 1, then press the
‘
‘
button, the LED blinks, then press
the ‘
+
’
button, to set as 4. Do the same
to set the minute and the
second (LED displays as 3□14 21 33, after all these have
been set, press
‘
ENTER
’
to save the setting. The signal set will be sent-out via the Dry Contact Module, or the TTL
Module.
7.3.2
Setting the time zone
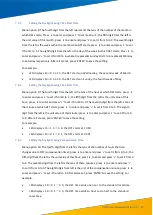
Menu option 7: The fourth digit from the left represents the tens of the hours ahead or behind
UTC. Press
to enter, then press
‘+’
to set it as 1, -1, 0 or -0. When it is 0 or 1, it is in the eastern
hemisphere; if it is -0 or -1, it is in the western hemisphere. The 5th digit from the left represents
the unit value of the hour, press
to enter and then press the
‘+’
to set the required figure from
0 to 9. The seventh digit is the tens of minutes, press
to enter and press
‘+’
to set it from 0 to
5. The eighth digit is for the unit value of minutes, press
to enter and then press
‘+’
to set it,
from 0 to 9. After all are set, press
‘
ENTER
’
to save the setting.
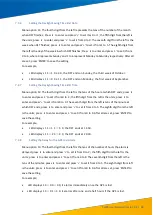
For example,
•
The eighth time zone ahead of UTC (Eastern) is displayed as: 7
□□
0 8
□
0 0
•
The sixth time zone behind UTC (Western) is displayed as: 7
□□
-0 6
□
0 0

