Model 4200A-SCS Pulse Card (PGU and PMU) User's Manual
Section 3: Setting up PMUs and PGUs in Clarius
4200A-PMU-900-01 Rev. A December 2020
3-43
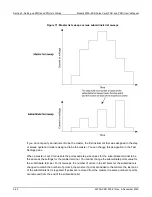
You can have a dual sweep on a subordinate terminal even if the master is not set to dual sweep. In
this case, the dual sweep of the subordinate terminal has a total number of steps equal to the number
of steps in the master terminal. For example, if the master terminal is set to measure ten points, the
subordinate dual sweep will measure five points on the first side of the sweep and five points on the
second side of the dual sweep. If the master is set to an odd number of points, the subordinate
terminal will repeat the measurement of the last sweep point.
The subordinate SMUs are not automatically set for dual sweep when Dual Sweep is enabled for the
master SMU. Dual Sweep must be individually enabled for each SMU.
To specify the master sweep:
1. Select the test.
2. In the right pane, select
Test Settings
.
3. For
Sweep Master
, select the instrument that you want to designate as the master.
Basic troubleshooting procedure
If the test pulse I-V results do not meet expectations, use the following steps as a guide for
troubleshooting. Because the pulse I-V results extract the spot mean measurements from the top of
the pulse, good pulse I-V results require a reasonable pulse shape.
Step 1. Verify prober connections from the PMU or RPM to the
DUT
1. Use cabling and connections optimized for high frequency (>150 MHz).
2. Connect the low side of the device under test (DUT) to the shield of the coaxial cable (see
(on page 2-2)), or connect the low side to another PMU or RPM channel (see
Connections to prober or test fixture bulkhead connectors
(on page 3-18)).
3. Connect the shields (refer to the figure in
(on page 2-15) that shows four-terminal
local sense connections).
4. If you are not using the supplied cabling, minimize the loop area created by the shield and center
conductor. Do not use the GNDU connection for the return or ground path for any pulse I-V signal.
(on page 2-2).
5. Minimize the cable length. See
(on page 2-3).

