1-12
Getting Started
Model 6220/6221 User’s Manual
Return to
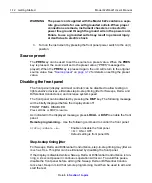
WARNING
The power cord supplied with the Model 622x contains a sepa-
rate ground wire for use with grounded outlets. When proper
connections are made, instrument chassis is connected to
power line ground through the ground wire in the power cord.
Failure to use a grounded outlet may result in personal injury
or death due to electric shock.
3.
Turn on the instrument by pressing the front panel power switch to the on (I)
position.
Source preset
The
PRES
key can be used to set the source to a preset value. When the
PRES
key is pressed, the source will set to the preset value (“PRES” message dis-
played). When the
PRES
key is pressed again, the unit will return to the original
source value. See “
for details on setting the preset
value.
Disabling the front panel
The front panel (display and most controls) can be disabled to allow testing on
light sensitive devices; eliminate step-to-step timing jitter for Sweeps, Delta, and
Differential Conductance; and increase system speed.
The front panel can be disabled by pressing the
DISP
key. The following message
will be briefly displayed before the display shuts off:
FRONT PANEL DISABLED
Press LOCAL or DISP to resume.
As indicated in the displayed message, press
LOCAL
or
DISP
to enable the front
panel.
Remote programming
– Use the following command to control the front panel:
Step-to-step timing jitter
For Sweeps, Delta, and Differential Conductance, step-to-step timing may jitter as
much as 1ms. This jitter can be eliminated by disabling the front panel.
If the display is disabled while a Sweep, Delta, or Differential Conductance is run-
ning, a 2-second pause in continuous operation will occur. To avoid this pause,
disable the front panel before arming the Sweep, Delta or Differential Conduc-
tance test. Keep in mind that remote programming must then be used to arm and
start the test.
DISPlay:ENABle <b>
‘
‘
‘
Enable or disable the front panel.
<b> = ON or OFF.
Default setting is front panel ON.
Summary of Contents for 6220 DC
Page 2: ......
Page 4: ......
Page 6: ......
Page 16: ......
Page 36: ...1 20 Getting Started Model 6220 6221 User s Manual Return to Section 1 topics...
Page 131: ...6 10 Averaging Filter Math and Buffer Model 6220 6221 User s Manual Return to Section 6 topics...
Page 148: ...A Specifications...
Page 167: ......
Page 169: ......
Page 170: ......


