8
Integra Series
Quick Start Guide
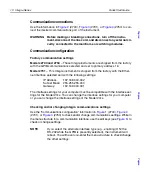
Power-up
NOTE
For the following power-up procedure, refer to
(Model
(Model 2701), or
(Model 2750).
1.
Check to see that the line voltage indicated in the window of the fuse holder
assembly is correct for the operating voltage in your area. If not, refer to
Section 1 of the Model 27xx User’s Manual (see “Setting line voltage and
replacing fuse”).
CAUTION
Operating the instrument on an incorrect line voltage may
cause damage to the instrument, possibly voiding the warranty.
2.
Before plugging in the power cord, make sure the front panel power switch
is in the off (O) position.
3.
Connect the female end of the supplied power cord to the AC receptacle on
the rear panel. Connect the other end of the power cord to a grounded AC
outlet.
WARNING
The power cord supplied with the mainframe contains a sepa-
rate ground wire for use with grounded outlets. When proper
connections are made, instrument chassis is connected to
power line ground through the ground wire in the power cord.
Failure to use a grounded outlet may result in personal injury or
death due to electric shock.
4.
Turn on the instrument by pressing the front panel power switch to the on (I)
position. After going through its power-up sequence, the instrument begins
its normal display of readings.
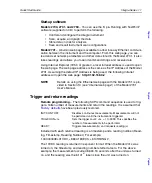
Edit keys
Edit keys are used to navigate through a menu structure to make selections and
enter values. The keys shown in
automatically become edit keys when in
a menu structure. To see an example of a menu structure, press the STORE key.
In this menu structure, you set the number of readings to store and enable the
buffer.
The
ß
and
©
keys control cursor position. The cursor is identified as a blinking digit or blink-
ing menu item. With the cursor positioned where desired, use the
¹
and
ƒ
keys to select
alternate menu items or change the value. The ENTER or EXIT key is then used. The
ENTER key accepts the displayed selection, while the EXIT key exits the menu
structure without making any changes.
When in the STORE menu structure, use the
ß
,
©
,
¹
,
and
ƒ
keys to specify the number
of readings (e.g., 100) to store in the buffer. Then press ENTER to enable the buffer. The
asterisk (*) annunciator is on while readings are being stored.
To
p
To
p
To
p
Summary of Contents for Integra 27 Series
Page 3: ......
Page 8: ...QuickStartGuide Integra Series...


