26
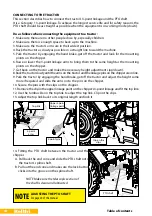
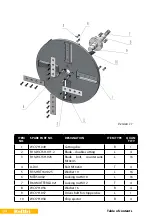
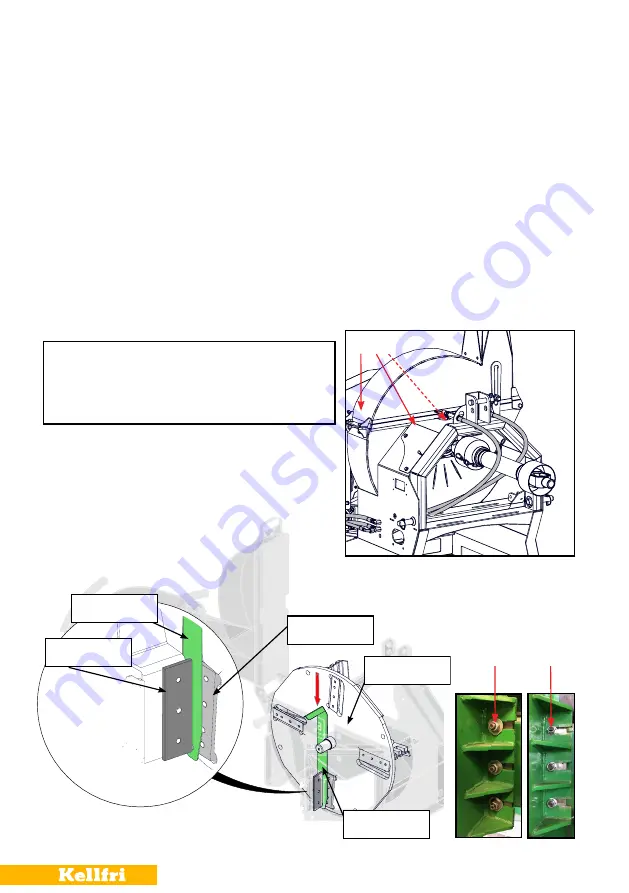
Fixed knife
Adjustment
spacer
Chipping disc
knife
Chipping disc
Adjustment
spacer
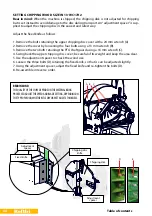
SETTING CHIPPING WOOD SIZE IN 13-WC17H2
Bear in mind:
When the machine is shipped, the chipping disk is not adjusted for chipping
but is set instead to avoid damage to the disc during transport. An “adjustment spacer” is sup-
plied to adjust the chipping disc in the easiest and safest way.
Adjust the fixed knife as follows:
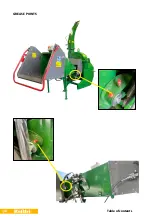
1. Remove the bolts retaining the upper chipping disc cover with a 24 mm wrench (A).
2. Remove the cover by loosening the four bolts using a 13 mm wrench (B).
3. Remove the two bolts retaining the PTO shaft guard using a 16 mm wrench (C).
4. Swing back the upper chipping disc cover; be careful of its weight and keep the area clear.
5. Use the adjustment spacer to check the wood size.
6. Loosen the three bolts (D) retaining the fixed knife, so that is can be adjusted slightly.
7. Using the adjustment spacer, adjust the fixed knife and re-tighten the bolts (D).
8. Re-assemble in reverse order.
A B C
D
E
BEAR IN MIND:
THE QUALITY OF THE CHIPS DEPENDS ON THE MATERIAL BEING
PROCESSED. ADJUST THE SPEED AND BLADE SETTING, DEPENDING ON
THE TYPE OF WOOD, WHETHER IT IS DRY OR WET AND ITS THICKNESS.
Summary of Contents for 13-WC17H2
Page 34: ...34 Table of contents Version 1 1...
Page 36: ...36 Table of contents Version 1 1...


