4
SNA-Series Tankless Heater
Installation
10/17/2014
Keltech •
215-1815 Rev. B; ECN 130011
Mounting Heater
1
WARNING! HIGH VOLTAGE SHOCK. Disconnect power supply before performing any work inside
the heater enclosure.
CAUTION! If heater is installed where freezing can occur, specify Keltech's ENHT Freeze
Protection Option.
A
Drain water from heat exchanger through
2 drain plugs located at the bottom of the
heat exchanger . Power must be removed
from the heater and not restored until all
air has been bled off .
C
Set heater in a vertical, upright position
with the water outlet located at top .
D
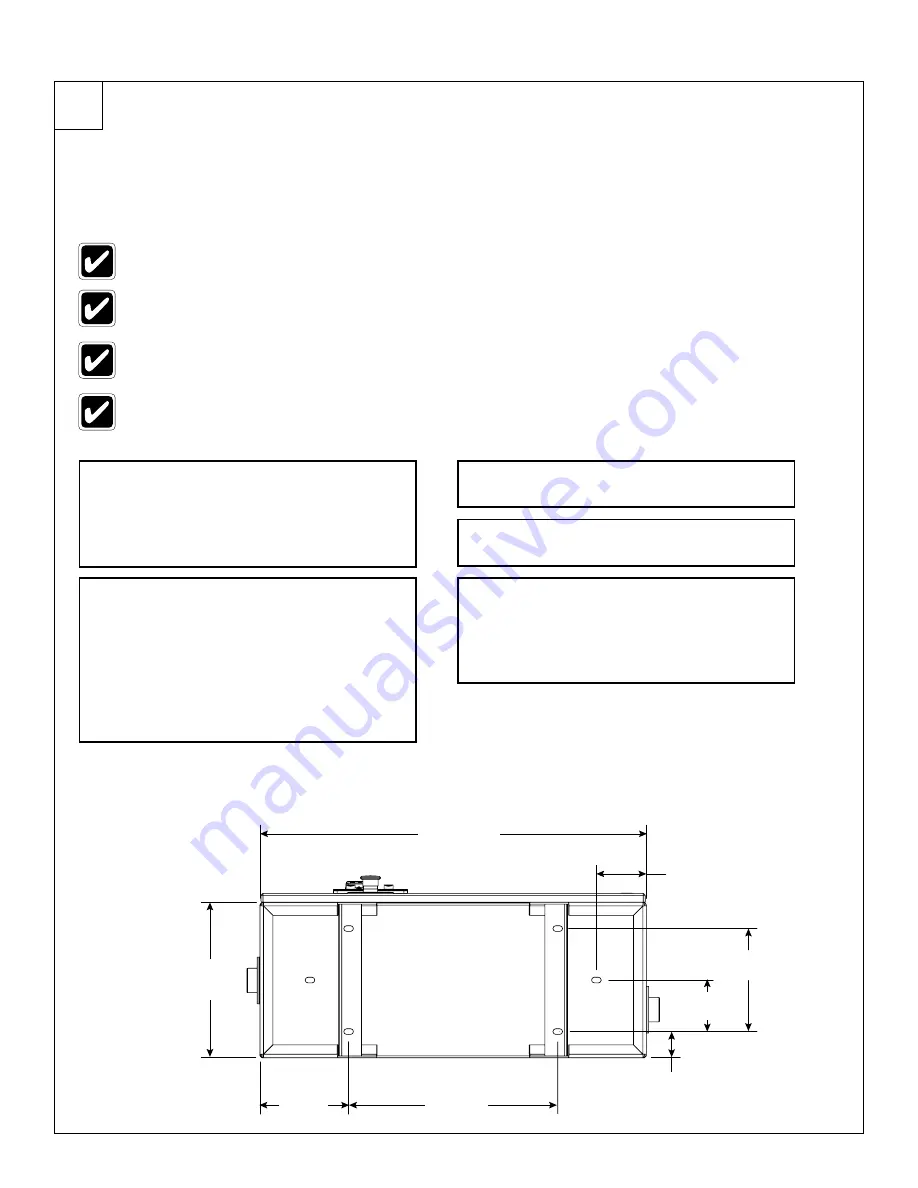
Secure heater by bolting each leg to the
floor using 3/8” anchor bolts (See Figure 1) .
E
Install the pressure and temperature relief
valve on hot water outlet immediately
following the union .
NOTE: Valve must empty into a drain
(See Figure 2).
B
Remove air by re-installing drain plugs
and open inlet supply valve to apply
line pressure to heater . Open fixture
connected to the heater outlet for (5)
minutes or until all air has been removed
from the heater . Fixture can be closed
and power restored to the heater .
For best results, install heater as close as possible to the point of use.
Installation is to be performed by licensed trades people.
Long pipe runs are not recommended. A heat loss of 1°F for every 10ft (3 meters) of uninsulated
pipe can occur.
When determining a mounting location, ensure accessibility of the enclosure door and other
plumbing for service and maintenance.
FIGURE 1
Bottom View - Leg Mounting Holes
30" (762mm)
12"
(305mm)
2"
(51mm)
4"
(102mm)
8"
(204mm)
6-7/8"
(175mm)
16-1/4"
(413mm)
3-7/8"
(99mm)
3/4" x 7/16" Slot
(6) Places


