background image

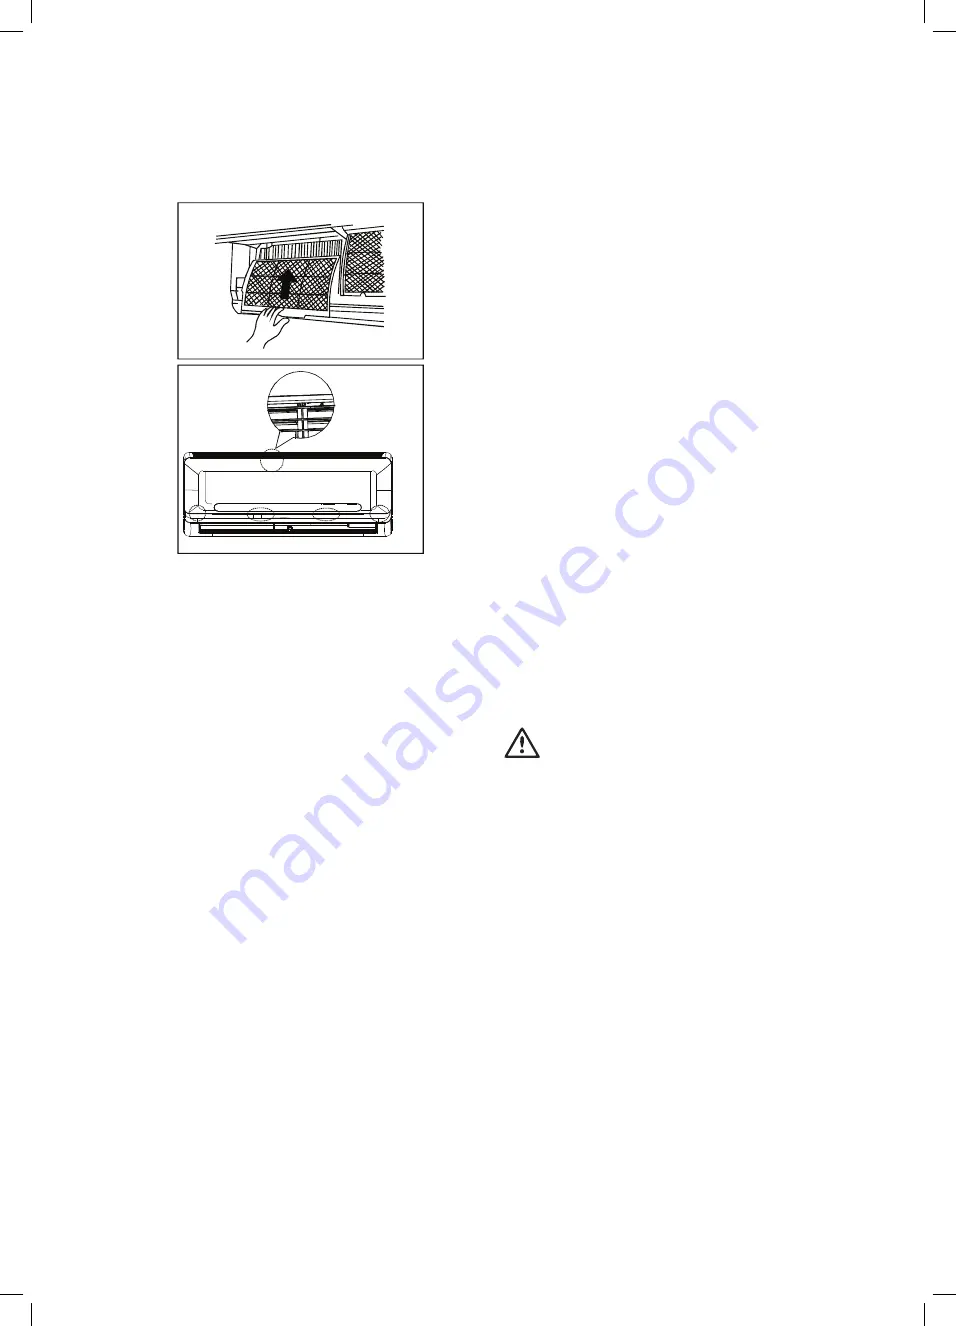
5.   After the filters are dry, refit the small filters onto the large  

air filter. 

6.   Re-insert the filters back into the unit following the reverse 

order as described in steps 1 & 2. 

7.   Close the front panel. Make sure the buckles are fully fit and 

the panel is completely closed.

Preparation for extended non-operation

If you plan not to use unit for a long time, perform the following:

1.   Clean the indoor unit and filters.

2.   Operate the fan for about half a day to dry the inside  

of the unit.

3.   Stop the air conditioner and disconnect power.

4.   Remove the batteries from the remote controller. The outdoor 

unit requires periodic maintenance and cleaning. Do not 
attempt to do this yourself. Contact your dealer or service 
provider.

Pre-season inspection

• 

 Damaged or disconnected wires.

• 

 Clean the indoor unit and filters.

• 

 Check water or oil leaks.

• 

 Check that the outdoor unit is clear of leaves, rubbish and 
other objects that may block the air inlet or outlet.

• 

 Check if the remote control batteries are flat, replace as 
required.


WARNING

warning

• 

 Do not touch the metal parts of the unit when removing the 
filter. Injuries can occur when handling sharp metal edges. 

• 

 Do not use water to clean inside the air conditioner. Exposure 
to water can destroy the insulation, leading to possible electric 
shock. 

• 

 When cleaning the unit, first make sure that the power and 
circuit breaker are turned off. 

• 

 Do not wash air filter with hot water at more than 40°C . Shake 
off moisture completely and dry it in the shade. Do not expose 
it directly to the sun, it may shrink.

Care and maintenance  

Panel 

buckles

18

Care and maintenance

Summary of Contents for KSV25HRH

Page 1: ...Inverter Air Conditioner User Manual KSV25HRH KSV35HRH KSV50HRH KSV71HRH KSV90HRH KSD25HRH KSD35HRH KSD50HRH KSD71HRH KSD90HRH...

Page 2: ...Record model and serial number here Model number Serial number ENVIRONMENTAL TIPS environment Information on disposal for users Most of the packing materials are recyclable Please dispose of those mat...

Page 3: ...ing process or to clean other than those recommended by the manufacturer Do not store the appliance in a room with continuously operating ignition sources for example open flames an operating electric...

Page 4: ...at the main power switch if the unit will not be used for a long period of time It may cause failure of the unit or fire Do not use strong chemical cleaners such as detergents abrasive cleaners or thi...

Page 5: ...te control Before screwing the remote controller holder to the wall make sure that control signals are properly received by indoor unit 2x AAA batteries In sites with poor drainage use block bases for...

Page 6: ...infrared signal receiver on the indoor unit is exposed to direct sunlight the air conditioner may not function properly Use curtains to prevent the sunlight from falling on the receiver If other elect...

Page 7: ...not dispose batteries as unsorted general waste Collection of such waste separately for special treatment is necessary Indoor unit display Digital display Displays the temperature settings when the a...

Page 8: ...3 4 Mode r e m i T r e m i T Follow me Self clean Short cut LED Swing Direct Turbo ON OFF Fan Quiet 3 5 7 1 11 12 6 3 Timer Button Sleep 5 LED Button 6 Follow me Button Press this button to initiate t...

Page 9: ...re setting in 1 C increments to 17 C AUTO LOW MED HIGH F 9 an quiet B n o t t u Press the button for more than 2s to activate the Quiet function Used to select the fan speed in four steps NOTE You can...

Page 10: ...e under TIMER setting Displayed in Sleep Mode operation Indicated that the air conditioner is operating in follow me mode Displayed when quiet feature is activated Fan speed indication Low speed Mediu...

Page 11: ...esired temperature The temperature can be set within a range of 17 C 30 C in 1 C increments 3 Press the FAN button to select the fan speed in four steps Auto Low Med or High 4 Press the ON OFF button...

Page 12: ...splay window WARNING caution When you select the timer operation the remote controller automatically transmits the timer signal to the indoor unit for the specified time Therefore keep the remote cont...

Page 13: ...ously Timer off Timer on On Stop Start operation On Set 2 hours later after setting 10 hours later after setting This feature is useful when you want to stop the air conditioner after you go to bed an...

Page 14: ...minutes and the unit turns off automatically For cooling heating models the unit will operate as in the following sequence FAN mode at Low fan speed Heating operation with LOW fan speed FAN operation...

Page 15: ...xcessively low or high temperature waste energy Improve performance by keeping windows and doors closed Limit energy usage run time by using the TIMER function Do not put any object near air inlet or...

Page 16: ...nutes operation in forced COOL mode the air conditioner will switch to AUTO mode and FC will be replaced with AUTO mode set temperature of 24 on the display Close the panel after manual operation has...

Page 17: ...ould cause deformation or discoloration Cleaning the unit Wipe the unit with a soft dry cloth only If the unit is very dirty wipe it with a cloth soaked in warm water Cleaning the air filter and air f...

Page 18: ...ler or service provider Pre season inspection Damaged or disconnected wires Clean the indoor unit and filters Check water or oil leaks Check that the outdoor unit is clear of leaves rubbish and other...

Page 19: ...ely after stopping the air conditioner refrigerant flowing sound may be head Squeaking sound normal expansion and contraction of plastic and metal parts caused by temperature change during the operati...

Page 20: ...hing The unit may stop operation or continue to run in a safety condition Error code appears in the indoor unit such as E0 E1 E2 P1 P2 P3 or F1 F2 F3 Before you call for or request servicing troublesh...

Page 21: ...Notes 21 Notes...

Page 22: ...Notes 22 Notes...

Page 23: ...23 Warranty...

Page 24: ...hone 0800 436 245 fax 0800 225 088 email customercare electrolux co nz web kelvinator co nz For more information on all Kelvinator appliances or for dimension and installation information call into yo...

Reviews: