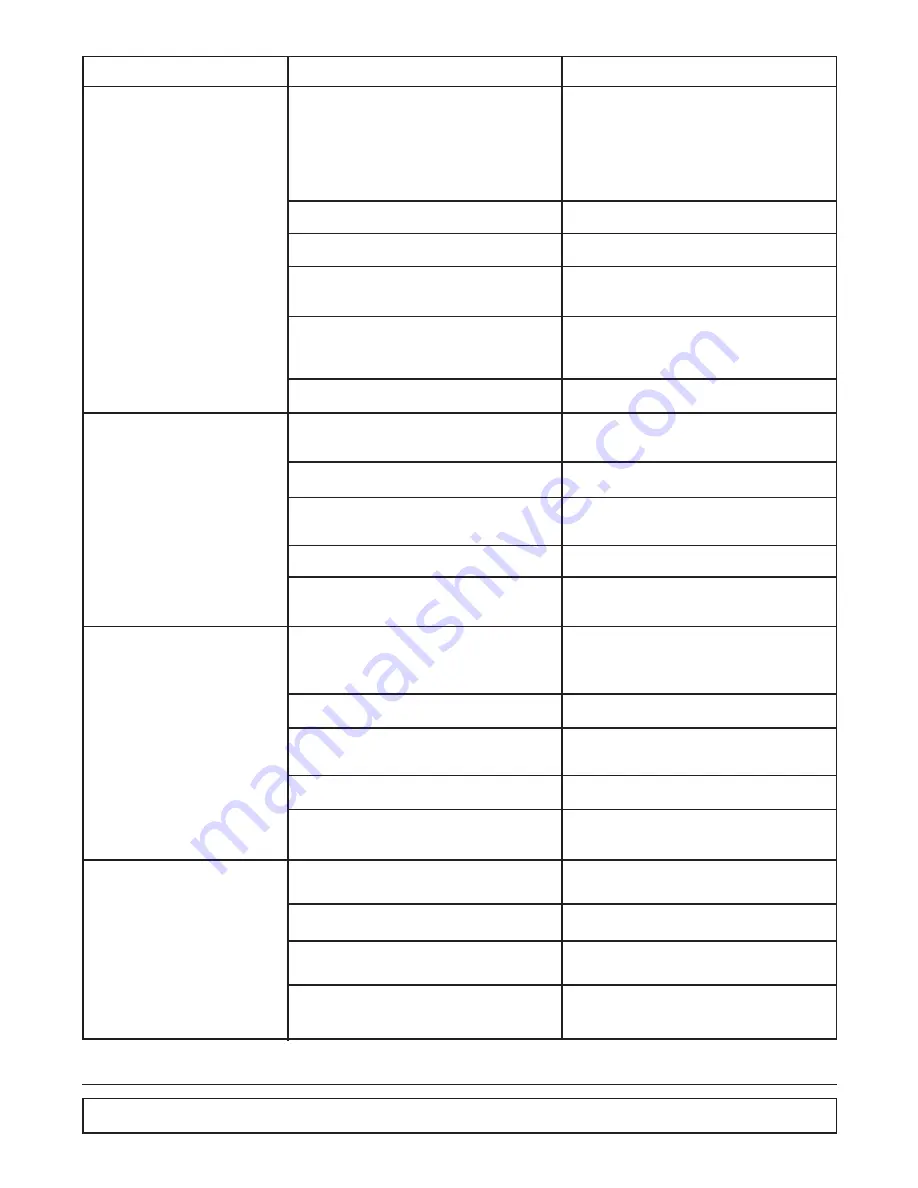
TROUBLE
COMMON CAUSE
REMEDY
NO STARTING EFFORT OR
SLOW STARTING.
DECREASED LIGHT
OUTPUT.
Full illumination of
bulbs requires correct
assembly of all components
of lighting system.
BLINKING ON/OFF.
Accompanied by shimmering
effect during “lighted” period.
Open lamp cathode circuit due to broken
cathode, air leak, or open weld.
Wrong lamp type used.
Starter at end of life.
Starter sluggish.
Ballast installed not supplying the specified
electrical values.
Temperature cold air contact to bulb.
Circuit voltage.
Temperature operation, cold air affects lamp
performance.
Circuit voltage.
Ballast improperly or incompletely
connected.
Dust or dirt on lamp or fixture.
Normal failure. Active material on cathodes
exhausted.
Possible lamp fault.
Wrong type of starter or defective starter.
Ballast installed not supplying the specified
electrical circuit.
Circuit voltage.
Loose circuit contact.
Wrong lamp type used.
Wrong ballast used. Wrong voltage rating.
Circuit voltage.
Ballast improperly or incompletely connected.
If open, circuit is shown by continuity test
or by viewing end of bulb against a
pinhole of light. Replace lamp.
Replace with lamp type indicated in
owner’s manual.
Replace starter.
Replace starter.
Replace with certified ballast of correct
rating for lamp size.
Correct installation of lamp protection
tubes, or shields to prevent cold air
effects.
Check voltage and correct if possible.
Properly install jacketed lamps where
applicable.
Check voltage and correct if possible.
Study ballast label wiring instructions and
check connections.
Clean.
Replace lamp promptly.
Replace lamp. Investigate further if
successive lamps blink or flicker in same
lampholders.
Replace with proper starter.
Replace with correct ballast with correct
rating for lamp size.
Check voltage and correct if possible.
Lampholders should be rigidly mounted
and lamp securely seated.
Replace with correct lamp number located
in owner’s manual.
Replace ballast.
Check voltage and correct to design
specification.
Study ballast label. Correct if installed
wrong.
MAINTENANCE & REPAIR
51
OVERHEATED BALLAST.
Dipping Cabinet 1298.02 2/3/03 1:15 PM Page 53
Summary of Contents for R-404A
Page 3: ...Introduction...
Page 13: ...SECTION II Principles of Operation...
Page 14: ......
Page 28: ......
Page 29: ...SECTION III Maintenance Repair...
Page 55: ...PARTS LISTING With Illustration Identification...
Page 56: ...CABINET PARTS EXPLODED VIEW 54 CABINET PARTS EXPLODED VIEW 2 1 3 4 7 9 8 6 10 11 5...
Page 60: ...CONDENSING UNIT EXPLODED VIEW 58 CONDENSING UNIT EXPLODED VIEW...
Page 62: ...ELECTRICAL PARTS EXPLODED VIEW 60 ELECTRICAL PARTS EXPLODED VIEW...
Page 64: ...1 6 7 2 4 3 5 LID EXPLODED VIEW 62 LID EXPLODED VIEW...
Page 66: ......
Page 67: ...ACCESSORIES...
Page 68: ......
Page 73: ...ADJUSTABLE LEG KIT 52 1831 01 ACCESSORIES 71...
Page 74: ...CASTER KIT 52 1830 01 72 ACCESSORIES...
Page 76: ...CAN CLAMP INSTALLATION 74 ACCESSORIES...
Page 79: ......
Page 80: ...by National Refrigeration Products 563 Corbin Road Honea Path South Carolina 800 486 8369...


