background image

EN

2. 

INSTALLATION

2.1  Removal from packaging

The equipment is packed in durable packages specially designed for them. Check the 

equipment before taking it into use, to make sure that the equipment or a part of it have not 

got damaged during the transportation. Also check that the delivery corresponds your order 

and that you have received all the necessary instructions for installing and operating the 

equipment. The packaging material can be recycled.

2.2  Locating the machine

Place the machine on a horizontal, stable and clean ground. Protect the machine from heavy 

rain and burning sunshine. Check that there is enough space for cooling air circulation in front 

of and behind the machine.

2.3  Serial number

The serial number of the machine is marked on the machine CE-marking. Identificating the 

serial number is the only proper means of maintaining and identifying parts for a specific 

product. It is important to make correct reference to the serial number of the product when 

making repairs or ordering spare parts.

2.4  Installation and main parts

2.4.1  Assembling the equipment

The equipment is assembled in the following order:

1. 

Transport unit PM500 

6185291

2. 

Cooling unit FastCool 10 

6068100

Assembly the transport unit according to the instructions in the package. Fasten the cooling 

unit to the transport unit by using the screws and bolts delivered with the equipment.

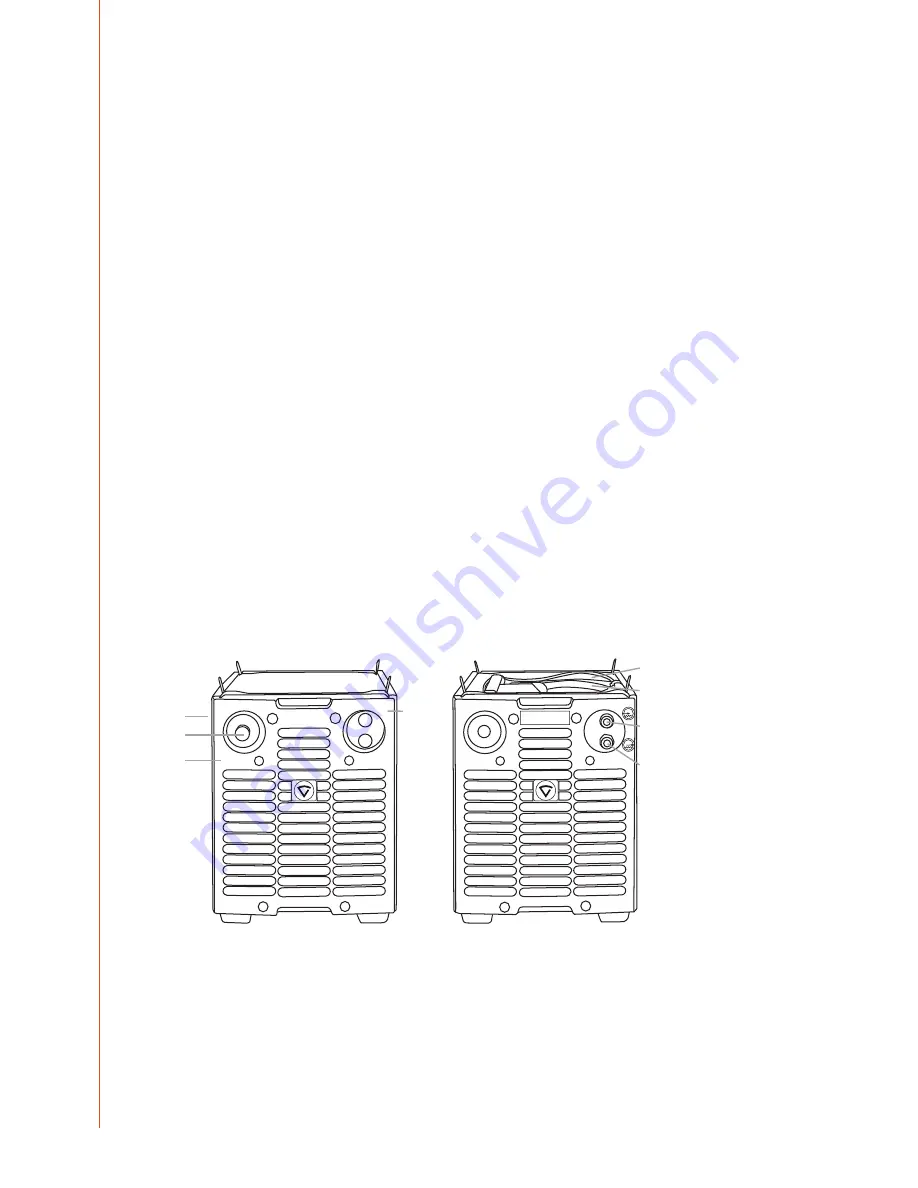
2.4.2  Main parts of cooling unit

A

B

C

D


E

F

G

H

Front machine

A. 

Housing

B. 

Test switch

C. 

Overheat control lamp

D.  Filling hole

Back side

E. 

Mains voltage connection cable

F. 

Control cable

G. 

Cooling water output hose

H.  Cooling water input hose

FastCool 10

4

Summary of Contents for fast cool 10

Page 1: ...Gebrauchsanweisung Manual de instrucciones Käyttöohje Manuel d utilisation Manuale d uso Gebruiksaanwijzing Bruksanvisning Instrukcja obsługi Manual de utilização Инструкции по эксплуатации Bruksanvisning 操作手册 EN DA DE ES FI FR IT NL NO PL PT RU SV ZH ...

Page 2: ......

Page 3: ...EN OPERATING MANUAL English ...

Page 4: ...lation and main parts 4 2 4 1 Assembling the equipment 4 2 4 2 Main parts of cooling unit 4 2 5 Preparing for operation 5 3 Operation 7 3 1 Cooler operation 7 3 2 Overheat signal lamp 7 3 3 Storage 7 4 Maintenance 8 4 1 Daily maintenance 8 4 2 Every sixth months 8 4 3 Trouble shooting 8 4 4 Disposal of the machine 8 5 Ordering codes 9 6 Technical data 9 FastCool 10 2 ...

Page 5: ...ite at www kemppi com The specifications presented in this manual are subject to change without prior notice Important notes Items in the manual that require particular attention in order to minimise damage and personal harm are indicated with the NOTE notation Read these sections carefully and follow their instructions Disclaimer While every effort has been made to ensure that the information con...

Page 6: ...ial number of the machine is marked on the machine CE marking Identificating the serial number is the only proper means of maintaining and identifying parts for a specific product It is important to make correct reference to the serial number of the product when making repairs or ordering spare parts 2 4 Installation and main parts 2 4 1 Assembling the equipment The equipment is assembled in the f...

Page 7: ...d Also water can be used if the temperature doesn t go below 0 degrees Celsius The capacity of the reservoir is 3 litres 5 Switch on the power supply 6 Press and hold down the test switch until the torch hoses are filled with liquid 7 Depending on the FastMig model in question and the control panel type fitted please follow the graphical instruction below in order to deselect or select water cooli...

Page 8: ...ted the cooling state required reset the power source by switching off at the main on off switch Restart the power source and weld SF 51 SF 54 WIRE INCH weld data V A m min 4T SETUP 2T U MMA MIG MMA PANEL SF 51 W001318 DYNAMICS ARC FORCE GAS TEST GAS TEST ARC FORCE DYNAMICS GAS TEST ARC FORCE DYNAMICS MR 200 MR 300 SF 52W SF 53W and MS 200 MS 300 5 s SETUP A D B WIRE INCH GAS TEST ch ch clear MINI...

Page 9: ...ed above the device is ready for welding Before welding read the operating instructions 3 OPERATION 3 1 Cooler operation See also 2 4 2 Main parts of cooling unit FastMig 10 cooler operation is controlled by the microprocessor of the power supply The cooler pump starts to operate when the welding begins After the welding has stopped the pump will operate 1 to 5 minutes longer depending on the weld...

Page 10: ... 2 Overheat signal lamp Overheat signal lamp is lit The unit is overheated Check water circulation Check that there is enough free space behind the machine for cooling air circulation Error code Err 5 Err 27 on the FastMig panel Check the liquid hoses for damages Remove any hose blockages Check water circulation add liquid if needed For further information and assistance contact your nearest Kempp...

Page 11: ... voltage 400V 15 20 Connection capacity 100 ED 250W Cooling power 1 kW Start pressure max 0 4 MPa Cooling liquid Kemppi brand cooling liquid Tank volume ca 3 l External dimensions LxWxH 570 x 230 x 280 mm Weight 11 kg Operating temperature range 20 40 C Storage temperature range 40 60 C EMC class A Degree of protection IP23S 9 Kemppi Oy 1515 ...

Page 12: ... 7792 0 Telefax 49 6 403 779 79 74 sales de kemppi com KEMPPI SPÓŁKA Z O O Ul Borzymowska 32 03 565WARSZAWA POLAND Tel 48 22 7816162 Telefax 48 22 7816505 info pl kemppi com KEMPPI AUSTRALIA PTY LTD 13 Cullen Place P O Box 5256 Greystanes NSW 2145 SMITHFIELD NSW 2164 AUSTRALIA Tel 61 2 9605 9500 Telefax 61 2 9605 5999 info au kemppi com OOO KEMPPI Polkovaya str 1 Building 6 127018 MOSCOW RUSSIA Te...

Reviews: