www.kenall.com | P: 800-4-Kenall | F: 262-891-9701 | 10200 55th Street Kenosha, Wisconsin 53144, USA
This product complies with the Buy American Act: manufactured in the United Stateswith more than 50% of the component cost of US origin It may be covered by patents
found at www.kenall.com/patents. Content of specification sheets is subject to change; please consult www.kenall.com for current product details. ©2019 Kenall Mfg.Co.
2
INSTALLATION INSTRUCTIONS
LPS_F-5295_090418
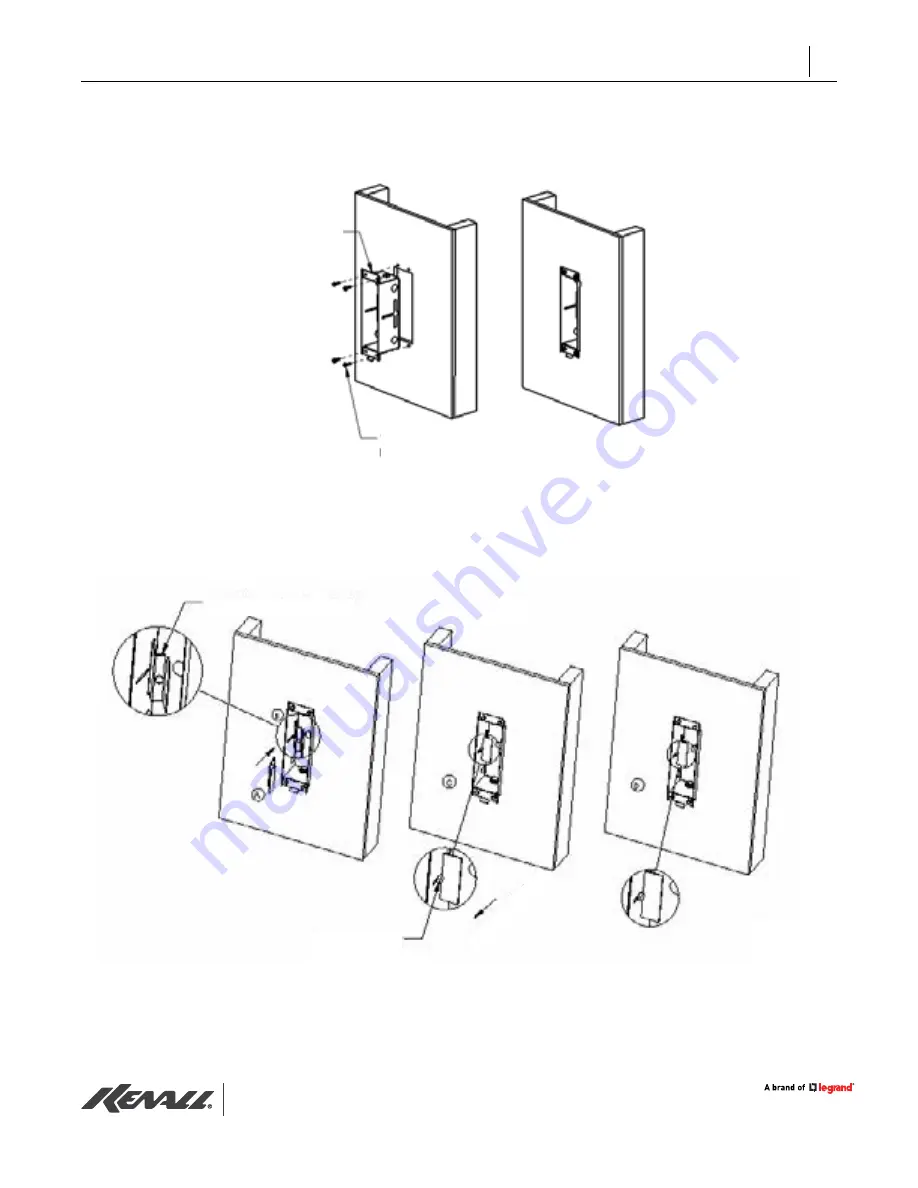
5. Mount Back-box. Insert the back-box into the cutout making sure that the hooks are pointing up. Attach
back-box using 1/4-20 screws and nuts (supplied by others). Remove knockouts as needed.
Note: Remember to use non-ferrous hardware when installing MRI fixtures.
Back-box
1/4 20 Screws
(supplied by others)
Back Mounting Bracket
Thumb Screw
Slide Br
ack
et
6. Install back mounting brackets.
a-b. Insert back mounting bracket as shown below.
c.
Slide bracket towards the wall and tight thumb screw.
d.
Break metal tab by twisting it back-and-forth. Repeat these steps to install the second bracket.


