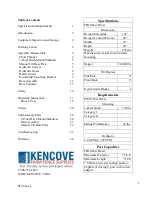
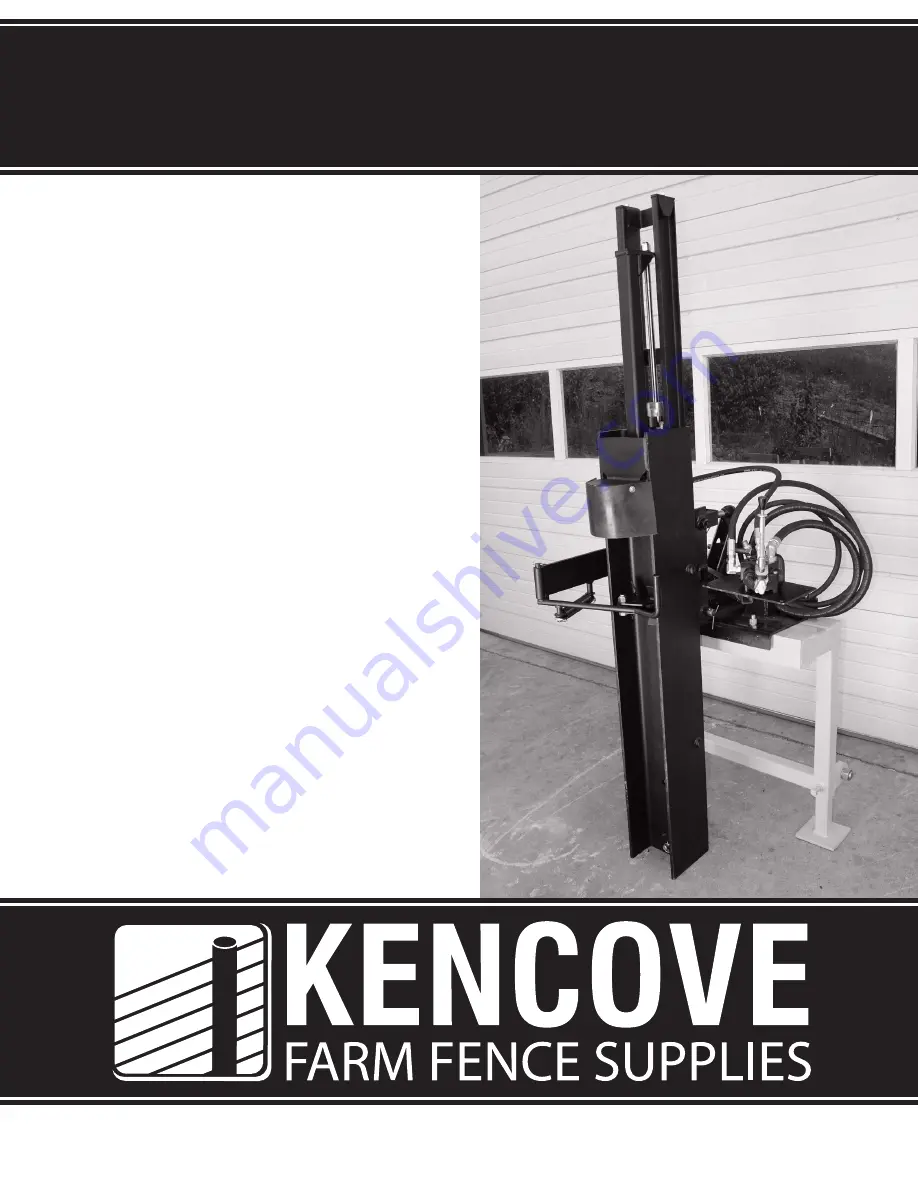
background image

OPERATOR’S MANUAL

WWW.KENCOVE.COM      800-536-2683

344 KENDALL RD, BLAIRSVILLE, PA 15717

PD80

POST


DRIVER

Summary of Contents for PD80

Page 1: ...OPERATOR S MANUAL WWW KENCOVE COM 800 536 2683 344 KENDALL RD BLAIRSVILLE PA 15717 PD80 POST DRIVER ...

Page 2: ...izer 20 Ram Assembly 21 Manual Tilt Base Plate 22 Troubleshooting 23 Warranty 24 1 800 536 2683 WWW KENCOVE COM Specifications PD80 Post Driver Dimensions Height Extended 122 Height Locked Position 88 Width 32 Depth 20 Weight 252 lbs Dimension weight do not include mounting Impact 30 000 lbs Tilt Degrees Side Side 15 Front Back 15 Nyrim Guide Blocks 4 Requirements PD80 Post Driver Mounting 3 Point...

Page 3: ...AUTION IT IS IMPORTANT THAT ALL SAFETY PRECAUTIONS MENTIONED THROUGHTOUT THIS MANUAL BE FOLLOWED FAILURE TO FOLLOW THESE INSTRUCTIONS OR CONFORM TO THE WARNING AND SAFETY LABELS ON THE EQUIPMENT MAY RESULT IN SERIOUS INJURY DEATH AND OR PROPERTY DAMAGE Kencove Farm Fence Supplies reserves the right to make changes or discontinue manufacture or sale at any time without notice and without any liabil...

Page 4: ...ng protection protective gloves and steel toe footwear Storage 1 Clean before storing Remove loose debris Clean the entire driver Compressed air or pressure washer 2 Inspection of the Driver Road lock pin should be in the top hole of ram I beam for storage Ensure all bolts are tight Check that correct pins are secured in the correct location Verify all warning labels are in their correct location ...

Page 5: ...specific function NOTE These are recommended positions and can vary depending on type and make of power supply equipment Top position Is used to mount to the front of a tractor Middle position Three point hitch mounting Lower position this position will permit the driving of 10 foot tall posts KD 2 Short Channel Mounting 1 Select corresponding mounting position from the above information Mount the...

Page 6: ...tered on three point hitch mount with the top crank handle above the stabilizer legs 2 Using the four 4 5 8 11 x 2 bolts 5 8 washers 5 8 lock washers and 5 8 11 nuts mount base plate on the three point hitch and securely tighten Manual Tilt Base Plate Disassembly 1 To remove reverse above steps one 1 and two 2 Base Plate Hitch Mounting to Ram Assembly WARNING Before mounting the base plate hitch t...

Page 7: ... object to prevent the unit from tipping Serious injury death and or property damage may be a result from not securing unit 1 To prevent tipping secure ram assembly only Recommend using an overhead lifting device rated to hold the weight equipment Note A floor jack may be used to assist in stabilizing Base Plate Hitch mounting and to move assembly 2 Remove one 1 cotter pin from each channel mounti...

Page 8: ...e 1 2 12MM X 3FT 4 Fitting 1 2 X 90 DEG O RING 5 Fitting 1 2 X 45 DEG O RING 6 Fitting 3 4 X 90 DEG O RING 7 Coupler 1 2 for supply line Assemble the hydraulic lever valve KD 10 1 Before installing inspect valve assembly for defects and ensure lever neutral safety bracket is installed 2 Lift lever out of its neutral position and move to verify that the lever as full range of motion Return to neutr...

Page 9: ... cylinder a Connect o ring seal end of 3 4 return hose to 3 4 fitting on top of valve assembly Tighten the hose fittings securely b Connect o ring seal end of 1 2 supply hose long to 1 2 fitting on side of valve assembly Tighten the hose fittings securely c Connect o ring seal end of 1 2 cylinder hose short to 1 2 fitting on top of valve assembly Tighten the hose fittings securely d Apply Teflon t...

Page 10: ...hoses have a container available to catch the fluid that is remaining in the system 1 Detach the hydraulic hoses to valve assembly and ram cylinder a Reverse steps a through e 1 800 536 2683 WWW KENCOVE COM Debris Guard KD 14 Mount Debris Guard 1 Locate debris guard and bag containing hardware 2 Attach debris guard to the drive ram head with two 2 1 4 20 X 3 4 mounting bolts and 1 4 washers as sho...

Page 11: ...ck Nut 1 Post Guide 3 Lynch Pins 2 3 4 Lock Washers 3 3 4 Washers 2 3 4 10 X 2 Hex Bolts 1 5 8 11 x 2 1 4 Hex Bolt KD 17 Post Holder Assembly 1 Assemble post holder by bolting post guide to arm as shown above Use one 1 5 8 11 X 2 1 4 bolt and 5 8 11 locknut Do not over tighten guide must be able to rotate freely KD 18 Mount post holder assembly 1 Remove pin and washer from long shaft of assembly 2...

Page 12: ...20 5 Carefully test the Post Holder for range of motion Post Holder handle should be able to contact the Ram I beam and swing back to the arm stop on the mount bracket KD 21 Remove Post Holder NOTE Post holder should only be removed for servicing 1 Reverse assembly instructions one 1 through four b 4b Ram KD 22 NOTE Your Kencove Post Driver Ram Assembly comes pre assembled from the warehouse The f...

Page 13: ...lock bracket nuts and remove road lock bracket 12 Slide main carriage channel out from the top of the ram I beam IMPORTANT Before removing Nyrim blocks and shims note the location of each as these will need to be replace in the exact location from which they were removed Shims may be different thicknesses 13 Remove guide blocks and shims from ram I beam Ram Assembly 1 Place Ram I beam Assembly hor...

Page 14: ...D 25 NOTE Hydraulic ram cylinder must be placed in main carriage channel before springs can be inserted Center the cylinder loose in the ram beam KD 26 NOTE Replacement springs will be supplied with u clips installed on each end 9 Un crimp and remove u clips from one 1 end of each spring 10 Install the two 2 spring u clips into spring bracket 11 Thread each spring back onto spring u clip three 3 t...

Page 15: ... bottom hole in Ram I beam and insert top of ram cylinder into mounting bracket 20 Install road lock pin and secure with lynch pin Warning Personal protective equipment should be worn during all service procedures This includes but not be limited to safety glasses hearing protection protective gloves and steel toe footwear KD 28 K 29 21 Hook a pulling strap to one 1 of the spring s upper spring cl...

Page 16: ...osen cylinder cap and remove 4 Slowly pull shaft out of cylinder body taking caution not to contact the shaft with the cylinder body 5 To disassembly shaft a Remove piston guide nut and remove piston guide Ram Cylinder Seal Disassembly KD 31 1 O Ring Seal 1 O ring Washer 1 Shaft Wiper 1 Shaft Seal 1 Cylinder Cap 6 To disassembly seal assembly a With an O ring Oil seal pick remove seals and shaft w...

Page 17: ...d around in which you are operating in 4 Do not modify the hydraulic lever control valve or remove safety neutral bracket 5 Be aware of underground utilities If unsure of locations call your local utility companies 6 Never operate equipment on steep slopes 7 The Post Driver operator is to never stand directly in front of equipment Stand to the valve side of equipment 8 Keep Hands Clear of post and...

Page 18: ...sure hose to the equipment s hydraulic supply pressure side Connect the Driver s 3 4 hydraulic hose to the equipment s fill cap on the hydraulic reservoir 5 Remove securing device from Post Driver 6 Road lock pin is to be secure in top position for storage Before transporting more than one hundred 100 feet raise ram and reposition road lock pin in bottom hole Dismounting Post Driver from Power Sou...

Page 19: ... and steel toe footwear WARNING Driving posts is a two 2 person operation an operator for the power source equipment and an operator for the post driver Never attempt to operate the post driver alone WARNING IT IS IMPORTANT THAT ALL SAFETY STEPS MENTIONED BELOW BE FOLLOWED FAILURE TO FOLLOW THESE INSTRUCTIONS OR CONFORM TO THE WARNING AND SAFETY LABELS ON THE EQUIPMENT MAY RESULT IN SERIOUS INJURY...

Page 20: ... and the ram strike plate 9 Swing post holder assembly so that the guides contact and secure post 10 The Post Driver operator is to never stand directly in front of equipment Stand to the valve side of equipment 11 Lift valve lever out of neutral and push control lever to release the drive ram to impact the post 12 Pull valve lever back past neutral to raise drive ram again Repeat cycling until po...

Page 21: ... Protective Equipment This includes but not be limited to safety glasses hearing protection protective gloves and steel toe footwear All service of equipment requires that ram assembly be horizontal Place on a support rated to hold the weight of the equipment Important Contact Kencove Farm Fence Supplies if any of the instructions provided in this manual are unclear or not understood Proper care i...

Page 22: ...uard 6 5 8 11 X 1 1 4 Hex Bolts 1 Road Lock Pin 1 Lynch Pin 2 10 Gauge Shims 2 14 Gauge Shims 2 18 Gauge Shims 4 Nyrim Guide Blocks 2 Springs 4 Spring Hooks 1 Lower Spring Bracket 6 5 8 Lock Washers 1 Ram Cylinder 1 Road Lock Bracket 2 3 8 16 X 2 1 2 Hex Bolts Note Number and sizes of shims are 2 3 8 16 Heavy Hex Nuts unique to each assembly 2 3 8 16 Lock Nuts ...

Page 23: ...uts 1 Base Plate Assembly 4 Cotter Pins 1 Screw Block Plate 1 Screw Block w bolt 1 Side to Side Crank 1 3 4 10 Lock Nuts 1 Short Channel Assembly 4 5 8 11 X 1 3 4 Hex Bolts 4 5 8 Washers 4 5 8 Lock Washers 4 5 8 11 Hex Nuts 2 Mounting Pins 1 Crank Collar 1 Forward Tilt Yoke 1 Forward Tilt Crank 1 1 8 Lock Nut 2 1 Washers ...

Page 24: ...m Fence Supplies for replacement parts Low power or limited movement Insufficient hydraulic pressure from power supply Verify power supply is operating correctly and check connections for proper installation Hydraulic hoses are restricted Check and replace if required Hydraulic Cylinder is damaged Do Not attempt to operate and contact Kencove Farm Fence Supplies for replacement parts Weak or broke...

Page 25: ...ial resulting from or caused by any failure malfunction or defect of any product Rubber Bumpers and Drive Ram Springs are warranted for thirty 30 days from the date of purchase Manufactures replacement Rubber Bumpers and Drive Ram Springs are warranted for thirty 30 days from the date of purchase TERMS THAT APPLY TO THE WARRANTY Kencove Farm Fence Supplies cannot be held liable for the inability t...

Page 26: ......

Page 27: ......

Reviews: