


Summary of Contents for Electric Cognex DataMan 260
Page 1: ...Kendall Technology Summit 2017 DataMan ID Basic and Advanced Labs Featuring the DataMan 260 ...
Page 2: ......
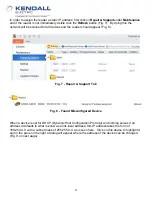
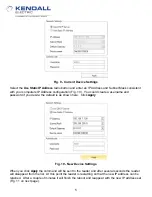
Page 10: ...7 ...
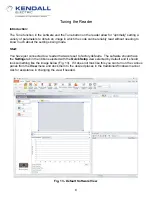
Page 32: ...29 ...
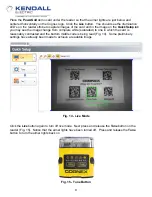
Page 42: ...39 Fig 64 Buffering and Transfer Dialog ...
Page 53: ...50 Fig 81 System Settings Outputs ...
Page 56: ......


