background image

20

SERVICE AND ADJUSTMENT

If you lack the necessary skills required to service this water 
heater properly, or if you have dif

fi

 culty following the instructions, 

you should not proceed.  Have a quali

fi

 ed service technician 

perform the maintenance of this water heater.

 Anode Rod Inspection

See also

 “Smelly Water” on page 23.

Each water heater contains at least one anode rod, which will 
slowly deplete (due to electrolysis), prolonging the life of the 
water heater by protecting the glass-lined tank from corrosion. 
Adverse water quality, hotter water temperatures, high hot water 
usage, hydronic heating devices, and water softening methods 
can increase the rate of anode rod depletion. Once the anode rod 
is depleted, the tank will start to corrode, eventually developing 
a leak.

Certain water conditions will cause a reaction between the anode 
rod and the water. The most common complaint associated with 
the anode rod is a “rotten egg smell” produced from the presence 
of hydrogen sul

fi

 de gas dissolved in the water. CAUTION: Do 

not remove this rod permanently as it will void any warranties. A 
special anode rod may be available if water odor or discoloration 
occurs. NOTE: this rod may reduce but not eliminate water odor 
problems. The water supply system may require special 

fi

 ltration 

equipment from a water conditioning company to successfully 
eliminate all water odor problems.

Arti

fi

 cially softened water is exceedingly corrosive because the 

process substitutes sodium ions for magnesium and calcium ions. 

The anode rod should be inspected after a maximum of three 
years and annually thereafter until the condition of the anode 
rod dictates its replacement. 

NOTE:

 Arti

fi

 cially softened water 

requires the anode rod to be inspected annually.

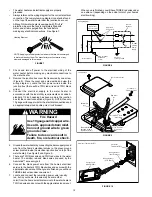
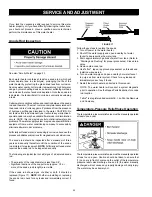
The following are typical (but not all) signs of a depleted anode 
rod:

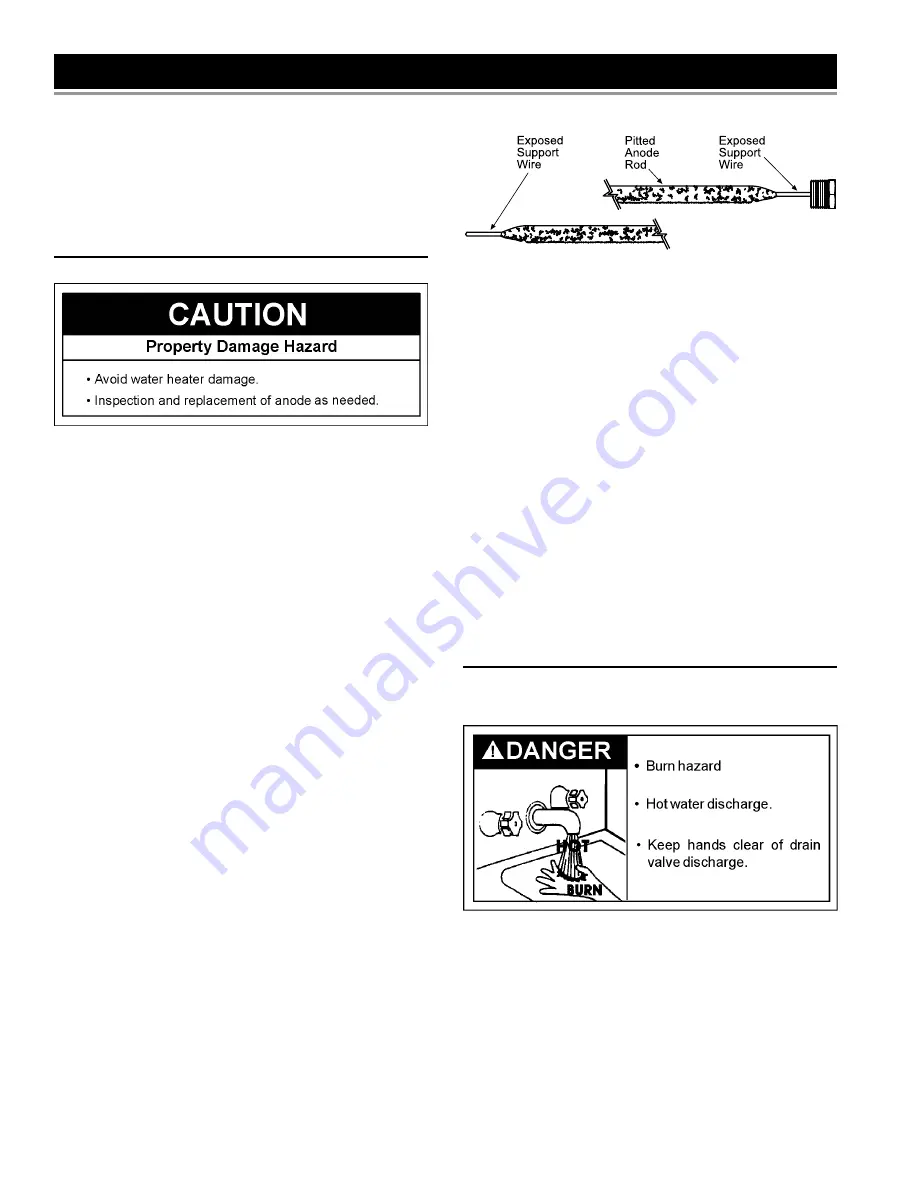
•  The majority of the rods diameter is less than 3/8”.
•  Signi

fi

 cant sections of the support wire (approx. 1/3 or        

   more of the anode rod’s length) are visible. 

If the anode rod shows signs of either or both it should be 
replaced (Figure 17).  

NOTE:

 Whether re-installing or replacing 

the anode rod, check for any leaks and immediately correct if 
found.

FIGURE  17

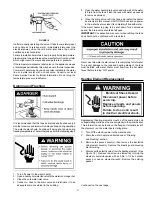
Follow these steps to replace the anode:
1.  Turn off power to the water heater.
2.    Shut  off  the  water  supply  and  open  a  nearby  hot  water                       
     faucet to depressurize the water tank.
3.  Drain approximately 5 gallons of water from tank. (Refer to  
     “Draining and Flushing” for proper procedures). Close drain  
     valve.
4.  Remove old anode rod.
5.  Use Te

fl

 on

®

  tape or approved pipe sealant on threads and  

     install new anode rod.
6.  Turn on water supply and open a nearby hot water faucet  
     to purge air from water system. Check for any leaks and  
     immediately correct any if found.
7.  Restart the water heater as directed in this manual.  


NOTE: The water heater will conduct a system diagnostic 
prior to operation.  See the Repair Parts Illustration for anode 
rod location.

 Te

fl

 on

®

 is a registered trademark of E. I. du Pont de Nemours 

and Company.

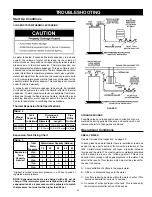
 Temperature-Pressure Relief Valve Operation

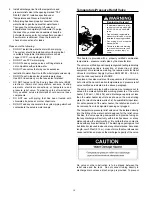
The temperature-pressure relief valve must be manually operated 
at least once a year.

The temperature-pressure relief valve must be manually operated 
at least once a year. Caution should be taken to ensure that 
(1) no one is in front of or around the outlet of the temperature-
pressure relief valve discharge line, and (2) the water manually 
discharged will not cause any property damage or bodily injury. 
The water may be extremely hot.

Summary of Contents for 153.582400

Page 1: ...ng only Not suitable for space heating INSTALLER Affix these instructions to or near the water heater OWNER Retain these instructions for future reference Si no puede leer o entender el inglés y necesita el manual de instrucciones en español puede solicitarlo al 1 800 821 2017 NO TRATE DE INSTALAR U OPERAR ESTE CALENTADOR DE AGUA SI NO ENTIENDE LAS INSTRUCCIONES No hacer caso de esta advertencia pod...

Page 2: ...ow level exposure to some of the substances listed in the act IMPORTANT DEFINITIONS Sears Service Center The Sears Service Center has the ability equivalent to a licensed tradesman in the fields of plumbing and electrical work including a thorough understanding of the requirements of the National Electrical Code as it relates to the installation of electric water heaters The Sears Service Center a...

Page 3: ...3 GENERAL SAFETY ...

Page 4: ...Water Temperature Adjustment 18 Operating Mode Descriptions 18 The Electronic Thermostat 19 Diagnostic LED Light 19 Overriding The Energy Saver Module ESM 19 SERVICE AND ADJUSTMENT 20 Anode Rod Inspection 20 Temperature Pressure Relief Valve Operation 20 21 Draining and Flushing 21 Heating Element Replacement 21 22 Service 22 TROUBLESHOOTING 23 Start Up Conditions 23 Closed System Thermal Expansio...

Page 5: ... easily be determined to have the appropriate certification logo Disclaimer of implied warranties limitation of remedies Customer s sole and exclusive remedy under this limited warranty shall be product repair or replacement as provided herein Implied warranties including warranties of merchantability or fitness for a particular purpose are limited to one year on the water heater and twelve years ...

Page 6: ...If after reading this manual you have any questions or do not understand any portion of the instructions call the Sears Service Center The product is certified to comply with a maximum weighted average of 0 25 lead content as required in some areas Carefully plan the place where you are going to put the water heater Correct electrical wiring and connections are very important in preventing death f...

Page 7: ... ROLL OF LEAD FREE SOFT SOLDER SOLDER FLUX Materials Needed To simplify the installation Sears has available the installation parts shown below You may or may not need all of these materials depending on your type of installation EXPANSION TANKS FOR THERMAL EXPANSION CONDITIONS AVAILABLE IN 2 GALLONS AND 5 GALLONS CAPACITY THROUGH LOCAL SEARS STORE OR SERVICE CENTER S U I TA B L E D R A I N PA N S...

Page 8: ...eater junction box FIGURE 4 5a If you have copper piping to the water heater the two copper water pipes can be cut with a hacksaw approximately four inches away from where they connect to the water heater This will avoid cutting off the pipes too short Additional cuts can be made later if necessary Disconnect the temperature pressure relief valve drain line When the water heater is drained disconn...

Page 9: ... pan piped to a drain However unanticipated damage can be reduced or prevented by a leak detector or water shut off device used in conjunction with a piped drain pan These devices are available from some plumbing supply wholesalers and retailers and detect and react to leakage in various ways Sensors mounted in the drain pan that trigger an alarm or turn off the incoming water to the water heater ...

Page 10: ...ain relief Connect ground wire to green ground screw Failure to do so can result in death fire or electrical shock WARNING 4 Ground the water heater by connecting the bare copper ground wire from the home s electrical service to the green ground screw located inside the electrical junction box on top of the water heater See Figure 8 and Figure 9 5 There are TWO black wires and TWO red wires in the...

Page 11: ...er in a closed water system install a relief valve or expansion tank in the cold water line as specified under Closed System Thermal Expansion 5 Install a shut off valve in the cold water inlet line It should be located close to the water heater and be easily accessible Know the location of this valve and how to shut off the water to the heater Water Piping HOTTER WATER CAN SCALD Water heaters are...

Page 12: ...WDOOHG LQ RSHQLQJ SURYLGHG R QRW SOXJ EORFN RU FDS WKH GLVFKDUJH OLQH DLOXUH WR IROORZ WKLV ZDUQLQJ FDQ UHVXOW LQ H FHVVLYH WDQN SUHVVXUH VHULRXV LQMXU RU GHDWK This heater is provided with a properly certified combination temperature pressure relief valve by the manufacturer The valve is certified by a nationally recognized testing laboratory that maintains periodic inspection of production of li...

Page 13: ...ks Repair as needed bodily injury hazard to life or property damage the relief valve must be allowed to discharge water in quantities should circumstances demand If the discharge pipe is not connected to a drain or other suitable means the water flow may cause property damage The Discharge Pipe Must not be smaller in size than the outlet pipe size of the valve or have any reducing couplings or oth...

Page 14: ... 12 10 10 10 10 120 V 208 V 240 V Copper Wire Size AWG Based on N E C Table310 16 C Wattages less than 1500 may be wired 14 gage with a maximum 15 amp protection ELECTRONIC THERMOSTAT ET FUSED DISCONNECT OR CIRCUIT BREAKER L 1 L 3 L 4 T 4 T 2 TEMPERATURE SENSOR UPPER ELEMENT LOWER ELEMENT ENERGY SAVER MODULE ESM GROUND SCREW ELECTRICAL SERVICE GROUND RED BLACK YELLOW RED BLACK BLUE ON JUNCTION BOX...

Page 15: ...nts air fresheners paint and varnish removers refrigerants and many other commercial and household products WATER SYSTEM PIPING Temperature and pressure relief valve properly installed with a discharge pipe run to an adequate drain and protected from freezing See Figure 11 on page 11 All piping properly installed and free of leaks Suitable drain pan lines installed and piped to an adequate drain S...

Page 16: ...ing you to remotely monitor and control via Wi Fi To get started all you need is your Kenmore Assurelink Wi Fi Module and Assurelink Gateway and a smartphone tablet or computer The Assurelink Wi Fi module and Assurelink gateway are products that when available are sold separately ...

Page 17: ...afety Shut Off This water heater is designed to automatically shut off in the event that the water temperature exceeds 180 F 82 2 C A temperature limit switch or ECO Energy Cut Off is used to shut off the power to the system if the water temperature exceeds 180 F or 82 2 C The ECO can be reset by firmly pushing in the red reset button located on the electronic thermostat See Figure 15 on page 19 I...

Page 18: ...eater from freezing during cold weather NOTE If your water heater is in Vacation Mode you can return it to its previous settings by pressing the Vacation Mode button again REMOTE ACCESS Pressing this button will enable or disable remote monitoring and control through an optional Assurelink water heater controller See page 16 ENTER LOCK Pressing this button once after a user setting has been change...

Page 19: ...eating element is powered Red LED will flash error codes If a fault is detected by the electronic thermostat the LED light indicator will use the red LED to indicate the fault detected The flash code sequence is to consist of 1 2 second flashes of the red LED each separated by a 1 2 second off period The number of flashes indicates the fault code number See diagnostic code chart section in this ma...

Page 20: ...e anode rod dictates its replacement NOTE Artificially softened water requires the anode rod to be inspected annually The following are typical but not all signs of a depleted anode rod The majority of the rods diameter is less than 3 8 Significant sections of the support wire approx 1 3 or more of the anode rod s length are visible If the anode rod shows signs of either or both it should be repla...

Page 21: ...ith water as needed to remove sediment 6 Close the drain valve refill the tank and restart the heater as directed in this manual CAUTION Do not turn on power to the water heater unless it is completely filled with water If the water heater is going to be shut down for an extended period the drain valve should be left open IMPORTANT Condensation may occur when refilling the tank and should not be c...

Page 22: ...cumulated sediment on the bottom of the tank Refer to Draining and Flushing 6 Make sure the replacement element has the correct voltage and wattage rating Lubricate the new gasket with a few drops of dishwashing soap position the new gasket on the element and insert it into the water heater tank Figure 20 Tighten the element by turning it clockwise until secure 7 Close the drain valve Open the nea...

Page 23: ...art TABLE 3 Inlet Water Pressure Water Heater Capacity Gallons 30 40 50 66 82 Expansion Tank Capacity Needed 40psi 2 2 2 5 5 50psi 2 2 2 5 5 60psi 2 2 5 5 5 70psi 2 2 5 5 5 80psi 2 5 5 5 5 Highest recorded inlet water pressure in a 24 hour period or regulated water pressure NOTE Expansion tanks are pre charged with a 40 psi air charge If the inlet water pressure is higher than 40 psi the expansion...

Page 24: ... water system are used such as a dishwasher or washing machine If hydrogen gas is present there will probably be an unusual sound similar to air escaping through the pipe as the hot water faucet is opened There must be no smoking or open flame near the faucet at the time it is open RUMBLING NOISE In some water areas scale or mineral deposits will build up on your heating elements This buildup will...

Page 25: ... the high temperature shut off system See High Temperature Shut Off System in the Troubleshooting section 8 During very cold weather the incoming water will also be colder and it will require a longer time to become heated 9 The hot water usage may exceed the capacity of the water heater If so wait for water heater to recover after abnormal demand Also examine pipes and faucets for possible water ...

Page 26: ...r element circuit for resistance of 5 25 ohms replace if required 3 Check wires at elements and Electronic Thermostat ET for damage If this 4 flashes condition continues replace Electronic Thermostat ET 4 Turn on electrical power at breaker E05 with an alert Icon flashing Lower element circuit failure Note Upper element is still operable 1 Turn off electrical power at the breaker 2 Check lower ele...

Page 27: ...ostat ET 1 Turn off electrical power at the breaker check all electrical con nections and wiring for damage 2 Replace the Electronic Thermostat ET 3 Turn on electrical power at breaker E52 with an alert Icon flashing Energy Saver Module ESM is receiving the wrong data from the Electronic Thermostat ET 1 Turn off electrical power at the breaker check all electrical con nections and wiring for damag...

Page 28: ... 1 Turn off electrical power at the breaker 2 Check upper element circuit for resistance of 5 25 ohms replace if required 3 Check wires at elements and Electronic Thermostat ET for damage If this 4 flashes condition continues replace Electronic Thermostat ET 4 Turn on electrical power at breaker E05 5 FLASHES Red Lower element circuit failure Note Upper element is still operable 1 Turn off electri...

Page 29: ...e breaker 2 Check electrical connections at Electronic Thermostat ET 3 Replace Lower Thermistor Sensor 4 Turn on electrical power at breaker E08 8 FLASHES Red Energy Saver Module ESM failure 1 Turn off electrical power 2 Check wires at the interface module for damage 3 If this 8 flashes condition continues replace module ESM 4 See Overriding The Energy Saver Module ESM on page 19 Unplug the Electr...

Page 30: ...ater usage 9 Insulate piping 10 Insulate piping HIGH OPERATION COSTS 1 Temperature set too high 2 Sediment or lime in tank 3 Heater too small for job 4 Leaking faucets and or plumbing system 5 Wasted hot water 6 Long runs of exposed piping 7 Hot water piping in exposed wall 8 Elements covered with sediment or lime 1 Lower temperature control or change to Energy Saver Mode 2 Drain Flush Provide wat...

Page 31: ... The element may be leaking at the tank fitting Turn electrical power OFF remove access panel and insulation cap with handle If leaking around element follow proper draining instructions and remove element Reposition or replace gasket on element Place element into opening and tighten securely Then follow Filling the Water Heater instructions in the Installation Instructions section E Water from dr...

Page 32: ...3932 14 Energy Saver Wire Harness Assembly 100263933 100263933 15 Assurelink Electric Water Heater Controller allows water heater to be controlled remotely sold separately Sold separately Sold separately 16 Manual 100263002 100263002 REPAIR PARTS LIST Now that you have purchased this water heater should a need ever exist for repair parts or service simply contact any Sears Service Center or call 1...

Page 33: ...33 NOTES ...

Page 34: ...34 NOTES ...

Page 35: ...35 NOTES ...

Page 36: ...36 ...

Reviews: