background image

Summary of Contents for 30-inch electric wall ovens

Page 1: ... fault codes 17 Adjusting oven temperature 17 How to obtain service 18 Before you call for service chart 19 INSTALLER Please leave this manual with this appliance Be Sure the appliance has been properly installed CONSUMER To save you time energy and money read and keep this manual for future reference The model and serial numbers are found on the rating plate i_ated on the ovenfront frame_ Open th...

Page 2: ...bers of your appliance For your convenience we have provided space on the front cover to record this information In our continuing effort to improve the quality of our cooking products we may find it necessary to make changes to our line of appliances without revising this manual Instructions on the following pages are based on safety considerations and must be strictly followed to eliminate the p...

Page 3: ...lectrical shock then remove bulb CAUTION Do notuse an appliance as a step stool to cabinets above Misuse of appliance doors such as stepping leaning or sitting on the door may result in possible tipping of the appliance breakage of door and serious injuries if i iiiiii iii ilii iiiiiiii iiii i iill i Always turn off the oven when cooking is completed Never heat an unopened container as pressure bu...

Page 4: ...ii iiii iii Clean only parts listed in this booklet Do not clean door gasket The door gasket is essential for a good seal Care should be taken not to rub damage or move the gasket Do not use oven cleaners or oven liner protective coatings of any kind in or around any part of the self clean oven Before self cleaning the oven remove broiler pan oven racks and other utensils and wipe off excessive sp...

Page 5: ...e the time by one minute press either pad once To change the time in increments of 10 minutes press and hold either pad When power is first supplied to the oven or if there has been a power failure the display will flash Press CLOCK pad to recall time of day when another function is displayed Clock time cannot be changed when oven is set for a cook timed bake or self clean operation Cancel operati...

Page 6: ... pad 000 and BAKE indicator words will appear in the display 2 Press the or V pad Then press either pad until the desired oven temperature is displayed 350 will appear in the display when either pad is pressed once o The oven temperature can be set from 170 to 550 The ON indicator word and 75 or the actual oven temperature whichever is higher will appear in the display The temperature in the displ...

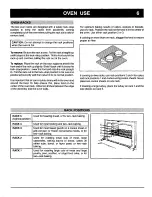
Page 7: ... the center of the oven rack Allow two inches between the edge of the utensil s and the oven walls For optimum baking results of cakes cookies or biscuits use one rack Position the rack so the food is in the center of the oven Use either rack position 2 or 3 If cooking on more than one rack stagger the food to ensure proper air flow Ifcooking on two racks use rack positions 2 and 4 for cakes and r...

Page 8: ...5 If you delay more than 30 seconds between pressing a pad and the or pad the display will either Return to the previous setting Beep and flash to indicate the next entry Return to the current time of day and cancel the operation i i J i i i iJ FJV ii iiii J i i i iii i ii To set oven 1 Place food in the oven 2 Press the COOK TIME pad The words SET COOK TIME will flash in the display 3 Press the o...

Page 9: ...ime you set It is NOT necessary to set aI start time I At the preset time the oven will automatically turn on and TIMED BAKE ON will appear in the display The display will begin counting down the cooking time At the end of the preset cooking time the oven will automatically turn off and END will appear in the display Continuous beeps will remind you to remove the food from the oven Press the CANCE...

Page 10: ...t one 13xgx2 inch cake pan or two 9 inch round cake pans on one rack Stagger pans when baking on two racks so one pan is not directly over another pan Allow one to two inches between the pan and the oven walls Check the cooking progress at the minimum time recommended in the recipe If necessary continue checking at intervals untilthe food is done Ifthe oven door is opened too frequently heat will ...

Page 11: ...i i i i i i fill i _ i iiii i_i iiiiii i iill i ii i i i i ili ilil _iii ii i iiiili iil iilili _i i iiiil ii iii iiiii iii i i ii i i jil Oven not preheated Pans touching each other or oven walls Incorrect rack position Incorrect use of aluminum foil Placed 2 cookie sheets on one rack Used glass dark stained warped or dull finish metal pans Use a shiny cookie sheet Follow cookware manufacturer s ...

Page 12: ... to select HI for normal broiling or press the V pad to select Lo for low temperature broiling 3 For optimum browning results remove the broiler pan and preheat the broil element for 3 minutes 4 Broil with the oven door opened to the broil stop position opened about 6 inches Tum meat once about half way through cooking Check for doneness by cutting a slit in the meat near the center for desired co...

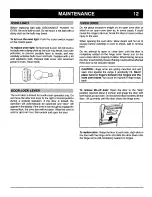
Page 13: ...properly in place When baking be sure the door is completely closed Baking results will be affected if the door is not securely closed CAUTION Hinge arms are spring mounted and will slam shut against the range if accidently hit Never place hand or fingers between the hinges and the front oven frame You could be injured if hinge snaps back ii ii i i iiiiiii i i iiiiii ii ii iiiiii iiiiiiiii ii iiii...

Page 14: ...he door is locked and the CLEAN button is pressed the oven wilt automatically begin to heat to cleaning temperatures A fan will automatically turn on during the self clean cycle and wilt automatically turn off after the clean cycle when the oven has cooled As the oven reaches cleaning temperatures the LOCK indicator will appear in the display to show that an internal lock mechanism has engaged At ...

Page 15: ...rid the oven door can be unlocked and opened The oven door and door lock lever will be damaged if the oven door is forced to open when the LOCK indicator is still displayed i i iii ii ii iii i lii i iii iiiiiiiiiiiiii iiiiii ii To delay the start of a clean cycle 1 Remove the oven racks and close the door 2 Move the door lock lever to the right or locked position 3 Press CLEAN pad 4 Press the or V...

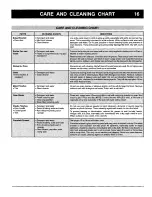
Page 16: ...ss Cleaners Bon Ami Cinch Glass Plus Windex Dishwashing Liquid Detergents Dawn Dove Ivory Joy Mild Liquid Spray Cleaners Fantastik Formula 409 Non Abrasive Cleaners Bon Ami paste of baking soda and water Mildly Abrasive Powder or Liquid Cleansers Ajax Barkeepers Friend Cameo Comet Soft Scrub Non Abrasive or Scratchless Plastic or Nylon Scouring Pads or Sponges Chore Boy Plastic Cleaning Puff Scrun...

Page 17: ...leaner Detergent and water Paste of baking soda and water Non abrasive plastic pad or sponge Elements are self cleaning Soil will burn off as elements are used Do not spray oven cleaner on elements electrical hook up or connection i _i_ _ e_ _i _e_ _i i i i i ilia i ii_ i i ili i i i iii i i i _i_ii i_ _ _i ii i i i 11 _i_ i_i ii il i ii_ _i_i i i i i i i i_ i_ i i i i i i i ii i ii ii ii ii i _ i...

Page 18: ...otter or cooler you can adjust it yourself To decide how much to change the thermostat set the oven temperature 25 F higher or lower than the temperature in your recipe then bake The results of the test should give you an idea of how much to adjust the thermostat To adjust the thermostat 1 Press the OVEN TEMP pad 2 Press the pad until 550 is displayed 3 Press and hold the OVEN TEMP pad for several...

Page 19: ... with the local response to your service requirements write to Maytag Customer Service P O Box 2370 Cleveland TN 37320 2370 Include your name address phone number the complete model and serial numbers of the appliance the name and address of the dealer from whom you purchased the appliance the date of purchase and details concerning your problem If you do not receive satisfactory service you may c...

Page 20: ...and two inches between the pans and the oven wails Are the oven and oven racks level Was good cookware bakeware of the proper size used Was the oven vent covered or blocked Are you using a tested recipe from a reliable source Baking results differ from previous oven Oven thermostat calibration may differ between old and new oven The newer oven thermostat may be more accurate than the one on you pr...

Reviews: