background image

Summary of Contents for 385.15202

Page 1: ...INE Owner s Manual MAQUINA DE COSER Manual de Instrucciones MACHINE A COUDRE Manuel d instructions Model Modelo Mod61e 385 15202 15208 I 304 800 009 Sears Roebuck and Co Hoffman Estates IL 60179 U S A wwwsears corn ...

Page 2: ...ues ou m_caniques 4 I1ne faut jamais faire fonctionner cette machine si les orifices d a_ration sont colmat_s Tenez les orifices d a_ration de cette machine coudre et le curseur d escamotage du pied de biche exempts de toute accumulation de peluches poussi_res et de morceaux de chiffon 5 11 ne faut jamais laisser tomber ou introduire d objet dans les orifices 6 I1ne faut pas l utiliser en ptein ai...

Page 3: ...0 dias a partir de ta fecha de compra Sears gratuitamente reemplazar_ piezas y reafizar el servicio mec nico necesario para el funcionamiento correcto de esta m quina de coser Esta garantia no abarca el mantenimiento normal que se describe en el manual del propietario El servicio cubierto por la garantia podr _ obtener Ilevando la m_quina de coser a centro de servicio Sears m_s cercano en Estados ...

Page 4: ...iento de puntadas lntegradas Ojales Dimensiones de la mAquina Peso Especificaci6n M_s de 730 s p m 4 turn M xima 5 mm Maxima 19 2 Funci6n de ojal incorporado de 4 pasos 390 mm I5 4 de ancho x 155 mm 6 1 de profundidad x 290 mm I1 4 de altura 59kg 132 Ibs Caract_ristiques de la machine 15202 Description Vitesse de couture Maximum Longueur du point Largeur du point Ensemble de points points de coutu...

Page 5: ...miento de puntadas lntegradas Ojales Dimensiones de la maquina Especificaci6n M_s de 730 sp m 4 mm M xima 5 mm M xima 25 Peso 8 Funci6n de ojal incorporado de 4 pasos 390 mm 15 4 de ancho x 155 mm 61 de profundidad x 290 rnm 11 4 de altura 5 9kg t32 tbs J Caract_ristiques de la machine 15208 Description Vitesse de couture Maximum Longueur du point Largeur du point Ensemble de points points de cout...

Page 6: ...lazo reempfazamos su producto cubierto en el acuerdo si cuatro o m s falfas del mismo ocurren en et plazo de doce rneses Reemplazo del Producto si su producto cubierto en el acuerdo no puede ser reparado Mantenimiento Anual Preventivo a su pedido sin cargo extra Ayuda R_pida por Tel6fono ayuda telef6nica por un t_cnico especiatista de Sears en productos que requieren arreglo en casa adem s puede f...

Page 7: ...r a Zigzag Stitch 28 Correct tension 28 Tension is too tight 28 Tension is too loose 28 Stitch Pattern Selector 30 Stitch Length Dial 30 Stitch Width Dial 30 Reverse Stitch Control 30 Use the Seam Guides 32 Turn a Square Corner 32 Variable Needle Position 34 Topstitching 34 Zipper Sewing 34 36 Fabric preparation 34 To sew 36 To Drop or Raise the Feed Dogs 38 Darning 38 SECTION IV ZIGZAG STITCH SEW...

Page 8: ...recta 29 o Et hito est_ demasiado tenso 29 Et hilo est demasiado flojo 29 Selector de patr6n 31 Perilla de la longitud de puntada 31 Perilta de anchura de puntada 3I Control de puntada reversa 31 SECCION 11 COSTURA DE PUNTADA RECTA Puntada recta 33 Para empezar a coser 33 Para terminar a coser 33 Uso de las gufas de costura 33 C6mo coser una esquina cuadrada 33 Posici6n variable de la aguja 35 Cos...

Page 9: ...t zig zag _ 29 Tension correcte 29 Si a tension est trop elev_e 29 Si la tension est trop faibfe 29 S_tecteur de point 31 Cadran de r_glage de ta fongueur du point 31 Cadran de r_glage de la largeur du point 31 Bouton de marche arri_re 31 PARTIE II1 COUTURE AU POINT DROIT Point droit 33 D_but d une couture 33 Finition d une couture 33 Utilisation des guides de couture 33 Pour coudre un angle droit...

Page 10: ...trol _ Stitch pattern setting display _ Stitch length dial _ Stitch width dial _ Bobbin winder spindle _ Spool pins _ Bobbin winding tension disc _ Upper needle thread guide _ Thread take up lever _ Thread tension dial Face cover _ Thread cutter _ Needle plate _ Extension table Accessory box _ Carrying handle Handwheet _ Power switch _ Machine socket _ Free arm _ Presser foot lifter Presser foot h...

Page 11: ...Cortahilos Pfaca de aguja _ Estuche de accesorios Ampliaci6n m6vil de la superficie de costura _ Asa de transporte Vofante lnterruptor de corriente _ Enchufe de la m quina __ g_ Brazo tibre _ Palanca de ojales Tornitlo del soporte de prensatelas _ Enmangue del prensatelas d _ Prensatetas 2_ Tornilto de sujeci6n de la aguja _ Aguja 2 Pedal de control Identification des pi_ces _ S_leeteur de point _...

Page 12: ...e ORANGE 5 x No 14 needle RED 5 x No t6 needle PURPLE 5 x No t8 needle GREEN Needle clamp with screw Sliding buttonhole foot Straight stitch foot Zigzag foot Satin stitch foot Zipper foot Foot holder Thumb screw i Light bulb i Seam rippedButtonhole opener i Lint brush i i Large screwdriver i Small screwdriver oH Needle threader Hemmer foot 2ram Walking foot Pin tuck foot Ruffler Binder foot Ultrag...

Page 13: ...5208 Para ordenar partes adicionates para reparar su m_ quina siga estos pasos 1 Escriba en la pantalla de Interact _www3 sears corn para visitar el sitio web de Sears Parts 2 Siga las instrucciones y escriba su numero de mode o de la m_ quina de coser Ud encontrara el numero de modeto detrb s de la m quina en la Ptaca de tdentificaci6n Escriba las echo primeras cifras de este nQmero seguido de un...

Page 14: ...rea Do not touch any moving parts such as the thread take up lever handwheel or needle Always turn off the power switch and unplug from the power supply When leaving the machine unattended When attaching or removing any parts When cleaning the machine Do not place anything on the foot control when not sewing Polarized Plug This appliance has a polarized plug one blade wider than the other To reduc...

Page 15: ...ra El pedal de control sir e para regular la vefocidad de ta costura La velocidad se regula pulsando et pedal de control con fa planta dei pie a m s presi6n mAs velocidad PARTIE I1 PRE_PAREZ VOUS A COUDRE Branchez la machine I rise _lectrique lnterrupteur de courant Prise de courant Prise de la machine Fiche de raccord 61ectrique Ampoule d eclairage Avant de brancher le cordon d alimentation assur...

Page 16: ...resser foot lifter raises and lowers the presser foot You can raise it about 1 4 0 6 cm higher than the normal up position for easy removal of the presser foot or to help place heaw fabric under the foot Thread Cutter _Thread cutter You do not need a pair of scissors to cut threads after sewing Simply use the built in thread cutter _ f r J J Accessory Box Open the cover of the accessory box toward...

Page 17: ...para que te resulte m_ s f_cil colocar telas gruesas o como ayuda para quitar el prensatelas Relive pied presseur _ Releve pied presseur _ Position relev_e normale _ Position relev_e maximum Le relive pied presseur remonte et abaisse le pied presseu_ Vous pouvez te remonter d environ 0 6 cm 1 4 plus haut que la position normaie pour retirer plus facilement le pied presseur ou pour vous aider _ pas...

Page 18: ...the needle into the needle clamp _ push it up as far as it goes Tighten the needle clamp screw _ firmly by turning it clockwise_ To see if the needle is good place the flat side of the needle onto something flat eg needle plate or glass _ The gap between the needle and the flat surface should be consistent Never use a bent or blunt needle A damaged needle can cause permanent snags or runs in knits...

Page 19: ...r I aiguille _ Vis du pince l aiguille _ Pince l aiguille Eteignez la machine Faites monter I aiguille le plus haut possible en tournant le volant en sens antihoraire et _ abaissez le pied presseur Desserrez ta vis du pince aiguille en ta tournant en sens antihoraire Retire I aiguille du pince aiguille _ lns6rez la nouvelle aiguilfe dans le du pince aiguitle _ avec Ie meplat vers l arri_re Lorsque...

Page 20: ...e Bar tacking Button sewing Overcasting stitch Multiple zigzag stitch Blind hem stitch Lace work Shelt stitch Decorative stitch patterns Twin needle stitch Model 15208 exclusive page 32 page 34 page 40 page 40 page 42 page 42 page 44 page 44 page 46 page 46 page 48 page 48 page 50 page 50 page 52 Sliding buttonhole foot Use this foot for manual buttonhole making it is marked to help you measure a ...

Page 21: ...concha p_gina 51 Puntadas decorativas pd gina 51 Puntadas de doble aguja p_ gina 53 Exclusivo Modelo 15208 y puntada de Diff_rents pieds presseurs Pied zig zag Ce pied convient pour les points zig_zags et les points droits Pour Point droit page 33 SurpiqdJre page 35 Zig zag simple page 41 Point lanc_ page 4I Monogrammes page 43 Appliques page 43 Brides de renfort page 45 Pose des boutons page 45 S...

Page 22: ...ten caused by damaged needles Always purchase a good quality thread It should be strong smooth and consistent in thickness WEIGHT FABRIC NEEDLE SIZE Chiffon Georgette Fine Lace Organdy Organdy 9 65 Very Light 9 65 Light Medium Heaw All TYPE OF NEEDLE Universal Net Tulle Ball Point Batiste Voile Lawn Pure Silk Crepe de Chine Orange Sheer Crepe Chambray Handkerchief Linen Blue Gingham Challis Percal...

Page 23: ...a para comprobar que no estCn embotadas o despuntadas Las agujas daRadas suelen causar enganches y carreras irreparabtes en tejidos de punto sedas finas y imitaci6n de seda Adquiera siempre hilo de buena calidad Deber ser fuerte suave y de grosor uniforme f PESO TIPO DE TELA TIPO DE AGUJA TAMAI_O DE AGUJA _ir era Gasa Gasa delgada Encaje fino Organdi Malla OrgandY Universal 9 65 Muy Tul Punta de b...

Page 24: ...les fines et les _toffes semblables b la sole sont d_finitifs et sont souvent provoqu_s par des aiguifles abfm es Achetez toujours du fil de bonne qualit_ ii dolt 6tre solide lisse et d _paisseur r6guli_re Diam_tre Poids Tissu Type d aiguille d aiguille Mousseline Cr_pe Georgette Dentelle fine Organdi Tulle Tr_s l_ger L_ger Moyen Lourd Tout _ Batiste z_phyr linon pure soie cr6pe de chine cr_pe fin...

Page 25: ... blank page p gina blanca page blanche 17 ...

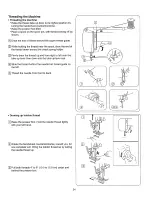
Page 26: ...cover _ Bobbin case To remove the bobbin case _ from the shuttle pull open the latch of the bobbin case_ Put the bobbin case straight out of the shuttte_ o Bobbin winding Release the clutch by pulling out the handwheeL This will stop the needle from moving while you wind the bobbin Draw thread from the spool Guide the thread around the thread guider _ Thread through the hole in the bobbin from the...

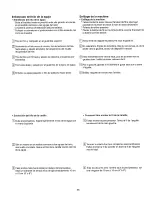
Page 27: ...nitlas para abrir Deje recto hacia afuera el portacanillas de la lanzadera Retirez le porte canette _ de la navette en tirant le loquet de la canette vers vous Sortez le porte canette en le tirant tout droit de la navette Embobinado de la canilla Libere et embrague jatando el volante y asi evitar que la aguja se mueva mientras devane la bobina _ Bobinage d une canette de fil Toumeg le volant vers ...

Page 28: ...ly Return the bobbin winder to its original position by moving the spindle to the left and cut the thread J d Push in the handwheet to engage the clutch The machine does not function until the clutch is engaged NOTE The position of the bobbin winder stopper is adjustable depending on required amount of thread on bobbin i e I 2 full or full Use a screwdriver and loosen the screw one turn or less_ D...

Page 29: ...rigine en poussant l axe vers la gauche et coupez le il Empuje el volante a la izquierda para la engranar el ernbrague La m quina no coser hasta que el ernbrague est_ engranado con la rn_quina Pousser le volant vers l int_rieur La machine ne fonctionnera pas tant que rembrayage n est pas engag_ NOTA El tope del devanador de canillas puede ser ajustado a la cantidad de hifo que requiere en la canit...

Page 30: ...through the slot of the case _ Continue to draw the thread under the tension spring _ and through the opening Pull out about 4 10 cm of thread_ _ Tension spring _ Holding the latch open position the bobbin case into the shuttle and then release the latch The case should lock into the place when the latch is released J J 22 ...

Page 31: ...te canette Continue tirando del hilo debajo def resorte tensor y a trav_s de la abertura Deje sebresalir aproximadamente t0 cm 4 de hiiOL _ Resorte tensor Tirez le fil sous le ressort de tension et faites le passer par le trou 3qrez environ 10 cm 4 de fit _ Ressort de tension Con el ret_n abierto meta el portacanillas en ta tanzadera y libere el ret_n Ouvrez le Ioquet pour engager le porte canette...

Page 32: ...und the check spring holder Firmly draw the thread up and from right to left over the take up lever then down into the take up lever eye Slide the thread behind the needle bar thread guide on the left _Thread the needle from front to back Drawing up bobbin thread Raise the presser foot Hold the needle thread lightly with your left hand_ Rotate the handwheel counterclockwise toward you for one comp...

Page 33: ...nte hacia atr_s Tenez le fil de I aiguille et passez le sous le guide ill En retenant te fil pros de la bobine tirezqe vers le bas et de la droite vers la gauche autour du dispositif _ ressort _rez fermement le fil vers le haut puis de la droite vers la gauche darts I oeillet du levier releveur de fil Par la gauche glissez le fil derriere le guide situ6 sur la barre d aiguille Enfilez aiguille de ...

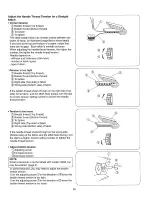
Page 34: ...d shows through on the right side Top side of the fabric and the stitch feels bumpy turn the dial to a lower tension setting number to loosen the needle thread tension Tension is too loose O Needle thread Top thread _ Bobbin thread Bottom thread To tighten Right side Top side of fabric Wrong side Bottom side of fabric If the needle thread shows through on the wrong side Bottom side of the fabric a...

Page 35: ...oint employ_ Si la tension est trop 61evde Fii de i aiguille Fil sup_rieur Fil de la canette Fil inf_rieur Pour rel cher la tension Endroit du tissu Envers du tissu Le fif de ta canette apparaft sur le c6t_ endroit du tissu et produit des bosses Tournez la molette vers ie haut pour rel cher a tension du fil de I aiguille El hilo est_ demasiado flojo Hilo de la aguja Hito superior _ Hifo de Ia cani...

Page 36: ...f fabric Minimize the amount of needle thread visible on the wrong side Bottom side of the fabric without causing excessive puckering or causing bobbin thread to show on the right side Top side of the fabric Results vary with fabric thread and sewing condition Tension is too tight Right side Top side of fabric _ Wrong side Bottom side of fabric The corner of each zigzag pulls together on the right...

Page 37: ...wous aux figures ci dessous pour voir quoi ressernble un point ex_cut_ correctement R_glez la tension du fil de dessus pour obtenir i aspect d_sir_ Tension correcte _ Endroit du tissu _ Envers du tissu R_duisez la quantit_ de fil de l aiguilte visible sur l envers du tissu sans pour autant plisser excessivement le tissu et sans que fe fil de la canette n apparaisse sur I endroit du tissu Les r6sul...

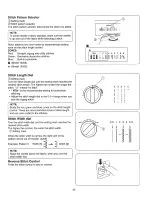
Page 38: ... the longer the stitch_ 0 means no feed _ is the recommended setting for buttonhole stitching Adjust the stitch length dial in the 0 5 4 range when you sew the zigzag stitch NOTE Study the red green and blue zones on the stitch length control These are recommended zones of stitch length and are color coded to the stitches Stitch Width dial Turn the stitch width dial until the setting mark reaches ...

Page 39: ...e cadran de reglage de la Iongueur du point de fa on placer le repere en face de la Iongueur de point desiree Plus le chiffre est grand plus le point est long A 0 I avance est nu le _ repr_sente te r_glage recommand6 pour les boutonnieres R_glez te cadran entre 0 5 et 4 lorsque vous utilisez un point zigzag NOTA Estudie las secciones roja verde y azul en el control Estas son las zonas de longitud ...

Page 40: ...the fabric draw the threads to the back and cut them with the thread cutter The threads are now the proper length to begin sewing the next seam CAUTION Do not place fingers near the presser foot when guiding fabric or the needle clamp screw may strike and injure your fingers_ Use the Seam Guides _ Cornering guide _ Guide lines in inches _ Guide lines in millimeters The seam guides on the needle pl...

Page 41: ...pied et se cassera certainemenL 1 ou2 Pied zig zag Pied point droit 2 6 1 5 4 c_ 0 ou _ _ 5 D_but d une couture Levez fe pied presseur et placez le tissu le long de la ligne de rep_re sur la plaque d aiguille la plus utilis_e est 16 cm 5 8 Abaissez I aiguilte I endroit ou vous souhaitez commencer ia couture Abaissez te pied presseur et tirez les _s vers I arriere Appuyez doucement sur la p_dale de...

Page 42: ... of topstitching around the outer edges of cuffs lapels or collars Lower the presser foot and keep the edge of the fabric next to the right edge of the presser foot Evenly guide the fabric along the edge to produce an even row of topstitching 3 8 1 0 cm from the edge Zipper Sewing _ Stitch selector t _ Presser foot Zipper foot _ Needle thread tension 3 to 6 _ Stitch length dial 1o5to 4 _ Stitch wi...

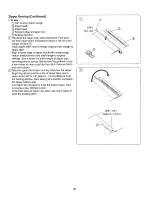
Page 43: ...t se cassera certainement Les surpiq0res permettent de faire des coutures d_coratives et de garder les bords plats et rigides Vous pouvez omer les ensembles et les blouses avec une ou deux surpiqeres autour des poignets revers et cols Abaissez le pied presseur et gardez ie bord du tissu pros du bord droit du pied Cousez ainsi pour faire une surpiqere r_gutiere 1 0 cm 3 8 du bord Costura de cremall...

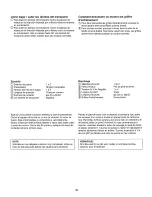
Page 44: ...h length to original settings Sew a seam the entire length of zipper tape removing pins as you go Before reaching pull tab unzip a few inches to clear a path for the stitch Remove fabric and close zipper Take the upper fabric layer and lay it flat over the zipper Beginning above pulHab at top of zipper tape sew a seam about 3 8 to 1 2 approx 13 cm distance from the basting stitches Stop sewing at ...

Page 45: ...ionar ambos lados de la cremallera utilice un abrecosturas para abrir la puntada de hilbvando La couture des fermetures _ glissi6re suite Pour coudre _ arge de tissu de 0 4 cm 1 8 de pouce Dents de la fermeture eclair Bande de la fermeture 6clair Bord avant du pied semelle 6troite Direction de la couture Repliez la couche superieure de la r6serve pour couture Repliez la partie inf6rieure de la r6s...

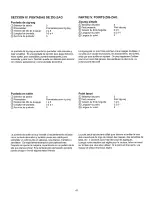
Page 46: ... length dial _ Stitch width dial _ Feed dogs 1 or2 Removed 1 to4 Any 0 or _ 5 Dropped Drop the feed dogs see above and remove the presser foot Center the hole in the fabric on an embroidery hoop as shown Lower the presser bar and sew at a slow speed Move the fabric back and forth slowly until the darning area is covered Turn the fabric a 1 4 turn 90 and sew another layer of stitching over the firs...

Page 47: ...ion du fil de I aiguille Largeur du point _ Longueur du point Griffes d entrahement 1 ou2 Pas de pied de biche I 4 Toute o ou _ 5 Descendues Baje las ufias v_ase ta secci6n anterior y quite el prensatetas Centre et agujero de la tela en un arc de bordado tat como se ilustra Baje el prensatetas y confeccione a velocidad lenta Mueva la tela con lentitud hacia detante y haeia atr s hasta cubrir la zo...

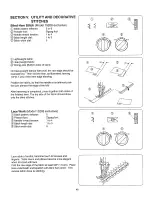
Page 48: ...t can also be used to decorate with trims appliques and cut work or as a decorative stitch Satin Stitching _ Stitch pattern selector 3 Presser foot Zigzag foot _ Needle thread tension 1 to 5 Stitch length dial 05 to 1 _ Stitch width dia 5 The satin stitch is often used to decorate and overcast the raw edge on blankets linens tablecloths and napkins It is also attractive in applique Once your machi...

Page 49: ...urs ou comme point d_coratifl Puntada en sat_n Selector de patr6n _ rensatelas Tensi6n det hilo de la aguja Longitud de puntada _ Anchura de puntada 3 Prensatelas para zig zag ta5 0 5al 5 Point lanc_ _ Selecteur de point 3 Pied presseur Pied zig zag Tension du fil de I aiguille 1 5 _ Longueur du point 0 5 1 Largeur du point 5 La puntada de sat_n es muy vers til y frecuentemente utilizada como punt...

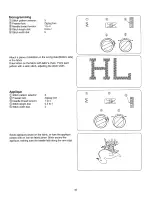
Page 50: ...tters on the fabric with tailor s chalk Form each pattern with a satin stitch adjusting the stitch width O f J Applique _ Stitch pattern selector 3 _ Presser foot Zigzag foot _ Needle thread tension 1 to 4 Stitch length dial 0 5 to 1 Stitch width dial 5 Baste applique pieces on the fabric or fuse the applique pieces with an iron on fabric joiner Stitch around the applique making sure the needle fa...

Page 51: ...ur renforcer les points de tension tels que les coins de poches et les bretelles de lingede_ Piquez quatre 4 six 6 points _ Brides de renfort Aplicaciones _ elector de patrSn Prensatelas TensiOn del hito de ta aguja Longitud de puntada Anchura de puntada 3 Prensatelas para zig zag la4 05at 5 Appliques _ Selecteur de point 3 Pied presseur Pied zig zag Tension du fil de i aiguilfe 1 4 Longueur du po...

Page 52: ...op the feed dogs Place the button below the zigzag foot making sure to align the holes with the horizontal slot in the foot Lower the presser foot to hold the button in place 2o Determine which zigzag width setting matches the distance between the button holes The needle must go safely through each hole when sewing Unthread the needle to help you determine the zigzag width 3 Turn the handwheel so ...

Page 53: ...orizontal del prensatelas Baje el prensatetas para mantener el bot6n en su iugar_ 2 Determine qu_ anchura de zigzag corresponde a la distancia entre los agujeros del bot6n La aguja debe pasar limpiamente por los agujeros durante la costura Quite el hilo de ia aguja para que sea m4s f_cil ta deterrninaci6n de fa anchura de zigzag 3 Gire el volante para que la aguja quede totalmente a la izquierda y...

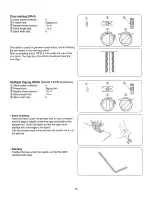
Page 54: ...gzag Stitch Model 15208 exclusive _ Stitch pattern selector 4 2_Presser foot Zigzag foot _ Needle thread tension 1 to 4 _ Stitch length dial 1 to 4 _ Stitch width dial 5 o Seam finishing Place the fabric under the presser foot in such a manner that the edge is slightly inside the right hand side of the presser foot Guide the fabric so that the right hand stitches fall at the edge of the fabric Tri...

Page 55: ... multiple zig zag xclusivo Modelo 15208 Selector de patr6n 4 Prensatelas Prensatelas para zig zag Tensi6n del hi o de la aguja 1 a 4 Longitud de puntada 1 a 4 Anchura de puntada 5 Point zig zag multiple Exclusivit6 de Mod6fe 15208 _ Setecteur de point 4 Pied presseur Pied zig_zag Tension du fit de I aiguille 1 4 4_ Longueur du point 1 4 _ Largeur du point 5 Cosido final Coloque la tela debajo del ...

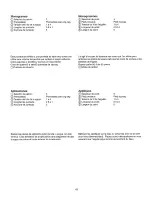
Page 56: ...at the needle at its ieftmost posi tion just pierces the edge of the fold After hemming is completed press together both sides of the finished hem The top side of the fabric should show only the blind stitches f I J Lace Work Model t5208 exclusive _ Stitch pattern selector 5 _ Presser foot Zigzag foot Needle thread tension 1 to 4 Stitch length dial 1 to 3 _ Stitch width dial 5 4 0 Lace adds a fanc...

Page 57: ...surfiler les bords bruts Puis pliez ourlet comme illustr_ en laissant apparaitre 07 cm 1 4 Placez le tissu sur la machine pour que l aiguifle perce peine la partie repli_e Iorsqu elle arrive t extr6me gauche du zig zag Abaissez le pied presseur Lorsque vous avez termin6 curler repassez les deux c6tes de l ourlet Sur l endroit du tissu vous ne devez pas voir les points Trabajos con encajes Exclusiv...

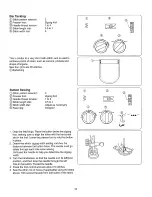
Page 58: ...ust clear the folded edge of the fabric If you sew rows of shell stitches space the rows at least 5 8 1 5 cm apart You can also sew shell stitches on knits or soft silky woven fabrics in any directionr _Bias f t I Decorative Stitch Patterns Model 15208 exclusive _ Stitch pattern selector _ Presser foot _ Needle thread tension _ Stitch length dial _ Stitch width dial 8 or9 Zigzag foot 1 to4 0 5 to ...

Page 59: ...omme du jersey Pliez te tissu et piquez sur le biais_ 1 Vous aurez peut etre besoin d augmenter l_g6rement la tension du fil sup_rieun Laissez l aiguille tomber juste en dehors du bord pli_ du tissu Iors du zig zag Si vous cousez des rang6es de points coquitle espacez les rang_es d au moins 1 5 cm 5 8 Vous pouvez _galement coudre des points coquifles sur les tricots et les _toffes soyeuses dans to...

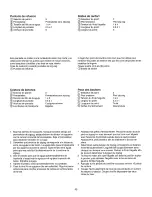
Page 60: ...y break _Upper thread guide _Check spring holder _Thread take up lever Needle bar thread guide Twin needle optional item Turn off the power switch Pull up the additional spool pin Place a piece of felt on the additional spool pin Make sure you separate the two threads by placing one thread in each needle bar thread guide Change the needle to a twin needle _ _Thread each needle from front to back W...

Page 61: ...la aguja pot una doble aguja _D Hile cada una de las agujas de adelante a arras Aiguilles jumel_es Option _tecteur de point Pied presseur Tension du fil de I aiguille Longueur du point Largeur du point _ Aiguille 3 8 ou 9 Pied zig zag 1 4 0o5 1 1 2 5 Aiguilles jumel_es en option Les points 8 et 9 seulement disponibles pour le mod61e 15208 I EMARQUE Lorsque vous utilisez I aiguille jumel6e ne s_lec...

Page 62: ...nt satisfies you I BH Starting to sew Snap the buttonhole foot J on the presser foot holder Carefully mark the buttonhole length on the fabric_ Place the fabric under the foot with the buttonhole marking running toward you Move the slider A toward you so that the red arrow C on the slider aligns with the start mark B _ Lower the presser foot NOTE The markings on the slider are engraved in centimet...

Page 63: ...s o Para empezar a coser Marque con cuidado la Iongitud det ojal en la tela Coloque la tela debajo del prensatelas con la marca del ojal hacia usted Commencer une couture Marquez avec soin la Iongueur de la boutonniere sur te tissu Piacez le tissu sous le pied avec la marque de la boutonni6re vers VOUS Mueva el deslizador A hacia usted de forma que ia marca superior C en et deslizador toque la mar...

Page 64: ...op sewing at a right stitch m Set the stitch selector at t21 Sew four 4 to six 6 stitches Stop sewing at a left stitch Remove the fabric and place a pin just before the bartack at each end to prevent cutting bartacks Cut the opening with the buttonhole opener f f J J J f NOTE hen sewing a buttonhole at the edge of a fabric set the sliding buttonhole foot as illustrated and sew in reverse _ __ _ _ ...

Page 65: ...de cuatro 4 a seis 6 puntadas Termine cosiendo con una puntada izquierda m R_glez le selecteur sur 1_1 Cousez quatre 4 six 6 points Arr_tez la couture avec I aiguille gauche Saque la prenda y coloque un alfiler justo antes de cada presilla para prevenir un corte accidental de las presi las Corte la abertura de ojat con el abreojales Retirez le tissu et placez une _pingte juste avant chaque arr_t p...

Page 66: ...when you handle it Unplug the machine and open the face covert While pushing the bufb up turn it to the left counterclockwise to remove Put in a new bulb by pushing it up and turning it to the right clockwise i U t N t i Cleaning the Feed Dogs Unplug the machine and remove the presser foot and needle Open the face cover to allow room to remove the needle plate screw with a screwdriver Use a lint b...

Page 67: ...mpoule ATTENTION L ampoule peut _tre CHAUDE donc prot_gez vos doigts avant d y toucher_ D6branchez la machine et ouvrez le couvercle frontal Tout en soulevant f ampoule tournez la vers la gauche en sens antihoraire pour la retirer Installez une nouvelle ampoule en la poussant vers la haut et en tournant vers la droite en sens horaire Limpieza de los dientes del transporte Desenchufe la m_quina y q...

Page 68: ...he shuttle race _ with a lint brush 4_ Put a drop of oil on the center pin of the shuttle _ and the shuttle race _ Do not over oil o Replacing shuttle assembly _ Levers _ Shuttle race cover _ Shuttle 6 Shuttle race _ Center pin on the shuttle _ Shuttle driver _ Pointed hook _ Oil here 1 Turn the handwheet so the shuttle driver _ forms a half moon on the left side of the machine 2 Hold the shuttle ...

Page 69: ...ote les pattes de retenue _du couvercie de la coursi_re enfevez ce dernier _ et retirez la navette _ 3 Nettoyez la coursi_re t aide d un pinceau _ charpie 4 Mettez une goutte d huile sur raxe commun de la navette _ et de la coursiere _ Ne huilez jamais excessivement Coloque nuevamente el conjunto de la lanzadera I afanca Cubierta de corredera Lanzadera Corredera de lanzadera Perno central Z lmpuls...

Page 70: ...oi is sufficient Remove excess oil otherwise it may stain the fabric_ In case the machine has not been used for a long period oil it before sewing Use quality sewing machine oiL Oil the shuttle area Open the shuttle cover by pulling down the embossed part on the left side of the cover Oil the point as indicated in the illustration One or two drops of oil is sufficient f J 62 ...

Page 71: ...ou deux gouttes d huile sont suffisantes Nettoyez i exc_s d huile qui pourrait t_cher le tissu Si vous n utitisez pas a machine pendant un certain temps lubrifiez la machine avant de commencer ceudre Utilisez une huile pour machine de bonne quatite Lubrique la firea de la lanzadera Abra la tapa def conjunto de ta lanzadera jafando hacia abajo la parte abollonada del lade izquierdo de fa cubierta R...

Page 72: ...correctly inserted 2 The needle is bent or blunt 3 The needle and or threads are not suitable for the work being sewR 4 A blue needle is not being used for sewing stretch very fine fabrics or synthetics 5 The needle thread is not threaded properly 6 The wrong needle is being used_ 1 The needle thread tension is too tight 2 The needle thread is not threaded properly 3 The needle is too heavy for th...

Page 73: ...ja no est _ bien colocada 2 La aguja est despuntada o doblada 3 La aguja y o los hilos no son los adecuados para el trabajo que se est_ cosiendo_ 4 No se est _ utilizando una aguja azul para coser tejidos el_sticos tejidos finos y telas sint_ticas 5 Et hilo de la aguja no est enhebrado correctamente 6 La aguja utifizada no es fa adecuada Frunce las costuras 1 La tensi6n del hito de la aguja es exc...

Page 74: ...uille n est pas installee correctement 2 L aiguille est tordue ou emoussee 3 L aiguille et ou le fi ne conviennent pas pour le tissu 4 Vous n utilisez pas une aiguille bout bteu pour une couture extensible un tissu tr_s fin ou synthetique 5 Le fil de f aiguille n est pas pass_ correctement 6 Vous utilisez une mauvaise aiguille 1 La tension du fil de l aiguilte est trop _tev_e 2 Le fil de I aiguill...

Page 75: ...call or go on line for the location of your nearest Sears Parts Repair Center 1 800 488 1222 Call anytime day or night U SoA only www sears com _ i To purchase a protection agreement U S A i ii i_i iiii or maintenance agreement Canada on a product serviced by Sears 1 800 827 6655 U S A 1 800 361 6665 Canada Para pedir servicio de reparaci6n a domicitio y para ordenar piezas 1 888 SU HOGAR sM 1 888...

Reviews: