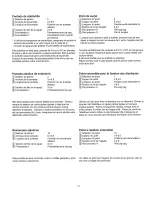
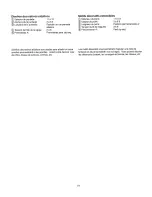
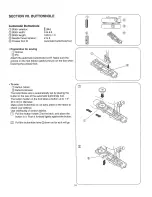
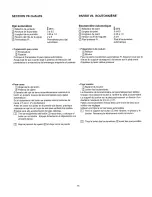
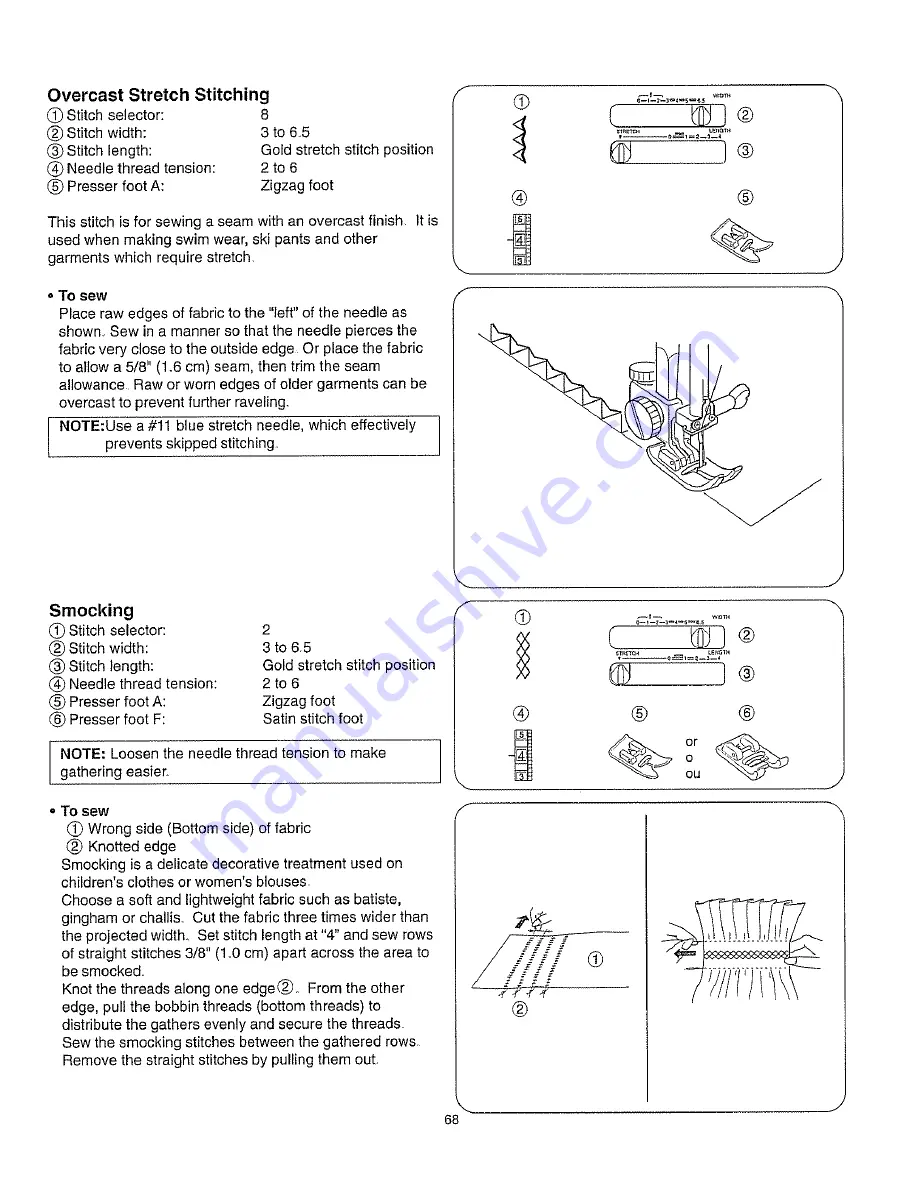
background image

Summary of Contents for 385.162213

Page 1: ...HINE Owner s Manual MAQUINA DE COSER Manual de Instrucciones MACHINE _ COUDRE Manuel d instructions Model Modelo Modele 385 16221300 0 5o5 8oo o2o Sears Roebuck and Co Hoffman Estates IL 60179 U S A www sears corn ...

Page 2: ...repair electrical or mechanical adjustment 4 Never operate the appliance with any air opening blocked Keep ventilation openings of this sewing machine and foot controller free from accumulation of lint dust and loose cloth 5 Never drop or insert any object into any opening 6 Do not use outdoers_ 7 Do not operate where aerosol spray products are being used or where oxygen is being administered 8 To...

Page 3: ...pararla o sorneterla a ajustes el_ctricos o rnec nicos 4 No utilice nunca el aparato si tiene bloqueada alguna via de ventilaci6n Mantenga las vias de ventilaci6n de esta m quina de coser y e pedal de control libres de pelusa polvo y trozos de tela 5 No deje caer ni introduzca ningun tipo de objeto en ninguna abertura 6 No utilice la maquina en exteriores 7 No utilice la rn quina donde se empleen ...

Page 4: ...es ou m_caniques_ 4 II ne faut jamais faire fonctionner cette machine si les orifices d a_ration sont colmat_s Tenez les orifices d a6ration de cette machine coudre et le curseur d escamotage du pied de biche exempts de toute accumulation de peluches poussibres et de morceaux de chiffon 5 II ne faut jamais laisser tomber ou introduire d objet dans les orifices 6 11 ne faut pas I utiliser en plein ...

Page 5: ...le parts Warranty Service All warranty service is available by returning this sewing machine to the nearest Sears Parts Repair Center If this sewing machine is used for other than private family purposes all warranty service is available for only 90 days from the date of purchase Except for 90 Days on Mechanical Adjustments and Specified Parts see above all warranty service covers only defects in ...

Page 6: ...as son partes desgastables Servicio de garant a Para hacer v lida su garantia Ileve la rnAquina de coser al Centre de repuestos y reparaciones de Sears mAs cercano a su domicilio Siesta mAquina de coser se utilizara con fines distintos de los familiares el servicio de garantia se extender L_nicamente a 90 dias a partir de la fecha de compra Con excepci6n de la garantia de 90 dias que cubre los aju...

Page 7: ...etie totale vous devez rapporter cette machine coudre au centre de r_paration et de pi_ces detach_es Sears le plus proche de chez vous Si cette machine coudre est utilis_e hors du cadre familial et priv le service de garantie tota e sera uniquement valable durant les 90 jours suivant la date d achat A I exception de Ia garantie de 90 ours concernant les r6glages m_caniques et les composants sp_cif...

Page 8: ...iento de puntadas Especificaci6n M sde730spm 4 mm M_xima 65 mm M xima 74 Integradas Ojales Dimensianes de la mAquina Peso 21 Funci6n de ojal incorporado de 1 paso 415 mm 163 de ancho x 173 mm 6 8 de profundidad x 300 mm 11 8 de altura 8 kg 176 Ibs Caract_ristiques de la machine Description Vitesse de couture Maximum Longueur du point Largeur du point Ensemblede points points de couture points inte...

Page 9: ... appointment online Sears has over 12 000 professional repair specialists who have access to over 4 5 million quality parts and accessories That s the kind of professionalism you can count on to help prolong the life of your new purchase for years to come Purchase your Master Protection Agreement today Some limitations and exclusions apply For prices and additional information call 1 800 827 6655 ...

Page 10: ...raciones con acceso a m s de 4 5 millones de accesorios y piezas de repuesto de lamAs alta calidad Este nivel de profesionalismo es Io que usted necesita para prelongar durante muchos aBos la vida uti de su nueva compra iAdquiera hey mismo un Contrato de Protecci6n Experta Se aplican algunas limitaciones y exclusiones Llame al 1 800 827 6655 para conocer los precios y obtener informaci6n adicional...

Page 11: ...32 Stitch Length Zones 32 Stitch Width Control 34 Stitch Length Control 34 Adjusting Stretch Stitch Balance 36 Reverse Stitch Control 36 SECTION III STRAIGHT STITCH SEWING Straight Stitch 38 Starting to sew 38 Finishing sewing 38 Use the Seam Guides 38 Turn a Square Corner 38 Topstitching 40 Quilting 40 Zipper Sewing 42 44 oTo snap on the zipper foot 42 Fabric preparation 42 To sew 42 44 To Drop o...

Page 12: ... puntadas 33 Zonas de Iongitud de puntada 33 Control de la anchure de puntada 35 Control de la Iongitud de puntada 35 Equilibrio de los patrones distorsionados 37 Control de puntada invertida 37 SECCION III COSTURA DE PUNTADA RECTA Puntada recta 39 Para empezar a coser 39 Para terminar a coser 39 Uso de las guias de costura 39 C6mo coser una esquina cuadrada 39 Costura a la vista 41 Acolchador 41 ...

Page 13: ...point 33 R6glage de la largeur du point 35 R_glage de la Iongueur du point 35 Pour corriger un motif d_form6 37 Bouton de marche arri re 37 PARTIE III COUTURE AU POINT DROIT Point droit 39 Debut d une couture 39 Finition d une couture 39 Utilisation des guides de couture 39 Pour coudre un angle droit 39 Surpiq_re 41 Matelassage 41 La couture des fermetures glissi6re 43 45 Pour fixer le pied fermet...

Page 14: ...bbin winder spindle O Spool pin Upper thread guide Thread take up lever Thread tension dial Face cover C2_ Thread cutter _ Needle threader Needle plate _ Hook cover plate 1_ Hook cover plate release button _ Extension table Accessory box _ Buttonhole pitch balance adjusting lever Carrying handle __ Handwheel Stitch pattern selector Feed balancing dial _ Power switch Machine socket Nomenclature pla...

Page 15: ... interrupter de corriente 6 Enchufe de la mAquina _5 Placa de identificaciSn _ Palanca de mando para los dientes del transporte __ Brazo libre Palanca de ojales _ Palanca de elevaci6n del prensatelas _ Tornillo del enmangue _j Prensatelas _ Tornillo de sujeci6n de la aguja Bot6n de fijaci6n de prensatelas 6 Pedal de control Identification des pi_ces _ Bouton de marche arri_re _ Fen_tre de r_glage ...

Page 16: ...05001 200013105 941620006 031119115 Description 10 x Bobbin Spool pin felt Assorted needle set 5 x No 11 stretch fabric needle BLUE 5 x No 11 needle ORANGE 5 x No 14 needle RED 5 x No 16 needle PURPLE 5 x No 18 needle GREEN Twin needle Additional spool pin H Straight stitch foot A Zigzag foot F Satin stitch foot E Zipper toot R Automatic buttonhole foot B Buttonhole foot C Overedge foot G Blind he...

Page 17: ...r grande Aceite Cepillo de limpieza Tapa carretes grande Tapa carretes pequel_ol Placa guia de ojal Placa base de ojal Plantilla Camiseria redonda peque5a Piantitla Camiseria redonda grande Pientilla Sastreria Prensatelas para ojal Prensatelas para entubar Prensatelas recogedor Prensateias para alforzas Prensatelas para dobladillo 2ram Prensatelas para fruncidos Pedal de control roveen con la mAqu...

Page 18: ...sewing area Do not touch any moving parts such as the thread take up lever handwheel or needle Always turn off the power switch and unplug from the power supply When leaving the machine unattended When attaching or removing any parts When cleaning the machine Do not place anything on the foot control when not sewing Polarized plug This appliance has a polarized plug one blade wider than the other ...

Page 19: ...pedaJde control sirve pare regular la velocidadde la costara La velocidad se regula pulsando el pedal de control con la planta del pie a m_s presi6n mAsvelocidad PARTIE II PRE_PAREZ VOUS COUDRE Branchez la machine _ rise _lectrique Interrupteur de courant Prise de courant _ rise de la machine Fiche de raccord _lectrique Ampoule d _elairage Avant de brencher la cordon d alimentation assurez vous qu...

Page 20: ...oot You can raise it about 1 4 0 6 cm higher than the normal up position for easy removal of the presser foot or to help you place heavy fabric under the foot f J Thread Cutter O Thread cutter You do not need a pair of scissors to cut the thread after sewing Simply use the built in thread cutter Extension Table o Detaching the table Pull the table away from the machine as illustrated for free arm ...

Page 21: ...Position relev_e normale _ Positionrelevee maximum Le relive pied presseur remonte et abaisse le pied presseur Vous pouvez le remonter d environ 06 cm 1 4 plus haut que la position normale pour retirer plus facilement le pied presseur ou pour vous aider passer un tissu epais sous le pied Cortahilos _ Cortahi os No necesita tijeras para cotlar e hi o despues de coser S61o necesita el cortahilos pr_...

Page 22: ...amaged needle can cause permanent snags or runs in knits fine silks and silk like fabrics To Remove and Attach the Foot Holder _ Thumb screw _ Foot holder _ Presser bar o To remove Remove the thumb screw _by turning it counterclockwise with a screwdrive To attach Match the hole in the foot holder _ with the threaded hole in the presser bar _ Fit the thumb screw _ into the hole Tighten the screw _b...

Page 23: ... _mouss_e Une aiguille d_fectueuse peut etre une cause continue d ennuis et de points sautes de ills tir_s dans les jerseys et les soles naturelles ou artificielles C6mo quitar poner el enmangue del prensatelas _ TorniHodel enmangue _ Enmangue del prensatelas Barra prensatelas Para quitar Gire con un destornillador el tomillo del enmangue _ en sentido contrario alas agujas de reloj o Para poner Co...

Page 24: ...aight stitching only with the center needle position For Straight stitch page 38 Topstitching page 40 Quilting page 40 Straight stretch page 66 Automatic buttonhole foot Foot R Use this foot for one step automatic buttonholing Simply set a button on the guide of this foot and depress the foot control You can sew exactly the same length of the buttonhole as the button For Automatic buttonhole page ...

Page 25: ...centro Para Puntada recta pAgina 39 Costura a la vista p gina 41 Acolchador p_gina 41 Puntada recta triple pagina 67 o Pied _ point droit Pied H Ce pied est uniquement recommand_ pour la couture points droits avec I aiguille en position centrale Pour Point dreit page 39 Surpiqt3re page 41 Matelassage page 41 Point dreit extensible page 67 Prensatelas para ojal autom_tico Prensatelas R Utilice este...

Page 26: ...nstructed for stitching and or overcasting seams The small brush and wire guides help control the fabric hold the raw edge in place and keep it from puckering especially when sewing on knit fabrics For Overcasting Page 54 Serging Page 70 Buttonhole foot B Option Use this foot for manual buttonholing It is marked to help you measure your buttonholes accurately For Manual buttonhole page 82 Quilter ...

Page 27: ...a controlar la tela mantener e borde en bruto en su lugar e impedir el arrugamiento especialmente al coser el tejido de punto Para Puntada de sobreHlado o remate pAgina 55 Puntada de dobladillo pAgina 71 Pied _l surjeter Pied C Ce pied est sp_cialement congu pour piquer et surjeter La petite brosse et les brins de guidage contr61ent le tissu maintenant le bord brut en place et I emp_chant de fronc...

Page 28: ...en caused by damaged needles Always purchase a good quality thread It should be strong smooth and consistent in thickness f WEIGHT Very Light Light Medium FABRIC Chiffon Georgette Fine Lace Organdy Organdy Net Tulle Batiste Voile Lawn Pure Silk Crepe de Chine Sheer Crepe Chambray Handkerchief Linen Gingham Challis Percale Wool Crepe Peau de Sole Taffeta Satin Silk Surah Satin backed Crepe Qiana Si...

Page 29: ...ia para cemprobar que no est_n embotadas o despuntadas Las agujas dafiadas suelen causar enganches y carreras irreparables en tejidos de punto sedas finas y imitaci6n de seda Adquiera siempre hilo de buena calidad Deber ser fuerte suave y de grosor uniforme PESO TIPO DE TELA Muy ligera Ligera Media Gruesa Todo k Gasa Gasa delgada Encajefine Organdi Malla Organdf Tu Batista Gasa Lin6n Seda natural ...

Page 30: ...es soles fines et les _toffes semblables la sole sont d6finitifs et sont souvent provoqu_s par des aiguilles abfm_es Achetez toujours du fil de bonne qualit_ II dolt 6tre solide lisse et d _paisseur r_guli_re Poids Tr_s 16ger L_ger Moyen Lourd Tissu Mousseline Cr_pe George_e Dentellefine O_andi Tulle Batiste z_phyr linon pure sole cr_pe de chine cr_pe fin chambray lin rnouchoir vichy challis perca...

Page 31: ... blank page p_gina blanca page blanche 19 ...

Page 32: ... spool holder _ and press it firmly against the spool of thread The small spool holder _ is used with narrow or small spools of thread oAdditional spool pin _ Additional spool pin _ Spool pin hole _ Spool pin felt The additional spool pin _ is for bobbin winding without unthreading the machine and for twin needle sewing Insert the additional spool pin _ into the hole _ Place the felt _ and a spool...

Page 33: ... Enfilez la grande rondelle de porte bobine _ et poussez la contre la bobine On utilise la petite rondelle pour les bobines plus minces Portacarretes adicional _ Portacarretes adicional _ AIojamiento del portacarretes adicional _ Fieltro para portacarretes El portacarretes adicional _ se usa para bobinar las canillas adicionales sin desenhebrar la mAquina e para costura con doble aguje Coloque el ...

Page 34: ... to the hole in the bobbin Depress the foot control again When the bobbin is fully wound it stops automatically Return the bobbin winder to its original position by moving the spindle to the left and cut the thread as shown Push the handwheel in The machine will not sew until the clutch is engaged NOTE The position of the bobbin winder stopper is adjustable depending on the required amount of thre...

Page 35: ... trou de la canette de I int_rieur vers I ext_rieur _ Placez la canette sur renrouleur de canette Poussez la canette vers la droite En tenant I extr6mit_ libre du fil la main appuyez sur la p_dale de contr61e Arr_tez la machine apr_s quelques tours et coupez le fil au ras du trou dans la canatte Appuyez de nouveau sur la p_dale de contr61e Lorsque la canatte est pleine elle e arr_te automatiquemen...

Page 36: ...Place a bobbin in the bobbin holder with the thread running off counterclockwise Guide the thread into notch _on the front side of the bobbin holder Draw the thread to the left sliding it between the tension spring blades Continue to draw the thread lightly until the thread slips into notch _ Pull out about 6 15 0 cm of thread Attach the hook cover plate Check the threading by referring to the dia...

Page 37: ...tal de Guidez lefildans I encoche _ I avant dusupport decanette portacanillas Tire delhilohacia laizquierda pas_ndolo entre Tirez fefilvers lagauche en le glissant entre les lames du la chapa muelle de tensi6n del portacanillas ressort de tension Continue tirando del hilo ligeramente hacia atr_ s hasta que pase por la ranura _ Deje sobresalir aproximadamente 150 cm 6 de hilo Continuez b tirer douc...

Page 38: ... lever eye Slide the thread behind the needle bar thread guide on the left Thread the needle from front to back or use a needle threader o Needle threader _Knob _Hook _ Guide _Thread end Raise the needle to its highest position Push down the needle threader knob _ as far as it will go The hook comes out through the needle eye from behind Paying close attention to the needle point draw the thread a...

Page 39: ... vers la gauche dans I oeillet du levier releveur de fil Par la gauche glissez le fil derriere le guide situ_ sur la barre d aiguille Enfilez Paiguille de I avant vers I arri_re ou utilisez I enfile aiguille Ensartador de agujas O Tirador _ Enhebrador _ Gufa _ El extremo del hilo Eleve la aguja hasta eu posici6n mAs alta Baje el tirador del enhebrador de agujas _ tanto como pueda El enhebrador sal...

Page 40: ...en two layers of fabric as illustrated magnified to show detail If you look at the top and bottom of a seam notice that the stitches are evenly balanced When adjusting the needle thread tension the higher the number the tighter the top thread tension Results depend on stiffness and thickness of the fabric number of fabric layers type of stitch Tension is too tight Q Needle thread Top thread _ Bobb...

Page 41: ...tados depender_n de la rigidez y el grosor del tejido el nt_mero de capas de tejido el ripe de puntada El bile est_ demasiado tense Hilo de la aguja Hilo superior Hilo de la canilla Hilo inferior Para aflojar _ arte de arriba de la tela Parte de abajo de la tela El hilo de la canilla aparece per la parte de arriba de la tela y se sentir_ desigual Atloje la tensi6n del hilo de la aguja girando haci...

Page 42: ...ric See the illustrations for the correct appearance_ To match this appearance adjust the needle tension Correct tension _ Right side Top side of fabric Wrong side Bottom side of fabric Minimize the amount of needle thread visible on the wrong side Bottom side of the fabric without causing excessive puckering or causing the bobbin thread to show on the right side Top side of the fabric Results var...

Page 43: ...la Los resultados pueden variar segun la tela hilo y condiciones de costura R_glage de ia tension du fil de I aiguille pour le point zig zag Lorsqu un point zig zag est effectu_ correctement le fil de la canette ne parait jamais sur le c6t6 endroit du tissu et le fil de I aiguille apparait peine sur le cSt_ envers du tissu Reportez vous aux figures ci dessous pour voir quoi ressemble un point ex_c...

Page 44: ...atically Use the color in the sewing guide display which corresponds to the color of the selected stitch NOTE To avoid needle or fabric damage make sure the needle is up and out of the fabric while selecting a stitch Stitch patterns are color coded to a recommended setting zone at the stitch length control Stitch Length Zones Red Straight Zigzag and Utility stitches Green Geometric decorative stit...

Page 45: ...ponible en el patrSn 9 Escoja el contro de ancho de puntada en SS Bouton de s61ection de points s_lectionner les points _ cran guide de couture _ Marque rouge _ Bouton de selection de points Tourner le bouton de selection de points jusqu ce que la marque rouge atteigne le point recherche Pour selectionner les points situes sur la rangee inferieure du panneau indicateur de motifs la commande de Ion...

Page 46: ... width control be sure to raise the needle above the fabric Q Stitch width control f WIDTH J Stitch Length Control how to adjust the stitch length Slide the stitch length control to the desired stitch length number Set the stitch length control at SS when using a stretch stitch The higher the number the greater the stitch length The r m mark shows the adjustment range when sewing the buttonhole Ra...

Page 47: ... tourner le r_glage de la largeur du point assurez vous que vous avez relev_ I aiguifle au dessus du tissu _ Marque de repute Control de la Iongitud de puntada cbmo ajustar la Iongitud de puntadas Deslice el control de la Iongitudhasta al numero deseado Situe el control de Iongitud de puntada en la posici6n SS cuando use puntadas elAsticas NL merosmAsaltos proporcionar_ nmayor Iongitudde puntada r...

Page 48: ...r fabric adjust them with the feed balancing dial _ To adjust the distorted patterns If the patterns are drawn out correct them by turning the dial in the direction If the patterns are compressed correct them by turning the dial in the direction_ f Reverse Stitch Control Press the stitch control to sew in reverse f J J 36 ...

Page 49: ...librador de puntada hacia el signo Pour corriger un motif d6form6 _ Bouton d _quilibrage Si les motif extensibles sent irr_guliers Iorsque vous piquez un tissu particulier corrigez4es avec le bouton d _quilibrage _ Comment r_gler I _quilibre d un motif extensible Si les motifs sont _tir_s corrigez le d6faut en tournant e bouton en direction du Si les motifs sont comprim_s corrigez le d6faut en tou...

Page 50: ...of a seam press the reverse stitch control and sew several reverse stitches Raise the presser foot Remove the fabric draw the threads to the back and cut them with the thread cutter The threads are now the proper length to begin sewing the next seam Use the Seam Guides _ Center needle position Edge of fabric _ Needle plate guide lines The seam guides on the needle plate are there to help you measu...

Page 51: ...vez le pied presseur et placez le tissu le long de la ligne de rep_re sur la plaque d aiguille la plus utilis_e est 1 6 cm 5 8 Abaissez I aiguille I endroit eL vous souhaitez commencer la couture Abaissez le pied presseur et tirez les ills vere I arri_re Appuyez doucement sur In p_dale de contr61e Guidez le tissu le long de In ligne de rep_re en laissant le tissu avancer naturellement t ATTENTION ...

Page 52: ...the edge to produce an even row of topstitching 3 8 10 cm from the edge_ Quilting _ Stitch selector 4 to 6 _ Stitch width 6 5 _ Stitch length Red zone Needle thread tension 2 to 6 Presser foot A Zigzag foot Presser foot H Straight foot NOTE When using the straight stitch foot make sure to use the center needle position otherwise the needle may strike the presser foot and possibly break Use the sea...

Page 53: ...oignets revers et cols Abaissez le pied presseur et gardez le bord du tissu pres du bord droit du pied Cousez ainsi pour faire une surpiqQre r_guli_re 10 cm 3 8 du bord Acolchador _ elector de puntada Anchura de la puntada Longitud de la puntada _Tensi6n del hilo de la aguja Prensatelas A Prensatelas H 4a6 65 Zona roja 2a6 Prensatelas para zig zag Prensatelas para puntada recta NOTA Cuando use el ...

Page 54: ... zipper bottom stop position Sew in reverse a few stitches to lock Increase the stitch length to 4 set needle thread tension to 0 and sew basting stitch _ the entire length of the zipper sewing To sew 1 8 0 4cm fabric margin _ Zipper teeth Zipper tape Attach zipper foot on right side of pin Fold back the upper layer seam allowance Fold back the lower layer seam allowance to leave a 1 8 0 4 cm marg...

Page 55: ...du bord droit _jusqu au point d arret inferieur estime de la fermeture eclair Pour securiser fa couture faites quelques points en marche arriere Augmentez la tongueur du point 4 reglez la tension du fil de I aiguille 0 puis effectuez un point de beti _ tout au long de la fermeture _clair o Para coser 2_ Margen de tela de 04 cm 1 8 Dientes de la cremallera Cinta de la cremallera _lnstale el prensat...

Page 56: ...stance from the basting stitch line Turn fabric 90 and sew a seam the entire length of zipper tape Before reaching pull tab stop the machine with needle in fabric and raise the fool Use seam ripper to open a few inches of basting stitch then unzip a few inches to clear a path for the stitch At end of seam sew in reverse a few stitches to lock Once both sides of zipper are sewn use seam ripper to o...

Page 57: ...oser ambos lados de la cremallera utilice un abrecosturas para abrir la puntada de hilvanado La couture des fermeture b glissi_re suite Soulever et rel cher le pied puis le fixer nouveau du c6t_ gauche de la broche Prendre la couche sup_rieure du tissu et la placer plat sur la fermeture Coudre sur tout le tissu en commenqant juste en dessous du point d arr_t inf_deur jusqu une distance d environ 3...

Page 58: ...thread tension 2 to 6 Pressure adjusting lever 0 Presser foot A Zigzag foot Presser foot F Satin stitch foot Feed dogs Dropped Drop the feed dogs Center the hole in the fabric on an embroidery hoop as shown Lower the presser foot F and sew at a slow speed Move the fabric back and forth slowly until the darning area is covered Turn the fabric 1 4 turn g0 and sew another layer of stitching over the ...

Page 59: ...ag _ Prensatelas F Prensatelas para puntada decorativa _ Los dientes de transporte Bajados Reprisage l S_lecteur de point 4 to 6 Largeur du point 65 Longueur du point Toute Tension du fil de I aiguille 2 6 Levier de r_glage de la pression 0 Pied presseur A Pied zig sag _ Pied presseur F Pied _ point lanc_ _ Gdffes d entrainement Descendues Baje los dientes de transporte Ponga la tela con el agujer...

Page 60: ...o decorate with trims appliques and cut work or as a decorative stitch Satin Stitch 10 Stitch selector 3 Stitch Width 2 to 6_5 _ Stitch length 0 5 to 1 _ Needle thread tension 3 to 8 Presser foot F Satin stitch foot _ Pressure adjusting lever 1 to 2 The satin stitch is often used to decorate and overcast the raw edge on blankets linens tablecloths and napkins It is also attractive in applique For ...

Page 61: ... _ Selecrot de puntada 3 Anchura de puntada 2 a 65 Longitud de puntada 05 a 1 4 Tensi6n del hilo de la aguja 3 a 8 _ Prensatelas F Prensatelas para puntada decorativa _ Palanca del ajuste de la presi6n 1 o 2 Point lanc6 _ S_lecteur de point _ argeur du point Longueur du point _ _ Tension du fil de I aiguille _ Pied presseur F _ Levier de r6glage de la tension 1 ou 2 3 2 65 05 1 3 8 Pied point lanc...

Page 62: ...h adjusting the stitch width f f J Applique _ Stitch selector 7 Stitch width 6 5 _ Stitch length Gold stretch stitch position Needle thread tension 2 to 6 _ Presser foot F Satin stitch foot _ Pressure adjusting lever 2 Baste applique pieces on the fabric or fuse the applique pieces with an iron on fabric joiner Stitch around the applique making sure the needle falls along the raw edge of the appli...

Page 63: ... Longitud de la puntada _ Tensi6n del hilo de la aguja _ Prensatelas F 7 65 Posici6n oro de puntada el_stica 2a6 Prensatelas pare puntada decorative _ Palace del ajuste de la presi6n 2 Appliques S_lecteur de point _ Largeur du point Longueur du point _ _ Tension du fil de I aiguine _ Pied preaseur F _ Levier de r_glage de la tension 2 7 65 Position dor_e point extensible 2b 6 Pied point lance Bast...

Page 64: ...ove Drop the feed dogs and then remove the foot holder Adjust stitch width as desired Draw a design onto the fabric with tailor s chalk_ Stretch the fabric between embroidery hoops and then place the fabric under the needle Lower the presser foot lifter to engage the needle thread tension Holding the needle thread in your left hand rotate the handwheel counterclockwise for one complete turn Pull t...

Page 65: ...sporte y retire el sujetador del prensatelas Ajuste la anchura de puntada a su gusto Dibuje el diseSo sobre la tela con una tiza de costura Coloque la tela templada sobre un aro de bordar y col6que la debajo de la aguja Baje la planca de elevaci6n del prensatelas para que agarre el hilo de la aguja de tensi6n Tomando e hilo de la aguja con su mano izquierda girando el volante en el sentido contrar...

Page 66: ...needle through the left buttonhole 4 Press the foot control and sew about 10 stitches 5 Sew the other row of holes if applicable using the steps above Trim excess threads from both sides of the fabric f O _ m LEI_G TM J J Overcasting Stitch selector 3 Stitch width 5 to 6 5 _ Stitch length Red zone _ Needle thread tension 3 to 8 Presser foot A Zigzag foot Presser foot C Overedge foot Brush holder s...

Page 67: ...ille Tournez le volant afin que I aiguille soit dans la position la plus gauche puis abaissez I aigui le dans la boutonni6re de gauche 4 Appuyez sur la p_dale de contr61e et ceusez environ 10 points de couture 5 Cousez I autre alignment de trous le cas 6ch_ant en suivant les 6tapes ci dessus Coupez les fils d passant des deux c6t6s du tissu Puntada de sobrehilado o remate _ elector de puntada Anch...

Page 68: ... sew When the needle comes to the left _ When the needle comes to the right _ Guide Folded edge There is a sliding guide screw on the blind hem foot that allows you to precisely control where the needle pierces the edge of the fabric fold Adjust the screw so that at the leftmost position of the stitch the needle just pierces the edge of the fold If the needle pierces too far left the stitches will...

Page 69: ..._ Envers du tissu 2 2 2_ 04 07 cm 1 4 7 16 _ Tissu fin Tissu epais Para coser _ Cuando la aguja va hacia la izquierda _ uando la aguja va hacia la derecha Gufa Borde doblado Posicione la tela de forme que el doblez se sitL_econtra el lado izquierdo de la aguja Baje el prensatelas Cosa guiando e borde doblado contra la gufa del prensatelas Para que el dobladii o tenga aspecto profesional doble la t...

Page 70: ...ess fabric close to stitching Q f J Multiple Zigzag Stitch 1_ Stitch selector 2 _ Stitch width 5 to 6_5 Stitch length 05 to 1 Needle thread tension 2 to 6 _ Presser foot A Zigzag foot o Seam finishing This stitch is used to finish the seam allowance on synthetics and other fabrics that tend to pucker The stitch is also excellent for darning and mending tears Place your fabric to allow a 5 8 15 cm ...

Page 71: ...a puntada 5 a 65 Longitud de Is puntada 05 a 1 Tensi6n del hile de ia aguja 2 a 6 _ Prensatelas A Prensatelas parazig zag Point zig zag multiple _ S61ecteur de point 2 _ Largeur du point 5 6 5 Longueur du point 0 5 1 Tension du fil de I aiguille 2 6 _ Pied presseur A Pied zig zag Cosido fical La puntada el_stica es muy util pare la costura de telas que tienden e fruncir Es excelente pare poner rem...

Page 72: ...o create a shelled edge You may need to increase the needle thread tension slightly If you sew rows of shell stitches space the rows at least 5 8 1 5 cm apart You can also sew shell stitches on knits or soft silky woven fabrics in any direction_ Box Stitch Q Stitch selector 1 Stitch width 3 to 6 5 Stitch length Red zone Needle thread tension 3 to 8 Presser foot A Zigzag foot Overlap two raw edges ...

Page 73: ...os de seda ligeros en cualquier direcci6n Utilisez un tissu leger comme du jersey Pliez le tissu et piquez sur le biais Vous aorez peut _tre besoin d augrnenter I_g_rement la tension du fll de I aiguille Laissez I aiguille tomber juste en dehors du bord pli_ du tissu Iors du zig zag Si vous cousez des rang_es de points coquille espacez les rang_ es d au moins 15 cm 5 8 Vous pouvez egalement coudre...

Page 74: ...c so the needle catches the folded edge on each side Two point Box Stitch _ Stitch selector 11 Stitch width 3 to 6 5 Stitch length 1 to 2 _ Needle thread tension 3 to 8 Presser foot A Zigzag foot This stitch is useful to join elastic fabrics f O 1 f L _J f _ _ C3 _ j ___ o _ __L _ _ 1 J J Decorative Stitch Patterns _ Stitch selector 12 to 13 Stitch width 3 to 6 5 Stitch length Green zone Needle th...

Page 75: ...guidant le tissu pour que I aiguille attrape les bords replies de chaque c6t_ Puntada de caja de dos puntos _ Selector de patr6n 11 Anchura de la puntada 3 a 65 Longitud de fa puntada 1 a 2 Tensi6n del hilo de la aguja 3 a 8 Prensatelas A Prensatelas para zig zag Point de cr_neau double points _ S_iecteur de point 11 _ Largeur du point 3 65 Longueur du point 1 2 Tension du fil de raiguille 3 8 _ P...

Page 76: ...guide _ Check spring holder _ Thread take up lever _ Needle bar thread guide _ Twin needle optional item Turn off the power switch Insert the additional spool pin into its hole Place a piece of felt and a spool on the additional spool pin_ Make sure you separate the two threads by placing one thread in each needle bar thread guide _ Change the needle to a twin needle _L Thread each needle from fro...

Page 77: ... de la barra de aguja _ Cambie la aguja por una doble aguja _ Hile cada una de las agujas de adelante a atr_ts Aiguilles jumel_es Option _ _lecteur de point Largeur du point Longueur du point Tension du fil de raiguille _ Pied presseur A Pied presseur F Aiguille 11 13 1 25 Position or point extensible ou zone verte 3 7 Pied zig zag Pied point lanc_ Aiguilles jumel_es en option Pour modifier la dir...

Page 78: ...asticity and strength are necessary in order to insure comfort and durability_ Use it to reinforce areas such as crotch and armhole seams as well as to eliminate puckering on knits and stretch fabrics Also use when constructing items requiring extra strength such as backpacks f Ul III Iit l 6 ill_ lU CUl Or o O f J J Rick rack Stretch _ Stitch selector Stitch width _ Stitch length Needle thread te...

Page 79: ...ur lee coutures ot_ la solidit_ et r_lasticit6 sont n_cessairee au confort et la durabilit_ Usela para reforzar reas como braguetas pufios de camisa y Utilisez le pour renforcer les coutures d entre jambes et tambi_n para evitar deshilachamientos en telas de punto y telas d ernmanchure ainsi que pour _liminer les fronces sur les jerseys el_ sticas Use tambi_n esta puntada para construir elementos ...

Page 80: ...ing 1 f _ o_ __2 _ J Smocking _ Stitch selector Stitch width Stitch length Needle thread tension Presser foot A _ Presser foot F 2 3to65 Gold stretch stitch position 2to6 Zigzag foot Satin stitch foot NOTE Loosen the needle thread tension to make gathering easier To sew Wrong side Bottom side of fabric Knotted edge Smocking is a delicate decorative treatment used on children s clothes or women s b...

Page 81: ...uma _ Selector de patr6n _ Anchura de la puntada Longitud de la puntada _ Tensi6n del hilo de la aguja _DPrensatelas A _ Prensatelas F 2 3a65 Posici6n oro de puntada el stica 2a6 Prensatelas para zig zag Prensatelas para puntada decorativa NOTA Atloje la tensi6n del hilo de fa aguja para facilitar el fruncido Para coser _ Parte de arriba de la tela _ Borde Esta es una puntada decorativa delieada e...

Page 82: ...e over the raw edge Elastic Stretch Stitch _ Stitch selector Stitch width Stitch length Needle thread tension _ Presser foot A 1 3 to 65 Gold stretch stitch position 3to6 Zigzag foot Choose this stitch to attach elastic to garments Mark elastic into quarters and match these to the center front center back and side seams Place the middle of the elastic under the center of the presser foot A and sti...

Page 83: ... de la puntada _ Tensi6n del hilo de la aguja _ Prensatelas A 1 3a65 Posici6n oro de puntada el_stica 3a6 Prensatelas para zig zag Point extensible pour la fixation des dlastiques _4 S_lecteur de point 1 Largeur du point 3 65 Longueur du point Position point extensible or Tension du fil de I aiguille 3 6 _ Pied presseur A Pied zig zag Elija esta puntada para colocar elAstieos en prendas Divida y m...

Page 84: ...to 6 5 Stitch length Gold stretch stitch position Needle thread tension 2 to 6 Presser foot A Zigzag foot Decorative stretch patterns are used for adding a creative and personalized touch to items You can decorate children s clothes women s blouses curtains etc f f J J 72 ...

Page 85: ...rgeur du point 3 6 5 Longueur du point Position point extensible or Tension du fil de raiguille 2 6 _ Pied presseur A Pied zig zag DiseSos decorativos el sticos son usados para aSadir un toque Les motifs d_coratifs vous permettent d ajouter une note de creativo personalizado alas prendas Usted podr_ decorar ropa fantaisie et de personnaliser vos ouvreges Vous pouvez d_corer de niRos bluses de seSo...

Page 86: ...wering the presser foot To sew _ Button holder _ Buttonhole lever The buttonhole size is automatically set by placing the button in the rear of the automatic buttonhole fool The button holder on the foot takes a button up to 1 0 2 5 cm in diameter Make a test buttonhole on an extra piece of the fabric to check your settings Use interfacing on stretch fabrics Pull the button holder _to the back and...

Page 87: ... toma autom4ticamente co ocando el bot6n en a parte trasera del pie prensatelas para ojales autom_ticos En el afojamiento del bot6n se pueden colocar botones de hasta 2 5 cm 10 de di4metro Antes de coser los ojales en la prenda que desee practique cosiendo un ojal en uri trozo de tela para verificar los ajustes Emplee para ello acoplamiento de telas el_sticas 13redel alojamiento del bot6n _ hacia ...

Page 88: ...owly and stop the machine at the starting point when the buttonhole is completed Remove the fabric and place a pin just before the fr_ barrack at each end to prevent cutting bartacks Cut the L2J opening with the buttonhole opener To sew another buttonhole you must reset the machine Reset by shifting the stitch selector in either direction _ or O to the next setting Then shift the selector back to ...

Page 89: ...tez la machine au point de depart Iorszue la bouturniese est terminie Saque la prenda y coloque un alfiler justo antes de cada presilla para prevenir un corte accidental de las presillas Certe la abertura del ojal con el abreojales Retirez le tissu et placez une epingle juste avant chaque arr_t pour _viter de couper les fils d arr_t Coupez I ouverture avec t ouvre boutonniere_ Despues de que un oj...

Page 90: ...rol to 1 for a looser density _ Slide the stitch length control to 0 25 for a tighter density f STRETCH _ LENGTH Y 0_1_2 3 4 J If the sides of the buttonhole are not balanced do the following If the buttonhole looks like use the screwdriver to move the lever to the right to make the left side of the buttonhole less dense see illustration otf the buttonhole looks like _ use the screwdriver to move ...

Page 91: ... le r6glage de la Iongueur du 1 pour des points moins denses Faites glisser le r_glage de la Iongeueur du 025 pour des points plus denses _ Haga Io siguiente si los lades del ojal no quedan equilibrados Si el ojal se parece a el _ _ mueva la palanca con un destomillador como es mostrado en la ilustraci6n hacia la derecha para hacer e lado izquierdo de ojal menos denso Si el ojal pareee a el _mueva...

Page 92: ...utomatic buttonhole foot JR to hold them tight Lower the needle into the garment where the buttonhole will start and lower the foot 0 Spur _ Forks Depress the foot control gently and sew the buttonhole Each side of the buttonhole and the bartacks will be sewn over the cord Remove the fabric from the machine and cut the sewing threads only _ Needle thread Top thread _ Bobbin thread Bottom thread Pu...

Page 93: ...enez es extr6mit6s vers vous en dessous du pied laissant ainsi ravant du pied libre Bloquez le cordonnet de remplissage dans les fourches ravant du pied boutonniere automatique R pour le maintenir tendu Abaissez I aiguille darts le tissu au point de d6part de la boutonniere et abaissez le pied _ Eperon _ Fourches Pise el pedal de control suavemente y cosa el ojaL Los labios del ojal y las presilla...

Page 94: ...on Raise the presser foot Set the stitch at _ by turning the stitch selector Attach the buttonhole foot B Pull the buttonhole lever downward as far as it will go Lower the needle into the garment where the buttonhole is to start and lower the foot Sew the front bartack and left row then stop Click the buttonhole lever toward you Sew the back bartack and right row then stop the machine at the start...

Page 95: ...ur H Fixez le pied boutonnieres B Hale la palanca de ojal hacia abajo hasta que Ilegue al punto m s bajo posible Baje le aguja en la tela donde empieza a hacer ojal y baje el pie Rrez sur le levier pour les boutonnieres pour le faire descendre au maximum Abaissez I aiguille dans le tissu au point de d_part de la boutonniere puis abaissez le pied Cosa la barra delantera y la hilera izquierda pare l...

Page 96: ...Guide block _ Two pins _ Hook _ Lever Gear _ Base plate Buttonhole foot f Buttonhole style and size _ Round end buttonhole Template Size 213 504 005 3 8 1 2 5 8 13 16 213 505 006 15 16 1 1 16 1 1 4 1 1 2 _ Keyhole buttonhole Template Size 213 506 007 7 8 1 1 16 1 1 4 1 3 8 NOTE Buttonhole patterns on templates show the actual length of buttonholes to be sewn You can find the most suitable buttonho...

Page 97: ...renze Plaque de base Pied pour boutonniere Estilo y tama _o del ojal _ Ojal de punta redonda Plantilla TamaSo 213_504 005 3 8 213 505 606 15 16 _ Ojal de cerradura Plantilla TamaSo 213 506 007 7 8 1 2 5 8 13 16 1 1 13 1 1 4 1 1 2 1 1 16 1 1 4 1 3 8 o Styles et dimensions des boutonnieres _ Boutonni6re bouts arrondis Gabarit Dimensions 213 504 605 3 8 1 2 5 8 13 16 213 505 606 15 16 1 1 16 1 1 4 1 ...

Page 98: ..._ Needle thread Top thread Bobbin thread Bottom thread Two round holes Rectangular hole Two pins fitting with the two round holes Hook _ Lever Base plate Remove the extension table accessory box Raise the needle to its highest position by turning the handwheel counterclockwise Remove the foot holder Pull the bobbin thread about 3 7 0 cm straight back toward the rear of the machine Insert the hook ...

Page 99: ...e 2 Fil de I aigui le Fil sup6rieur Fil de canette Fil inf_rieur Deux trous rends Trou rectangulaire 5_ eux tiges correspondent aux deux trous rends Crochet _8 Levier Plaque de base Quite la mesa extensible caja de accesorios Levante la aguja hasta la posici6n rn_s alta girando el volante en la direcci6n contraria alas agujas del reloj Quite el sujetador de pie prensatelas Tire del bile de la cani...

Page 100: ...guide slot _so that the guide block _ fits into the center of the guide slot f _ Needle thread _ Bobbin thread _ Buttonhole foot Gear Slot Starting point Attach the buttonhole foot Adjust the position of the gear _ so it is aligned with the starting point of the template The lever can be used to change gear positions Pull the bobbin thread up through the guide slot of the buttonhole guide plate by...

Page 101: ...e _ et faites passer le doigt de guidage _ au centre de la fente de guidage _ Hilo de la aguja Hilo de la canilla Prensatelas para ojales Dentada 5_ Ranura _ Punto de partida Acople el prensatelas para ojales _ Ajuste la posici6n del _ dentada de tal forma que quede alineado con el punto de partida de la plantilla _ La palanca puede set utilizada para cambiar la posici6n del dentada Tire del hilo ...

Page 102: ...ant buttonholes to be sewn at 1 2 12 cm from the fabric edge line up the fabric with the 1 2 marking on the guide plate each time you start to sew a buttonhole Interfacing is recommended when making buttonholes If fabric does not feed smoothly from the start increase the stitch length Lower the buttonhole foot Start sewing slowly Allow the machine to do the work by itself i e do not try to guide f...

Page 103: ...r un ojal Si la tela no es transportada suavemente desde el principio aumente la lengitud de las puntadas Baje el prensatelas para ojales Empiece a coser lentamente Deje que la maquina haga el trabajo pot si sola y no intente guiar la tela Pare de coser cuando la aguja regrese a la posici6n en la que empez6 Para soltar la plaea base del pie para ojales tire de la palanca hacia usted y levante la p...

Page 104: ... you handle it Unplug the machine and open the face cover Pull out the bulb from the sockeL Insert the new bulb into the opening of the socket Close the face cover Cleaning the Bobbin Holder To insure that the machine operates at its best you need to keep the bobbin area clean at all times Turn off the power switch and unplug the machine Remove the hook cover plate by sliding the hook cover plate ...

Page 105: ...oucher D_branchez la machine et ouvrez le couvercle frontal Retirer I ampoule Placer la nouvelle ampoule dans le socle Limpiando el portacanillas Para asegurarse de qua la m_ quina funcione en tima condici6n necesitar_ mantener siempre limpias las partes esenciales Limpie el polvo y la pelusa de la Area de la bobina La mAquina trabajar m_ s lenta y har_ ruidos cuando se ha la enganchado el hilo Ap...

Page 106: ...ok race _ with a lint brush Wipe out gently with a soft dry cloth _ Feed dogs Hook race Line up the triangle marks and position the bobbin holder so that the notch fits next to the stopper in the hook race Line up the triangle marks The notch fits next to the stopper Oiling the Machine Unplug the machine Open the face cover and oil the two points as shown at least once a year One or two drops of o...

Page 107: ...yez doucement avec un chiffon doux et sec _ riffes d entrainement Corsier_ Alinee las marcas tdangulares _ y coloque el portacanillas de forma que el saliente ajuste junto al tope _ en la via del garfio _ linee las marcas triangulares El saliente ajuste junto al tope Alignez les rep_res triangulaires _ et installez la boite canette afin que I encoche se place contre la butte _ darts la piste du cr...

Page 108: ...nt or blunL 3 The needle and or threads are not suitable for the work being sewn 4 A blue needle is not being used for sewing stretch very fine fabrics and synthetic 5 The needle thread is not threaded properly 6 The wrong needle is used 1 The needle thread tension is too tight 2 The needle thread is not threaded properly 3 The needle is too heavy for the fabric being sewn_ 4 The stitch length is ...

Page 109: ... hilos no son los adecuados para el trabajo que se est_ cosiendo 4 No se estA utilizando una aguja azul para coser tejidos elAsticos tejidos finos y telas sint_ticas 5 El hilo de la aguja no esta enhebrado correctamente 6 La aguja utilizada no es la adecuada 1 La tensiSn del hilo de la aguja es excesiva 2 El hilo de la aguja no se ha enhebrado correctamente 3 El nQmero de la aguja es demasiado gra...

Page 110: ...st trap fine pour le tissu emp oy_ 1 L aiguille n est pas install_e correctement 2 L aiguille est tordue ou _mouss_e 3 L aiguiile et le fil ne conviennent pas pour le tissu 4 Vous n utilisez pas une aiguille _ bout bleu pour une couture extensible un tissu tr_s fin ou synth_tique 5 Le fil de I aiguille n est pas enfil_ correctement 6 Vous utilisez une mauvaise aiguille 1 La tension du fil de I aig...

Page 111: ... electronics call or go on line for the location of your nearest Sears Parts Repair Center 1 800 488 1222 Call anytime day or night U SA only www sears com To purchase a protection agreement U S A or maintenance agreement Canada on a product serviced by Sears 1 800 827 6655 U S A 1 800 361 6665 Canada Para pedir servicio de reparacl6n a domicilio y para ordenar pezas 1 888 SU HOGAR sM 1 888 784 64...

Reviews: