background image

Summary of Contents for 385.166551

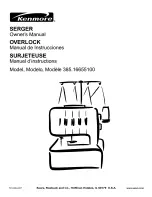
Page 1: ... SERGER Owner s Manual OVERLOCK Manual de Instrucciones SURJETEUSE Manuel d instructions Model Modelo Modele 385 16655100 791 820 007 Sears Roebuck and Co Hoffman Estates IL 60179 U S A www sears com ...

Page 2: ...Return this Serger to the nearest Sears store or service center for examination repair electrical or mechanical adjustment 4 Never operate this Serger with any air opening blocked Keep ventilation openings of this Serger and foot controller free from accumulation of lint dust and loose cloth 5 Never drop or insert any object into any opening 6 Do not use outdoors 7 Do not operate where aerosol spr...

Page 3: ...al centre de servicio o punto de venta autorizado Sears mas cercano para su revisi6n reparaci6n o ajuste mecanico o etectrico 4 No opere esta maquina si alguno de los orificios de ventitaci6n esta bloqueado Mantenga los orificios de ventitaci6n de la maquina y el pedal de control libres de acumulaci6n de pelusa polvo y residuos de tela 5 Nunca deje caer ni introduzca objetos en los orificios de la...

Page 4: ... la prise sont endommag_s si elle ne fonctionne pas correctement si elle est tombee ou est endommagee ou si elte est tombee a l eau Rapportez la machine au magasin Sears le plus proche pour une v6rification une r6paration un reglage electrique ou mecanique 4 N utitisez jamais une machine dont les ouvertures de ventilation sent obstru6es Maintenez les ouvertures d a6ration libres de toute accumulat...

Page 5: ...AS PIEZAS Y AJUSTES MECANICOS i Durante 90 dias a partir de la fecha de compra Sears reemplazara gratuitamente cualquier pieza y proveera el servicio i mec nico necesario para el funcionamiento adecuado de la m quina de overlook excepto para mantenimiento normal EL SERVICIO DE GARANTIA ESTA DISPONIBLE ENVIANDO LA MAQUINA DE OVERLOOK AL CENTRO DEPARTAMENTO DE SERVICIO SEARS MAS CERCANO EN LOS ESTAD...

Page 6: ...gujas Elevaci6n del prensatelas Aguja Cantidad de hilos Dimensiones de la maquina Peso Especificacibn 1300 s p m maxima 1 5 mm promedio ordinario 3 1 0 5 1 2 2 3 hilos 3 5 mm o 5 7 mm 4 hilos 5 7 mm 26 5 mm 5 mm HA 1 SP 11 o 14 304 Ancho 287 mm fondo 277 mm altura 275 mm 15 4 Ibs Caractdristiques de la machine Description Vitesse de couture Longueur du point montant de I entraTnement Rapport d ent...

Page 7: ...y nylon polyester thread 34 Threading the upper looper 36 38 To rethread the upper looper 38 Threading the right needle 40 Threading the left needle 42 3 thread serging 44 Regular 3 thread serging 1 8 3 5 ram width 44 Wide 3 thread serging 1 4 5 7 mm width 44 SECTION III LEARN THE STITCHES 46 Starting to sew 46 Finishing sewing 46 Sewing contiunously 46 How to use guide lines 46 Securing ends 48 A...

Page 8: ... guia superior 39 Enhebrado de la aguja derecha 41 Enhebrado de la aguja izquierda 43 Surjete con tres hilos 45 Surjete regujar con tres hilos anchura de 3 5 mm 1 8 45 Surjete ancho con tres hilos anchura de 5 7 mm 1 4 45 SECCl6N III APRENDA LAS PUNTADAS 47 Para empezar a coser 47 Para terminar a coser 47 Costura continua 47 C6mo utilizar las lineas de guia 47 C6mo asegurar los extremos de la cost...

Page 9: ...eur sup6rieur 37 39 Comment enfiler le boucleur sup6rieur 39 Enfitage de l aiguitle c6te droit 41 Enfitage de l aiguitle c8t6 gauche 43 Enfitage de la machine 3 ills 45 Surjet standard trois ills 3 5 mm 1 8 pouce de largeur 45 Surjets larges trois ills 5 7 mm 1 4 pouce de largeur 45 PARTIE III CONNAITRE LES POINTS 47 Commencer a coudre 47 Pour terminer votre couture 47 Couture continue 47 Utilisat...

Page 10: ...e thread tension dial _ Pressure adjusting screw Face plate Presser foot Needle plate Side cover Looper cover Lower looper pre tension setting slider Handwheet Power switch _ Plug connector Differential feed dial Stitch length dial Telescoping thread guide bar Thread guide Presser foot lifter Spool pin Spool holder Spool stand Nomenclature plate Upper knife Needle plate setting knob Lower knife Lo...

Page 11: ...etes _ Placa de identiflcaci6n _4_ Cuchilla superior _ Bot6n de posici6n de la placa de agujas _6_ Cuchilla inferior _ Ojo guia inferior _ Ojo guia superior _9_Bot6n giratorio de liberaci6n de la cuchilla superior _0_ Selector de ajuste del ancho de corte _ Pedal Identification et emplacement des pi_ces _ Cadran de tension du fil du boucleur inf6rieur C2_ Cadran de tension du fil du boucleur sup6r...

Page 12: ...Waste catcher Storing the accessory holder Insert the accessory holder into the waste catcher Waste catcher Accessory holder J Standard accessories Screwdrivers Tweezers Nets Set of needles Spool caps Lint brush Needle threader 4 ...

Page 13: ...tes _3_Caja de acceserios Rangement du porte accessoires Ilns6rez le porte accessoires dans le ramasse chutes C2_ Ramasse chutes _3_Porte accesseires Accesorios est_ndar _4_Destornilladeres _5_Pinzas C6_ Redes _7_Juege de agujas _8_Tapas de carrete _9_Cepillo para pelusa _0_Enhebrador de agujas Les accessoires standards _4_Tournevis _5_Brucelles C6_ Filets _7_Jeu d aiguilles _8_Capuchons _ bobine ...

Page 14: ...84860100 Needle set 7 624806006 Net 8 802424004 Lint brush 9 000009803 Light bulb 10 790005005 Upper knife 11 784809008 Spanner 12 784223105 Spool holder 13 741814003 Oil 14 200254801 Needle threader 15 200209100 Blind stitch foot 16 200211105 Taping foot with tape reel 17 200212106 Cording foot 1 18 200213107 Cording foot 2 19 200228105 Pearl sewing attachment 20 200230100 Gathering attachment 21...

Page 15: ...n 1 18 200213107 Pie del corden 2 19 200228105 Accesorio de costura perla 20 200230100 Accesorio de fruncido 21 200231101 Accesorio para el_stico 22 200229106 Guiatelas 23 200232102 Pie de ribete 1 8 24 200233103 Pie de ribete de 3 16 25 200249102 Pie de fruncido Estos articulos no se suministran con la m_quina pero se pueden pedir siguiendo las instrucciones anteriores Rdfdrence N de piece Design...

Page 16: ...structions This appliance has a polarized plug one blade wider than the other To reduce the risk of electric shock this plug is intended to fit in a polarized outlet only one way If the plug does not fit in the outlet reverse the plug If it still does not fit contact a qualified electrician to install the proper outlet Do not modify the plug in any way Foot Controller Model YC 482P is used with Se...

Page 17: ...na clavija polarizada en la que una pieza del enchufe es m_s ancha que la otra A fin de reducir el riesgo de descargas el6ctricas esta clavija est_ diseSada de forma que puede introducirse s61ode una manera en una toma de corriente polarizada Si no encaja en la toma de corriente invierta la clavija Si tampoco encaja de esta forma dispongaque un electricista calificado instale una toma de corriente...

Page 18: ...right and slightly toward the machine body Opening and closing the looper cover _Loopercover T o open While pushing with the thumb to the right as far as it will go pull looper cover toward you To close Lift looper cover and push against the machine The looper cover snaps into its position automatically For your safety Always close both the side and looper covers when the machine is in use B 10 ...

Page 19: ...los ojos guia _ Tapa de los ojos guia Para abrirla Empuje con el dedo pulgar la tapa de los ojos guia hacia la derecha hasta el tope y tire de ella hacia usted Para cerrarla Levante la tapa de los ojos guia y empt jela contra la m_quina La tapa de los ojos guia se acoplar_ autom_ticamente en su sitio con un chasquido Para su propia seguridad Cierre siempre la tapa lateral y la tapa de los ojos gui...

Page 20: ... a small thread spool remove the spool holder _ from the spool pin Then place the spool with its slit _ side up and put spool cap _ on top Spool pin Net If the thread slips down from the spool during threading and or sewing put a net _ on the spool as illustrated to prevent jamming The nets are supplied with the machine Raising or lowering the presser foot _ Presser foot lifter Presser foot By rai...

Page 21: ...nhebrado o al coser el hilo se desliza hacia abajo respecto al carrete ponga una red C6_ alrededor del carrete tal como se ilustra para evitar enredos Las redes se suministran con la maquina Installation du capuchon et le filet _ Couvre bobine C2_ Broche _ bobine C3_ Capuchon _4_Fente Quand vous utilisez un ill enlevez le couvre bobine 0_ de la broche bobine C2_ Ensuite placez la bobine de fil ave...

Page 22: ... indicates the differential feed ratio between the main and the sub feed motion 1 0 indicates the neutral position How to adjust Stretched Shrinked If the fabric is stretched _ turn the dial counter clockwise toward 2 2 If the fabric is shrunk _ turn the dial clock wise toward 0 5 Maximum differential feed ratio 2 2 is effective when the stitch length dial is in the range of 1 to 4 0 When the stit...

Page 23: ...le cadran C2_ Le chiffre darts la fen6tre indique le rapport entre I entrai nement principal et I entrai nement auxiliaire 1 0 indique la position neutre Como hacer ajustes _3_Estirado _4_Encogido Si la tela que se est_ cosiendo se estira C3_ gire el selector en el sentido contrario al de las agujas del reloj hacia 2 2 Si la tela que se est_ cosiendo se encoje _4_ gire el selector en el sentido de...

Page 24: ...p with the flat side to the back until the top of needle touches the stopper pin then tighten the needle clamp screw on the right To attach the needle on the left Insert new needle into the needle clamp with the flat side to the back until the top of needle touches the edge of needle bar then tighten the needle clamp screw on the left When the needles are set correctly the left needle is higher th...

Page 25: ...illo de sujeci6n de la derecha Si las agujas est_n colocadas correctamente la aguja izquierda quedar_ m_s alta que la aguja derecha _ Vis de blocage de I aiguille _ Contour de la barre d aiguille _2_06t6 plat _ I oppos6 de _ Aiguille vous C7_ Ajustement exact de I aiguille _3_Serrage de I aiguille _4_Cheville Pour ins6rer I aiguille du c6t6 droit ns6rez I aiguille dans le serre aiguille le c6t6 pl...

Page 26: ...ifter to check that the presser foot is secure l _ t q __ i _4 t _ Lr To disengage the upper knife _ Upper knife release knob Upper knife Turn off the power switch and unplug the machine Open the looper and side covers Pull out the upper knife release knob _ and slide it down along the guide until comes to its lowest position Turn the handwheet to check if the upper knife _ is deactivated A To eng...

Page 27: ...re _0 Boten giratorio de liberacien de la cuchilla superior 2 Cuchilla superior _ Bouton declencheur de la lame superieure _2 Lame superieure I1 Apague el interruptor de encendido y desenchufe la m_quina 1 Mettez la machine hors tension et debranchez la 12 Abra la tapa de los ojos guia y la tapa lateral L20uvrez le capot des boucleurs et le capot lateral 131Hale la perilla de liberacien de la cuch...

Page 28: ...arrow Turn cutting width adjusting dial clockwise Lower knife will move to right B When cutting width is too wide Turn the cutting width adjusting dial counterclockwise Lower knife will move to left Close the looper and side covers Test stitch to check the cutting width The cutting width of the model can be adjusted approximately 1 8 to 3 16 3 0 to 5 0 mm from the right needle position depending u...

Page 29: ...orte El ancho de corte de este modelo puede ajustarse entre 3 0 y 5 0 mm 1 8 a 3 16 de la posici6n de la aguja izquierda dependiendo desde la necesidad de la costura o de la tela usada Lorsque la largeur de coupe est trop 6troite ou trop large r6glez la comme ceci 1 Mettez la machine hors tension et d6branchez la L20uvrez le couvercle des boucleurs et lat6raL L3 Tournez le cadran de r6glage de lar...

Page 30: ...adjusting dial to right as far as it wilt go then move the needle plate setting knob to guide line of S for Standard Serging or R for Rolled Hemming Release the cutting width adjusting dial to the left gently Close the looper and side covers Standard serging Chaining finger Needle plate setting knob Guide line S The chaining finger _ is located beside the needle plate as shown in diagram for guidi...

Page 31: ...ne debranchez la prise electrique 12 Ouvrez le capot des boucleurs et le capot lateral 13_Desactivez la lame superieure Voir page 19 14 Poussez le bouton de reglage de la largeur de coupe _ droite aussi loin que possible puis deplacez le bouton de reglage de la plaque de I aiguille jusqu _ la ligne de guidage S pour surjet ordinaire ou R pour oudet roulotte Degagez delicatement le cadran de reglag...

Page 32: ...r pre tension setting slider Standard serging STD _ Lower looper pre tension setting slider Standard serging with 3 or 4 threads STD R H _ I __iiiii_1_ Rolled hemming R H Rolled hemming with 3 threads STD R H _ I __ iiiiii 24 ...

Page 33: ...ferior Surjete est_ndar con 3 o 4 hilos R_glage du dispositif de glissement du boucleur de pr_ tension inf_rieur Surjet normal STD d_ Dispositif de glissement de pr6 tension du boucleur inf6rieur Surjet normal _ 3 ou 4 ills Dobladillo enrollado R H Dobladillo enrollado con 3 hilos Ourlet roul_ R H Ourlet roul6 _ 3 file 25 ...

Page 34: ... follows Far right cone to lower looper thread green position _ Second cone from right to upper looper thread red position _ Second cone from left to right needle thread blue position _ Far left cone to left needle thread gold position _ Raise presser foot Turn handwheel clockwise away from you until needles are in the full up position Pull all threads out from behind the presser foot until the kn...

Page 35: ...na est_ lista para coser Enfllage de la machine Important Veuillez lire toutes les instructions sur I enfilage avant d entreprendre I enfilage _ Vert C2 Rouge C3 Bleu 4 Jaune 5 Tableau d enfilage Situ6 au dos du capot du boucleur C6 Guide d enfilage 7_Aiguille 8_ Fil d aiguille 9_ Pied presseur _0_Plaque d aiguille Pour plus de facilit6 votre surjeteuse Kenmore a fait I objet d un pr6 enfilage ini...

Page 36: ...ngled threads Re thread the thread which had been broken Example Re thread the lower looper thread _ Lower looper thread f Turn the handwheel toward you until the needle bar comes to its highest position Needle bar f Pull out the needle threads above the needle plate Pull all threads to back of machine 4 10 cm Lower presser foot turn handwheel toward you to chain off 3 or 4 stitches Plug in Resume...

Page 37: ...ucleur inf6rieur C2_ Abaissez le fll du boucleur 31 Gire el volante manual hacia Ud hasta que la barra de agujas L3 Tournez le volant vers vous jusqu _ ce que barre d aiguille soit Ilegue a su poxici6n m_s elevada darts la position la plus 61ev6e _3_Barra de agujas C3_Barre de I aiguille L4 Hale los hilos de aguja per encima de la plancha de aguga Hale los hilos 10 cm 4 hacia la parte posterior de...

Page 38: ...ower looper thread guide 4 Lower looper NOTE If you remove the needle plate the threading points of lower looper are easier to see Make sure the thread is not caught by the needle plate when replacing the plate after threading When threading the lower looper pre tension setting slider must be set at the STD position as illustrated Lower looper pre tension setting slider Draw the thread through the...

Page 39: ...pratique est plac6 sur le corps de la machine dans le capot du boucleur _ Guide ill C2_ Plaque du guide ill _3_Cadran de tension du fil du boucleur inf6rieur _4_Plaque du guide ill _5_Guide ill inf6rieur C6_ Guide ill 1 du boucleur inf6rieur _7_Levier releveur inf6rieur du fil _8_Guide ill 2 du boucleur inf6rieur _9_Guide ill 3 du boucleur inf6rieur _ Guide ill 4 du boucleur inf6rieur Boucleur inf...

Page 40: ...p the lower looper thread guide 2 to its threading position When you do this the other lower looper thread guides 3 and 4 witl automatically move up to make it easier to reach them _ Lower looper thread guide 2 Lower looper thread guide 3 _ _Lower looper thread guide 4 Pass the thread through lower looper thread guide 3 _ Pass the thread through the lower looper thread guide 4 _ Holding the end of...

Page 41: ...ando elvolante demano en direcci6n contraria alasagujas delreloj _4_ Plaque duguide ilL _5_ Guide ill duboucleur C6_ Guide ill 1duboucleur inf6rieur _7_ Levier releveur inf6rieur dufil _8_ Guide ill 2duboucleur inf6rieur _9_ Guide ill 3duboucleur inf6rieur _0_ Guide ill 4duboucleur inf6rieur 14 Passez lefilparrouverture pois passez le darts laplaque duguide ill ainsi queparleguide ill duboucleur 1...

Page 42: ...ylon polyester thread _ Lower looper Ordinary thread Woolly nylon polyester thread This is one of the easiest ways to pass woolly nylon polyester thread through the lower looper Use the same method for the upper looper J 34 ...

Page 43: ...6ster lanoso a trav6s del ojo guia inferior Emplee el mismo m6todo para el ojo gufa superior Enfllage du fU de nylon polyester extensible _ Boucleur inf6rieur _2_Fil ordinaire _3_Fil de nylon polyester extensible Ceci repr6sente I une des mani6res les plus ais6es pour passer un fil nylon polyester laineux _ travers le boucleur inf6rieur Utilisez la m_me m6thode pour le boucleur sup6rieur 35 ...

Page 44: ...ooper Draw the thread through the thread guide second from the right from back to front _ Thread guide If the thread slips out from the thread guide groove while serging pass the thread through the thread guide hole as shown t se Pass the thread through the second set of holes on the thread guide plate as illustrated Thread guide plate f Insert thread between the tension discs Hold the thread at b...

Page 45: ...adelante a trav6s de los segundos guia hilos de la derecha d Gufa hilo Si el hilo sale de la ranura del guia hilos durante el surjete pase otra vez el hilo por el orificio del gufa hilos como se muestra Fll Tirez le fil dans le guide fil du c8t6 droit de I arri re _ I avant _ Guide fil Si le ill sort de la rainure du guide fil passez le ill _ nouveau dans le trou du guide fil tel qu indiqu6 21 Pas...

Page 46: ... through upper looper thread guide Holding the end of the thread with a pair of tweezers pass it through the hole on the upper looper Pull 4 10 cm or more of thread through the hole to the back of the machine Upper looper thread guide Upper looper To rethread the upper looper _ Lower looper thread Upper looper Turn the handwheel toward you until the upper looper comes to the middle point of its tr...

Page 47: ... Hale hacia atr_s de la m_quina 10 cm 4 o m_s de hilo a trav6s del agujero _7_Guia hilo del ojo guia superior _ Ojo guia superior L6 Passez le fil dans le guide4il du boucleur sup6rieur En tenant le bout du fil avec des brucelles passez le dans le trou sur le boucleur sup6rieur Tirez 10 cm 4 pouces ou plus du fil travers le trou vers I arri_re de la machine _7_Guide4il du boucleur sup6rieur _8_Bou...

Page 48: ... Hold the thread at both ends and tug gently to ensure the thread is correctly inserted between the tension discs If the presser foot lifter is raised the thread easily inserts between the tension discs Right needle thread tension dial Pass thread through the front cover thread guide 1 then pass the thread under the front cover thread guide 2 and the take up lever cover from right to left Guide th...

Page 49: ..._ Pase el hilo a trav6s del guia hilo de la tapa frontal 1 luego pase el hilo de derecha a izquierda por debajo del guia hilo de la tapa frontal 2 y de la tapa de la palanca tira hilo 15 Guie el hilo por encima del guia hilo de la tapa frontal 3 16 Introduzca el hilo en la ranura derecha de la placa guia 17 Suba la aguja a su punto m_s alto y pase el hilo de izquierda a derecha a trav6s del guia h...

Page 50: ...ween the tension discs Hold the thread at both ends and tug gently to ensure the thread is correctly inserted between the tension discs If the presser foot lifter is raised the thread easily inserts between the tension discs Left needle thread tension dial Pass the thread under front cover thread guide 2 and the take up lever cover from right to left Guide the thread over the front cover thread gu...

Page 51: ...st_ subido el hilo se introduce f_cilmente entre los discos de tensi6n _3_ Selector de tensi6n del hilo de la aguja izquierda 14_ Pase el hilo de derecha a izquierda por debajo del guia hilo de la tapa frontal 2 y de la tapa de la palanca tira hilo 15 Guie el hilo por encima del guia hilo de la tapa frontal 3 Introduzca el hilo en la ranura izquierda de la placa guia 16 Suba la aguja a su punto m_...

Page 52: ...chine Remove the needle and the thread on the left Then tighten the needle clamp screw on the left slightly to avoid losing the screw Wide 3 thread serging 1 4 5 7 mm width Use only left needle Remove the needle and the thread on the right Then tighten the needle clamp screw on the right slightly to avoid losing the screw 44 ...

Page 53: ...la machine hors tension et d6branchezqa L2 Enlevez aiguille et le fil du c6t6 gauche L3 Resserrez 16g6rement la vis du serre aiguille du c6t6 gauche pour emp cher la perte de la vis Surjete ancho con tres hilos anchura de 5 7 mm 1 4 Emplee micamente la aguja izquierda 11 Quite la aguja y el hilo de la derecha L2 Luego apriete ligeramente el tornillo de sujeci6n de la aguja derecha para evitar perd...

Page 54: ...th the thread cutter as illustrated leaving about 2 5 cm thread chain from the end of fabric _ Thread cutter Sewing continuously Insert next fabric under the front of the foot then start sewing It is not necessary to raise the presser foot for ordinary fabric For heavy weight fabric raise the presser foot and insert the fabric in front of the knife Then lower the foot and start to sew while guidin...

Page 55: ... de fil au bout du tissu d_ Coupe ill Costura continua Introduzca la siguiente tela bajo el prensatelas y comience a coser No es necesario subir el prensatelas si se trata de tela normal Para coser telas gruesas suba el presetelas e introduzca la tela delante de la cuchulla Luego baje el prensatelas y cosa mientras guia la tela Couture continue Ins6rez le tissu suivant sous I avant du pied presseu...

Page 56: ...5 cm long behind the needle Put your fabric in the machine Then serge a few stitches and stop Raise the presser foot and bring the thread chain to the left around and under the presser foot Place the thread chain between the presser foot and upper knife holding it in position as you lower the presser foot to sew After sewing about 1 2 5 cm move the chain to the right and under the upper knife cutt...

Page 57: ...et_ndola en su sitio a medida que baja el prensatelas para coser Despues de coser unos 2 5 cm 1 mueva la cadeneta hacia la derecha y bajo de la cuchilla superior cortando la cadeneta mientras cose Points d arr_t Avant de placer le tissu sous le pied presseur preparez un fil libre d environ 5 cm 2 pouces derriere I aiguille Glissez votre tissu sous le pied cousez quelques points et arr_tez Relevez ...

Page 58: ...00 Sole N s 80 _ 100 Synth6tique N s 80 _ 100 Cotton No 60 100 Silk No 50 100 Synthetic No 60 100 Algod6n No 60 100 Seda No 50 100 Sint6tico No 60 100 Coton N s 60 _ 100 Sole N s 50 _ 100 Synth6tique N s 60 _ 100 Cotton No 50 60 Silk No 50 60 Synthetic No 50 60 Algod6n No 50 60 Seda No 50 60 Sint6tico No 50 60 Coton N s 50 _ 60 Sole N s 50 _ 60 Synth6tique N s 50 a 60 Cotton No 60 80 Synthetic No ...

Page 59: ... 5 3 0 5 0 2 5 3 5 Differential feedratio Relaci6n deavance diferencial Rapport d entrai nement diff6rentiel 0 5 1 0 1 0 1 0 1 0 2 2 Reportez vous _ la page 15 pour r6gler la Iongueur du point ainsi que le rapport d entrai nement diff6rentiel REMARQUE Cette surjeteuse utilise des aiguilles de machine _ coudre Kenmore standard HA 1 SP n 11 n 14 51 ...

Page 60: ...heck the thread tensions Thread tension dial Setting mark Tighten Loosen Incorrect tension Left needle thread is loose Tighten left needle thread tension Wrong side of fabric Left needle thread Right needle thread Right side of fabric Upper looper thread Lower looper thread Left needle thread tension Incorrect tension Right needle thread is loose Tighten right needle thread tension Wrong side of f...

Page 61: ...z Tensibn incorrecta El hilo de la aguja izquierda est_ flojo Apriete la tensi6n del hilo de la aguja izquierda _ Rev6s de la tela C2_ Hilo de la aguja izquierda C3_ Hilo de la aguja derecha _4_Derecho de la tela _5_Hilo del ojo guia superior C Hilo del ojo guia inferior _ Tensi6n del hilo de la aguja izquierda Mauvaise tension Le fil du c5t6 gauche est trop faible Augmentez la tension du fil du c...

Page 62: ...read is loose To correct loosen lower looper thread tension and or tighten upper looper thread tension Incorrect tension _ Wrong side of fabric Right needle thread Right side of fabric Upper looper thread Left needle thread _ Lower looper thread Upper looper thread tension Lower looper thread tension Upper looper thread is tight and or lower looper thread is loose To correct Loosen upper looper th...

Page 63: ...sez la tension du fil du boucleur inf6rieur et ou augmentez la tension du fil du boucleur sup6rieur Tensi6n incorrecta _ Rev6s de ia tela C2_ Hilo de ia aguja derecha C3_ Derecho de la tela _4_Hilo del ojo guia superior _5_Hilo de la aguja izquierda C6_ Hilo del ojo guia inferior _ _Tensi6n del hilo del ojo guia superior 8_ Tensi6n del hilo del ojo guia inferior El hilo del ojo guia superior est_ ...

Page 64: ...ric Upper looper thread _ Lower looper thread _ Left needle thread tension Right needle thread tension Incorrect tension _ Wrong side of fabric Lower looper thread Needle thread Upper looper thread _ Upper looper thread tension _ Lower looper thread tension Lower looper thread is tight and or upper looper thread is loose Loosen lower looper thread tension and or tighten upper looper thread tension...

Page 65: ...on de ills Cadran de tension du fil _ Marque de r6glage C2_ Serrez _3_Desserrez Mauvaise tension La tension du fil d aiguille est faible Augmentez la tension du fil d aiguille _ Mauvais c6t6 du tissu C2_ Fil d aiguille C3_ Bon c6t6 du tissu _4_Fil du boucleur sup6rieur _5_Fil du boucleur inf6rieur C Tension du fil de I aiguille gauche _7_Tension du fil de I aiguille droite Mauvaise tension _ Mauva...

Page 66: ...tting knob R Thread Needle Upper looper Lowerlooper Synthetic thread No 80 100 Woolly nylon thread or synthetic thread No 80 100 Woolly nylon thread or synthetic thread No 80 100 Method _ Wrong side of fabric Lower looper thread Right side of fabric Needle thread _ Upper looper thread Serge edge of fabric one layer Pull the fabric lightly to the back while serging This edging is effective for soft...

Page 67: ...a aguja a la vez que la cose con surjete o emplee alimentaci6n diferencial ajustada entre 0 5 y 1 0 Ourlet _troit Une technique utilis6e dans la finition du bord des tissus petite moyenne 6paisseur Evitez d utiliser des tissus qui s effilochent facilement R_glage de la machine Nombre de ills 3 Nombre d aiguilles 1 Enlever I aiguille de gauche Le rapport de I entrai nement diff6rentiel 1 0 Longueur...

Page 68: ...4 Upper looper thread tension Red 2 to 4 Lower looper thread tension Green 3 Lower looper pre tension setting slider R H Needle plate setting knob R Thread Needle Upper looper Lower looper Synthetic thread No 80 100 Woolly nylon thread or synthetic thread No 80 100 Woolly nylon thread or synthetic thread No 80 100 Method Wrong side of fabric Right side of fabric Needle thread Lower looper thread U...

Page 69: ... surjete el borde de la tela una capa Tire de la ligeramente hacia atr_s mientras cose Ourlet roul_ roulott_ Une bordure d6corative qui convient aux tissus 16gers id6ale pour les volants des blouses ou le bord des serviettes de table et des nappes S R6glage de la machine Nombre de ills 3 Nombre d aiguilles 1 Enlever I aiguille de gauche Le rapport de I entrai nement diff6rentiel 1 0 Longueur du po...

Page 70: ... setting slider R H Needle plate setting knob R Thread Needle Upper looper Lower looper Method _ Wrong side of fabric Right side of fabric Needle thread Lower looper thread _ Upper looper thread Synthetic thread No 80 100 Synthetic thread No 60 100 or silk thread No 50 100 Synthetic thread No 60 100 or silk thread No 50 100 J Turn handwheel toward you a couple of times Insert one layer of thin fab...

Page 71: ...du fil du boucleur sup6rieur Rouge Tension du fil du boucleur inf6rieur Vert Dispositif de glissement de pr6 tension du boucleur inf6rieur Bouton de r6glage de la plaque d aiguille Fil Aiguille Fil du boucleur sup6rieur Fil du boucleur inf6rieur 1 0 3_4 3_5 2_4 3 R H R Fil synth6tique N 80 100 Fil synth6tique N 60 100 ou fil en sole N 50 100 Fil synth6tique N 60 100 ou fil en sole N 50 100 M6todo ...

Page 72: ...he fabric side Serge one stitch past the fabric edge f 4 Raise the needle and presser foot Gently pull the thread chain off the chaining finger _ and pivot the fabric Chaining finger When you sew the next side align the cutting line with the upper knife The needle position should match with the previous row of stitching Cutting line Needle position Upper knife Then continue serging _ Cutting line ...

Page 73: ... y el prensatelas Luego tire suavemente de la cadeneta de hilo para sacarla del diente de puntada _4_ y gire la tela _4_Diente de puntada L3 Levez I aiguille et le pied presseur Tirez doucement sur le fil du doigt de chatnette _4_et faites pivoter le tissu _ Doigt de chai nette L4_ AI coser el segundo lado alinee la linea de corte con la cuchilla superior La posici6n de la aguja debe coincidir con...

Page 74: ...ull the fabric toward you in order to keep the cutting line of the fabric straight Then continue serging Cutting line Edging curves Outside curves Serge slowly around the curve pushing the fabric into the presser foot and knife to make an even edge Inside curves Serge the curve slowly pulling the front portion of the fabric to make an even edge 66 ...

Page 75: ...go del borde d_ Linea de corte L3 Tirez le tissu vers vous pour que la ligne de coupe soit droite Continuez de surjeter _ Ligne de coupe Bordes en curvas Curvas exteriores Cosa lentamentesiguiendo la curva empujandola tela haciael prensatelas y la cuchillapara obtenerun borde uniforme Surjet des courbes Courbes ext6rieures Surjetez lentement le long de la courbe en poussant le tissu dans le pied p...

Page 76: ...re tension setting slider STD Needle plate setting knob S 3 threads 3 hilos 3 ills Method _ Wrong side Seam allowance With right sides of fabric together sew a 5 8 1 6 cm seam on a conventional sewing machine reverse stitching at the beginning and end of the seam Serge seam allowances separately guiding the seam along the left edge of the serging foot The serger will trim 1 8 0 3 cm Press seam ope...

Page 77: ...e la tela _2_Espacio para costura Con los derechos de la tela juntos cosa una costura de 1 6 cm 5 8 con una m_quina de coser convencional invierta las pontadas al principio y al final de la costura Cosa con surjete por separado los espacios para costura guiando la costura a Io largo del borde izquierdo del pie de surjete El dispositivo de surjete recortar_ 0 3 cm 1 8 Presione la costura para que q...

Page 78: ...sing a conventional sewing machine to sew a row of straight stitches over the needle thread line to reinforce seams in high stress areas _ Right side Wrong side Top side Needle thread _ Looper thread _ Needle thread line J Machine setting Number of threads Number of needles Differential feed ratio Stitch length Needle thread tensions Gold Blue Upper looper thread tension Red Lower looper thread te...

Page 79: ...e couture la couleur et le poids de tousles fils doivent etre assortis au tissu utilis REMARQUE Nous vous conseillons d utiliser une machine _ coudre ordinaire pour coudre une rang6e de points droits par dessus le fil de raiguille 6_pour renfercer les coutures I_ ou elles doivent etre particulierement solides _ Ben c6t6 du tissu C2_ Mauvais cOte du tissu C3_ C6t6 sup6rieur _4_Fil de I aiguille _5_...

Page 80: ...lue 3 to 6 Upper looper thread tension Red 3 to 6 Lower looper thread tension Green 3 to 6 Lower looper pre tension setting slider STD Needle plate setting knob S Method _ Right side Seam allowance Disengage upper knife refer to page 18 Place elastic on top of the right side of fabric and even with the raw edge Serge on elastic side along the edge stretching elastic in front of the needle while gu...

Page 81: ... Tension des ills des aiguilles Jaune et bleu 3 _ 6 Tension du fll du boucleur sup6rieur Rouge 3 _ 6 Tension du fil du boucleur inf6rieur Vert 3 _ 6 Dispositif de glissement de pr6 tension du boucleur inf6rieur STD Bouton de r6glage de la plaque d aiguille S M6todo _ Derecho de la tela _2_Espacio para costura Desactive la cuchilla superior Consulte la p_gina 19 Coloque el el_stico sobre el lado de...

Page 82: ...der STD Needle plate setting knob S Method Wrong side Right side Straight stitch Disengage upper knife refer to page 18 Place 1 4 0 6 cm wide elastic on top of the wrong side of fabric and even with the raw edge Serge on elastic side along the edge stretching the elastic in front of the needle while guiding both edges along the guideline of the needle plate Fold elastic to the wrong side of fabric...

Page 83: ... de r6glage de ia plaque d aiguille S Mdtodo _ Rev6s de la tela C2_ Derecho de la tela _3_Puntada recta Desactive la cuchilla superior Consulte la pagina 19 Coloque un el_stico de 0 6 cm 1 4 de ancho sobre el rev6s de la tela e igualado con el borde que est_ sin coser Cosa con surjete del lado del el_stico a Io largo del borde estirando el el_stico delante de la aguja a la vez que guia ambos borde...

Page 84: ...ength 3 Needle thread tensions Gold Blue 3 to 6 Upper looper thread tension Red 3 to 6 Lower looper thread tension Green 3 to 6 Lower looper pre tension setting slider STD Needle plate setting knob S Method With right sides together place lace on top of fabric Right side Serge on lace side trimming the edge as you serge Right side Seam allowance Press seam towards the garment Right side 76 ...

Page 85: ...d_ Derecho de la tela R6glage de la machine Nombre de fils 4 Nombre d aiguilles 2 Le rapport de I entrai nement diff6rentiel 1 0 Longueur du point 3 Tensions des fils des aiguilles Jaune et bleu 3 _ 6 Tension du fil du boucleur sup6rieur Rouge 3 _ 6 Tension du fil du boucleur inf6rieur Vert 3 _ 6 Dispositif de glissement de pr6 tension du boucleur inf6rieur STD Bouton de r6glage de la plaque d aig...

Page 86: ... STD Needle plate setting knob S Thread Needle Upperlooper Lower looper Transparent or long fiber polyester thread Ornamental thread yarn or ribbon Transparent or long fiber polyester thread Method _ Right side Disengage upper knife Fold fabric with wrong sides together Serge along the folded edge keeping the edge in line with the right side of lower knife Engage upper knife Press all tucks in the...

Page 87: ...nf6rieur Vert 2 _ 5 Dispositif de giissement de pr6 tension du boucleur inf6rieur STD Bouton de r6glage de la plaque d aiguille S Fil Aiguille Fil du boudeur sup6rieur Fil du boudeur inf6rieur Fil transparent ou de polyester Iongue fibre Fil ill6 ou ruban ornementaux Fil transparent ou de polyester Iongue fibre M6todo d Derecho de la tela Desactive la cuchilla superior Doble la tela juntando los r...

Page 88: ...of needles 1 Remove the needle on the right Differential feed ratio 1 0 Stitch length 3 Left needle thread tension Gold 0 to 2 Upper looper thread tension Red 2 to 3 Lower looper thread tension Green 5 to 7 Lower looper pre tension setting slider R H Needle plate setting knob S Method Disengage upper knife Fold your fabric with wrong side together Right side Serge the folded edge while guiding it ...

Page 89: ...ansparent peuvent etre utilis6s dans I aiguille et dans le boucleur inf6rieur R6glage de la machine Nombre de fils 3 Nombre d aiguilles 1 Enlever I aiguille de droite Le rapport de I entrai nement diff6rentiel 1 0 Longueur du point 3 Tension du fil de I aiguille gauche Jaune 0 _ 2 Tension du fil du boucleur sup6rieur Rouge 2 _ 3 Tension du fil du boucleur inf6rieur Vert 5 _ 7 Dispositif de glissem...

Page 90: ...looper thread tension Green 1 to 3 Lower looper pre tension setting slider STD Needle plate setting knob S Thread Needle Transparent thread Upper lower loopers Fine thread size 80 to 100 Method Fold the fabric as illustrated _ Wrong side Hem bottom 1 4 0 6 cm lip Hem line Position hem line under the presser foot so that the needle will only pierce the edge of the fold The remainder of the lip will...

Page 91: ... Nombre d aiguilles 1 Enlever I aiguille de gauche Le rapport de I entrai nement diff6rentiel 1 0 Longueur du point 3 Tension du fil de I aiguille droite Bleu 1 _ 3 Tension du fil du boucleur sup6rieur Rouge 1 _ 3 Tension du fil du boucleur inf6rieur Vert 1 _ 3 Dispositif de glissement de pr64ension tu boucleur inf6rieur STD Bouton de r6glage de la plaque d aiguille S Fil Aiguille Boucleurs inf6ri...

Page 92: ...lk thread Lower looper thread Synthetic thread or silk thread R No 60 80 No 50 80 No 60 100 No 50 100 No 60 100 No 50 100 Method Disengage upper knife Draw guidelines for pintuck on the right side of the fabric _ Right side With wrong sides together fold fabric along the line drawn Then serge the folded edge guiding it along the guideline on the needle plate _ Right side _ Repeat for additional pi...

Page 93: ...00 ou fil en sole N 50 100 Fil du boucleur inf6rieur Fil synth6tique N 60 100 ou fil en sole N 50 100 M6todo 11 Desactive la cuchilla superior Trace lineas de guia para pliegues pequeSos en el derecho de la tela 0_ Derecho de la tela M6thode 11 Lib6rez la lame sup6rieure Tracez des rep res sur le bon c6t6 du tissu 0_ Bon c6t6 du tissu L2 Con los reveses de la tela juntos doble la tela a Io largo d...

Page 94: ...on setting slider STD Needle plate setting knob S Thread Polyester thread J Method With wrong sides together fold waistband in half lengthwise and press Then unfold and serge ends together _ Wrong side Fold waistband again with wrong sides together and serge it to the garment leaving a 1 to 2 2 5 to 5 cm opening for inserting elastic Right side insert elastic and sew its ends together S Serge rema...

Page 95: ...os reveses juntos doble Iongitudinalmente por la mitad la pretina y presione Luego desd6blela y cosa los extremos uno con otro 0_ Rev6s de la tela M_thode Fll En collant les mauvais cSt6s du tissu les uns contre les autres pliez la ceinture en deux sur la Iongueur et repassez D6pliez ensuite et surjetez ensemble les deux bouts 0_ Mauvais c8t6 du tissu L2 Vuelva a doblar la pretina con los reveses ...

Page 96: ...old 3 Upper looper thread tension Red 1 to 3 Lower looper thread tension Green 3 Lower looper pre tension setting slider STD Needle plate setting knob S Thread Needle Long fiber polyesterthread Upper looper Buttonhole twist Lower looper Long fiber polyesterthread Method Disengage upper knife Serge over tape Make sure the needle drops just off the left end of the tape NOTE You can use cord yarn or ...

Page 97: ...machine Nombre de fils 3 Nombre d aiguilles 1 Enlever I aiguille de droite Le rapport du differentiel 1 0 Longueur du point 1 _ 3 Tension du fil de I aiguille de gauche jaune 3 Tension du fil du boucleur superieur rouge 1 _ 3 Tension du fil du boucleur inferieur vert 3 Dispositif de glissement de pretension du boucleur inferieur STD Bouton de reglage de la plaque d aiguille S Fil Aiguille Polyeste...

Page 98: ...r pre tension setting slider STD Needle plate setting knob S Method Overedge the shoulder end of sleeve regulating the stitch length and the differential feed ratio as illustrated Attach the sleeve to the bodice with a conventional sewing machine Paff sleeve Differential feed ratio 2 0 Stitch length 3 3 Differential feed ratio 1 0 Stitch length 3 Differential feed ratio 1 0 Stitch length 3 Set in ...

Page 99: ...todo Sobrehile el extremo del hombro de la manga regulando la Iongitud de la puntada y la relaci6n de avance diferencial tal como se ilustra Ponga la manga en el cuerpo de la prenda con una m_quina de coser convencional _ Manga con pliegues 2 Relaci6n de avarice diferencial 2 0 Longitud de pontada 3 3 3 Relaci6n de avarice diferencial 1 0 Longitud de pontada 3 4 Relaci6n de avarice diferencial 1 0...

Page 100: ...old Blue 3 to 6 Upper looper thread tension Red 3 to 6 Lower looper thread tension Green 3 to 6 Lower looper pre tension setting slider STD Needle plate setting knob S Method Serge the sides of the skirt pieces from bottom to waist Sew the pieces together using a conventional sewing machine Serge the bottom edge of the skirt You can gather it evenly and easily Hem the bottom of the skirt using a c...

Page 101: ...t 3 Tension du fil de raiguille jaune et bleu 3 _ 6 Tension du fil du boucleur sup6rieur rouge 3 _ 6 Tension du fil du boucleur inf6rieur vert 3 _ 6 Dispositif de glissement de pretension du boucleur inf6rieur STD Bouton de r6glage de la plaque d aiguille S Mdtodo Fll Cosa con surjete los lados de las piezas de la falda desde abajo hacia la cintura L2 Cosa las piezas una con otra usando una m_quin...

Page 102: ...sion Green 3 to 6 Lower looper pre tension setting slider STD Needle plate setting knob S Thread Needle Synthetic thread No 60 80 or silk thread No 50 80 Upper looper Synthetic thread No 60 80 or silk thread No 50 80 Lower looper Synthetic thread No 60 80 or silk thread No 50 80 Method Gathering For gathering increase differential feed ratio above 1 0 The higher the feed differential the more gath...

Page 103: ...re m_s alta la relaci6n de avance diferencial m_s fruncido ocurrir Fronces R_glage de la machine Nombre de ills Nombre d aiguilles Le rapport du enchai nement diff6rentiel Longueur du point Tension des file de I aiguille jaune et bleu Tension du fil du boucleur sup6rieur rouge Tension du fil du boucleur inf6rieur vert Dispositif de glissement de pretension du boucleur inf6rieur Bouton de r6glage d...

Page 104: ...lightly Turn the handwheel toward you until the upper knife reaches its lowest position Loosen the hexagon bolt and adjust the position of the upper knife so that its blade overlaps the edge of lower knife 1 32 to 1 16 0 8 mm to 1 5 mm as shown Then tighten the hexagon bolt firmly Close the looper and side covers Cleaning upper knife area Turn off the power switch and unplug the machine Open the l...

Page 105: ... la tapa de los ojos guia y la tapa lateral Pour attacher la lame _ Lame sup6rieure _2_Boulon _ six pans C3_ Cheville _4_Lame inf6rieure _5 0 8 _ 1 5mm 1 32 _ 1 16 pouce Ins6rez une nouvelle lame dans I emplacement du support lame et de la tige d arr t et resserrez 16g rementle boulon _ six pans Tournez le volant vers vous jusqu _ ce que la lame sup6rieure soit _ la position la plus basse Desserre...

Page 106: ... and twist to the left To insert Push and twist to the right Attach the face plate and tighten the face plate set screw To remove To attach _ Light bulb Cleaning the feed dogs _ Needle plate setscrew Needle plate Turn off the power switch and unplug the machine Open the looper and side covers Remove the needles and presser foot Remove the needle plate setscrew and needle plate Feed dogs Push the l...

Page 107: ... Poussez et tournez vers la droite Fixez la plaque de face et serrez la vis d arr6t de la plaque de face _3_Pour enlever I ampoule _4_Pour fixer I ampoule 5_Uampoule Limpieza del trinquete de avarice _ Tornillo fijaci6n de la placa de agujas _2 Piaca de agujas Apague el interruptor de encendido y desenchufe la mbquina Abra la tapa de los ojos guia y la tapa lateral Quite las agujas y el prensatela...

Page 108: ...ated witharrows Itisrecommended thatyouapplyoiloncea weekinnormal use onceintenhours incontinuous use _ Oilthrough theoilinghole Openthesidecoverandapplyoil Openthelooper coverandapply oit 1 Carrying the machine Put your fingers into the opening of the rear arm as illustrated 100 ...

Page 109: ...jos guia y aceite Huilage de la machine Huilez la surjeteuse avec quelques gouttes d huile _ machine coudre sur les sections indiqu6es par les fl ches II est pr6f6rable de huller la surjeteuse une fois par semaine ou toutes les dix heures d utilisation continue _ Lubrifiez dans le trou de lubrification C2_ Ouvrez le capot lat6ral et appliquez de rhuile _3_Ouvrez le capot des boucleurs et appliquez...

Page 110: ...page 16 See pages 52 56 The seam is not sewn neatly 1 The needle and or looper thread tensions are not correctly adjusted 2 The machine is not correctly threaded 3 The needle and or the thread are not suitable for the fabric being sewn 4 The thread is not between the tension discs See pages 30 44 See pages 50 51 58 62 68 94 See pages 32 36 40 42 Seam puckering 1 The needle or looper thread tension...

Page 111: ...ida incorrectamente Vea la p_gina 17 Vea las p_ginas 53 a 57 El hilo se rompe 1 2 3 4 La mbquina salta puntadas 1 2 3 La costura no es uniforme 1 2 3 4 La costura se arruga 1 2 3 La mbquina no funciona 1 2 La tela no se corta bien 1 2 La tensi6n del hilo de la aguja y o del ojo guia no est_ ajustada correctamente La m_quina no est_ enhebrada correctamente La aguja y o el hilo no son adecuados para...

Page 112: ... fil n est pas enfil6 correctement Voir page 17 3 Uaiguille n est pas ins6r6e correctement Voir page 17 Le fil de canette se 1 Tensions mal r6gl6es Voir pages 53 _ 57 brise 2 La machine n est pas enfil6e cerrectement Voir pages 31 _ 45 3 Uaiguille et ou le fil ne cenviennent pas au tissu Voir pages 50 51 59 _ 63 69 _ 95 4 Le fil n est pas dans les disques de tension Voir pages 33 37 41 43 La coutu...

Page 113: ... 366 7278 6 a m 11 p m CST 7 days a week U S A only www sears comlpartsdirect To purchase or inquire about a Sears Service Agreement or Sears Maintenance Agreement 1 800 827 6655 U S A 1 800 361 6665 Canada 7 a m 5 p m CST Mon Sat 9 a m 8 p m EST M F 4 p m Sat Para pedlr servlcio de reparacl6n a domlcdlo y para ordenar plezas 1 888 SU HOGAR sM 1 888 784 6427 Au Canada pour service en fran ais 1 80...

Reviews: