background image

Summary of Contents for 580.74053300

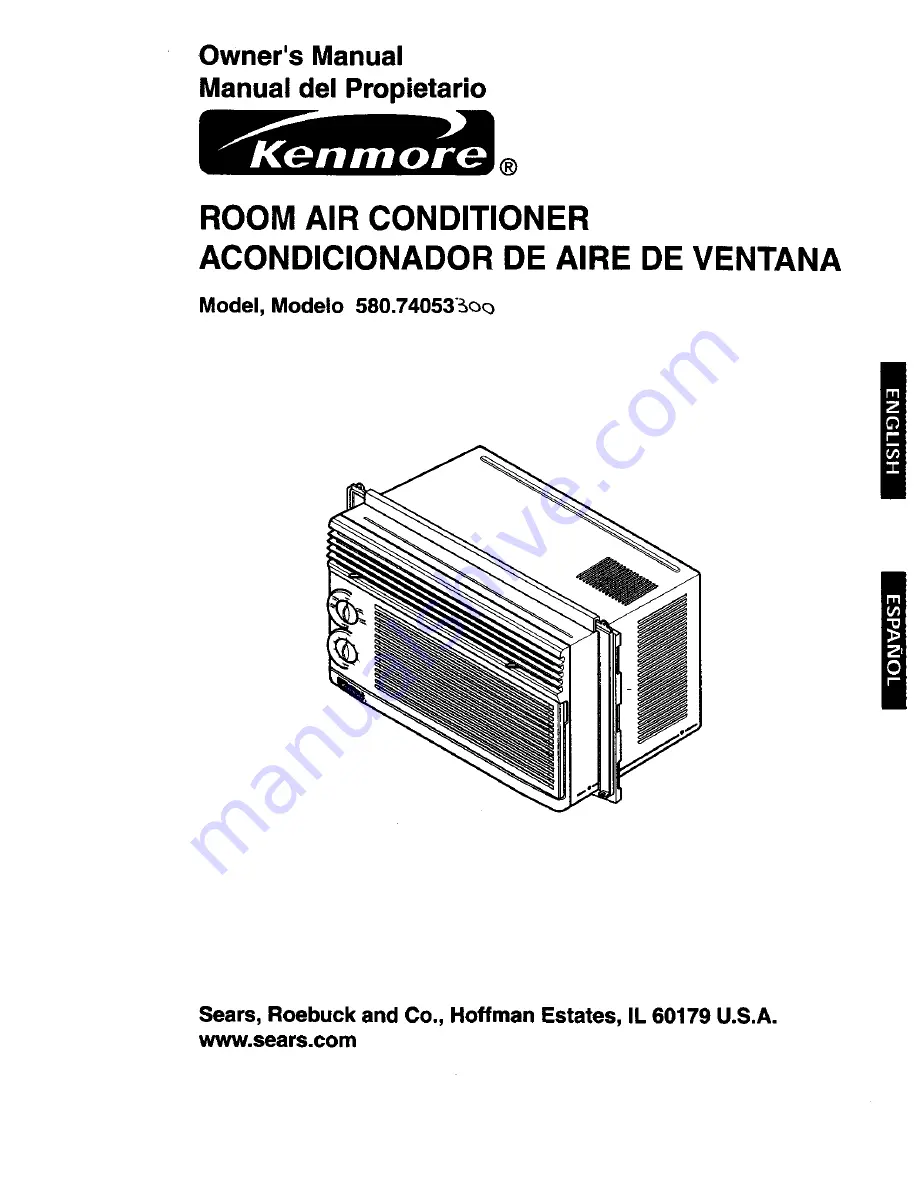
Page 1: ...Owner s Manual Manual del Propietario ROOM AIR CONDITIONER ACONDICIONADOR DE AIRE DE VENTANA Model Modelo 580 74053_o_ Sears Roebuck and Co Hoffman Estates IL 60179 U S A www sears com ...

Page 2: ...ctions inthis owner smanual Searswill repairthisair conditioner free ofcharge it defectiveinmatedalor workmanship FULL FIVE YEAR WARRANTY ON SEALED REFRIGERATION SYSTEM For five years from the date of purchase when this air conditioner is operated and maintained for normal room cooling according to instructions in this owner s manual Sears will repair the sealed refdgeration system consisting of r...

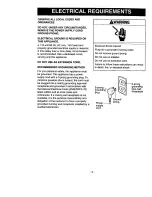
Page 3: ...rong grounding plug for protection against shock hazards Your air conditioner must be plugged into a propedy grounded wall receptacle If the wall receptacle you intend to use is not adequately grounded or protected by a time delay fuse or circuit breaker have a qualified electrician install the proper receptacle Do not run air conditioner with a protective covering This could result in mechanical ...

Page 4: ...ble shock hazard the cord must be plugged into a mating grounding type wall receptacle and grounded in accordance with the National Electrical Code ANSI NFPA 70 latest edition and all local codes and ordinances If a mating wall receptacle is not available it is the personal responsibility and obligation of the customer to have a properly grounded 3 prong wall receptacle installed by a qualified el...

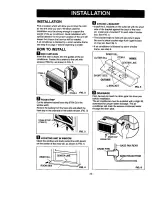
Page 5: ...L for future reference The carton is the best way to store unit during winter or when not in use To avoid riskof personal injury propertydamage or roductdamage due tothe weightof this device and sharp edges that may be exposed Air conditionerscovered in this manual pose an excessiveweight hazard Two or more peopleare neededto move and installthe unit To preventinjury or strain use properlifting an...

Page 6: ...rside of the bottom window FIG 3 _1 LOCATING UNIT IN WINDOW Open the window and mark center line with pencil on the center of the inner sill as shown in FIG 4 L_ A B ACH L BRACKET Install the L brackets on the outer sillwith the short side of the bracket against the back of the inner sill Install one L bracket 8 to each side of center line See FIG 5 The bracket helps to hold unit securely in place...

Page 7: ...he inner window sillacross the full width of the sill The wood stripshould be thick enough to raise the height of the window sill so that the unit can be installedwithout interference from the the storm window frame See FIG t 1 Top of wood stdpshould be approximately 3 4 higher than the storm window frame to help condensation to drain propedy to the outside Install a second woodstdp approximately ...

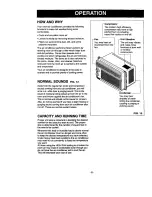
Page 8: ...ld not be cause for concern Also do not be alarmed ifyou hear a slight hissing or gurgling sound coming from your air conditioner after it is off These are normal coolant noises CAPACITY AND RUNNING TIME Proper unit size is important in deciding the desired comfort for the area you want to cool The proper size is determined by the number of square feet in the area to be cooled Whenever the heat or...

Page 9: ...ortable air flow with control tab 5 Once the room has cooled adjust the TEMP and MODE control to the setting you find most comfortable NOTE If the air conditioner is turned off wait 3 minutes before restarting This allows pressure inside the compressor to equalize Failure to wait 3 minutes before restarting may cause inefficient operation If you move the TEMP control to a warmer then immediately b...

Page 10: ...of these directions OFF HIGH _ HIGH F iF coo LOWfl II I LOW FANo_OCOOL MODE 5 3e 4 o6 o7 2 _ 8 TEMP FIG 14 FIG 15 TEMP Turn the TEMP dial to a higher number for a cooler room temperature Position 5 or 6 is a normal setting for average conditions MODE OFF Turns the air conditioner off HIGH FAN High fan speed operation without cooling LOW FAN Low fan speed operation without cooling HIGH COOL Cooling...

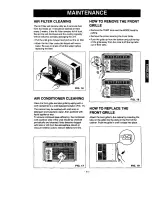
Page 11: ... pull the top of the grille away from the case to lift the top tabs out of their slots FIG 16 AIR CONDITIONER CLEANING Clean the front grille and inlet grille by wiping with a cloth dampened in a mild detergent solution FIG 17 The cabinet may be washed with mild soap or detergent and lukewarm water then polished with liquid appliance wax To ensure continued peak efficiency the condenser coils outd...

Page 12: ...efrost setcelector to FANposition TEMP Control settoncoldfornight time cooling Todefrost thecoil setselector toa FAN pseilJon Tnsn settheMODE codcrol at FAN _ or High Cool with theTEMP control toawarmer position 11 1E AIR CONDmONER COOUNG BUT ROOM ISTOO WARM Check if Dirtyairfilter airrestdeted TEMPContro_ settoowarm Frontof unitis blockedbydrapes blinds furniture etc Air distitbulJon is restncted...

Page 13: ......

Page 14: ...nual del propietario Sears reparard gratuitamente este aquipo de aire acondicionado si tiene algt_n defecto en materiales o fabdcaci6n GARANT A TOTAL DE ClNCO ANOS POR EL SISTEMA DE REFRIGERACION HERMETICAMENTE SELLADO Durante cinco afios a partir de la fecha de compra sieste equipo de aire acondicionado recibe mantenimiento y se utiliza para el enfdamianto normal de habitaci6n segl_n las instrucc...

Page 15: ...con conexi Yla liena para protegedecontra dpsgos de descargas el_eldcas Su aire acondicicodo debe ser enchufadoen unatoma de la pareddebidamenteconectadoa la _erra Si la tomade cordentede pared que ustedpiensausarno estdconactada correctamente a tiena o no estd protegidacon un fusible de acci6n relardada o conun interruptor de circuito haga que un electdcista caJificado le instalela toma de corden...

Page 16: ... pared con conexi6n a tierra y esta conexi6n debe hacerse de acuerdo con la 61timaedici6n del C6digo EI6ctrico Nacional ANSI NFPA 70 as come con losc6digos y reglamentos locales Si no existe una cenexi6n de pared adecuada el cliente tiene ia responsabilidady la obligaci6n de mandar instalar con un electricista calificade una conexi6n de pared adecuada de tres terminales con conexi6n a tierra Pelig...

Page 17: ...IETARIO para deele sirra comoreferencia enel futuro Lacaja eslamejor maneradeconservarla unidadduranteel inviernoocuandono estaenuse Paraevitarel desgo de heridaspersonales daSos en losbienes odaSo en el producto debe set expuestoel agudez de los bordeey el peso apto del aparato El aire acondicionado del que se habla en este manualafirma peligro de peso excesivo Dos omas personasse requiem paramov...

Page 18: ... la lineacentralen el centro del alfdizar interior como se muestra en la Figura 4 ANTEPECHO INTERIOR TABURETE Flgura 4 O SOPORTE DE FIJACI _N L Instale los sopol_es L en la solera extema con el lado corto del soporte contra la parte trasera de la solera interna Instale un soporte L de 8 a cada lado de la Ifnea central V_ase la Figura 5 El soporte ayuda a mantener la unidad correctamente en su luga...

Page 19: ...Ellistbndemaderadebeser suficientemente gruosoparalevantarla altura delalf6izardela ventaos detatmaneraquela uni lad puedaset instaladesinla interferencia del marcodela contraventana Veala Figura11 La partesuperior del list6ndemaderadebeser aproximademente 3 4 rn_saltoqueel marco dela osntraventana oel istdndemadera fueradela case pare que elvaporemanado dela unidad puedadrenar adecuadamente hacia...

Page 20: ...do de silbido o borboteo proveniente de su equipo de aire acondicionado despues que Io apaga Estos son ruidos normales del refrigerante Compresor El modemo compresorde gran eficienciapuecleproducirun ruido agudo de murmulloo un mido de pulsaci6nque viene y se va Ventilador Usted puede escucharel movimiento del aire proveniente del ventilador Vlbraciones de la unidad La unidad puede vibrary hacer r...

Page 21: ...2 Ajuste el control de temperatura TEMP en a graduaci6n m_s fda 3 Ajuste el control de MODE al m_s alto nivel fresco 4 Ajuste las persianas con a pesta_a de control para que el flujo de aire sea de su agrado 5 Una vez que la habitacibn se haya enfdado ajuste el control de temperatura TEMP a la graduadbn que usted considere rods confortable NOTA Si se apaga el aire acondicionado espere 3 minutos an...

Page 22: ...dirigirse hacia la izquierda la derecha recto o en cualquier combinacibn de estas direcciones Flgura 15 TEMPERATURA Gire el dial de TEMP al n_mero m_s alto para una temperatura ambiente mds fmsca La posicibn 5 o 6 es una graduaci6n normal para las condiciones promedios MODO OFF HIGH FAN LOW FAN HIGH COOL LOW COOL Apaga el equipo de aire acondicionado La operacibndel ventilador a alta velocidadsine...

Page 23: ...7 El gabinete puede lavarse con un jab6n odetergente suave y agua tibia seguidamente puede pulirsecon cera Iiquida especial para electrodomdsticos Para asegurarse de la eficiencia maxima y contfnua el serpentin del condensor lado de enfrente de la unidad tiene que set chequeado periodicamente y limpiarse si se Ilega a obstruircon tizne o tierra de la atm6sfera Cepille o aspire el serpentinexterior...

Page 24: ...conge_ar elsepentinIleveel selector a lapos_ci6n FAN Seguidarnente _re elcontrol detemperatura _MPenel santide de asagulas delm_ para Ilevade hastausegraduad__s _ide Limpieel flltro Cu_ulte lasecci_ Mantenimiento Paradescongelar Ileveel selector a la_ FAN Paradescongelar el serpentin Ileveelsek3ctor a lapoelel_n FAN Seguidamente ajusteelcontrolde temperatura a unaposi_ rndsc_lida EL AIRE ACONDICIO...

Page 25: ... 25 ...

Page 26: ...o26 ...

Page 27: ...quipment and electronics call or go on line for the location of your nearest Sears Parts Repair Center 1 800 488 1222 Call anytime day or night U S A only www sears com To purchase a protection agreement on a product serviced by Sears 1 800 827 6655 U S A 1 800 361 6885 Canada Para pedir serviciode reparaci6n a domicilio y para ordenar piezas 1 888 SU HOGAR _ 1 888 784 6427 Au Canada pour service ...

Reviews: