background image

Summary of Contents for 790.3673 Series

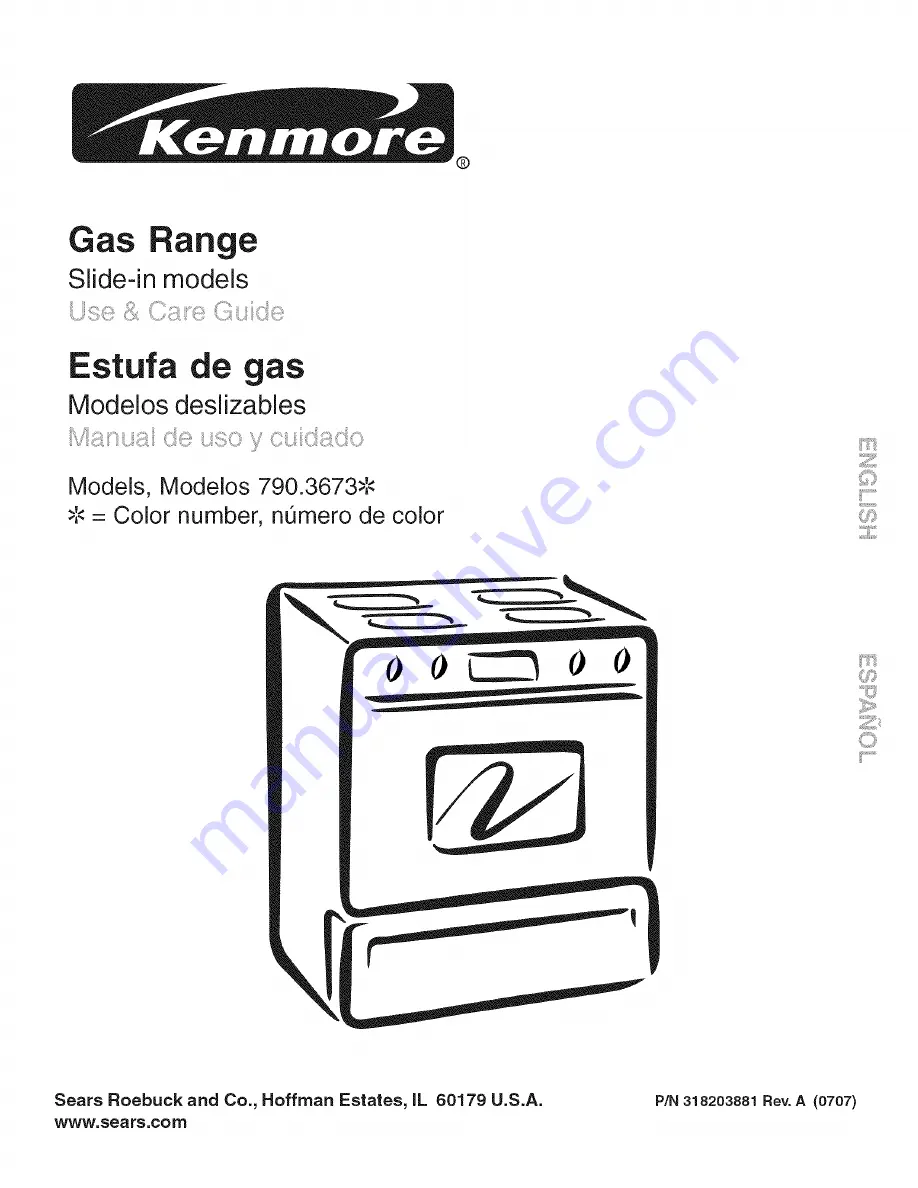
Page 1: ...ge Slide in models iii _ ill L_ _ Estufa de as Modelos deslizables Models Modelos 790 3673 Color number nQmero de color Sears Roebuck and Co Hoffman Estates IL 60179 U S A www sears com P N 318203881 Rev A 0707 ...

Page 2: ...sulting from unauthorized modifications made to this product Disclaimer of implied warranties limitation of remedies Customer s sole and exclusive remedy under this limited warranty shall be product repair as provided herein Implied warranties includingwarranties of merchantability or fitness for a particular purpose are limited to one year or the shortest period allowed by law Sears shall not be ...

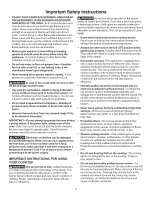
Page 3: ...n accordance with the National Fuel Gas Code ANSi Z223 1 latest edition and National Electrical Code ANSI NFPA No 70 latest edition and local code requirements install only per installation instructions provided in the literature package for this range Sears Parts Repair is the recommended repair service for this appliance Know how to disconnect the electrical power to the appliance at the circuit...

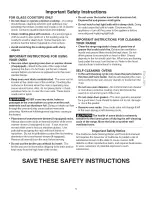
Page 4: ... utensil to flame will also improve efficiency Do not use stove top grills on the burner grates of sealed gas burners If you use a stove top grill on a sealed gas burner it will cause incomplete combustion and can result in exposure to carbon monoxide levels above allowable current standards This can be hazardous to your health Know which knob controls each surface burner Place a pan of food on th...

Page 5: ... moving Do not use the broiler pan without its insert The broiler pan and its insert allow dripping fat to drain and be kept away from the high heat of the broiler Do not cover the broiler insert with aluminum foil Exposed fat and grease could ignite Do not touch a hot light bulb with a damp cloth Doing so could cause the bulb to break Disconnect the appliance or turn off the power to the applianc...

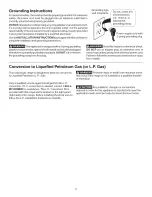
Page 6: ...ctly into a properly g rounded receptacle DO NOTcut or remove the grounding prong from this plug Avoid fire hazard or electrical shock DO NOT use an adapter plug an extension cord or remove grounding prong from electrical power cord Failu re to follow this warning can cause serious injury fire or death Conversion to Liquefied Petroleum Gas or L P Gas This natural gas range is designed to allow for...

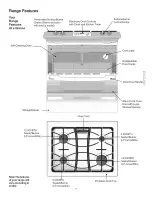
Page 7: ...l Knobs Self Cleaning Oven __ Oven Light 2 Adjustable Oven Racks Storage Drawer Oven Vent Z Oven Door Handlei Glass Front Oven Doorwith Large WindowOpening 12 200 BTU Sealed Burner LP convertible 5 OOOBTU Sealed Burner LP convertible 14 000 BTU Sealed Burner LP convertible Note The features of your range will vary according to model 9 500 BTU Sealed Burner LP convertible Porcelain Cook Top ...

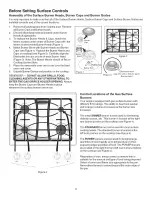
Page 8: ...MATERIAL TO ENTER THE GAS ORiFiCE HOLDER OPENING Always keep the Burner Caps and Burner Heads in place whenever the surface burners are in use Figure 1 W14K Figure 2 Figure 3 align into slot or hole for each Burner Head Figure4 Control Locations of the Gas Surface Burners Your range is equipped with gas surface burners with different BTU ratings The ability to heat food quicker and in larger volum...

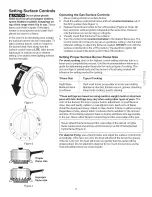
Page 9: ...n the highest control setting and then turn to a lower one to complete the process Use the recommendations below as a guide for determining proper flame size for various types of cooking The size and type of utensil used and the amount of food being cooked will influence the setting needed for cooking Flame Size Type of Cooking High Flame Start most foods bring water to a boil pan broiling Medium ...

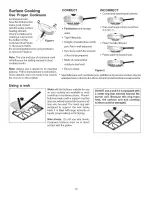
Page 10: ...ell balanced Pan sizes match the amount of food to be prepared Made of material that conducts heat well Easy to clean Heavy handle tilts pan Flame extends beyond unit Figure 2 Specialty pans such as lobster pots griddles and pressure cookers may be used but must conform to the above recommended cookware requirements Using a wok Woks with flat bottoms suitable for use on your cooktop are available ...

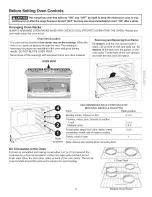
Page 11: ...ven Racks To remove pull the rack forward until it stops Lift up front of rack and slide out To replace fit the rack onto the guides on the oven walls Tilt the front of the rack upward and slide the rack back into place i 1 ill i Rack _positions RECOMMENDED RACK POSITIONS FOR BROILING BAKING ROASTING Food Rack position Broiling meats chicken or fish 3 or4 Cookies cakes pies biscuits muffins 1 rack...

Page 12: ...mperature is reset higher than the actual oven temperature The DOOR LOCKED light will flash when the oven door locks and unlocks or when using the Self Clean cycle or when the oven lockout is activated The indicator light will glow constantly after the door locks WARM HOLD PAD Used to set the Warm Hold feature STOP CLEAR PAD Used to clear any function previously entered except the time of day and ...

Page 13: ...display will countdown in seconds 4 When the set time has run out the timer will beep 3 times it will then continue to beep 3 times every 60 seconds until _ is pressed Note The indicator light located above the _ pad will glow while the minute timer is active Note The minute timer does not start or stop cooking It serves as an extra timer in the kitchen that will beep when the set time has run out...

Page 14: ...ours and 59 minutes The oven can be programmed to override this feature for continuous baking To set control for continuous baking 1 2 Press and hold _ down for 5 seconds until tone is heard hr will appear in display for continuous cooking The current time of day will return to the display To cancel the Continuous Bake function press and hold for 5 seconds until tone is heard 12hr will appear in d...

Page 15: ...he correct time of day 2 Place the food in the oven 3 Press appears in the display 4 Within 5 seconds press the A or V The display will show 350 F 177 C By holding the A or V the temperature can then be adjusted in 5 F increments 1 C if the control is set to display Celsius 5 Press _ 0 00 will flash in the display HR MiN 6 Press the A or V until the desired baking time appears 7 Press _i_ The earl...

Page 16: ... too cool Oven overcrowded Oven door opened too frequently Allow oven to preheat to the selected temperature before placing food in oven Choose pan sizes that will permit 2 to 4 5 1 cm to 10 2 cm of air space on all sides when placed in the oven Use a medium weight aluminum baking sheet Allow oven to preheat to the selected temperature before placing food in the oven Use proper rack position for b...

Page 17: ...ess _ 7 When Broil Rack Position Table Refer to Fig 2 Rack Postion Food category 3 4th rack position Medium rare steaks hamburgers 3rd rack position Fish medium steaks pork chops 2nd rack position Well done foods such as chicken lobster Figure 1 Note The broiler pan and the insert allows grease to drain and be kept away from the high heat of the broiler DO NOT use the pan without the insert DO NOT...

Page 18: ...n Warm Hold OFF at any time press _ The Warm Hold indicator light above the pad will turn OFF Adjusting the Oven Temperature Your oven control has been precisely set at the factory This setting may differ from your previous oven however so your recipe times may not give you the results you expect If you think that the oven is cooking too hot or too cool for your recipe times you can adjust the con...

Page 19: ...ould cause damage Remove the broiler pan and insert all utensils and any aluminum foil These items cannot withstand high cleaning temperatures Oven racks do not have to be removed If they are not removed during the Self Clean cycle their color will turn slightly blue and the finish will be dull If left in after the cycle is complete and the oven has cooled rub the sides of the oven racks with wax ...

Page 20: ...ds for the oven door to lock 6 CLn will appear in the display during the Self Clean cycle and the Door Locked light will glow until the Self Cleaning cycle is completed or cancelled and the oven temperature has cooled When the Self Clean Cycle is Completed 1 The time of day or End will appear in the display window and the Clean and Door Locked light will continue to glow 2 Once the oven has cooled...

Page 21: ...t then push the knob into place Clean burner grates broiler pan and insert in the dishwasher and dry upon removal If soils are not removed follow the cooktop cleaning instructions below Gentle scouring with a soapy scouring pad will remove most spots Rinse with a 1 1 solution of clear water and ammonia If necessary cover difficult spots with an ammonia soaked paper towel for 30 to 40 minutes Rinse...

Page 22: ...movable Do not remove any parts from the cooktop until they have completely cooled and are safe to handle Do not operate the surface Burners without the Burner Caps and Burner Heads properly in place Surface To Clean the surface Burner Caps and Burner Heads Use a soap filled scouring pad or a mild abrasive cleanser to clean the surface Burner Caps and Burner Heads The ports or slots around the Bur...

Page 23: ... fully over the hinge lever hooks 3 Grab the door by the sides and pull the bottom of the door up and toward you to disengage the hinge supports Keep pulling the bottom of the door toward you while rotating the top of the door toward the range to completely disen gage the hinge levers Figure 2 4 To clean oven door follow the instructions provided in the General Care Cleaning table To Replace Oven ...

Page 24: ...e oven is unplugged and all parts are COOL before replacing the oven light bulb Do not turn the oven light on during a self cleaning cycle High temperature will reduce lamp life On some models an interior oven light will turn on automatically when the oven is opened The oven light may be turned on when the door is closed by using the oven light switch located on the Electronic Oven control The ove...

Page 25: ...MY HOME See back cover Electrical power outage Check house lights to be sure Call your local electric company for service Surface burners can be lit manually Oven control beeps and displays any F Electronic control has detected a fault condition Press STOP CLEAR to clear the code error for exemple Fll display and stop beeping Reprogram oven if fault recurs record fault number Press STOP CLEAR and ...

Page 26: ...operly prepared Remove excess fat from meat Remove remaining fatty edges to prevent the meat from curling but do not cut into the lean of the meat Broiler pan used without the Broiler Pan Insert or insert is covered with foil DO NOT use the Broiler Pan without the Broiler Pan Insert or cover the insert with foil Broiler Pan or Broiler Pan Insert needs to be cleaned Ecessive smoking is caused by bu...

Page 27: ...lidad de su nuevo producto El acuerdo incluye Io siguiente _ Piezas y mano de obra necesarias para contribuir a mantener el funcionamiento adecuado de los productos utilizados en condiciones normales de uso no s61o en caso de defectos de los productos Nuestra cobertura va mucho m s all que la garantia del producto No se aplican deducibles ni exclusiones por fallas del funcionamiento es deck verdad...

Page 28: ...y in items like vacuums lawn equipment and electronics call or go on line for the location of your nearest Sears Parts Repair Service Center 1 800 488 1222 U S A 1 800 469 4663 Canada Call anytime day or night www sears com www sears ca To purchase a protection agreement on a product serviced by Sears 1 800 827 6655 U S A 1 800 361 6665 Canada Para pedir servicio de reparaci6n Au Canada pour servi...

Reviews: