background image

Summary of Contents for 790.4715

Page 1: ... l T E DUAL EL Jide in modems ModeJos desJizabJes Models modelos 790 4715 color number nurnero de coJor 0 0 OO Sears Roebuck end Co Hoffman Estates IL 60179 U S A www sears com P N 318200876 _evo C _04_0 ...

Page 2: ...duct if it is abused misused or used for other than the intended purpose o Damage to the cooktop glass caused by the use of cleaners or utensils other than the recommended cleaning cream and tools o Damage to the cooktop glass caused by hardened spills of sugary materials including starches from vegetables or pastas or melted plastic that are not cleaned off according to the directions in the Use ...

Page 3: ...o 7g latest edition and Iocam code requirements Install only per installation instructions provided in the literature package for this range Ask your dealer to recommend a qualified technician and an authorized repair service Know how to disconnect the power to the range at the circuit breaker or fuse box and gas supply at the main shutoff valve in case of an emergency Remove the drawer to access ...

Page 4: ...t has been exposed to a temperature above 0 C 32 F for at meast 3 hours before connecting it to the power suppmy IMPORTANT INSTRUCTIONS FOR USING YOUR COOKTOP Know which knob controls each surface heating unit Always turn the knob to the MTE position when igniting the burners Visually check that burner has lit Then adjust the flame so it does not extend beyond the edge of the utensil _ Use proper ...

Page 5: ...urn off the power to the appliance before removing and replacing light bulb mMPORTANT mNSTRUCTmONS FOR CLEANmNG YOUR RANGE _ Clean the range reguBarmy to keep aH parts free of grease that could catch fire Exhaust fan ventiIation hoods and grease fiIters should be kept ctean Do not aIIow grease to accumulate on hood or filter Greasy deposits in the fan couId catch fire When you are flaming food und...

Page 6: ...dule a service appointment online mn Canada Maintenance Agreements Your purchase has added value because you can depend on Sears HomeCentraPfor service With over 2400 Service Technicians and more than a million parts and accessories we have the tools parts knowledge and skills to ensure our pledge We Service What We Sell Your Kenmore product is designed manufactured and tested to provide years of ...

Page 7: ...c Warmer Zone Control Surface Burner Controls Broil Element Self _g Oven 1 Broil Pan 1 insert 1 Searing Grill 12 000 BTU Sealed Burner LP convertible 9 50O BTU Sealed Burner LP convertible Note The features of your range wilt vary according to model T Warmer Drawer with Rack Warmer Zone Element Glass Oven Door with Large Window Opening 5 000 BTU Sealed Burner 17 000 BTU Sealed Burner LP convertibl...

Page 8: ...rifice HoUderand that the Ebctrode is located properly in the slot of each Burner Head See Figure 2 Proper Burner Head placement insures that each Burner will have the correct spark required for surface gas ignition 2 Place the correct Burner Caps at each of the burner locations Burner Cap Pilot Hob must face up Each of the 4 four Burner Heads MUST have a Burner Cap installed to insure proper igni...

Page 9: ...tion on the cooktop see Page 12 Operating the Gas Surface Controls 1 Place cooking utensil on surface burner 2 Push the surface control knob down and turn counterclockwise out of the OFF position See Figure 2 3 Release the knob and rotate to the LFE position Note All four electronic surface ignitors will spark at the same time However only the burner you are turning on will ignite 4 Visually check...

Page 10: ... adjustment A good flame is clear blue and hardly visible in a weNighted room Each cone of flame should be steady and sharp Adjust or clean burner if flame is yellow orange Using the Wok Stand The Wok Stand provided with your range is designed to allow round bottomed woks to be used It is recommended that you use a 14 inch diameter 35 5 cm Wok The Wok Stand MUST be used on either the right or left...

Page 11: ...oks with Hargefiat bottoms may aHsobe used on your cooktop Surface Burner Grates without the Wok Stand See Figure 2 Hnsure the stability of the fiat bottom wok before cooking without the Wok Stand HfunstabHe DO NOT use the fiat bottom wok without the Wok Stand Rounrf bottom woks with a support ring shouHdNOT be used without the Wok Stand See Figure 3 The supporting ring was not designed for proper...

Page 12: ...e to turn ON the power level for Hi see Figure 2 or to turn ON the power level for LO see Figure 5 The Warmer Zone Indicator light located above the ON OFF pad will turn on steady and the Hot Su ace indicator light will turn ON when the Warmer Zone becomes hot Each touch _ or _ will increase or decrease the power levels The Warmer Zone has 5 power levels from HI see Figure 2 through MED see Figure...

Page 13: ... of the rack upward and slide the rack back into place Arranging Oven Racks To bake on a single rack place the rack in position 2 or 3 To bake on 2 racks place the racks in positions 2 and 3 f 1st Rack __ _ position 2nd Rack zpos t on _ position Rack positions RECOMMENDED RACK POSITIONS FOR BROILING BAKING ROASTING Food Rack position Broiling meats chicken or fish 1 or 2 Cookies cakes pies biscuit...

Page 14: ...maintain quaHity Do not use plastic wrap to cover food PJastic may meJt onto the drawer and be very difficult to ctean Use onHyutensiHsand cookware recommended for oven use in the Warmer Drawer AHwaysuse pothoHders or oven mitts when removing food from the Warmer Drawer as cookware and pHates wiHH be hot and you can be burned Warmer Drawer Temperature Selection Recommended Warmer Drawer settings t...

Page 15: ...tting touch Qpad at least once Note For best results preheat the Warmer Drawer before adding the food or bread dough An empty drawer will preheat in approximately 15 minutes 4 When the food is ready for removal touch the On OFF pad once to turn the Warmer Drawer or bread Proof feature OFF The Warmer Drawer indicator light will turn OFF Preparing Dread Dough for the Warmer Drawer The Warmer Drawer ...

Page 16: ...ormal Meats Cakes baking and Breads feature cooking feature STOP CLEAR Use to cancel any oven mode previously entered except the time of day and minute timer Press STOP CLEAR to stop cooking Press STOP CLEAR and hold for 3 seconds to activate the Oven Lockout feature Press and hold again for 3 seconds to disable the Oven Lockout Minimum and Maximum Contro Pad Settings FEATURE PREHEAT TEMP BAKE TEM...

Page 17: ...in the dispHay Press _ CLO wiHH disappear and the chock wiHH start Figure 4 Changing between 12 or 24 hour time of day display 1 Press and hoHd_CLOC_for 6 seconds Figure 3 WhiHehoHding the pad down the current time of day wiHH remain and CLO wiHH disappear from the dispHay Figure 4 CONTHNUE hoHdingthe pad untiHa beep is heard _foc 6 seconds 2 The dispHaywiHH show either 12Hr Figure 5 or 24Hr Figur...

Page 18: ...L _EAPR to reject the change PRESS DISPLAY or c L E_ R Figure 1 Figure 2 Figure 3 Figure 4 Setting Kitchen Timer The KITCHEN TIMER _ _ pad controls the Kitchen Timer feature The Kitchen Timer serves as an extra timer in the kitchen that will beep when the set time has run out It does not start or stop cooking The Kitchen Timer feature can be used during any of the other oven control functions Refe...

Page 19: ... oven Hghts mNSTRUCTmONS To activate the Oven Lockout feature STOP 1 Press and hoUd _CL _ R R for 3 seconds Figure 1 2 After 3 seconds the Uockicon Hght _ wHU appear a beep wHU sound and BOOR LOCKED wHU flash in the dispUay Once the oven door is Uocked the BOOR LOCKED indicator will stop flashing and remain on along with the lock icon light To reactivate normam oven operation STOP 1 Press and hold...

Page 20: ...R _o reject the change _for 7seconds Figure 1 Figure 2 Setting Silent Control Operation The STARTTIME and CLEAN _ _ pads control the Silent Control operation feature The Silent Control operation feature allows the oven control to be operated without sounds or beeps whenever necessary if desired the control can be programmed for silent operation and later returned to operating with all the normal s...

Page 21: ...ure wiHH be dispHayed Figure 4 Hfthe beep was missed a quick gHanceat the dispHay with oven temperature showing in the oven dispHay is a good way to check that the oven has aHready reached the preheat temperature Once the oven has preheated PLACE FOOD IN THE OVEN The BAKE HightwiHH stay on STOP STOP Press _L E_R when baking is compHete or to canceH the preheat feature CLEAR Figure 1 Figure 2 Figur...

Page 22: ... oven temperature reaches 350 F and the display wiii show 350 and BAKE FigureS Pressing C E_ R will cancel the Bake feature at any time LEAR To change the Bake Temperature examp e changing from 350 to 425 F 1 After the oven has already been set to bake at 350 F and the oven temperature needs to be changed to 425 F press _AKE_ Figure4 and o wiii show in the display 2 Press 4 Q _ Figure 5 BAKE flash...

Page 23: ...3 When using Convection Bake with a single rack place oven rack in position 2 or 3 If cooking on multiple racks place the oven racks in positions 2 and 3 for 2 racks See Figure 2 4 Cakes have better results when baked with the Cake pad in the Food Categories feature Air circumatien during Convection Figure Bake 1st Rack position I o9 pos on 3rd Raok pos t on Figure 2 Benefits of Convection Sake So...

Page 24: ...the current time of day will appear in the display Note After the Timed Bake feature has activated press 0V_NCOOK to display the bake time remaining in the Timed Bake mode Once Timed Bake has started baking a beep will sound when the oven temperature reaches the set temperature _p Press CL L_ R when baking has finished or at any time to cancel the Timed Bake feature PRESS DISPLAY OVEN COOK OVEN CO...

Page 25: ...splay Figure 5 Note Baking time can be set for any amount of time from 1 minute to 11 hours and 59 minutes 8 Press TIMED BAKE and 350 will show Figure6 Press _ Enter the desired start time using the number pads 9 10 Press When Delayed Time Bake starts the set oven temperature will disappear TIMED DELAY BAKE and the current time of day will appear in the display Figure 8 11 When the desired start t...

Page 26: ...rve Warm indicator light will flash Note If further pads are touched within 25 seconds the request to turn ON serve Warm will be cleared 3 Press _ The Serve Warm Indicator Light will turn ON steady indicating Serve Warm is ON Figure 1 4 To turn the Sewe Warm OFF at any time press again _ The serve Warm Indicator Light will turn OFF If the Sewe Warm pad is not pressed again the Serve Warm feature w...

Page 27: ...is desired minimum broil temperature setting is 400 F press the desired temperature before continuing to step 5 5 Press _A_ The oven will begin to broil BROIL and 550 d will appear in the display Figure 2 6 Broil on one side until food is browned turn and cook on the second side Season and serve Note Always pull the rack out to the stop position before turning or removing food 7 To cancel broiling...

Page 28: ... and 350 wili appear in the dispiay See Figure 3 The convection fan icon wiii come STOP to Press _CLEAIBI stop cooking Meats Cakes or Breads or to cancei cooking Meats Cakes or Breads at any time PRESS DISPLAY QQdb Recommended Meats Cakes Breads i foods to be cooked in each Meat Cakes Breads category Pouitry Brownies Rolis Figure 4 Biscuits Baked Custards Muffins Cheescake Combread ii Roasting ins...

Page 29: ...ace of the oven Oven racks shouid be removed or eise their finish wili duli and their color turn siightiy biue if they do go through the seif ciean cycie wait untii the oven has cooled then remove the racks and rub their sides with wax paper or a cioth containing a smali amount of baby or salad oii this wili make the racks giide easier back into their positions ii Figure 2 The bake element may be ...

Page 30: ...losed Press _ CLEAN will flash and 3 00 HR will show in 2 the display Figure 1 The control will automatically clean for a 3 hour period default self cleaning cycUetime Note if a 2 or 4 hour clean time is desired press 2 for 2 hour or press _for hour clean time Set the time based a 4 cUeaning on the amount of soil light medium or heavy See above 3 Press _ The DOOR LOCKED icon will flash CLEAN icon ...

Page 31: ...bally clean for a 3 hour period default self cleaning cycle time Note If a 2 or 4 hour clean time is desired press 2 for 2 hour or press _for hour clean time Set the time based a 4 cleaning on the amount of soil light medium or heavy See previous page 3 Press _ The DOOR LOCKED icon wiii flash CLEAN icon and the letters CLn will remain on in the display Figure 2 4 Press Enter the desired start time...

Page 32: ...aking resuUtsshouUdhelp you to decide how much of an adjustment is needed mNSTRUCTmONS PRESS To adjust the oven temperature higher 1 Press _ for 6 seconds Figure 1 2 To increase the temperature use the number pads to enter the desired change Example30 F __ Figure2 The _ temperature may be increased as much as 85 F 17 C 3 Press _ to accept the temperature change and the display will return to the t...

Page 33: ...ers that are especially made for cleaning stainless steel Always be sure to rinse the cleaners from the surface as bluish stains may occur during heating that cannot be removed Gentle scouring with a soapy scouring pad wiii remove most spots Rinse with a 1 1 solution of clear water and ammonia ffnecessary cover difficult spots with an ammonia soaked paper towel for 30 to 40 minutes Rinse with clea...

Page 34: ...face Burner Grates properly in ptace To Clean the Burner Caps Burner Heads Grates and Wok Stand Use a soap filled scouring pad or a mild abrasive cleanser to clean the surface burner caps and surface burner heads The Grates and Wok Stand are designed to be Dishwasher safe for cleaning The ports or slots around the burner heads must be routinely cleaned If residue still remains in these ports use a...

Page 35: ... OFF and the cooktop is COOL chemically_damageDO NOTthe ceramic glassUSe a cooktOPsurface Cleaner on a hot cooktop The fumes can be hazardous to your health and can For light to moderate soil Apply a few drops of CookTop Cleaning Creme directly to the cooktop Use a paper towel or a 3M Scotch Brite Blue Multi Purpose No Scratch Scrub Sponge to clean the entire cooktop surface Make sure the cooktop ...

Page 36: ...on both hinge supports and engage it in the hinge levers Figure 1 You may have to apply a little downward pressure on the door to pull the locks fully over the hooks 3 Grab the door by the sides pull the bottom of the door up and toward you to disengage the hinge supports Keep pulling the bottom of the door toward you while rotating the top of the door toward the range to completely disengage the ...

Page 37: ...th finger I Push down latch Right Glide with finger Figure 1 Figure 2 Removing and Replacing Warmer Warm Ready TM Drawer To Remove Warmer Drawer 1 _Turn poweroff before removing thewarmerdrawer 2 Open the drawer to the fully opened position 3 Locate glide lever on each side of drawer pull up on the left glide lever and push down on the right glide lever See Figure 1 5 Puli the drawer away from the...

Page 38: ...ss shield 3 Replace the old bulb with a new 40 watt appliance bulb 4 Replace Glass Shield over bulb and snap Wire Holder into place 5 Turn power back on again at the main source or plug in the range Cooking Tables Foods for __ CONVECTION BAKEpad Decrease normaJ cook time by Frozen foods pies pastries and pizza Refrigeratorcookies Rolls Breads Fresh Pies Pastries 15 25 15 35 15 30 20 25 10 20 Begin...

Page 39: ...hts to be sure Call your local electric company for service Oven control beeps and displays F1 F2 F3 or Fg This oven is equipped with a state of the art electronic oven controller Among the many features is a full time oven circuit diagnostics system The controller constantly monitors the internal circuitry as well as several crucial oven circuits to insure they are all operating correctly If at a...

Page 40: ...for pie spillovers or large amounts of grease on the oven bottom Wipe up excessive spillovers before starting the self clean cycle if flames or excessive smoke are present stop the self clean cycle and follow the steps under Stopping or interrupting the Self Cleaning Cycle in the Oven Cleaning Section Oven smokes excessively during broiling Control s not set properly Follow instructions under Sett...

Page 41: ...r entre el vidrio y el borde de a cubierta porce anizada Sears no cubre o Fa as de producto si este os ma usado usado para prop6sitos distintos a o origina os o bien si muestra soSas de abuse o DaSo en el vidrio de a cubierta causado per el use de substancias o utensi ios impiadores distintos a as cremas impiadoras y herramiontas recomondadas apropiadas o DaSo on o vidrio do a cubierta causado per...

Page 42: ...ma edici6n y con eB National Electricam Code ANSJ NFPA No 70 ultima edicion y requirimientos de codigos mocales Instale solamente en conformidad con las instrucciones de instalaci6n provistas en el paquete de literatura qua viene con esta estufa Solicite de su distribuidor de recomendarle a un tecnico calificado y una agencia de reparaci6n autorizada AsegOrese de saber como desconectar et corrient...

Page 43: ...eta y puede generar niveles de mon6xido de carbono superiores a los estandares permitidos Esto puede ser periudiciai para la salud _Los pueden set controtes electricos daSados con fdas temperaturas Cuando utHice su estufa pot la primera vez o si no ha sido utilizada pot mucho tiempo asegurese que no haya sido expuestas a temperaturas mas amtas que 0 C 32 F pot mas de 3 horns antes de conectar su e...

Page 44: ...o de maparrilla con pelicula de aluminio La grasa que queda fuera podria encenderse No toque la bombiHa de Buz caliente con una tema rnojada Esto puede romper la bombilla Antes de retirar o remplazar ia bombiila desconecte el aparato o corte el suministro el6ctdco IMPORTANTES INSTRUCCIONES PARA LIMPIAR SU COCINA Limpie Baeatufa reguBarmente para mantener todas Bas partes sin grasa que puede encend...

Page 45: ...omputadora En Canada Acuerdos de Mantenimiento Su compra tiene valor mayor porque puedes depender de Sears HomeCentraP para servicio Con sobre 2 400 T6cnicos de Servicios y m_ s de un mill6n de piezas y accesorios tenemos las herramientas piezas conocimiento y destrezas para asegurar nuestro compromiso Le damos servicio a Io que vendemos Su producto Kenmore_es dise_ado y puesto a prueba para prove...

Page 46: ...1 Parilla para grillar Quemador Estanco 12 000 BTU Convertible LP _ Quemador Estanco 9 500 BTU Convertible LP Gaveta Calentadora r maj Zona de entibiado con Controles de los Quemadores Superiores Ventilaci6n Homo Elemento Homo piante 3 Rejillas del Homo Adjustables Manijas Grandes de la Puerta de una Sola Pieza Puerta Delantera de Vidrio del Homo con VentanHUade Vidrio Grande Quemador Lento de 5 0...

Page 47: ...que ei electrodo sea cotocado debidamente en Ia ranura provista en Ia cabeza de cada quemador Ver F ra 2 La oo ooao 6o oorroota do a oaboza do q e a or ase a q e cada quemader preduzca la chispa cerrecta requerida para encender el gas 2 Celeque las tapas de les quemaderes cerrectas en cada une de les quemaderes el agujere pilote de Ia tapa del quemader debe quedar dirigide hacia arriba Cada una de...

Page 48: ...ta en la posici6n trasera central Vet paginas 53 e LO C WARMER ZONE Figura 1 Funcionamiento de los Controles Superiores de Gas 1 CoJoque el utensilio de cocina sobre el quemador superior 2 Optima la perilla de control superior y g rela a la izquierda para sacarla de Ia posici6n OFF Vet Figura 2 3 Suelte Ia perilla y gire a la posici6n LITE Nota Los cuatro encendedores superiores electr6nicos emiti...

Page 49: ...abitaci6n bien iluminada El cono de la llama debe set constante y bien definido Ajuste o limpie el quemador sila llama es de color amarillo anaranjado Uso de_ Soporte para Wok El soporte para wok provisto con su estufa ha sido dise_ado para usar con woks de rondo redondo Se recornienda que use un wok de 14 pulgadas de diarnetro 35 5 cm El soporte para el wok DEBE set usado en Ia posici6n del quema...

Page 50: ...ras Los woks de fondo piano cuyos fondos sean grandes pueden tambi6n set usados en Ias rejillas de los quemadores de gas de la cubierta sin el soporte para wok Ver Figura 2 Asegure la estabilidad de wok de fondo plano antes de cocinar si no va a usar el soporte para wok Si no tiene buena estabilidad NO use el wok de rondo piano sin el soporte para el wok Los woks de fondo redondo con un are de sop...

Page 51: ...er Nota Si ningQn boton es presionado en 25 segundos la funci6n ON se anular 2 Para controlar a Zona de Calentar presione una vez para ENCENDER el hive en HI 0N 0FF WARMER ver Figura 2 o el nivei LO ver Figura 5 aEl indicador luminoso que se encuentra ZONE arriba del bot6n ON OFF se encendera constantemente y el indicador luminoso de la Superficie Ca ente se encender una vez que la Zona de Calenta...

Page 52: ... coloque Ias parriJlas en Jas posiciones 2 y 3 _ 1 _ posici6n de la rejJlla _ vXy _ _ _2 _ posici6n de la re ilia Posiciones de las Parrillas POSICIONES RECOMENDADAS DE LAS PARRILLAS PARA ASAR A LA PARRILLA HORNEAR Y ASAR AIimento Posici6n de la Parrilla Asar a la parriIIa carnes polio o pescado 1 o 2 Galletas pasteIes tartas bizcochos y panquecitos 2 o 3 Tartas congeladas pastel esponjoso levadur...

Page 53: ... ditci de impiar En la gaveta calentadora use solamente vaji as y utensilos de cocina recomendados para usar en el homo __1 Use tomao as de cocina cuando siempre o guantes retire los a mentos de Ia gaveta calentadora ya que los pIatos o los utensi os pueden estar ca entes y usted puede quemarse SeJecci6rl de Ja Temperatura La tabla de ajustes recomendados para Ia gaveta calentadora se muestra en I...

Page 54: ...ento presione Q el bot6n aunque sea una vez Nota Para mejores resultados precaliente la gaveta de entibiamiento antes de colocar los alimentos o la masa de pan Una gaveta vacia toma 15 minutos para precalentar 4 Cuando los alimentos esten listos para set retirados presione ON OFF el bot6n una vez para apagar ei dispositivo de ia gaveta de entibiamiento o de ia panera Ei indicador luminoso de la ga...

Page 55: ...BAKE HORNEAR MEATS CAKES CLOCK Se usa para BREADS RELOJ seleecionar e modo CARNES Se usa para de homeado normal PASTELESY poner la PANES Se usa hera del dia para seleccionar la caracteristica de cocci6n de carnes pasteles y panes TERMINAR ANULAR Utilizado para anular cualquier programaci6n a excepci6n de la hera y del cron6metro Presione STOP CLEAR para terminar la cocci6n Presione STOP CLEAR para...

Page 56: ...cador Oprima _ CLO desaparecerA y el reloj visual comenzar6 a funcionar Figura 4 Q Cbqbq Cambio de_ despHegue de _a hora de_ d_a entre 12 o 24 horas 1 Oprima y mantenga oprimida a tecla _ durante 6 segundos Figura 3 Mientras a tecla est oprimida a hora correcta de dia permanecera desp egada y a pa abra CLO desaparecer_ de indicador visual Figura 4 CONTINUE oprimiendo a tecla hasta que se escuche u...

Page 57: ...ra del dia u oprima ST P ara STOP CL E_ r P rechazar el o LeamR cambio Contador de Tiempo La tecla CONTADOR DETIEMPO _rl_ controla la caracteristica del contador de tiempo El contador de tiempo sirve como un contador de tiempo adicional en la cocina que emitir5 seSales cuando el tiempo que ha sido programado haya _ expirado No comienza ni detiene la cocci6n La caracteristica del contador de tiempo...

Page 58: ...ante 3 segundos Figura 1 2 Despu6s de 3 segundos la luz del icono de bloqueo aparecer_ se emitira una sehal sonora y DOOR LOCKED PUERTA BLOQUEADA destellar_ en el indicador Una vez que la puerta del homo es bloqueada el indicador DOOR LOCKED dejar6 de destellar y permanecer6 encendido junto con la luz del icono de bloqueo STOP _CL _ R durante 3 segundos Para reactivar e funcionamiento normal de ho...

Page 59: ...ara rechazar eH cambio Figura 1 Figura 2 Figura 3 Funcionamiento SHencioso de _os Contro_es Las tecHasTIEMPO DE PARADA _ y LIMPIEZA _ controHan Hacaracteristica de funcionamiento siHencioso de V HoscontroHes La caracteristica de funcionamiento siHencioso de HoscontroHes permite que eH controH dell homo sea operado sin sonidos o se_aHes sonoras cuando sea necesario Si se desea eH controH puede set ...

Page 60: ...ura del homo Figura 4 Si no se escucha la seSal sonora una mirada rapida al indicador con la temperatura del homo mostrada en el indicador del homo es una buena manera de verificar que el homo ya ha alcanzado la temperatura de precalentamiento Una vez que el homo se ha precalentado COLOQUE EL ALIMENTO EN EL HORNO La luz BAKE permanecera encendida Oprima CL _ R cuando se haya completado el horneado...

Page 61: ... _ Se escuchar_ una seSal sonora una vez que la temperatura del homo haya llegado a 350 F y el indicador mostrara 350 y BAKE Figura 3 Oprima para cancelar la caracteristica de hornear en cualquier momento Para cambiar la temperatura de hornear ejemplo cambiar de 350 F a 425 F 1 Despu6s de que el homo ha sido programado para homear a 350 F y la temperatura necesita ser cambiada a 425 R oprima _ Fig...

Page 62: ...l homo cuando se cocinan guises usando horneado per convecci6n 3 Cuando se usa horneado pot convecci6n con una sola parrilla coloque la parrilla del homo en la posici6n 2 o 3 Si cocina con parri las m01tiples coloque las parrillas del homo en las posiciones 2 y 3 para 2 parrillas Vet Figura 2 4 Se obtienen mejores resultados con los pasteles cuando se hornean con la tecla Cake de la caracteristica...

Page 63: ...AKE permaneceran encendidos en el indicador Figura 6 Una vez que Ia caracter stica de horneado programado haya comenzado la hora del dia aparecera en el indicador visual Figura 3 Nota Despues de que se ha activado la caracteristica de homeado OVEN COOK programado optima OVENCOOK para despiegar el tiempo de homeado restante en el modo de horneado programado Oprima C L _ r cuando haya terminado de h...

Page 64: ... MED destellara BAKE 50 y 350 aparecerAn en e indicador Figura 5 Nota El tiempo de homeado puede ser programado para cualquier cantidad de tiempo desde 1 minuto hasta 11 horas y 59 minutos 8 Oprima ST_ _ TIMED BAKE y 350 aparecer_n en elindicador A visual Figura 6 9 Oprima Programe e tiempo de inicio deseado usando las teclas 10 Oprima Cuandocomience e homeado programadodiferido la A temperatura d...

Page 65: ...os 25 segundos el dispositivo para encender SERVlR TIBIO se anWara 3 Presione _ART f _ El indicador luminoso SERVlR TIBIO se encender_ constantemente para indicar que el dispositivo est en marcha Figura 1 4 Para apagar el dispositivo Servir Tibio a cualquier momento simplemente presione _ otra vez El indicador luminoso Servir Tibio se apagar_ Si no presiona el bot6n de nuevo el dispositivo Se_ ir ...

Page 66: ...tura mas baja minima temperatura de asado es 400F puIse Ia temperatura deseada antes de seguir con la etapa 5 5 Optima _ Ei homo comenzara a asar a Ia parrilla BROIL y 550 apareceran en el indicador visuaI Figura 2 6 Primero ase un lado hasta que el alimento este dorado de vueIta y cocine ei otto Iado Sazone y sirva Nora Siempre tire de Ia parrilla hacia afuera hasta que Ilegue al tope antes de da...

Page 67: ...pantala El simbolo del ventlador del convector rotativo aparecera minutes despues de haber puisado START Figura 3 STOP El icono del ventilador de convecci6n se encender Oprima _cL E_ r para terminar de cocinar carnes pasteles o panes o para cancelar la cocci6n de cames pasteles o panes en cualquier memento OPRiMA QQcZ CLEAR Aimentos recomendados q_A pueden set cocinados en carla categuorla Figura ...

Page 68: ...n retirar Ias parriIIas del homo Si se dejan en et cido de Iimpieza su color se votvera ligeramente azul y el acabado se puede opacar Despues de que se haya terminado el ciclo y enfriado el homo frote los bordes de las parrilIas con papel de cera o con un parle impregnado con aceite para bebe o aceite de cocina esto hara que las parrillas se deslicen mas facilmente a su lugar Limpie todos los derr...

Page 69: ...EA_ CLEAN deste ar_ y 3 00 HR se mostrara en el indicador visual Figura 1 El control automaticamente Iimpiara durante un periodo de tres horas tiempo implicito del ciclo de mpieza Nota Si se desean 2 o 4 horas de tiempo de mpieza optima L2D para 2 horas u oprima 4 para un tiempo de mpieza de 4 horas Sebccione ei tiempo de mpieza basandose en la cantidad de suciedad que tenga el homo leve mediana o...

Page 70: ...nte un periodo de 3 horas duraci6n del cicto de autoJimpieza implicito Nota Si se desean 2 o 4 horas de tiempo de limpJeza optima 2_ para 2 horas u oprima 4 para un tiempo de limpieza de 4 horas Programe el tiempo de limpieza de acuerdo a Ia cantidad de suciedad que tenga leve mediana o bastante suciedad Vet p _gina 71 3 Oprima ST___ El icono DOOR LOCKED destellarb el icono CLEAN y las letras CLn ...

Page 71: ...ior o inferior a la temperatura recomendada Los resultados del homeado le ayudaran a decidir cuanto aiuste necesita la temperatura mNSTRUCCIONES OPRIMA mNDICADOR Para aumentar el ajuste de ia temperatura deJ homo 1 Oprima __BAK_ durante 6 segundos Figura 1 2 Para aumentar Ja temperatura use Jas teclas num icas para prog ama eloambio deseado tEiemplo 30 t Figura 2 La temperatura puede set aumentada...

Page 72: ..._ados para limpiar acero inoxidabte Siempre asegOrese de enjuagar bien para quitar los limpiadores de las superficies pues pueden ocurrir manchas azuladas con el calor las cuales no pueden ser quitadas Restriegue suavemente con una esponja jabonosa de fregar para sacar Ia mayor a de Jas manchas Enjuague con una soluci6n 1 1 de agua y amon aco Si es necesario cubra las manchas dificiles con una toa...

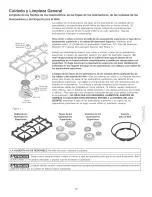
Page 73: ...or Cabeza del Quemador Superior Electrodo Soporte de la Tobera Limpieza de las tapas de mosquemadoree de mascabezas de mosquemadores de masrejiHas y demsoporte demwok Use una esponja con jab6n o un limpiador abrasivo suave para limpiar las tapas de los quemadores superiores y Ias cabezas de los quemadores superiores Las rejillas y el soporte del wok han side dise_ados para ser lavados en el Iavava...

Page 74: ...icie de vidrio ceramico Para euciedad leve y mederada Para aplicar la crema de limpieza sobre la superficie de la cubierta use una esponja no abrasiva un patio o una toalla de papel Frote a superficJe hasta que toda la suciedad y la crema sean elJminadas Tambien se puede usar un detergente para avar platos suave AsegOrese de que Ja cubJerta sea eniuagada minuciosamente sin dejar ningOn residuo de ...

Page 75: ...ido hacia abajo Para retirar ta puerta del homo 1 Abra ta puerta completamente 2 Tire eI cierre situado en cada una de Ias bisagras de ambos lades y col6quelo en las palancas de Ias bisagras Figura 1 Tendrb que ap car una pequeSa presi6n hacia abajo sobre Ia puerta para poder retirar el cierre de sus ganchos 3 Tome la puerta de cada lade tire la base de Ia puerta para arriba y hacia Ud para desalo...

Page 76: ...o sacar magaveta calentadora 1 _ Apague la estufa antes de sacar la gaveta cabntadora 2 Abra completamente la gaveta 3 Ubique Ia palanca de Ia corredera a cada lade de Ia gaveta tire de Ia palanca de la corredera del lade izquierdo y empuje hacia abaio en la palanca de la corredera dei lade derecho Ver Figura 1 5 Tire de Ia gaveta para sacarla de la estufa Reinstalaci6n de la Gaveta Camentadora Wa...

Page 77: ...guo con un foco nuevo para electrodomesticos de 40 watts 4 Vuelva a cotocar ei protector de vidrio y cierre ei soporte met_lico 5 Vuelva a conectar el suministro electrico en la fuente prinicipal o enchufe Ia estufa 6 Se debera volver a programar el reloj Para velvet a programarlo vea la secci6n Programaci6n demRemoj en este Manual del Usuario Tablas de Cocinar Alirnentos para la tecla Horneado po...

Page 78: ...la casa para asegurarse Llame a su copa_ia de electricidad local para el servicio El controJ deJ homo suena yen ta pantaHa aparece F1 F2 F3 o Fg El control electr6nico ha detectado una anomalia Pulse CLEAR para borrar la pantalla y parar el sonido Reprograme el homo Si la anomalia se repite tome nota del nQmero de anomalia Pulse CLEAR y consulte un servicio autorizado La tuz del homo no funciona C...

Page 79: ... estan programados adecuadamente Siga las instrucciones en Ajuste de los eontroles det homo en Guia de control del homo electr6nico AsegOrese que el homo est abierto a la Posioi6n de parar et asado Las carnes est_ n muy cerca del elemento del asador Vuelva a colocar la rejilla para obtener un espacio suficiente entre las carnes y el elemento Precaliente el elemento del asador Precaliente el elemen...

Page 80: ...e location of your nearest sears Parta Repair Center iiiiHHHHHi_ HHHHHHH_ 1 800 488o1222 iiiiiiiiiiiiiii_ iiiiiiiiiiiiiii Call anytime day or night U S A only HHHHHHHi_ HHHHHHH_ HHHHHHHi_ HHHHHHH_ www ea oom TO purchase a protection agreement U S A or maintenance agreement Canada on a product serviced by Sears 1 800 827 6655 U S A 1 800 361 6665 Canada Para pedir servicio de reparaci6n Au Canada p...

Reviews: