background image

10

Setting Oven Controls

Note: The time of day must first be set in order to operate the oven.

To Set the Clock

When the range is first plugged in, or when the power supply to the range has been interrupted, the display will flash
"12:00".

1.

Press 

.

2.

Within 5 seconds, press and hold the 

 or

 until the correct time of day appears in the display.

Note: The clock cannot be changed during any timed bake or self-clean cycle.

To Set the Minute Timer:

1.

Press 

.

2.

Press the 

 to increase the time in one minute increments. Press and hold the 

 to increase the time in 10

minute increments. The timer can be set for any amount of time from 1 minute to 11 hours and 59 minutes.

Note: If you press the 

 first, the timer will advance to 11 hours and 59 minutes.

3.

The display shows the timer count down in minutes until one minute remains. Then the display will count down in

seconds.

4.

When the set time has run out, the timer will beep 3 times. It will then continue to beep 3 times every 60 seconds

until 

 is pressed.

Note: The minute timer does not start or stop cooking. It serves as an extra timer in the kitchen that will beep when
the set time has run out. The minute timer can be used alone or during any of the other oven functions. When the
minute timer is in use with any other function, the minute timer will be shown in the display. To view other functions,
press the pad for that function.

To Change the Minute Timer while it is in use:

While the timer is active and shows in the display, press and hold the 

 or 

 to increase or decrease the time.

To Cancel the Minute Timer before the set time has run out: Press 

.

ENGLISH

Note: To turn the time of day display OFF or ON in the display press 

 and hold for 15 seconds (the control will beep

once) and then release.

Summary of Contents for 790.7185 Series

Page 1: ...offman Estates IL 60179 U S A P N 316258040 0309 www sears com ESPAÑOL ENGLISH Models Modelos 790 7185Ü 7285Ü 7286Ü 7585Ü 7586Ü Ü color number número de color Gas Range Use Care Guide Estufa de gas Guía para el Uso y Cuidado ...

Page 2: ...THE NEAREST SEARS SERVICE CENTER IN THE UNITED STATES This warranty gives you specific legal rights and you may also have other rights which vary from state to state Sears Roebuck and Co Dept 817WA Hoffman Estates IL 60179 Table of Contents Free Standing Range Warranty 2 Product Record 2 IMPORTANT SAFETY INSTRUCTIONS 3 4 Grounding Instructions 5 Range Features 6 Setting Surface Controls 7 Before S...

Page 3: ...by properly installed anti tip bracket provided with the range To checkifthebracketisinstalledproperly visually check that rear leveling leg is inserted into and fully secured by the anti tip bracket by removing lower panel or storage drawer For models with a warmer drawer grasp the top rear edge of the range and carefully attempt to tilt it forward Refer to the Installation Instructions for prope...

Page 4: ...e with a pan lid or use baking soda a dry chemical or foam type extinguisher When heating fat or grease watch it closely Fat or grease may catch fire if allowed to become too hot Use Only Dry Potholders Moist or damp potholders on hot surfaces may result in burns from steam Do not let potholders touch hot heating burners Do not use a towel or other bulky cloth instead of a potholder DoNotHeatUnope...

Page 5: ...perly grounded 3 prong wall receptacle installed by a qualified electrician Important Safety Notice The California Safe Drinking Water and Toxic Enforcement Act requires the Governor of California to publish a list of substances known to the state to cause cancer birth defects or other reproductive harm and requires businesses to warn customers of potential exposure to such substances ENGLISH Impo...

Page 6: ...6 Range Features Note The features of your range will vary according to model ...

Page 7: ... being burned by the flame These settings are based on using medium weight metal or aluminum pans with lids Settings may vary when using other types of pans The color of the flame is the key to proper burner adjustment A good flame is clear blue and hardly visible in a well lighted room Each cone of flame should be steady and sharp Adjust or clean burner if flame is yellow orange Setting Surface C...

Page 8: ... OVEN RACKS WHEN THE OVEN IS COOL PRIOR TO OPERATING THE OVEN Always use oven mitts when using the oven Removing Replacing Oven Racks To remove pull the rack forward until it stops Lift up front of rack and slide out To replace fit the rack onto the guides on the oven walls Tilt the front of the rack upward and slide the rack back into place Arranging Oven Racks with 6 Rack Positions To bake on a ...

Page 9: ...except the time of day and minute timer Press STOP CLEAR to stop cooking Also the STOP CLEAR pad is used to activate oven door lockout setting TIMER SET OFF PAD Used to set or cancel the minute timer The minute timer does not start or stop cooking Also TIMER SET OFF pad is used to set the Continuous Bake feature For a silent control panel When choosing a function a beep will be heard each time a p...

Page 10: ...count down in minutes until one minute remains Then the display will count down in seconds 4 When the set time has run out the timer will beep 3 times It will then continue to beep 3 times every 60 seconds until is pressed Note The minute timer does not start or stop cooking It serves as an extra timer in the kitchen that will beep when the set time has run out The minute timer can be used alone o...

Page 11: ...t in 12 Hour Energy Saving feature that will shut off the oven if the control is left on for more than 11 hours and 59 minutes The oven can be programmed to override this feature for continuous baking To set control for continuous baking 1 Press 0 00 will appear in the display 2 Press and hold down for 5 seconds until tone is heard hr will appear in display for continuous cooking The current time ...

Page 12: ...ay 6 Press the or until the desired baking time appears in the display 7 The oven will turn on and begin heating To Program Oven for a Delayed Start Time and to Shut Off Automatically 1 Be sure that the clock shows the correct time of day 2 Place the food in the oven 3 Press 4 Within 5 seconds press the or The display will show 350 F 177 C By holding the or the temperature can then be adjusted in ...

Page 13: ...the for LO broil Most foods may be broiled at the HI broil setting Select the LO broil setting to avoid excess browning or drying of foods that should be cooked to the well done stage 4 Place the insert on the broil pan then place the food on the insert DO NOT use the broil pan without the insert or cover the insert with aluminum foil The exposed fat could ignite 5 Place the pan on the oven rack C...

Page 14: ... column for recommended settings If a particular food is not listed start with the medium setting If more crispness is desired remove the lid or aluminum foil Most foods can be kept at serving temperatures by using the medium setting When a combination of foods are to be kept warm for instance a meat with 2 vegetables and rolls use the high setting Refrain from opening the warmer drawer while in u...

Page 15: ...If you do not hear the levers click or the bearing glides do not feel seated remove the drawer and repeat steps 1 thru 3 This will minimize possible damage to the bearing glides Electrical Shock Hazard can occur and result in serious injury or death Disconnect appliance from electric power before cleaning and servicing the warmer drawer To Remove and Replace Warmer Warm Ready Drawer some models Fi...

Page 16: ... gasket The woven material of the oven door gasket is essential for a good seal Care should be taken not to rub damage or remove the gasket DO NOT use any cleaning materials on the oven door gasket Doing so could cause damage Remove the broiler pan and insert all utensils and any aluminum foil These items cannot withstand high cleaning temperatures Oven racks should be removed If they are not remo...

Page 17: ...splay for a 2 hour cycle 4 As soon as the or is released CLn appears in the display 5 As soon as the controls are set the motor driven lock will begin to close automatically and the LOCK indicator light will flash DO NOT open the door while the light is flashing it takes about 15 seconds for the oven door to lock 6 The LOCK light will glow until the cleaning cycle is completed or cancelled and the...

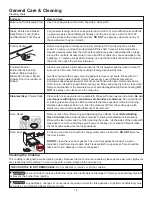
Page 18: ...y with a clean cloth Remove all cleaners or the porcelain may become damaged during furture heating DO NOT use spray oven cleaners on the range top Clean with hot soapy water and a dishcloth Rinse with clean water and a cloth Do not use cleaners with high concentrations of chlorides or chlorines Do not use harsh scrubbing cleaners Only use kitchen cleaners that are especially made for cleaning sta...

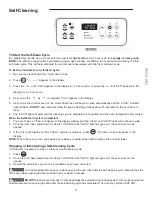
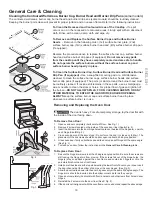
Page 19: ...rner drip pans some models should be routinely cleaned Keeping the burner ports clean will prevent improper ignition and an uneven flame Refer to the following instructions Fig 3 Removing and Replacing the Oven Door The door is heavy For safe temporary storage lay the door flat with the inside of the door facing down To Remove Oven Door 1 Open oven door completely horizontal with floor See Fig 1 2...

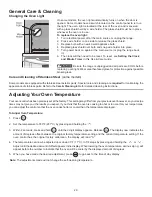
Page 20: ...imes may not give you the results you expect If you think that the oven is cooking too hot or too cool for your recipe times you can adjust the control so that the oven cooks hotter or cooler than the temperature displayed To Adjust Oven Temperature 1 Press 2 Set the temperature to 550 F 287 C by pressing and holding the 3 Within 2 seconds press and hold until the 2 digit display appears Release T...

Page 21: ...Be sure cord is securely plugged into the outlet Electrical power outage electric ignition models only Burners can be lit manually See Setting Surface Controls Burner ports are clogged With the burner off clean ports by using a small gauge wire or needle Moisture is present after cleaning Lightly fan the flame and allow burner to operate until flame is full Dry the burners thoroughly following ins...

Page 22: ...recommended temperature or baking time If you feel the oven is cooking too hot or cool see Adjusting Your Oven Temperature Controls are not set properly Follow instructions in Self Cleaning section Self cleaning cycle was interrupted Stop time must be set 2 to 4 hours past the start time Follow steps under Stopping or Interrupting a Self Clean Cycle under Self Cleaning Failure to clean bottom fron...

Page 23: ...ice appointment online Sears has over 12 000 professional repair specialists who have access to over 4 5 million quality parts and accessories That s the kind of professionalism you can count on to help prolong the life of your new purchase for years to come Purchase your Master Protection Agreement today Some limitations and exclusions apply For prices and additional information call 1 800 827 66...

Page 24: ......

Reviews: