background image

28

Before You Call

Oven Baking

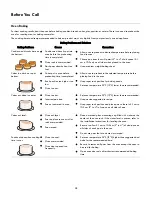
For best cooking results, heat the oven before baking cookies, breads, cakes, pies, pastries, et cetera. There is no need to preheat the 
oven for roasting meat or baking casseroles. 

The cooking times and temperatures needed to bake a product may vary slightly from your previously owned appliance.

Baking Problems and Solutions

Baking Problems

Causes

Corrections

Cookies and biscuits burn on 
the bottom. 

Cookies and biscuits put into 
oven before the preheating 
time is completed.

Oven rack is overcrowded.

Dark pans absorbs heat too 
fast.

Allow oven to preheat to desired temperature before placing 
food in oven.

Choose pan sizes that will permit 2” to 4” of air space (5.1 
cm o 10.2 cm) on all sides when placed in the oven.

Use a medium weight baking sheet.

Cakes too dark on top or 
bottom

Cakes put in oven before 
preheating time is completed.

Rack position too high or too 
low.

Oven too hot.

Allow oven to preheat to the selected temperature before 
placing food in the oven.

Use proper rack position for baking needs.

Set oven temperature 25°F (13°C) lower than recommended.

Cakes not done in center

Oven too hot.

Incorrect pan size.

Pan not centered in oven.

Set oven temperature 25°F (13°C) lower than recommended.

Use pan size suggested in recipe.

Use proper rack position and place pan so there is 5.1 cm to 
10.2 cm (2” to 4”) of space on all sides of pan.

Cakes not level.

Oven not level.

Pan too close to oven wall or 
rack overcrowded.

Pan warped.

Place a marked glass measuring cup filled with water on the 
center of the oven rack. If the water level is uneven, refer to 
the installation instructions for leveling the oven.

Be sure to allow 5.1 cm to 10.2 cm (2” to 4”) of clearance on 
all sides of each pan in the oven.

Do not use pans that are dented or warped.

Foods not done when cooking 
time is over. 

Oven too cool.

Oven overcrowded.

Oven door opened too 
frequently.

Set oven temperature 25°F (13°C) higher than suggested and 
bake for the recommended time.

Be sure to remove all pans from the oven except the ones to 
be used for baking.

Open oven door only after shortest recommended baking 
time.

Summary of Contents for 790.7400

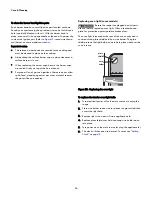
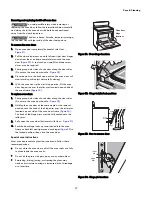
Page 1: ...r Use Care Guide Guía de uso y cuidada English Español Model Modelos 790 7423 7400 P N 807189601 Rev A Sears Brands Management Corporation Hoffman Estates IL 60179 U S A www kenmore com www sears com Sears Canada Inc Toronto Ontario Canada M5B 2C3 www sears ca ...

Page 2: ... incandescent light bulbs and bags 4 A service technician to instruct the user in correct product installation operation or maintenance 5 A service technician to clean or maintain this product 6 Damage to or failure of this product if it is not installed operated or maintained according to all instructions supplied with the product 7 Damage to or failure of this product resulting from accident abu...

Page 3: ... warmer drawer or lower oven This includes paper plastic and cloth items such as cookbooks plastic ware and towels as well as flammable liquids Do not store explosives such as aerosol cans on or near the oven Never cover any slots holes or passages in the oven bottom or cover an entire oven rack with materials such as aluminum foil Doing so blocks air flow through the oven and may cause carbon mon...

Page 4: ...ay result in burns from steam Do not let potholders touch hot cooking areas Do not use towels or other bulky cloths Use dry potholders Moist or damp potholders on hot surfaces may result in burns from steam Do not let potholders touch hot cooking areas Do not use towels or other bulky cloths Important Important Safety Notice The California Safe Drinking Water and Toxic Enforcement Act requires the...

Page 5: ...an range by removing the leveling legs panels wire covers anti tip brackets screws or any other part of the range Remove the oven door from any unused range if it is to be stored or discarded For electric ignition models only Do not attempt to operate the range during a power failure If the power fails always turn off the range If the range is not turned off and the power resumes the range will be...

Page 6: ...urn the fan on Use proper pan size This appliance is equipped with one or more surface units of different sizes Select utensils having flat bottoms large enough to cover the surface unit heating element The use of undersized utensils will expose a portion of the heating element to direct contact and may result in ignition of clothing Proper relationship of utensil to element will also improve effi...

Page 7: ...eal Care should be taken not to rub damage or move the gasket Some birds are extremely sensitive to the fumes given off during the self clean cycle of any oven Move birds to another well ventilated room DO NOT TOUCH SURFACE HEATING UNITS OR SURFACE COOKING ELEMENTS AREAS NEAR THESE SURFACE HEATING UNITS OR INTERIOR SURFACE OF THE OVEN Both surface heating and oven heating elements may be hot even ...

Page 8: ...only available outlet it is the personal responsi bility of the consumer to have it replaced with a properly grounded 3 prong wall receptacle installed by a qualified electri cian See the installation instructions packaged with this range for complete installation and grounding instructions PRODUCT RECORD In this space below record the date of purchase model and serial number of your product You w...

Page 9: ...ce the oven rack on the rack guides on both sides of oven walls Tilt the front of oven rack upward slightly and slide the oven rack back into place Be sure oven racks are level before using Oven Rack Descriptions Flat oven racks or the flat handle oven rack may be used for most cooking needs and may be placed in most oven rack positions The offset oven rack some models provides additional stepdown...

Page 10: ...ly sliding the burner cap from side to side to be sure it is centered and firmly seated See Figure 7 When the burner cap lip makes contact inside the center of the burner head you will be able to hear the burner cap click Please note that the burner cap should NOT move off the center of the burner head when sliding from side to side Check and be sure that all oval style some models burner caps are...

Page 11: ...e outer edge of the cooking utensil A higher flame wastes energy and increases your risk of being burned by the flame The color of the flame is the key to proper burner adjustment A good flame is clear blue and hardly visible in a well lighted room Each cone of flame should be steady and sharp Adjust or clean burner if flame is yellow orange For most cooking start on the highest setting and then t...

Page 12: ...radiate from the bottom center when home canning Heat is spread more evenly when the bottom surface is flat Make sure the diameter of the canner does not exceed 1 inch beyond the surface element markings or burner It is recommended to use smaller diameter canners on electric coil and ceramic glass cooktops and to center canners on the burner grates Start with hot tap water to bring water to boil m...

Page 13: ... Important notes Do not cook with the surface control knob left in the LITE position The electronic ignitor will continue to spark if the control knob setting remains in the LITE position When setting any surface control knob to the LITE position all electronic surface ignitors will spark at the same time However only the surface burner you are setting will ignite Never place or straddle a cooking...

Page 14: ...ook time or start time functions 15 Cook Time Use to set a specific amount of time needed for cooking Automatically cancels cooking process at end of set time 16 Delay Start Use with Bake and Self Clean functions to program a delayed start bake or delayed start self clean cycle 17 CLOCK Use with arrow keys to set time of day 18 LIGHT Use to turn internal oven light on and off Minimum and Maximum C...

Page 15: ...active Loc will appear in the display as a reminder that the oven keys are inactive when the OVEN LOCK feature is active Silent or audible control mode The appliance may be set for silent or audible operation If the silent mode is selected most of the sounds associated with setting the controls will be silent But sounds will be heard when the timer ends when a baking function ends and when the set...

Page 16: ...nd minutes until 1 hour remains When less than 1 hour remains the display will count down in minutes and seconds Once the timer has less than 1 minute remaining only seconds will display If the timer is active when oven cooking the minute timer will show in the display by default To view information of any other active oven function press the key once for the active function to view status Setting...

Page 17: ...gin baking immediately and to shut off automatically 1 Be sure that the clock displays the correct time of day and arrange oven racks and close oven door 2 Press Bake 350 appears in display 3 Within 15 seconds press or The display will show the default oven temperature of 350 F 177 C By pressing or the temperature may be adjusted in 5 F increments 1 C Press START to accept 4 Press Cook Time 00 wil...

Page 18: ...ay 4 Within 15 seconds press or The display will show the default oven temperature of 350 F 177 C By pressing or the oven temperature may be adjusted in 5 F increments 1 C When desired tempera ture is reached press START to accept 5 Press Cook Time 00 will appear in display 6 Press the or to set the desired cook time Then press START to accept 7 Press Delay Start The time of day will appear in the...

Page 19: ...nvec Bake For optimum cooking results it is recommended to preheat the oven when baking foods such as cookies biscuits and breads Reduce oven temperature 25 F from recipe s recommended oven temperature Follow the remainder of the recipe s instructions using the minimum recommended cook time For best results when using a single oven rack place rack in position 2 or 3 See Figure 14 When using two ov...

Page 20: ...oven When cooking the oven interior oven racks and cook top will become very hot which can cause burns Should an oven fire occur close the oven door and turn the oven off If the fire continues use a fire extin guisher Do not put water or flour on fire Flour may be explo sive Important notes Always arrange oven racks when the oven is cool For best results when broiling use a broil pan with broil pa...

Page 21: ...ght see Replacing oven light some models on page 26 Adjusting oven temperature The appliance has been factory calibrated and tested to ensure an accurate baking temperature known as the User Preference Offset UPO For the first few uses follow your recipe times and temperature recommendations carefully If you think the oven is cooking too hot or too cool for your recipe times you may adjust the con...

Page 22: ... cleaners or oven protective coatings in or around any part of the oven interior Clean any soil from the oven frame the door liner outside the oven door gasket and the small area at the front center of the oven bottom See Figure 18 These areas heat sufficiently to burn soil on Clean using soap and water prior to starting Self Clean Remove any excessive spills Any spills on the oven bottom should b...

Page 23: ...ut 1 hour and the OVEN LOCK indicator light has turned off the oven door may be opened 3 When the oven interior has completely cooled wipe away any residue or powdered ash with a damp cloth or paper towel Delayed Start Self Clean To start Delay Start Self Clean 1 Be sure the oven is empty and all oven racks are removed Remove all items from the cooktop Be sure oven door is completely closed 2 Be s...

Page 24: ...nse and wipe dry with a clean cloth Do not allow food spills with high sugar or acid content milk tomatoes sauerkraut fruit juices or pie filling to remain on the surface they may cause a dull spot even after cleaning Oven interior For oven interior remove excessive spillovers from oven cavity bottom before starting Self Clean Clean any soils from oven frame and door liner outside the oven door ga...

Page 25: ...ade by an authorized qualified agency Routinely clean the cooktop Wipe with a clean damp cloth and wipe dry to avoid scratches Keeping the surface burner head ports and slots clean will prevent improper ignition and an uneven flame Cleaning recessed and contoured areas of cooktop If a spill occurs on or in the recessed or contoured areas blot up spill with an absorbent cloth Rinse with a clean dam...

Page 26: ...eaning agents or any other material to enter the gas orifice port opening Replacing oven light some models Be sure the range is unplugged and all parts are cool before replacing oven light Wear a leather faced glove for protection against possible broken glass The oven light is located at the rear of the oven cavity and is covered with a glass shield held by a wire holder The glass shield protects...

Page 27: ... frame Figure 24 To replace oven door 1 Firmly grasp both sides of oven door along the door sides Do not use the oven door handle Figure 23 2 Holding the oven door at the same angle as the removal position seat the hook of the hinge arm over the roller pins located on each side of the oven door frame Figure 24 The hook of the hinge arms must be fully seated onto the roller pins 3 Fully open the ov...

Page 28: ...d temperature before placing food in the oven Use proper rack position for baking needs Set oven temperature 25 F 13 C lower than recommended Cakes not done in center Oven too hot Incorrect pan size Pan not centered in oven Set oven temperature 25 F 13 C lower than recommended Use pan size suggested in recipe Use proper rack position and place pan so there is 5 1 cm to 10 2 cm 2 to 4 of space on a...

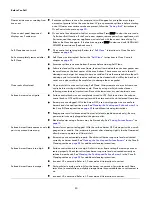
Page 29: ...s line is hard plumbed Have a flexible CSA International approved metal appliance connector installed Entire appliance does not operate Make sure power cord is plugged properly into outlet Electrical power outage Check house lights to be sure Call your local electric company for service outage information In addition service wiring is not complete Call 1 800 4 MY HOME for assistance See back cover...

Page 30: ...r s instructions Rinse with clean water dry and replace in oven Surface burners do not ignite Surface control knob was not completely turned to LITE Push in and turn the surface control knob to LITE until burner ignites and then turn control knob to desired flame size Burner ports are clogged With the burner OFF use a small gauge wire or needle to burner head slots and ignition ports See Cleaning ...

Page 31: ...31 Before You Call ...

Page 32: ......

Reviews: