background image

Summary of Contents for 79031033803

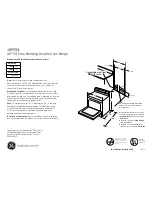
Page 1: ...t 36 in long flexible gas connector A T handle type manual gas valve must be installed in the gas supply line to this appliance Shave Raised Edge to Clear Space for a 31s 16 min 81 cm Wide Cooktop See Dimension C in table 11 2 Max 3 8 cm Max WA These surfaces should be flat leveled hatched area 1 30 Min 76 2 cm Min 11 see Note 3 18 Min 33 cm 45 7 cm Min IM PORTANT Cabinet and countertop width shou...

Page 2: ...abinet is unprotected For cutouts below 22 7 8 58 1 cm appliance will slightly show out of the cabinet Allow at least 19 48 9 cm clearance for door depth when it is open 22 7 8 58 1 cm min 23 1 4 59 05 cm max see Note 4 ______ 1 1 8 2 86 cm FRONT OF _F _ CABINET Ref S Door Open see note 5 A Side Panel A HEIGHT B WIDTH C Co KToP D DEPTH T0 E CUTOUT WIDTH F cUTOUT GIHEIGHT I I WIDTH FRONTOF RANGE Co...

Page 3: ...ooktop 1 1 2 Max 3 8 cm Max Illustration 1 Slide the unit into the cabinet Make sure the center of the unit is aligned with the center of the cabinet cut out Remove the protective channels on each side of the glass cooktop if provided The metal flange under each side of the cooktop MUST be placed over the cabinet countertop for proper unit support The glass cooktop should NOT directly touch the co...

Page 4: ...ad or sheet of 1 4 10 16 cm thick plywood between the range and carpeting Make sure the wall coverings around the range can withstand the heat generated by the range Do not obstruct the flow of combustion air at the oven vent nor around the base or beneath the lower front panel of the range Avoid touching the vent openings or nearby surfaces as they may become hot while the oven is in operation Th...

Page 5: ...gulator is set for natural gas 4 10 16 cm manifold pressure inlet pressure must be at least 5 12 60 cm if regulator has been converted for LP Propane gas 10 25 4 cm manifold pressure inlet pressure must be at least 11 27 9 cm Leak testing of the appliance shall be conducted according to the instructions in step 4 The gas supply line should be 1 2 or 3A I D Interior Diameter The gas supply piping c...

Page 6: ...t included 7 Pressure regulator included Shutoff Valve Open position Figure 5 The supply line must be equipped with an approved manual shutoff valve This valve should be located in the same room as the range and should be in a location that allows ease of opening and closing Do not block access to the shutoff valve The valve is for turning on or shutting off gas to the appliance Once regulator is ...

Page 7: ...d 2 prong wall receptacle is installed it is the personal responsibility and obligation of the consumer to have it replaced by a properly grounded 3 prong wall receptacle Do not under any circumstances cut or remove the third ground prong from the power cord Disconnect electrical supply cord from wall receptacle before servicing cooktop Moving the Appliance for Servicing and Cleaning Turn off the ...

Page 8: ...tertop and the range cooktop may occur _ To reduce the risk of damaging your appliance do not handle or manipulate it by the ceramic glass Manipulate with care Position range in front of the cabinet opening Make sure that the glass which overhangs the countertop clears the countertop If necessary raise the unit by lowering the leveling legs Level the range see section 9 The floor where the range i...

Page 9: ...en 2 Place a level on the rack see Figure 8 Take 2 readings with the level placed diagonally in one direction and then the other Level the range if necessary by adjusting the 4 leg levelers with a wrench see Figure 17 3 Taking care to not damage the countertop slide range into cutout opening and double check for levelness Figure 8 oScrew 3 loor and surface underneath the cooktop fra_ Trim Figure 9...

Page 10: ... Oven Burners and Oven Adjustments 11 5 1 Electric Ignition Burners Operation of electric igniters should be checked after range and supply line connectors have been carefully checked for leaks and range has been connected to electric power The oven burner is equipped with an electric control system as well as an electric oven burner igniter If your model is equipped with a waist high broil burner...

Page 11: ...behind the oven door some models or on the drawer side frame some models When ordering parts for or making inquiries about your range always be sure to include the model and serial numbers and a lot number or letter from the serial plate on your range Your serial plate also tells you the rating of the burners the type of fuel and the pressure the range was adjusted for when it left the factory Bef...

Page 12: ...r at the range back position if there is no wall 2 Unfold paper template and place it flat on the floor with the right rear corner positioned exactly on the intersection of the center and back lines you just drew before Use the diagram below to locate brackets if template is not available Figure 14 3 Mark on the floor the location of the 4 mounting holes shown on the template For easier installati...

Page 13: ...cm Anti tip Bracket _ 71 4cm Rearwidth of range with body sides CL Center line 1 Unfold paper template and place it flat on the floor with the back and side edges positioned exactly where the back and sides of range will be located when installed Use the diagram below to locate brackets if template is not available Figure 16 2 Mark on the floor the location of the 4 mounting holes shown on the tem...

Page 14: ...das Una wilvula manual de gas de tipo manija de forma de T se debe instalar en la Ifnea del suministro de gas de este aparato Acepille el borde subido a que deje espacio para un borde 31Y2 81 cm de anchura de estufa PARED La superfide debe estar plana y nive ada area sornb 1 2 Min i Min 5 2 TCm delaPaied ambos lados 31 1 2 81 cm Exacto 30 Min 76 2 cm Min 30 Min 76 2 cm Min 13 v6a la nota 3 33 cm 1...

Page 15: ...a los recortados menos que 22 7 8 el electrodomestico apareceria ligeramente en el exterior del armario Deje pot los 19 48 9 cm de espacio libre para la profundidad de la puerta cuando este abierta PARTE DELANTERA DEL ARMARIO 22 7 8 58 1 cm min 23 1 4 59 05 cm max yea la nota 4 r r I 1 1 8 _ 2 86 cm Ref Panel lateral A ALTURA B ANcH0 c ANCHO DE D PROFUNDIDAD A LA PLANCHA DE LA FRENTEDE LA COCINAR ...

Page 16: ...imensi6n d_ 31 Y2 81 cm 1 1 2 Max 3 8 cm Max IlustraciOn 1 Deslice la unidad hacia el gabinete Aseg0rese que la unidad este centrada con el centro de la abertura del gabinete Remueva la parte en pl_qstico extruido en cada lado de la cubierta de vidrio Algunos modelos Es imprescindible que el reborde de metal que se encuentra debajo de la cubierta este sobre la cubierta del gabinete La cubierta de ...

Page 17: ... que recubre las paredes alrededor de la estufa pueda resistir el calor generado por la estufa No obstruya el flujo del aire de cornbustion en la ventilacion del homo ni tarnpoco alrededor de la base o debajo del panel inferior delantero de la estufa Evite tocar las aberturas o _ireas cercanas de la ventilacion ya que pueden estar muy calientes durante el funcionamiento del homo La estufa requiere...

Page 18: ...s del aparato debe set realizado segOn las instrucciones en el paso 4 La linea de fuente de gas debe set de 1 2 o de 3A 311 2 _ 81 cm ostrador moldeado o azulejo recortado 3 4 cm hacia atr_s en las _l _ cmj esquinas de frente de la abertura del mostrador Figura I Si el ancho de la abertura del mostrador es mas grande que 30 1 16 76 4 cm ajuste alas dimensiones como para el 3 4 1 9 El mostrador deb...

Page 19: ... en una Iocalizaci6n que permita la facilidad de la abertura y del cierre No bloquee el acceso a la wilvula La wilvula es para encender o apagar el gas del aparato UBICACION DEL REGULADOR DE PRESION Figura 3 Conecte el Regulador de Presi6n El regulador de presiOn esta ya instalada para la estufa No haga la conexi6n demasiado apretada El regulador es de die cast Elapretar demasiado puede agrietar e...

Page 20: ... cable del suministro el_ctrico de esta estufa est 1 equipado con un enchufe de tres patillas para puesta a tierra que coincida con un enchufe de pared est_indar con puesta a tierra de tres patillas para minimizar la posibilidad que se produzcan descargas el_ctricas El cliente deber_i encargar a un t_cnico para asegurarse de que el enchufe se encuentra debidamente conectado a tierra y polarizado F...

Page 21: ...idrio debe soportar el peso de la unidad Luego atomille con cuidado en las dos patas de nivelaciOn anteriores igual a 15 hasta que el vidrio que est 1 colgado toque levemente la cubierta Para los modelos equipado con las patas niveladoras Aseg0rese que el frente de las patas niveladoras y el dispositivo de nivelaciOn posterior est_n ajustados mas altos que la altura del gabinete _ _ _ Instale el s...

Page 22: ...el nivel puesto diagonalmente en una direcci6n y despu_s en la otra Nivele la estufa si es necesario ajustando las 4 patas niveladoras con una Ilave de tuercas Figura 17 3 Aseg0rese de no dahar al mostrador deslice la estufa dentro de la abertura del hueco y vuelva a verificar a la nivelaciOn Tornillos de niveladOn Pata de frente BAJAR LEVANTAR Figura 8 Instalacion de Accesorio Decorativo Trasero ...

Page 23: ... superior inserte un destornillador piano pequeflo en el hueco del wistago del a wilvula hasta enganchar el tornillo interior El tamaflo de la llama puede ser aumentado o disminuido girando el tornillo Ajuste el tamaflo de la llama hasta que pueda pasar r_ipidamente de la posici6n LITEhasta la posici6n MAS BAJA sin que se apague la llama La llama debe ser Io m_ispequefla posible sin que se apague ...

Page 24: ...a del obturador de aire Vea el tama_o 2 en el figura 13 Si la llama es de azul claro reduzca el tama_o de la abertura del obturador de aire Para ajustar un tornillo de cierre flojo Yea el tamaBo 3 en el figura 13 vuelva a colocar el obturador de aire y ajuste el tornillo de cierre Reemplace el fondo del homo i TuBos del quemador del homo Tornillos de _ seguridad _ Obturador _ de aire Tapa del orif...

Page 25: ...responda a la parte posterior de la cocina 2 Desplegar el molde de papel y colocarlo alisado sobre el piso con el v_rtice posterior derecho posicionado exactamente en la intersecci6n de las lineas central y posterior dibujadas anteriormente Sino se dispone de un molde usar el diagrama induido a continuaci6n para ubicar las m_nsulas Figura 14 3 Marque en el suelo la ubicaci6n de los cuatro orificio...

Page 26: ...olocados cuando sea instalada Use el diagrama siguiente para ubicar los soportes si no se dispone de la plantilla Figura 16 2 Marque en el piso la ubicaci6n de los 4 agujeros de montaje como se muestra en la plantilla Para facilitar la instalaci6n se pueden taladrar agujeros piloto de 3 16 0 5 cm de dia y 1 2 1 3 cm de profundidad en el piso 3 Saque la plantilla y coloque los soportes en el piso c...

Page 27: ...Notas 27 ...

Page 28: ...RD TOP BURNER I cuARBoDE MODULO DE ENOENDIMO I f _ m S Z x QUEMADOR DE ENOENBtDO SURER IOR _ BOUGtE D A UMAGR BRUI EUR W 14 TOP BURNER QUEMADOR DE ENCENBIDO SUPERIOR BOUGIE D ALLUMAGE ORULEUR R 14 TOP R QUEMAMOR DE ENOEND DO SUPERIOR BOUGIE O AItUMAGE BRU BUR RIGHT REAR IGNITER SWITCH CAUtiON DISCONNECT POWER BEFORE SERVICING UM_l LABEL ALL WEBER PRIOR TO DISCONNECTION WHEN SERVECENG CONTROLS WERE...

Reviews: