background image

24

General Care & Cleaning 

(cont’d)

To Clean the Recessed and Contoured Well Areas of the Cooktop -

 If a spill occurs on or in the recessed or contoured

areas, blot up spill with an absorbent cloth. Rinse with a clean, damp cloth and wipe dry.

To Clean the Surface Burner Grates, Caps & Surface Burner Drip Pans

 (some models)

 -

 Use a soap-filled scouring

pad or a mild abrasive cleanser to clean the surface burner caps and surface burner drip pans (if equipped).

Please Note: THE COOKTOP IS NOT REMOVABLE.

 Do not attempt to remove or lift the cooktop.

 Any additions, changes or conversions

required in order for this appliance to satisfactorily meet the
application needs must be made by an 

authorized

distributor or qualified agency.

Cleaning the Cooktop

The cooktop is designed to make cleaning easier.  Since the four burners are sealed, cleanups are easy when spillovers
are cleaned up immediately. To clean, wipe with a clean, damp cloth and wipe dry. 

DO NOT 

attempt to clean the cooktop

when the cooktop or burner heads are still hot. The contoured well areas and burner drip pans (some models) should be
routinely cleaned. Keeping the burner head ports and slots clean will prevent improper ignition and an uneven flame. Refer
to the following sections for further instructions.

Cooktop Burner Head

FOOD, CLEANING AGENTS OR ANY OTHER MATERIAL TO ENTER THE GAS ORIFICE HOLDER OPENING. ALWAYS

keep the surface burner cap and surface burner head in place whenever a surface burner is in use.

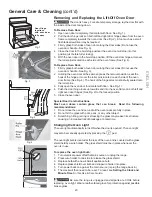
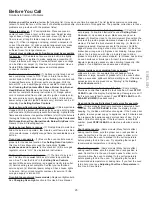
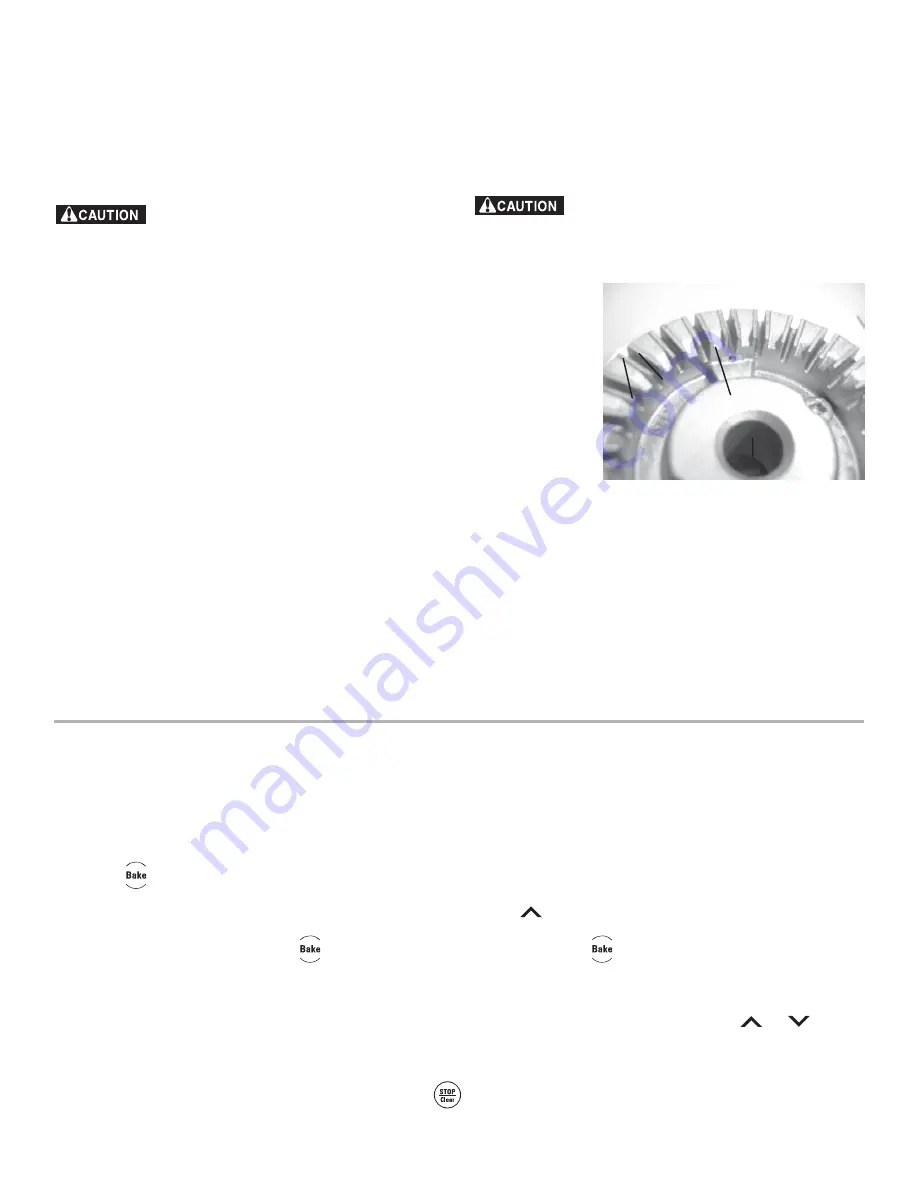
To clean the burner head ignition ports -

 Each burner head has a small

ignition port located as illustrated. Should you experience ignition problems it
may be that this port hole is partially blocked with soil. With the burner head in
place, use a small wire gauge needle or the end of a paper clip to clear the
ignition port.

To Clean the Surface Burner Heads

 - For proper gas flow it may be necessary

to clean the burner head and slots. To clean, first use a clean DAMP cloth to
soak up any spills. Remove any food from between the burner slots using a small
non-abrasive brush like a toothbrush and afterwards wipe up using a damp cloth.
For stubborn soils located in the slots, use a small-gauge wire or needle to clean
the slots.

Please Note: 

The surface burner heads are secured to the cooktop and must be

cleaned in place on the cooktop.

For proper flow of gas and ignition of the burner —

 DO NOT ALLOW SPILLS,

ignition port

slots

orifice port


DO NOT 

attempt to clean the cooktop when

the cooktop or burner heads are still hot. Touching hot
cooktop areas, burner grates and burner caps can cause
burns.

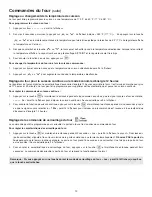
Adjusting the Oven Temperature

 Note:

 Oven temperature adjustments made will not change the Self-Cleaning feature temperature.

Your oven control has been precisely set at the factory. This setting may differ from your previous oven however, so your recipe
times may not give you the results you expect. If you think that the oven is cooking too hot or too cool for your recipe times,
you can adjust the control so that the oven cooks hotter or cooler than the temperature displayed.

To Adjust Oven Temperature:

1.

Press 

 .

2.

Set the temperature to 550°F (287°C) by pressing and holding the 

.

3.

Within 2 seconds, press and hold 


until the 2 digit display appears. Release 

The display now indicates the amount

of degrees offset between the original factory temperature setting and the current temperature setting. If the oven control
has the original factory calibration, the display will read "0."

4.

The temperature can now be adjusted up or down 35°F (17°C), in 5°F steps by pressing and holding the 


or 

 Adjust

until the desired amount of offset appears in the display. When lowering the oven temperature, a minus sign (-) will appear
before the number to indicate that the oven will be cooler by the displayed amount of degrees.

5.

When you have made the desired adjustment, press 

 to go back to the time of day display.

Summary of Contents for 970-3368 Series

Page 1: ...0 3368 3369 color number numéro de couleur FRANÇAIS Gas Range Use Care Guide Cuisinière à gaz Guide d utilisation et d entretien Models Modèles Sears Canada Inc Toronto Ontario Canada M5B 2B8 Visit our website at http www sears ca ...

Page 2: ... This warranty covers only defects in material and workmanship Sears will NOT pay for 1 Cracks in a ceramic glass cooktop that are not a result of thermal shock 2 Stains and scratches on a ceramic glass cooktop resulting from failure to maintain it properly according to all instructions supplied with the product 3 Expendable items that can wear out from normal use including but not limited to filt...

Page 3: ... not allow children to climb or play around the range The weight of a child on an open door may cause the range to tip resulting in serious burns or other injury Do not use the oven or warmer drawer if equipped for storage Do not store items of interest to children in the cabinets above a range or on the backguard of a range Children climbing on the range to reach items could be seriously injured ...

Page 4: ...with a pan lid or use baking soda a dry chemical or foam type extinguisher When heating fat or grease watch it closely Fat or grease may catch fire if allowed to become too hot Use Only Dry Potholders Moist or damp potholders on hot surfaces may result in burns from steam Do not let potholders touch hot heating burners Do not use a towel or other bulky cloth instead of a potholder DoNotHeatUnopene...

Page 5: ...ng prong from this plug For personal safety the range must be properly grounded For maximum safety the power cord must be plugged into an electrical outlet that is correctly polarized and properly grounded If a 2 prong wall receptacle is the only available outlet it is the personal responsibility of the consumer to have it replaced with a properly grounded 3 prong wall receptacle installed by a qu...

Page 6: ...ccasionnelles C est pourquoi un contrat de protection principal peut vous permettre d épargner de l argent et vous éviter des problèmes Le contrat de protection principal contribue également à prolonger la durée de vie de votre nouvel appareil Voici ce que couvre le contrat Les pièces et la main d oeuvre requises pour le fonctionnement adéquat de l appareil dans des conditions d utilisation normal...

Page 7: ...interior 14 Adjustable Oven Racks s 15 Large 1 piece Oven Door Handle 16 Full width Oven Door style vary with model 17 Storage Drawer some models or Warmer Drawer with Handle and Warmer Drawer rack some models 18 5 000 BTU Simmer Burner some models 19 9 500 BTU Center Burner some models or Oval Burner styles may vary 20 12 000 BTU Power Burner some models 21 14 200 BTU Power Burner some models 22 ...

Page 8: ...g cakes using 2 oven racks place cookware on oven rack positions 2 5 Refer to Figs 2 3 When using a single oven rack place cookware on oven rack position 3 or 4 Refer to Fig s 2 4 Types of Oven Racks Your range may be equipped with one or more of the oven rack types shown Flat Rack or Handle Rack Flat Oven Rack Handle Oven Rack Oven Vent Location The oven vent is located below the backguard See Fi...

Page 9: ...d DO NOT cook with the surface control knob in the LITE position The electronic ignitor will continue to spark if the knob is left in the LITE position Setting Proper Surface Burner Flame Size For most cooking start on the highest control setting and then turn to a lower one to complete the process Use the recommendations below as a guide for determining proper flame size for various types of cook...

Page 10: ...STOP CLEAR pad is used to activate oven door lockout setting For a silent control panel When choosing a function a beep will be heard each time a pad is pressed If desired the control can be programmed for silent operation Press and hold After 7 seconds the control will beep once This will block the controls from sounding when a pad is pressed To return the sound press and hold again for 7 seconds...

Page 11: ...0 minute increments The timer can be set for any amount of time from 1 minute to 11 hours and 59 minutes Note If the pad is pressed first the timer will advance to 11 hours and 59 minutes 3 The display shows the timer countdown in minutes until 1 minute remains Then the display will countdown in seconds 4 When the set time has run out the timer will beep 3 times and will continue to beep 3 times e...

Page 12: ...n be programmed to override this feature for continuous baking To set control for continuous baking 1 Press and hold down for 5 seconds until tone is heard hr will appear in display for continuous cooking The current time of day will return to the display 2 To cancel the Continuous Bake function press and hold for 5 seconds until tone is heard 12hr will appear in display indicating that the contro...

Page 13: ...ss the or until the desired baking time appears in the display 7 The oven will turn ON and begin heating To Program Oven for a Delayed Start Time and to Shut Off Automatically Delayed Timed Bake 1 Be sure that the clock shows the correct time of day 2 Place the food in the oven 3 Press appears in the display 4 Within 5 seconds press the or The display will show 350 F 177 C By holding the or the te...

Page 14: ...for LO broil Most foods may be broiled at the HI broil setting Select the LO broil setting to avoid excess browning or drying of foods that should be cooked to the well done stage 4 For optimum browning preheat broil element for 5 6 minutes before adding food 5 Place the insert on the broil pan then place the food on the insert See Fig 1 some models DO NOT use the broil pan without the insert or c...

Page 15: ...s feature will not work with any other function including a Delayed Timed Bake setting To Program the Oven to Begin Baking Immediately and record a Recipe 1 Place the food in the oven 2 Press appears in the display 3 Within 5 seconds press the or The display will show 350 F 177 C By holding the or the temperature can then be adjusted in 5 F increments 1 C if the control is set to display Celsius 4...

Page 16: ...moist or use a loose or vented type cover to allow foods to turn crisp or brown Roasts may be left uncovered so browning can occur Cook times will vary depending on the weight fat content bone the shape of the roast Use the recipe s recommended food temperature and a food thermometer to determine when the food is done Preheating the oven will not be necessary when using the Slow Cook feature Add a...

Page 17: ...is time If not skip this step and continue to step 6 Refer to the Timed Bake complete steps 5 6 Delayed Start Bake complete steps 5 9 section on page 15 for complete instructions Remember the oven will shut down after using Timed Bake or Delay Start Bake and therefore may only be used once during the Sabbath Jewish Holidays The maximum Delayed Start Bake time is 11 hours 59 minutes 6 The oven will...

Page 18: ...eight food items and empty dishware for example rolls or pastries and dinner plates See Fig 2 To set Warm Hold 1 Arrange interior oven racks and place baked food in oven If the food is already in the oven go to step 2 2 Press will appear in the display and the Warm Hold indicator light above the pad will turn ON Note If no further pads are touched within 6 seconds the request to turn ON Warm Hold ...

Page 19: ... temperature setting 2 For best results preheat the drawer before adding food An empty drawer will preheat in approximately 15 minutes 3 Turn the thermostat control to OFF after use Warmer Warm Ready Drawer Temperature Selection some models Refer to the table in the side column for recommended settings If a particular food is not listed start with the medium setting If more crispness is desired re...

Page 20: ...ld be taken not to rub damage or remove the gasket DO NOT use any cleaning materials on the oven door gasket Doing so could cause damage Remove the broiler pan and insert all utensils and any aluminum foil These items cannot withstand high cleaning temperatures Remove oven racks If they are not removed during the Self Clean cycle their color will turn slightly blue and the finish will be dull Afte...

Page 21: ... in the display 5 Press the or once 3 00 appears in the display for a 3 hour cycle To change to a 2 hour cycle press 2 00 appears in the display or to select a 4 hour cycle press 4 00 appears in the display As soon as the controls are set the motor driven lock will begin to close automatically and the LOCK indicator light will flash DO NOT open the oven door while the light is flashing it takes ab...

Page 22: ...Rinse and wipe dry with a clean cloth Remove all cleaners or the porcelain may become damaged during furture heating DO NOT use spray oven cleaners on the range top Clean with hot soapy water and a dishcloth Rinse with clean water and a cloth Do not use cleaners with high concentrations of chlorides or chlorines Do not use harsh scrubbing cleaners Only use kitchen cleaners that are especially made...

Page 23: ...nto the oven frame on both left and right oven door hinges See Fig 2 to the locked position 5 Close the oven door Special Door Care Instructions Most oven doors contain glass that can break Read the following recommendations 1 Do not close the oven door until all the oven racks are fully in place 2 Do not hit the glass with pots pans or any other object 3 Scratching hitting jarring or stressing th...

Page 24: ...rner Heads For proper gas flow it may be necessary to clean the burner head and slots To clean first use a clean DAMP cloth to soak up any spills Remove any food from between the burner slots using a small non abrasive brush like a toothbrush and afterwards wipe up using a damp cloth For stubborn soils located in the slots use a small gauge wire or needle to clean the slots Please Note The surface...

Page 25: ...controls are set properly for the desired function See Setting Oven Controls in this Use Care Manual or read the instructions Entire appliance does not operate in this checklist 2 Be sure gas regulator valve is ON See installation instructions Oven control beeps displays F1 or F3 Some models Electronic control has detected a fault condition Press STOP CLEAR to clear the display stop beeping Reprog...

Page 26: ......

Page 27: ...2 970 3368 3369 color number numéro de couleur Gas Range Use Care Guide Cuisinière à gaz Guide d utilisation et d entretien Models Modèles Sears Canada Inc Toronto Ontario Canada M5B 2B8 Visitez notre site Internet à www sears ca ...

Page 28: ...eulement les défauts de fabrication et les vices de matériau Sears NE COUVRE PAS les frais liés 1 Aux fissures de la table de cuisson en vitrocéramique qui ne résultent pas d un choc thermique 2 Aux taches et aux égratignures sur la table de cuisson en vitrocéramique qui sont apparues à la suite du non respect de toutes les instructions fournies avec ce produit 3 Aux articles consomptibles sujets ...

Page 29: ...ourraenrésulterunfeuouuneexplosion entraînant des dommages matériels des blessures ou même la mort POUR VOTRE SÉCURITÉ N entreposez pas ou n utilisez pas de l essence ou tout autrevapeurouliquideinflammableauvoisinagedecet appareil ou de tout autre appareil ménager QUE FAIRE SI VOUS DÉTECTEZ UNE ODEUR DE GAZ Ne mettez pas d appareil en marche Ne touchez pas de commutateur électrique ne vous servez...

Page 30: ...nt par suite du contact accidentel de l ustensile la poignée d un ustensile doit être placée vers l intérieur et non au dessus des brûleurs de surface Ne laissez jamais les brûleurs de surface sans surveillance à des réglages élevés les débordements peuvent causer de la fumée la graisse peut s enflammer ou bien une casserole sans liquide peut fondre Revêtements protecteurs n utilisez pas de papier...

Page 31: ...se à la terre La fiche doit être branchée dans une prise correctement polarisée et mise à la terre Si une prise murale à deux alvéoles est la seule prise à votre disposition il vous revient de demander à un électricien qualifié de la remplacer par une prise murale à trois alvéoles correctement mise à la terre Consultez les INSTRUCTIONS D INSTALLATION emballées avec cette cuisinière pour y trouver ...

Page 32: ...ccasionnelles C est pourquoi un contrat de protection principal peut vous permettre d épargner de l argent et vous éviter des problèmes Le contrat de protection principal contribue également à prolonger la durée de vie de votre nouvel appareil Voici ce que couvre le contrat Les pièces et la main d oeuvre requises pour le fonctionnement adéquat de l appareil dans des conditions d utilisation normal...

Page 33: ...utonettoyage pour la porte du four 13 Four autonettoyant 14 Grille s de four ajustable s 15 Grande poignée de porte de four simple 16 Porte de four pleine largeur les styles varient selon le modèle 17 Tiroir de rangement certains modèles ou tiroir chauffant avec poignée et grille certains modèles 18 Brûleur de mijotage de 5 000 Btu certains modèles 19 Brûleur central de 9 500 Btu certains modèles ...

Page 34: ...ille à la position 3 ou 4 reportez vous aux figures 2 et 4 Circulation d air dans le four Pour assurer une bonne circulation d air dans le four et obtenir les meilleurs résultats de cuisson laissez 5 à 10 cm 2 à 4 po autour des ustensiles pour que la circulation de l air se fasse bien et vous assurer que les ustensiles ne se touchent pas les uns les autres qu ils ne touchent la porte les côtés ni ...

Page 35: ...à cette position Dimension de la flamme Pour presque tous les types de cuisson commencez par le réglage le plus élevé puis tournez sur un réglage plus faible pour terminer la cuisson Suivez les recommandations ci dessous pour déterminer la bonne dimension de la flamme correspondant aux différents types de cuisson La dimension et le type d ustensiles utilisés ainsi que la quantité d aliments à cuir...

Page 36: ...e vous choisissez une fonction vous entendez un bip chaque fois que vous appuyez sur une touche Si vous le désirez le tableau de commande peut être programmé pour fonctionner silencieusement Appuyez sur la touche et maintenez la enfoncée Après sept secondes le tableau de commande émet un bip Le tableau de commande n émet plus de son lorsque vous appuyez sur une touche Pour obtenir le son appuyez d...

Page 37: ...emarque Le voyant lumineux situé au dessus de la touche s allume pendant que la minuterie fonctionne Remarque La minuterie ne fait pas démarrer ni arrêter la cuisson Elle sert de minuterie additionnelle dans la cuisine et émet un signal sonore lorsque la durée programmée s est écoulée La minuterie peut être utilisée indépendamment ou pendant toute autre fonction du four Lorsque la minuterie est ut...

Page 38: ...ler la commande de cuisson continue 1 Appuyez sur la touche et maintenez la enfoncée pendant cinq secondes jusqu à ce que le signal sonore se fasse entendre hr paraît à l afficheur pour indiquer la cuisson continue L heure actuelle paraît à l afficheur 2 Pour annuler la fonction de cuisson continue appuyez sur la touche et maintenez la enfoncée pendant cinq secondes jusqu à ce que le signal sonore...

Page 39: ...araît à l afficheur 4 Dans les 5 secondes qui suivent appuyez sur ou L afficheur indique 350 F 177 C En appuyant sur la touche ou et en la maintenant enfoncée la température peut être ajustée par intervalles de 5 F 1 C si le régulateur est réglé pour afficher la température en Celsius 5 Appuyez sur 0 00 clignote à l afficheur HR MIN 6 Appuyez sur ou jusqu à ce que le temps de cuisson désiré parais...

Page 40: ...a lèchefrite sans sa grille et ne recouvrez pas la grille de papier d aluminium La graisse ainsi exposée pourrait prendre feu 6 Placez la grille de four à la position désirée selon le besoin Placez la lèchefrite sur la grille du four Fermez la porte durant l utilisation du gril 7 Passez le premier côté au gril jusqu à ce que l aliment ait bruni Tournez l aliment et passez le 2e côté au gril Remarq...

Page 41: ...t le réglage de cuisson minutée différée Programmation du four pour enregistrer le réglage d une recette et débuter la cuisson immédiatement 1 Placez la nourriture dans le four 2 Appuyez sur paraît à l afficheur 3 Dans les cinq secondes qui suivent appuyez sur ou L afficheur indique 350 F 177 C En appuyant sur la touche ou et en la maintenant enfoncée la température peut être ajustée par intervall...

Page 42: ...iments pour qu ils restent tendres ou utilisez un couvercle lâche ou muni d aération pour les faire brunir ou les rendre croustillants Vous pouvez omettre de couvrir les rôtis pour qu ils puissent brunir Les durées de cuisson varient selon le poids la teneur en graisse les os et la forme du rôti Pour savoir si la nourriture est à point respectez la température recommendée dans la recette en mesura...

Page 43: ...vous pouvez le faire maintenant Sinon sautez cette étape et passez à l étape 6 Référez vous aux instructions complètes de la section cuisson minutée suivez les étapes 5 et 6 cuisson différée suivez les étapes 5 à 9 à la page 15 Souvenez vous que le four s éteint après une cuisson minutée ou une cuisson différée Celles ci peuvent donc être utilisées qu une seule fois durant le sabbat les fêtes juiv...

Page 44: ...ît à l afficheur et le témoin lumineux du maintien au chaud au dessus de la touche S ALLUME Remarque Si vous n appuyez sur aucune touche dans les 6 secondes qui suivent la demande pour mettre en MARCHE le maintien au chaud s annulera 3 Appuyez sur ou pour débuter 4 Pour ÉTEINDRE le maintien au chaud en tout temps appuyez sur Le voyant du maintien au chaud au dessus de la touche S ÉTEINT Pour progr...

Page 45: ...auffant ne peut fonctionner pendant le cycle d autonettoyage Le témoin lumineux ne s allume pas durant le cycle d autonettoyage Dépose du tiroir chauffant 1 Coupez le courant avant d enlever le tiroir chauffant 2 Ouvrez complètement le tiroir 3 Repérez le levier de chaque côté du tiroir soulevez le levier de la glissière gauche et appuyez sur le levier de la glissière droite fig 1 5 Enlevez le tir...

Page 46: ...onneuse chaude De grosses saletés peuvent produire de la fumée ou s enflammer si elles sont soumises à de hautes températures NE laissez PAS les renversements à contenu élevé en sucre ou en acide lait tomates choucroute jus de fruit ou garniture pour tarte sur la surface au risque de causer des taches ternes même après nettoyage Nettoyez toute saleté sur le cadre de la cuisinière le revêtement de ...

Page 47: ...te il faut environ 15 secondes à la porte de four pour se verrouiller 6 CLn paraît à l afficheur durant le cycle d autonettoyage et le voyant LOCK reste allumé jusqu à ce que le cycle d autonettoyage soit terminé ou annulé et que le four ait refroidi À la fin du cycle d autonettoyage 1 L heure actuelle ou End fin paraît à l afficheur et les voyants Clean nettoyage et LOCK verrouillage restent allu...

Page 48: ...z que des produits nettoyants pour la cuisine qui sont destinés au nettoyage de l acier inoxydable Assurez vous de rincer les produits de la surface pour éviter lors du chauffage la formation de taches bleuâtres qui ne peuvent être enlevées Enlevez les grilles du four Voir Enlever et replacer les grilles du four Avant l utilisation du four Si les grilles sont laissées dans le four durant un cycle ...

Page 49: ...eutcasser Lisezlesrecommandations suivantes 1 Ne fermez pas la porte du four jusqu à ce que toutes les grilles soient bien en place 2 N accrochez pas la vitre avec les casseroles les ustensiles ou tout autre objet 3 Égratigner cogner frapper ou soumettre la vitre à des perturbations peut affaiblir sa structure et augmenter le risque qu elle se brise dans le futur Remplacement de l ampoule du four ...

Page 50: ...ppropriés NE LAISSEZ PAS DE RENVERSEMENTS DENOURRITURE DEPRODUITSDENETTOYAGENID AUTRESPRODUITSPÉNÉTRERDANSL OUVERTURE DU PORTE GICLEUR Laissez TOUJOURS le chapeau et la tête du brûleur de surface en place lorsque le brûleur est utilisé Nettoyage des zones concaves et encastrées de la table de cuisson Si un renversement se produit sur les zones encastrées ou concaves vous pouvez le nettoyer avec un...

Page 51: ... section Entretien et nettoyage pour obtenir des instructions de nettoyage supplémentaires 3 Le cordon d alimentation de la cuisinière n est pas branché modèles à allumage électrique seulement Assurez vous que le cordon d alimentation est bien branché dans la prise 4 Il y a une panne d électricité modèles à allumage électrique seulement Les brûleurs peuvent être allumés manuellement Reportez vous ...

Page 52: ......

Reviews: