background image

20

Setting Oven Controls

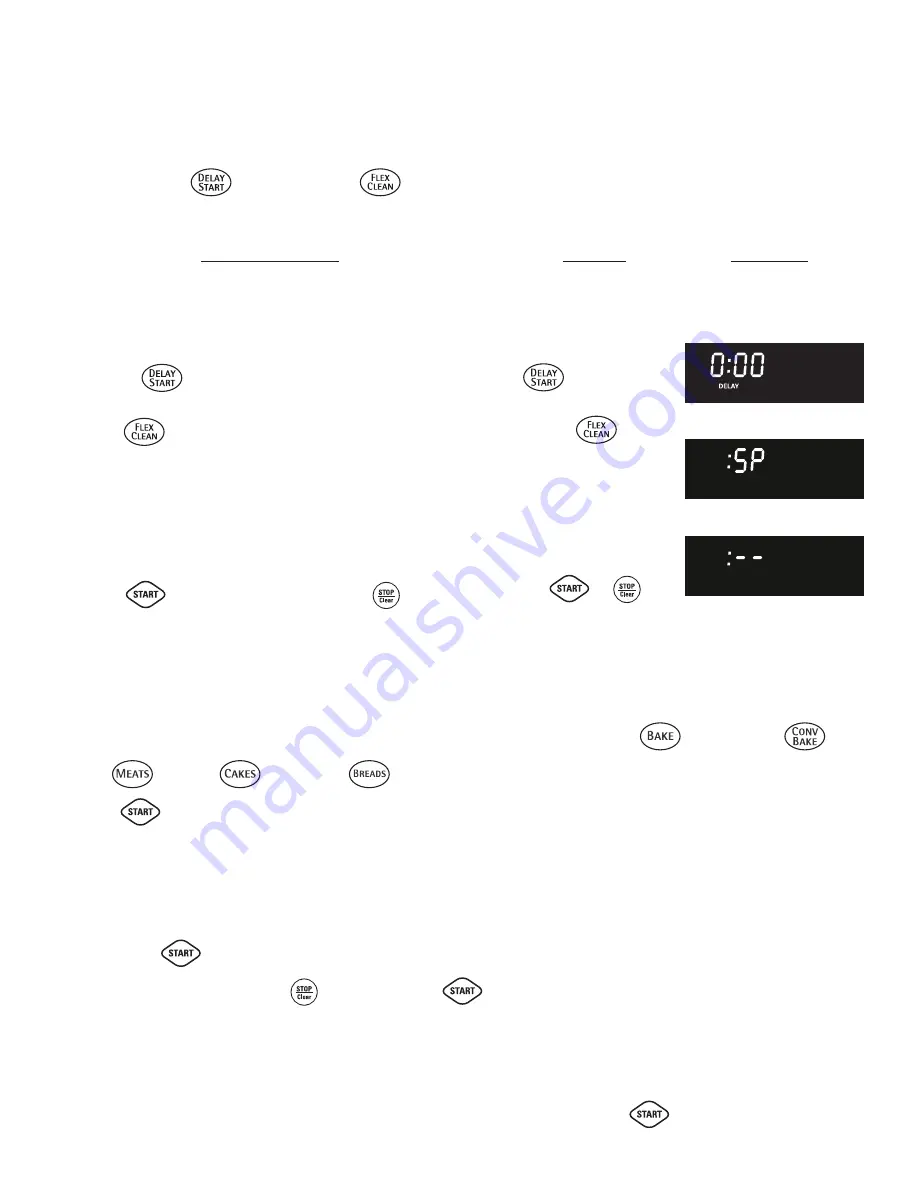
Silent Control Operation

Saving & Recalling Recipe Settings

Setting Silent Control Operation

The DELAY START 

 and FLEX CLEAN 

 pads control the Silent Control operation feature. The Silent Control

operation feature allows the oven control to be operated without sounds or beeps whenever necessary. If desired the control
can be programmed for silent operation and later returned to operating with all the normal sounds and beeps.


 for 7seconds


To change control from normal sound operation to
silent control operation:

1.

To tell if your range is set for normal or silent operation press

and hold 

 for 7 seconds. "0:00" will appear and "DELAY"

will flash in the display (Fig. 1).

2.

Press 

 to switch between normal sound operation and

silent operation mode. The display will show either ":SP" (Fig. 2)
or ":--" (Fig. 3).

If ":SP" appears (Fig. 2), the control will operate with normal
sounds and beeps.  If ":- -" appears (Fig.3), the control is in the
silent operation mode.

3.

Press 

 to accept the change or press 

 to reject the

change.

 or 

INSTRUCTIONS

PRESS

DISPLAY

Fig. 1

Fig. 2

Fig. 3

Saving and Recalling Recipe Settings

The Recipe Recall feature may be used to record and recall your favorite recipe settings. This feature may store 1 setting

for each of the basic cooking pads. The pads that a recipe may be stored with are BAKE 

CONV BAKE 

,

MEATS 

CAKES 

 & BREADS 

.  To store a recipe, start your recipe with one of the pads listed. When

using the 

 pad to start cooking, press and hold the START pad for 6 seconds. When the 2nd beep sounds, release

the START pad. The 2nd beep indicates the the recipe has been stored correctly. To store a new recipe over the old stored
recipe, set up the recipe as you normally would and save by holding the START pad until the 2nd beeps sounds. The
recipe will be saved and the oven will start with the new recipe.

NOTES:

1. Pressing the 

 pad when entering cooking temperatures and times will start the oven. If you wish to store the

recipes but not start the oven press 

 after pressing the 

 pad.

2. Once a recipe has been stored with any of the 5 basic cooking pads listed above, the recipe information will appear in
the display when pressing the pad in the future.

3. Should a recipe be needed that is different from the currently stored recipe, but do not wish to loose the old stored

recipe, override with the new time and temperature settings and press (do not hold) the 

 pad once.

Summary of Contents for 970-3394 series

Page 1: ...01 970 3394 color number numéro de couleur Gas Range Use Care Guide Cuisinière à gaz Guide d utilisation et d entretien Models Modèles FRANÇAIS Sears Canada Inc Toronto Ontario Canada M5B 2B8 Visit our website at www sears ca ...

Page 2: ...e Kenmore Elite Appliance Warranty One Year Limited Warranty When installed operated and maintained according to all instructions supplied with the product if this appliance fails due to a defect in material or workmanship within one year from the date of purchase call 1 800 4 MY HOME to arrange for free repair If this appliance is used for other than private family purposes this warranty applies ...

Page 3: ...th gas ranges other than when the hood and range have been designed tested and listed by an independent test laboratory for use in combination with each other Stepping leaning or sitting on the doors or drawers of this range can result in serious injuries and also cause damage to the range Do not allow children to climb or play around the range The weight of a child on an open door may cause the r...

Page 4: ...he fire with a pan lid or use baking soda a dry chemical or foam type extinguisher When heating fat or grease watch it closely Fat or grease may catch fire if allowed to become too hot Use Only Dry Potholders Moist or damp potholders on hot surfaces may result in burns from steam Do not let potholders touch hot heating burners Do not use a towel or other bulky cloth instead of a potholder DoNotHea...

Page 5: ...e an adapter plug an extension cord or remove grounding prong from electrical power cord Failure to follow this warning can cause serious injury fire or death This appliance is equipped with a 3 prong grounding plug for your protection against shock hazard and should be plugged directly into a properly grounded receptacle DO NOT cut or remove the grounding prong from this plug For personal safety ...

Page 6: ...igente Su nuevo producto Kenmore fue diseñado y fabricado para ofrecer muchos años de servicio confiable Sin embargo como todo producto el mismo podría requerir mantenimiento preventivo o reparaciones ocasionales Es por eso que el tener un Acuerdo maestro de protección podría ahorrarle dinero y molestias Adquiera ya un Acuerdo maestro de protección y protéjase de gastos y frustraciones inesperados...

Page 7: ...ner Heads See Fig 4 3 Discard all packing material located under all Burner Heads 4 To replace Burner Heads Caps match the letters located under center of Burner Caps with the letters located inside Burner Head only positions A F are marked with letters See Fig 5 Place all Burner Heads Caps on the cooktop See Fig 4 while carefully aligning the Electrodes into slots or holes of the Burner Heads Fig...

Page 8: ...er 17 Adjustable Porcelain Coated Oven Racks includes Handle Half Oven Racks 18 Large 1 piece Oven Door Handle styles colors vary with model 19 Full width Oven Door styles colors vary with model 20 Warmer Drawer with Handle Warmer Drawer Rack 21 5 000 BTU Simmer Burner 22 9 500 BTU Center Burner some models 23 9 500 BTU Power Burner 24 14 200 BTU Power Burner 25 16 200 BTU Power Burner 26 9 000 BT...

Page 9: ...inches between the pan placed on the rack and oven side or rear walls Fig 3 Fig 4 Fig 6 Fig 2 Removing Replacing Oven Racks To remove pull the rack forward until it stops Lift up front of rack and slide out To replace fit the rack onto the guides on the oven walls Tilt the front of the rack upward and slide the rack back into place Recommended Rack Positions for Broiling Baking Roasting Food RackP...

Page 10: ...ar or long shaped cookware The left rear and left middle positions are combined The left front Burner may also be added for a total of 3 burners Fig 3 Left Front Burner Left Rear Burner Right Rear Burner Right Front Burner Center Burner For models with a Deep Well Cooktop See Fig 3 Ther SIMMER Burner is best used for simmering delicate sauces etc This burner is located at the right rear burner pos...

Page 11: ...he flame beyond the outer edge of the utensil A higher flame wastes heat and energy and increases your risk of being burned by the flame Fig 2 These settings are based on using medium weight metal or aluminum pans with lids Settings may vary when using other types of pans The color of the flame is the key to proper burner adjustment A good flame is clear blue and hardly visible in a well lighted r...

Page 12: ...he 2nd HI and LO settings on the left rear control knob adjust the flame size for both burners Use the guide marks between the 2nd HI and LO settings and adjust the flame size as needed Refer to Fig 3 7 Add the left front Burner if needed Once lit visually adjust the flame size of the left front Burner to match the flame size of the Bridge Burner 8 Place cooking utensil centered over the left hand...

Page 13: ... be burned Note The Warmer Drawer will not operate during the Self Clean cycle Fig 2 Fig 3 Surface Cooking Care Seasoning of the Griddle Using the Griddle Care Seasoning of the Griddle Before first use Wash Griddle in hot soapy water Rinse and then dry completely Apply a thin coat of vegetable oil to the entire surface front and back of griddle Preheat your oven to 350 F Place the griddle on the u...

Page 14: ... to turn the Warmer Drawer or Bread Proof feature OFF The Warmer Drawer indicator light will turn OFF Setting Warmer Drawer Controls Warmer Drawer Bread Proofing Indicator Lights Setting Warmer Drawer Bread Proofing Controls WarmerDrawerFoodTemperatureSettings Warmer Drawer Food Temperature Settings UsetherecommendedWarmerDrawer food temperature settings table See Fig 6 If a particular food is not...

Page 15: ...nect appliance from electric powerbeforecleaningandservicingtheWarmerDrawer To Remove Warmer Drawer 1 Turnpoweroffbeforeremovingthewarmerdrawer 2 Open the drawer to the fully opened position 3 Locate glide lever on each side of drawer pull up on the left glide lever and push down on the right glide lever See Fig 2 4 Pull the drawer away from the range To Replace Warmer Warm Ready Drawer 1 Pull the...

Page 16: ...me is below the minimum or above the maximum settings for the feature FEATURE PREHEATTEMP BAKE TEMP BROILTEMP KITCHENTIMER CLOCKTIME COOKTIME STARTTIME CLEANTIME CONVECTIONBAKE MIN TEMP TIME 170 F 77 C 170 F 77 C 400 F 205 C 0 01 Min 0 01 Min 1 00 Hr Min 0 00 Hr Min 0 01 Min 0 01 Min 1 00 Hr Min 0 00 Hr Min 2hours 325 F 163 C MAX TEMP TIME 550 F 288 C 550 F 288 C 550 F 288 C 11 59 Hr Min 11 59 Hr ...

Page 17: ...the display Press CLO will disappear and the clock will start Fig 4 Changing between 12 or 24 hour time of day display 1 Press and hold for 6 seconds Fig 3 While holding the pad down the current time of day will remain and CLO will disappear from the display Fig 4 CONTINUE holding the pad until 12 Hr Fig 5 or 24 Hr appears in the display 2 Press to switch between the 12 and 24 hour time of day dis...

Page 18: ... set time has run out Press The display will return to the time of day for 6 seconds or Setting Continuous Bake or 12 Hour Energy Saving The KITCHEN TIMER and FLEX CLEAN pads control the Continuous Bake or 12 Hour Energy Saving features The oven control has a factory preset built in 12 Hour Energy Saving feature that will shut off the oven if the oven control is left on for more than 11 hours and ...

Page 19: ... is again fully operational Setting Oven Controls OvenLockout TemperatureDisplay Setting Temperature Display Fahrenheit or Celsius The BROIL and FLEX CLEAN pads control the Fahrenheit or Celsius temperature display modes The oven control can be programmed to display temperatures in Fahrenheit or Celsius The oven has been preset at the factory to display in Fahrenheit To change display from Fahrenh...

Page 20: ... Settings The Recipe Recall feature may be used to record and recall your favorite recipe settings This feature may store 1 setting for each of the basic cooking pads The pads that a recipe may be stored with are BAKE CONV BAKE MEATS CAKES BREADS To store a recipe start your recipe with one of the pads listed When using the pad to start cooking press and hold the START pad for 6 seconds When the 2...

Page 21: ...ture while oven is preheating example changing from 350 to 425 F If it is necessary to change the preheat temperature while the oven is preheating to the original temperature 1 While preheating press and BAKE will appear in the display Fig 5 2 Enter the new preheat temperature Press 425 and BAKE will appear in the display Fig 6 3 Press PRE and BAKE will appear in the display as the oven heats to 4...

Page 22: ...ature at any time To change the Bake Temperature example changing from 350 to 425 F 1 After the oven has already been set to bake at 350 F and the oven temperature needs to be changed to 425 F press Fig 4 and will show in the display 2 Press BAKE flashes and 425 will appear in the display 3 Press BAKE and 425 will appear in the display See Fig 5 INSTRUCTIONS PRESS DISPLAY Setting Bake The BAKE pad...

Page 23: ...Both TIMED and BAKE will remain on in the display Fig 6 Once the Timed Bake feature has started the current time of day will appear in the display Note After the Timed Bake feature has activated press to display the bake time remaining in the Timed Bake mode Once Timed Bake has started baking a long beep will sound when the oven temperature reaches the set temperature Press when baking has finishe...

Page 24: ...start time using the number pads Fig 7 10 Press When Delay Start starts the set oven temperature will disappear TIMED DELAY BAKE and the current time of time of day will appear in the display Fig 8 Note Once Delay Start has started press to display the bake time remaining Once the Delayed Timed Bake has started baking a long beep will sound when the oven temperature reaches the set temperature Pre...

Page 25: ...sed grease could ignite 2 Arrange the interior oven rack and place the broiler pan on the rack Be sure to center the broiler pan directly under the broiler burner Close the oven door For optimum browning preheat broil burner for 3 4 minutes before adding food 3 Press BROIL will flash and 550 will appear Fig 1 4 If a lower broil temperature is desired minimum broil temperature setting is 400 F pres...

Page 26: ...350 F 1 Arrange interior oven racks and place food in oven 2 Press MEATS will flash and will be displayed See Fig 1 3 Press MEATS will flash and 350 will appear in the display See Fig 2 4 Press MEATS and 350 will appear in the display See Fig 3 The convection fan icon will come on Press to stop Convection Roast at any time Fig 1 Fig 2 Fig 3 Setting the Food Categories Features The MEATS CAKES and ...

Page 27: ...d to be cooked Cookies and biscuits should be baked on pans with no sides or very low sides to allow heated air to circulate around the food Food baked on pans with a dark finish will cook faster 2 Preheating is not necessary when cooking casseroles with Convection Bake 3 When using Convection Bake with a single rack place oven rack in position 3 or 4 If cooking on multiple racks place the oven ra...

Page 28: ...mer is not active and the pad is pressed the Kitchen Timer feature will become active and will begin counting down from 1 minute When the Kitchen Timer reaches the end of the set time the timer will display End and signal 3 long beeps at regular intervals until is pressed If a Kitchen Timer function has ended pressing will restart the timer at 1 minute For further information on how to set the Kit...

Page 29: ...pen when checking foods If the oven heat escapes often the Slow Cook time may need to extended Cover the foods to keep them moist or use a loose or vented type cover to allow foods to turn crisp or brown Roasts may be left uncovered so browning can occur Cook times will vary depending on the weight fat content bone the shape of the roast Use the recipe s recommended food temperature and a food the...

Page 30: ...vate the Sabbath feature 1 Be sure that the clock is set with the correct time of day 2 Arrange the oven racks and place the food in the oven 3 Press will appear in the display Fig 1 4 Press Fig 2 BAKE will flash and 350 will appear in the display 5 Press The display will show 350 and BAKE The oven will turn ON and begin heating See Fig 3 6 If a Timed Bake or Delay Start Delayed Timed Bake is need...

Page 31: ...ated be followed with 2 presses of the START pad This will insure the oven remains ON even if the attempt to set the oven temperature was lower or higher than the oven control can accept If the oven temperature is set incorrectly the oven temperature will default to 170 F or 550 F Try to set the desired oven temperature again To set Warm Hold 1 Arrange interior oven racks and place baked food in o...

Page 32: ... a good seal Care should be taken not to rub damage or remove the gasket DO NOT use any cleaning materials on the oven door gasket Doing so could cause damage Remove the broiler pan and insert all utensils and any aluminum foil These items cannot withstand high cleaning temperatures Porcelain Oven racks do not have to be removed After the cycle is complete and the oven has cooled rub the sides of ...

Page 33: ...isplay See Fig 1 2 4 hours of Self Cleaning time may be choosen by pressing any amount of time from 2 hours through 4 hours in one minute increments You may also skip the time entry and accept the default cleaning time of 3 hours by pressing the Start key pad See Step 3 3 Press The DOOR LOCKED icon will flash CLEAN and the letters CLn will remain on in the display Fig 2 4 As soon as the control is...

Page 34: ...d the oven door can then be opened IMPORTANT NOTES when using the Self Cleaning feature 1 A Self Cleaning cycle cannot be started if the Oven Lockout feature is active 2 If a Self Cleaning Cycle has started but not finished and a power failure occurs the appliance may not have thoroughly cleaned Once power is restored set for another Self Cleaning cycle to finish 3 If your clock is set for normal ...

Page 35: ...emperature higher 1 Press for 6 seconds Fig 1 2 To increase the temperature use the number pads to enter the desired change Example 30 F Fig 2 The temperature may be increased as much as 35 F 19 C 3 Press to accept the temperature change and the display will return to the time of day Fig 3 Press to reject the change if necessary To adjust the oven temperature lower 1 Press for 6 seconds Fig 4 2 To...

Page 36: ... scouring with a soapy scouring pad will remove most spots Rinse with a 1 1 solution of clear water and ammonia If necessary cover difficult spots with an ammonia soaked paper towel for 30 to 40 minutes Rinse with clean water and a damp cloth and then scrub with a soap filled scouring pad Rinse and wipe dry with a clean cloth Remove all cleaners or the porcelain may become damaged during future he...

Page 37: ...y grasp both sides of oven door along the door sides Do not use the oven door handle See Fig 3 2 Holding the oven door at the same angle as the removal position seat the hook of the hinge arm over the roller pins located on each side of the oven door frame See Fig 4 The hook of the hinge arms must be fully seated onto the roller pins 3 Fully open the oven door horizontal with floor See Fig 1 4 Pus...

Page 38: ... safe and may be cleaned in the dishwasher Remove any excessive soils before placing in the dishwasher To Clean the Cooktop and contoured areas of the Cooktop for models with Deep Well Cooktop only If a spill occurs on or in the recessed or contoured areas blot up spill with an absorbent cloth Rinse with a clean damp cloth and wipe dry Do not use harsh abrasive cleaners on the cooktop They can scr...

Page 39: ...or glass across the cooktop Do not use your cooktop as a cutting board or work surface in the kitchen Do not cook foods directly on the cooktop surface without a pan Do not drop heavy or hard objects on the glass cooktop they may cause it to crack If soils remain carefully scrape soils with a metal razor blade scraper holding scraper at a 30 degree angle to the surface Remove loosened soils with c...

Page 40: ...ive cleaners and scouring pads such as metal and some nylon pads They may scratch the cooktop making it more difficult to clean Do not use harsh cleaners such as chlorine bleach ammonia or oven cleaners as they may etch or discolor the cooktop Do not use dirty sponges cloths or paper towels as they can leave soil or lint on the cooktop which can burn and cause discoloration Special Caution for Alu...

Page 41: ...lectric company for service Entire appliance does not operate Surface burners do not light Surface Control knob has not been completely turned to LITE Push in and turn the Surface Control knob to LITE until burner ignites and then turn control knob to desired flame size Burner ports are clogged With the burners OFF use a small gauge wire or needle to clean ports See Cleaning the Cooktop Burner Cap...

Page 42: ... not to damage the oven gasket Excessive spillovers in oven Set Self Cleaning cycle for a longer cleaning time Excessive spillovers in oven This is normal especially for pie spillovers or large amounts of grease on the oven bottom Wipe up excessive spillovers before starting the Self Clean cycle If flames or excessive smoke are present stop the Self Clean cycle and follow the steps under Stopping ...

Page 43: ...seasoning 1 teaspoon salt seasoning 1 tablespoon parsley 6 medium potatoes sliced 1 medium onion sliced In a large mixing bowl combine first 5 ingredients blend well In a roasting pan spread potatoes and onions over the bottom of the pan Pour soup mixture over potatoes and onions topping with the pork chops Sprinkle pepper seasoning and parsley on top of pork chops Cover pan with lid or aluminum f...

Page 44: ...44 ...

Page 45: ...601 970 3394 color number numéro de couleur Gas Range Use Care Guide Cuisinière à gaz Guide d utilisation et d entretien Models Modèles Sears Canada Inc Toronto Ontario Canada M5B 2B8 Visitez notre site Internet à www sears ca ...

Page 46: ...n Les réparations de pièces ou de systèmes résultant des modifications de l électroménager non autorisées Garantie sur appareil Kenmore Elite Garantie limitée d un an Si le produit est installé utilisé et entretenu selon toutes les instructions fournies et qu il présente un problème relié à un défaut de fabrication ou à un vice de matériau au cours de l année suivant la date d achat téléphonez au ...

Page 47: ...eur ou liquide inflammable au voisinage de cet appareil ou de tout autre appareil ménager QUE FAIRE SI VOUS DÉTECTEZ UNE ODEUR DE GAZ Ne mettez pas d appareil en marche Ne touchez pas de commutateur électrique ne vous servez pas du téléphone dans le bâtiment Chez le voisin appelez immédiatement le fournisseur de gaz Suivez ses instructions S il n est pas possible d appeler le fournisseur de gaz ap...

Page 48: ...de surface sans surveillance à des réglages élevés les débordements peuvent causer de la fumée la graisse peut s enflammer ou bien une casserole sans liquide peut fondre Revêtements protecteurs n utilisez pas de papier d aluminium pour recouvrir les cuvettes des brûleurs de surface ou la sole du four saufselonlesrecommandationsdeceguide Unemauvaiseinstallation de ces revêtements peut entraîner un ...

Page 49: ...erre N enlevez PAS la broche de mise à la terre de cette fiche Pour des raisons de sécurité personnelles cette cuisinière doit être correctement mise à la terre Pour des raisons de sécurité maximales la fiche doit être branchée dans une prise correctement polarisée et mise à la terre Si une prise murale à deux alvéoles est la seule prise à votre disposition il vous revient de demander à un électri...

Page 50: ...tien préventif annuel à votre demande pour vous assurer que votre produit est en bon état de marche Certaines limites s appliquent Pour de plus amples renseignements sur les contrats d Entretien Sears Canada composez le 1 800 361 6665 Maintenance Agreements Your purchase has added value because you can depend on Sears Home Central for service With over 2400 Service Technicians and more than a mill...

Page 51: ...s deux tiges situées sur chacune des deux grilles des brûleurs du côté dans les trous de veilleuse situés sur le dessus des chapeaux de brûleur fig 8 Placez les grilles de brûleur sur la table de cuisson et vérifiez que tous les pieds des grilles de brûleur reposent à plat sur la surface en vitrocéramique 7 Placez la grille du brûleur central entre les deux grilles des brûleurs de côté Assemblage ...

Page 52: ...ur à cuisson à convection avec couvercle 17 Grilles de four recouvertes d émail incluant la poignée et les demi grilles de four 18 Grande poignée de porte de four simple style et couleur varient selon le modèle 19 Porte de four pleine largeur styles et couleurs varient selon le modèle 20 Tiroir chauffant avec poignée et grille 21 Brûleur de mijotage de 5 000 BTU 22 Brûleur central de 9 500 BTU cer...

Page 53: ... entre l ustensile posé sur la grille et le mur de côté ou arrière du four Fig 3 Fig 4 Fig 6 Fig 2 Positions de grille recommandées pour le gril la cuisson et le rôtissage Aliment Position de la grille Hamburgers et steaks au gril 1 Viande poulet ou poisson au gril 1 2 ou 3 Biscuits gâteaux tartes petits pains 3 ou 4 et muffins Tartes congelées gâteau des anges 5 ou 6 levure pain plats mijotés pet...

Page 54: ...ile de forme rectangulaire ou ovale Le brûleur arrière gauche et celui du milieu à gauche sont combinés Le brûleur avant gauche peut aussi être ajouté pour totaliser trois brûleurs Fig 3 Brûleur avant gauche Brûleur arrière gauche Brûleur arrière droit Brûleur avant droit Brûleur central Emplacement des commandes des brûleurs à gaz de surface Pour les modèles munis d une table de cuisson en vitroc...

Page 55: ...rriture absorbe la graisse Si la graisse est trop chaude la nourriture rissole si rapidement que le centre n est pas cuit N essayez pas de frire une trop grande quantité à la fois la nourriture risquant de ne pas rissoler ou cuire correctement Emploi d un brûleur à gaz de surface 1 Placez l ustensile sur le brûleur de surface 2 Appuyez sur le bouton de commande du brûleur de surface et tournez le ...

Page 56: ...entre les 2e réglages HI et LO du bouton de commande arrière gauche ajustent la taille de la flamme des deux brûleurs Utilisez les repères entre les 2e réglages HI et LO et ajustez la taille de la flamme selon le besoin reportez vous à la figure 3 7 Ajoutez le brûleur avant gauche si nécessaire Une fois allumé ajustez à l oeil la taille de la flamme du brûleur avant gauche pour qu elle soit de la ...

Page 57: ...ent de la plaque chauffante Utilisation de la plaque chauffante Entretien et conditionnement de la plaque chauffante Avant la première utilisation Lavez la plaque chauffante avec de l eau chaude savonneuse Rincez et séchez complètement Appliquez une fine couche d huile végétale sur toute la surface avant et arrière de la plaque chauffante Préchauffez le four à 350 F 177 C Placez la plaque chauffan...

Page 58: ...é en continu indiquant que la fermentation est EN COURS voyez la fig 5 et les instructions de préparation de la pâte sur cette page Pour revenir aux réglages standard du tiroir chauffant appuyez sur la touche au moins une fois Remarque Pour de meilleurs résultats préchauffez le tiroir chauffant avant d ajouter de la nourriture ou de la pâte à pain Un tiroir vide préchauffera en environ 15 minutes ...

Page 59: ... 1 Coupez le courant avant d enlever le tiroir chauffant 2 Ouvrez complètement le tiroir 3 Repérez le levier de chaque côté du tiroir soulevez le levier de la glissière gauche et appuyez sur le levier de la glissière droite fig 2 4 Enlevez le tiroir de la cuisinière Remise en place du tiroir chauffant Warm ReadyMC 1 Tirez les glissières à roulement à l avant du châssis fig 3 2 Alignez la glissière...

Page 60: ...nférieure à la valeur minimale ou supérieure à la valeur maximale de la fonction choisie FONCTION TEMP DE PRÉCHAUFFAGE TEMP DE CUISSON AU FOUR TEMP DE GRIL MINUTERIE HORLOGE TEMPS DE CUISSON HEURE DE MISE EN MARCHE DURÉE DE NETTOYAGE CUISSON AVEC CONV TEMP TEMPS MIN 170 F 77 C 170 F 77 C 400 F 205 C 1 mn 1 mn 01 00 00 h mn 0 h mn 1 mn 1 mn 01 00 00 h mn 0 h mn 2 heures 325 F 163 C TEMP TEMPS MAX 5...

Page 61: ...ît et l horloge se met en marche fig 4 Changement d affichage entre 12 et 24 heures 1 Appuyez sur la touche et maintenez la enfoncée pendant six secondes fig 3 Pendant que vous maintenez la touche enfoncée l heure actuelle reste affichée et CLO disparaît de l afficheur fig 4 CONTINUEZ à maintenir la touche enfoncée jusqu à ce que 12 Hr fig 5 ou 24 Hr paraisse à l afficheur 2 Appuyez sur pour passe...

Page 62: ...ée soit écoulée Appuyez sur L afficheur revient à l heure Réglage de la cuisson continue ou du mode économie d énergie 12 heures Les touches KITCHEN TIMER et FLEX CLEAN commandent les caractéristiques de cuisson continue ou d économie d énergie 12 heures Le régulateur du four comporte une caractéristique d économie d énergie 12 heures préprogrammée à l usine qui arrête le four s il est laissé en m...

Page 63: ...e la température Fig 3 Fig 4 Fig 5 Affichage de la température Fahrenheit ou Celsius Les touches BROIL et FLEX CLEAN commandent les modes d affichage de la température en Fahrenheit ou Celsius Le régulateur de four peut être programmé pour afficher les températures en degrés Fahrenheit ou Celsius Le four a été programmé en usine pour un affichage en Fahrenheit Pour changer l affichage de Fahrenhei...

Page 64: ... et rappeler les réglages de votre recette préférée Cette caractéristique peut enregistrer un réglage pour chacune des touches de cuisson de base Les touches utilisées pour enregistrer une recette sont BAKE CONV BAKE MEATS CAKES et BREADS Pour enregistrer une recette commencez la par une des touches énumérées Lorsque vous utilisez la touche pour commencer la cuisson appuyez sur la touche START et ...

Page 65: ...a atteint la température souhaitée dans cet exemple 350 F 175 C le régulateur émet un bip long et le voyant PRE s éteint alors que la température du four est affichée fig 4 Si vous n avez pas entendu le bip un coup d oeil rapide à l afficheur est un moyen facile de vérifier que le four a déjà atteint la température de préchauffage Une fois que le four a préchauffé PLACEZ LA NOURRITURE DANS LE FOUR...

Page 66: ...2 Appuyez sur paraît à l afficheur fig 1 3 Appuyez sur fig 2 BAKE CUISSON AU FOUR clignote et 350 paraît à l afficheur 4 Appuyez sur Un long bip retentit une fois que la température du four a atteint 350 F 177 C et que 350 et BAKE paraissent à l afficheur fig 3 Appuyez sur pour annuler la caractéristique de cuisson au four à tout moment Pour changer la température de cuisson par exemple pour chang...

Page 67: ...istique de cuisson minutée a débuté l heure actuelle paraît à l afficheur Remarque Une fois la caractéristique de cuisson minutée activée appuyez sur pour afficher la durée de cuisson restante en mode de cuisson minutée Une fois que la caractéristique de cuisson minutée a débuté un long bip retentit lorsque la température du four atteint le niveau souhaité Appuyez sur lorsque la cuisson est termin...

Page 68: ...inutes 8 Appuyez sur Les mots TIMED BAKE et 350 paraissent à l afficheur fig 6 9 Appuyez sur Entrez l heure de départ désirée à l aide des touches numériques fig 7 10 Appuyez sur Lorsque la cuisson minutée différée débute la température du four disparaît les mots TIMED DELAY BAKE et l heure actuelle paraissent à l afficheur fig 8 Remarque Une fois que la cuisson minutée différée a débuté appuyez s...

Page 69: ... Appuyez sur Le gril commence BROIL et 550 paraissent à l afficheur fig 2 6 Passez la viande au gril sur un côté jusqu à ce qu elle prenne couleur Retournez la et faites la cuire de l autre côté Assaisonnez et servez Remarque Tirez toujours la grille jusqu à la position d arrêt avant de tourner la nourriture ou de la retirer du four 7 Pour annuler l opération de gril ou si le gril est terminé appu...

Page 70: ... 2 Appuyez sur MEATS clignote et paraît à l afficheur fig 1 3 Appuyez sur MEATS clignote et 350 paraît à l afficheur fig 2 4 Appuyez sur MEATS et 350 paraissent à l afficheur fig 3 L icône du ventilateur de convection paraît Appuyez sur pour arrêter le rôtissage à convection à tout moment Fig 1 Fig 2 Fig 3 Réglage des caractéristiques de catégories d aliments Les touches MEATS CAKES et BREADS de l...

Page 71: ...ui tourne à la figure 5 Appuyez sur à tout moment pour arrêter la cuisson à convection ou l annuler Fig 2 Fig 3 Fig 5 Fig 4 1 2 3 4 5 6 La cuisson à convection utilise un ventilateur qui fait circuler la chaleur à l intérieur du four de façon uniforme et continuelle fig 1 La distribution de chaleur est améliorée et permet une cuisson uniforme et donne d excellents résultats lors de l utilisation d...

Page 72: ... elle est réglée correctement cette caractéristique est conçue pour afficher la température convertie réduite La conversion à la convection peut être utilisée SEULEMENT avec le réglage Bake cuisson Timed Bake cuisson minutée ou le réglage Delay Start cuisson minutée différée Lorsque la caractéristique de conversion à la convection est utilisée avec un réglage de cuisson minutée ou différée le mess...

Page 73: ... échappe souvent vous devrez prolonger la durée de la cuisson lente Couvrez les aliments pour qu ils restent tendres ou utilisez un couvercle lâche ou muni d aération pour les faire brunir ou les rendre croustillants Vous pouvez omettre de couvrir les rôtis pour qu ils puissent brunir Les durées de cuisson varient selon le poids la teneur en graisse les os et la forme du rôti Pour savoir si la nou...

Page 74: ...édiatement la cuisson et activer la caractéristique de sabbat 1 Assurez vous que l horloge est à l heure 2 Disposez les grilles du four et placez la nourriture dans le four 3 Appuyez sur paraît à l afficheur fig 1 3 Appuyez sur fig 2 BAKE cuisson au four clignote et 350 paraît à l afficheur 4 Appuyez sur Les messages 350 et BAKE Le four s allume et commence à se réchauffer fig 3 5 Si vous devez en...

Page 75: ...ois heures la caractéristique de maintien au chaud S ÉTEINT automatiquement La caractéristique de maintien au chaud peut être utilisée sans aucune autre activité de cuisson ou lorsque la cuisson en utilisant CUISSON MINUTÉE ou CUISSON DIFFÉRÉE cuisson minutée différée est terminée INSTRUCTIONS APPUYEZ SUR Pour régler le maintien au chaud 1 Disposez les grilles du four et placez la nourriture cuite...

Page 76: ...r Faites attention à ne pas frotter le joint l endommager ou le retirer N utilisez PAS de produits de nettoyage du commerce sur ce joint Vous risqueriez de l endommager Enlevez la lèchefrite et sa grille tous les ustensiles ainsi que le papier d aluminium Ces articles ne résistent pas aux hautes températures de nettoyage Vous n avez pas à enlever les grilles de four recouvertes d émail Après le ne...

Page 77: ...sir un autonettoyage à la minute près qui dure entre deux et quatre heures Vous pouvez aussi ne pas entrer de durée et accepter la durée de nettoyage par défaut de trois heures en appuyant sur la touche Start étape 3 3 Appuyez sur L icône DOOR LOCKED PORTE VERROUILLÉE clignote l icône CLEAN NETTOYAGE et les lettres CLn restent allumées à l afficheur fig 2 4 Dès que la programmation est effectuée l...

Page 78: ...rte fig 7 INSTRUCTIONS APPUYEZ SUR AFFICHEUR REMARQUES IMPORTANTES lors de l utilisation de la caractéristique d autonettoyage 1 Le cycle d autonettoyage ne peut pas débuter si la caractéristique de verrouillage du four est activée 2 Si le cycle d autonettoyage est interrompu par une panne d électricité l appareil peut ne pas être complètement nettoyé Une fois l électricité revenue terminez le net...

Page 79: ...e du four INSTRUCTIONS APPUYEZ SUR AFFICHEUR Augmentation de la température du four 1 Appuyez sur pendant six secondes fig 1 2 Pour augmenter la température utilisez les touches numériques pour entrer le changement désiré Exemple 30 F fig 2 La température peut être augmentée d une valeur allant jusqu à 35 F 19 C 3 Appuyez sur pour accepter le changement de température et l afficheur revient à l he...

Page 80: ...s Rincez avec un mélange à parties égales d eau et d ammoniaque Au besoin recouvrez les taches rebelles d un papier essuie tout trempé dans l ammoniaque et laissez agir pendant 30 à 40 minutes Rincez bien à l eau propre et avec un linge humide puis frottez avec un tampon récureur rempli de savon Rincez et séchez avec un linge propre Enlevez bien tous les produits de nettoyage sinon l émail risque ...

Page 81: ...utilisez pas la poignée de la porte voyez fig 3 2 En tenant la porte dans le même angle que pour la dépose assoyez le crochet du bras de charnière sur les tiges situées de chaque côté du cadre de la porte fig 4 Le crochet des bras de charnière doit être bien assis sur les tiges 3 Ouvrez complètement la porte du four parallèle au sol comme dans la fig 1 4 Poussez les verrous des charnières de droit...

Page 82: ...e la table de cuisson et des zones concaves de la table de cuisson pour les tables de cuisson profondes seulement Les zones encastrées ou concaves se nettoient en épongeant les renversements avec un linge absorbant Rincez avec un linge propre et humide et séchez N utilisez pas de produits de nettoyage abrasifs sur le dessus de la table de cuisson Ceux ci peuvent rayer l émail Pour éviter d endomma...

Page 83: ...es qui ont de la saleté accumulée sur leur fond remplacez les par des ustensiles propres N utilisez pas votre table de cuisson comme planche à découper ou comme surface de travail Ne cuisez pas directement sans ustensile les aliments sur la surface de la table de cuisson Ne faites pas tomber d objets lourds ou durs sur la surface ceci risquerait de la casser S il reste encore de la saleté grattez ...

Page 84: ...ssez en AUCUN cas le papier d aluminium toucher la surface de cuisson en vitrocéramique Ustensiles en aluminium Le point de fusion de l aluminium est très inférieur à celui des autres métaux Faites attention lorsque vous utilisez des casseroles et des ustensiles en aluminium sur la surface de cuisson Si vous les laissez chauffer sans liquide à l intérieur non seulement l ustensile sera détruit mai...

Page 85: ...à la dimension de flamme voulue Les orifices des brûleurs sont obstrués Les brûleurs ÉTEINTS utilisez une aiguille ou un fil fin pour nettoyer les orifices Reportez vous à Nettoyage de la table de cuisson des têtes de brûleur des chapeaux de brûleur et des grilles dans la section Entretien et nettoyage pour des instructions détaillées Le cordon d alimentation de la cuisinière n est pas branché mod...

Page 86: ...autonettoyage pour une durée plus longue Renversements excessifs dans le four Ceci est normal surtout pour les débordements ou les grandes quantités de graisse sur la plaque de sole Essuyez les produits renversés avant de démarrer le cycle d autonettoyage Si des flammes ou une fumée excessive se forment arrêtez le cycle et suivez les étapes présentées sous Arrêt ou interruption d un cycle d autone...

Page 87: ...cuillerée à thé de sel d assaisonnement 1 cuillerée à soupe de persil 6 pommes de terre moyennes tranchées 1 oignon moyen tranché Dans un grand bol combinez les cinq premiers ingrédients Mélangez bien Utilisez les pommes de terre et les oignons pour recouvrir le fond d une rôtissoire Versez le mélange à soupe sur les pommes de terre et les oignons Placez les côtelettes de porc sur le dessus Saupou...

Page 88: ...44 ...

Reviews: