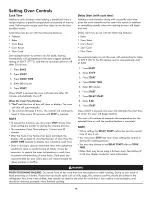
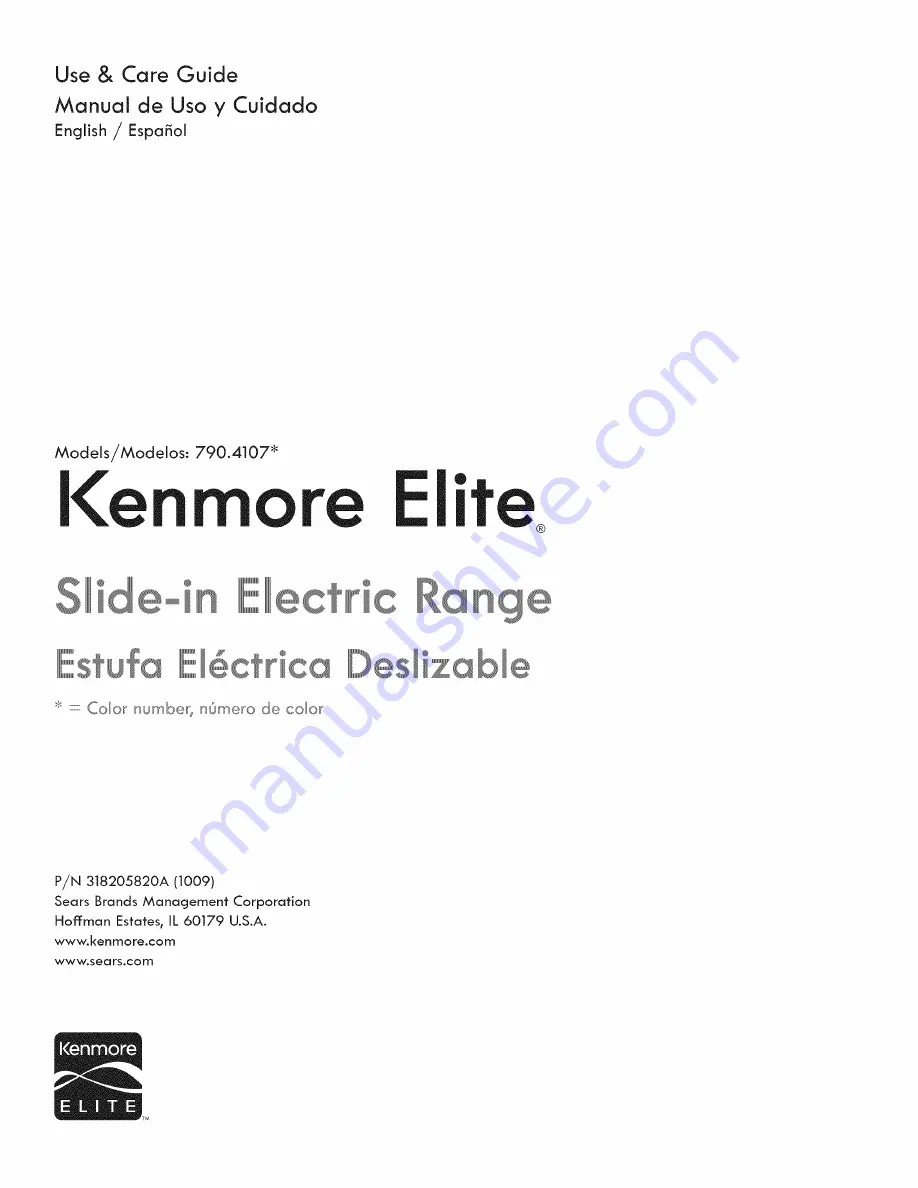
background image

Summary of Contents for ELITE 790.4107 Series

Page 1: ...Kol Models Modelos 790 4107 _ I e Elite llllllllllllllllllli 5 d _o_ n _ct r c e_ ng E6ctrica DeslizaD e _ Color numbe_ nOmero de color P N 318205820A 1009 Sears Brands Management Corporation Hoffman Estates IL 60179 U S A www kenmore com WWW Sea rs com ...

Page 2: ... maintain this product 6 Damage to or failure of this product if it is not installed operated or maintained according to the all instructions supplied with the product 7 Damage to or failure of this product resulting from accident abuse misuse or use for other than its intended purpose 8 Damage to or failure of this product caused by the use of detergents cleaners chemicals or utensils other than ...

Page 3: ...t to tilt it forward Refer to the Installation Instructions for proper anti tip bracket installation Never modify or alter the construction of an appliance by removing panels wire covers or any other part of the product Remove the oven door from any unused appliance if it is to be stored or discarded Stepping leaning sitting or pulling down on the door of this appliance can resuff in serious injur...

Page 4: ...tend over adjacent surface units To reduce the risk of burns ignition of flammable materials and spillage due to unintentional contact with the utensil Never leave surface units unattended m Boilovers cause smoking and greasy accumulations that may ignite or a pan that has boiled dry may melt Glazed cooking utensilsmOnly certain types of glass glass ceramic ceramic earthenware or other glazed uten...

Page 5: ...TRUCTIONS FOR CLEANING YOUR OVEN Clean the appliance regularly to keep all parts free of grease that could catch fire Exhaust fan ventilation hoods and grease filters should be kept clean Do not allow grease to accumulate Greasy deposits in the fan could catch fire Refer to the hood manufacturer s instructions for cleaning Clean Ventilating Hoods Frequently Grease should not be allowed to accumula...

Page 6: ...trol and electronic display 8 Right front element size selector 9 Self clean door latch 10 Oven vent 1 Broil element 12 Self cleaning convection oven interion 13 Dual convection bake cooking system 4 Adjustable interior porcelain oven rack s 15 Large 1 piece oven door handle 16 Full width oven door with window 17 Warmer drawer 18 7 single radiant element 19 7 single radiant element 20 6 single rad...

Page 7: ...rculate around the pans and cookware in the oven for even Types of Oven Racks Always use pot holders or oven mitts when adjusting the oven racks Wait until the oven has completely cooled if possible Oven racks may HOT and cause burns Your appliance may be equipped with one or more of the oven rack types shown Flat Handle Oven Rack Offset Oven Rock and Flat Half Oven Rock The Fiat Oven Hondle Rack ...

Page 8: ...ON A poor heat conductor however will retain heat very well Cooks evenly once cooking temperature is reached Not recommended for use on ceramic cool tops Figure 1 PORCELAIN ENAMEL on METAL Heating characteristics will vary depending on base material Porcelain enamel coating must be smooth to avoid scratching ceramic cooktops Correct incorrect GLASS Slow heat conductor Not recommended for ceramic c...

Page 9: ... a cooktop keypad only activates or deactivates the element but will not start the heating process Activat ing and powering any surface cooking element requires pressing two keys the ON OFF keypad first and then a power level section must be added before the element will begin heating Be sure to read the detailed instructions for ceramic glass cooktop cleaning in the Care Cleaning and Before You C...

Page 10: ...OFF 2 Press and hold Cooktop Lockout keypad until acceptance tone sounds about 3 seconds When the cooktop is locked the cooktop locked indicator icon will appear in the oven control display window Fig 11 Hot Element Indicator Message HE After using any of the radiant element positions the cooktop will become very hot Even after setting the controls to OFF the cooktop will remain hot for some time ...

Page 11: ... holders or plastic wrappings on top of the range when it is in use These items could melt or ignite Potholders towels or wooden spoons could catch fire if placed too close to the surface elements To Operate the Single Radiant Surface Elements 1 Place correctly sized cookware on the radiant surface element 2 Touch and hold the _ pad for the desired element position until a beep is heard The displa...

Page 12: ...tors the temperature of the cooktop and displays the message HE hot element warning when the cooktop is still too hot to touch If the HE message appears in the window the control can still be turned on again for use Radiant surface elements may appear to have cooled after they have been turned of The glass surface may still be hot and burns may occur if the glass surface is touched before it has c...

Page 13: ...lock the cooktop functions 19 Oven Light Used to turn oven light ON and OFF 20 STOP Used to cancel any oven function previously entered except Clock and Timer 21 Clock Set Used to set the time of day 22 Oven Lockout Used to lock oven functions and door 0 fhru 9 number Used to enter temperature and times Minimum Maximum Control Settings Aii of the features listed below have minimum and maximum time...

Page 14: ... affect the cooking process Preheat Temperature Display Once a cooking feature has been started the control wiii display the actual oven temperature while preheating Once the oven reaches the oven set temperature only the oven set temperature will be displayed The preheat temperature display is available with the following cooking modes Baize Conv Baize Setting Oven Lockout The Oven Lockout featur...

Page 15: ...require normal cooking temperatures The following temperature settings apply to the bake feature Auto suggest default setting 350 F 177 C Min baize setting 170 F 77 C Max baize setting 550 F 288 C Setting bake See example below to set a baize to start immediately at the default temperature 1 Press BAKE If needed use numeric keypads to enter a different oven tem peratu re 2 Press START Once START i...

Page 16: ... until STOP is pressed NOTE To cancel the function you may press STOP at any time when setting the control or during the cooking process The maximum Cool Time setting is 11hours and 59 minutes After the Cool Time feature has been activated the display will go back to showing the hour of day Press the COOK TIME keypad to display any remaining cook time Dark or dull pans absorb more heat than shiny ...

Page 17: ...ults When baking with a single rack use rack positions 2 or 3 When using 2 racks use rack positions 2 4 When using 3 racks use rack positions 1 3 4 Cookies and biscuits should be baked on pans with no sides or very low side to allow heated air to circulate around the food e e Food baked on pans with a dark finish will cook faster When placing multiple food items in the oven allow 2 4 5 10cm of spa...

Page 18: ...with a dark finish will cool faster When placing multiple food items in the oven allow 2 4 5 10cm of space between the food items for proper air circulation See the example below to set conv bake starting immediately with the auto suggest default setting of 350 F 177 C and adding the conv convert option 1 Press CONV BAKE If needed use numeric keypads to enter a different oven tern peratu re 2 Pres...

Page 19: ...TART Once START is pressed the oven will begin heating NOTE You may press STOP any time when setting the control or during the cooking process Roasting rack instructions The broil pan its insert and the roasting rack are available via the mail order card When preparing meats for convection roasting you may use the broiler pan insert and the roasting rack supplied with your appliance The broiler an...

Page 20: ...r best results Use the recommended pans and oven rack positions for the type of meat being prepared For optimum browning results allow the oven to preheat 5 6 minutes before placing the food in the oven Do not use the broiler pan without the insert Do not cover the broil pan insert with aluminum foil the exposed grease could ignite To prevent food from contacting the broil element and to prevent g...

Page 21: ...ng on a single oven rack When baking layer cakes or cookies using 2 oven racks place cookware on rack in position 2 and 4 For best results when baking cakes or cookies using a single oven rack place rack in position 2 or 3 Warm Hold TM The Warm Hold feature wiii keep oven baked foods warm for serving up to 3 hours after cooking has finished After 3 hours the Warm Hold feature wiii shut off automat...

Page 22: ...Do not allow the probe to touch bone fat gristle or the pan For bone in ham or lamb insert the probe into the center of the lowest large muscle or joint For dishes such as meat loaf or casseroles insert the probe into the center of the food To find the center of the food visually measure with the probe Fig 1 When cooking fish insert the probe just above the gill For whole poultry or turkey insert ...

Page 23: ... cooking after reaching the probe target temperature 1 Press MEAT PROBE keypad and hold for 6 seconds 2 Press FLEX CLEAN keypad and toggle until the Continu message appears Fig 1 then press START to accept To set the oven to cancel cooking and automatically start Warm Hold after reaching the probe target temperature 1 Press MEAT PROBE keypad and hold for 6 seconds 2 Press FLEX CLEAN keypad and tog...

Page 24: ... roast Preheating the oven will not be necessary Use the recipe s recommended food temperature and a food thermometer to determine when the food is done Recipe Recall The Recipe Recall feature may be used to record and recall your favorite recipe settings This feature may store 1 setting for each of the basic cooking pads The keypads that a recipe may be stored with are Bake Cony Bake Conv Roast C...

Page 25: ...ld a power failure or interruption occur during the Sabbath Holidays the appliance will shut OFF When power is restored the appliance wiii not turn back on automatically to the original BAKE feature settings SF wiii appear in aii the control display panels indicating a Sabbath mode failure After a power failure the food may be safely removed from the oven while still in the Sabbath made For furthe...

Page 26: ...itions The keep warmer drawer rack may be used in 2 ways In the upright position See Fig 1 to allow low profile food items to be placed both under and on top of the rack for example rolls or biscuits on top of the rack and a casserole dish underneath In the downward position See Fig 2 to allow for light weight food items and empty cookware for example rolls or pastries and dinner plates on the rac...

Page 27: ... in Fig 3 The settings provided are meant to be used as a recommendation only If a particular food item is not listed start with a medium setting If more crispness is desired remove the lid or aluminum foil from the food Most foods may be maintained at serving temperatures using a medium heat setting When a combination of foods are to be kept warm for example a meat with 2 vegetables and rolls use...

Page 28: ...n the On and Off mode Changing Between F or C Your control has the ability to display and set Fahrenheit or Celsius temperatures The factory preset temperature display is Fahrenheit See the example below to change the default temperature display to Celsius 1 Press and hold BROIL for 7 seconds until F or C appear in the display 2 Press FLEX CLEAN to switch between the F and C mode 3 Press START to ...

Page 29: ...se heavy smoke or fire when subjected to high temperatures Clean any soil from the oven frame the door liner outside the oven door gasket and the small area at the front center of the oven bottom with soap and water These areas heat sufficiently to burn soil on Do not allow food spills with a high sugar or acid content such as mill tomatoes sauerkraut fruit juices or pie filling to remain on the p...

Page 30: ...e above Press START As soon as the control is set the motor driven oven door loci will begin to close automatically Once the door has been locked the DOOR LOCKED indicator light will stop flashing and remain on Note Allow about 15 seconds for the oven door loci to close Note If the opflonal delay Self Clean feature is needed finish steps 4 6 4 Press DELAY START 5 Enter the desired Self Clean start...

Page 31: ...erkrauh fruit juices or pie filling to remain on the surface they may cause a dull spot even after cleaning Oven interior For oven interior remove excessive spillovers from oven cavity bottom before starting Flex Clean Clean any soils from oven frame and door liner outside the oven door gasket For very important cleaning precautions be sure to read all the instructions in the Flex Clean section Po...

Page 32: ...cooktop is COOL DO NOT use a cooktop cleaner on a hot cooktop The fumes can be hazardous to your health and can chemically damage the ceramic glass surface For light to moderate soil Apply a few drops of CookTop Cleaning Creme directly to the cooktop Use a paper towel or use a non abraslve plas tic type no scratch cleaning pad to clean the entire cooktop surface Make sure the cooktop is cleaned th...

Page 33: ...ights may also be manually operated by pressing the 9 pad The oven light bulb is covered with a glass shield The glass shield can be removed to be cleaned manually or to change oven light THIS GLASS SHIELD MUST BE IN PLACE WHENEVER THE OVEN IS IN USE To replace the light bulb BE SURE THE OVEN IS COOL l Turn the power off at the main source 2 Wear a leather faced glove for protection against possib...

Page 34: ... left and right door hinges down from the oven frame completely towards the oven door See Figure 2 A tool such as a small fiat blade screwdriver may be required 3 Firmly grasp both sides of oven door along the door sides Do not use the oven door handle See Figure 3 4 Close the door to the broil stop position the oven door will stop into this position just before fully closing 5 With the oven door ...

Page 35: ... To Replace the Drawer 1 Pull the plastic slider to the front of the glide slots on each side of the drawer cavity See Figure 2 2 Align the glide on each side of the drawer with the drawer cavity glide slot 3 Push the drawer into the drawer cavity until glide levers click approximately 2 If you do not hear the glide levers _cJlck or the drawer does not feel seated remove the drawer and repeat step...

Page 36: ...reheat to the selected temperature before placing food in the oven Use proper rack position for baking needs Set oven temperature 25 F 12 C lower than recommended Cakes not done in the center Cakes not level Foods not done when cooking flme is up Oven too hot Incorrect pan size Pan not centered in oven Range not level Pan too close to oven waft or rack overcrowded Pan warped Oven too cool Oven ove...

Page 37: ...ngs are an indicator of relative heat settings and will vary slightly Voltage is incorrect Be sure appliance is properly connected to the power source specified in the installation instructions If you are not sure about this requirement carl gOO 4 MY HOME for service See back cover Lightweight or warped pans were used Be sure to use proper cookware Use only flat bottom evenly balanced medium or he...

Page 38: ... drain into broiler pan Always place the grid on the broiler pan with the ribs up and the slots down to allow grease to drip into the pan Broiler pan used without grid or grid cover with foil DO NOT use the broiler pan without the grid or cover the grid with foil Oven needs to be cleaned Grease has built up on oven surfaces Regular cleaning is necessary when broiling frequently Old grease or food ...

Page 39: ...la durabilidad de su nuevo producto El acuerdo incluye Io siguiente Piezas y mano de obra necesarias para contribuir a mantener el funcionamiento adecuado de los productos utilizados en condiciones normales de uso no s61o en case de defectos de los productos Nuestra cobertura va mucho mas alia que la garantia del producto No se aplican deducibles ni exclusiones per fallas del funcionamiento es dec...

Page 40: ...f carry in items like vacuums lawn equipment and electronics call anytime for the location of your nearest Sears Parts Repair Service Center 1 800 488 1222 U S A 1 800 469 4663 Canada www sears com www sears ca To purchase a protection agreement on a product serviced by Sears 1 800 827 6655 U S A 1 800 361 6665 Canada Para pedir servicio de reparaci6n a domicilio y para ordenar piezas 1 888 SU HOG...

Reviews: