background image

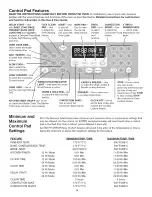
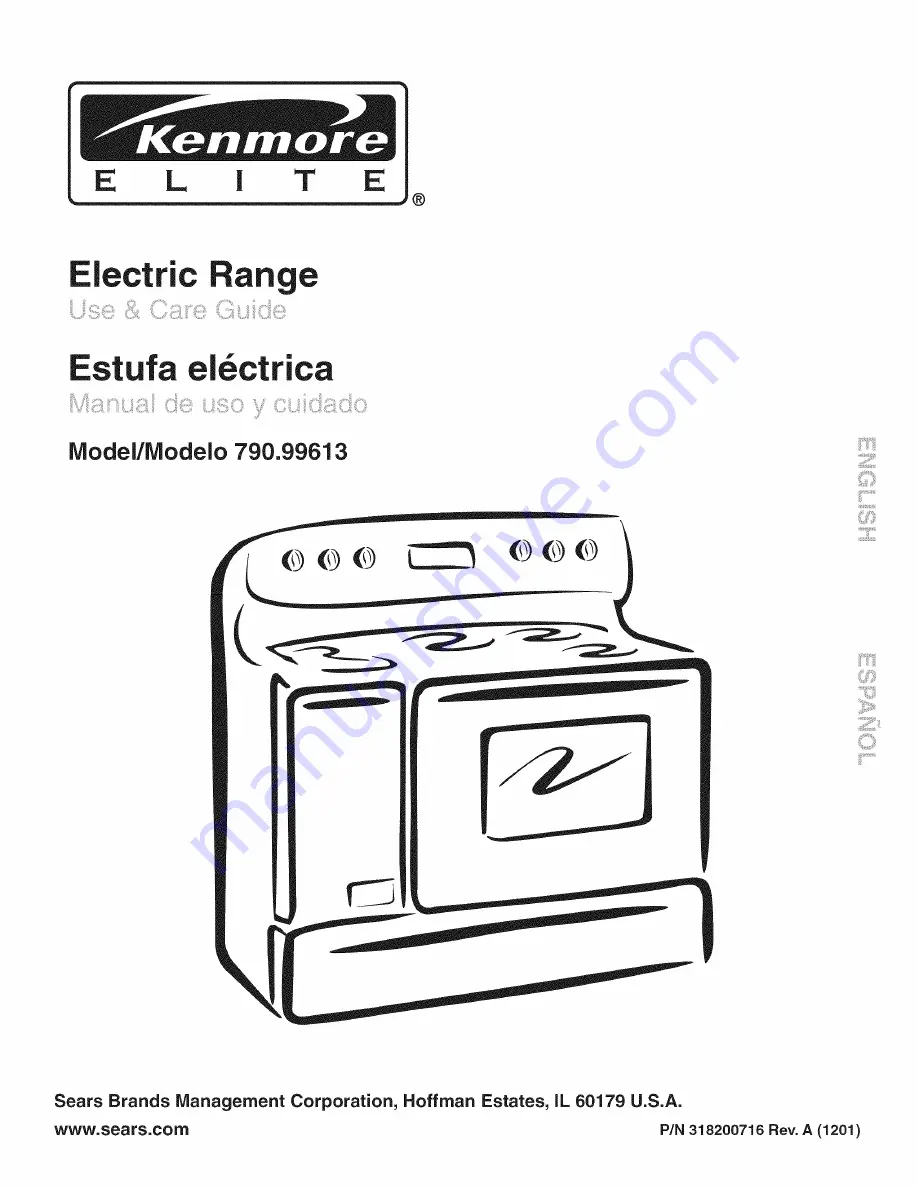
Summary of Contents for ELITE 790.99613

Page 1: ... Electric Range Estufa el4ctrica Model Modelo 790 99613 Sears Brands Management Corporation Hoffman Estates IL 60179 U S A www sears com P N 318200716 Rev A 1201 ...

Page 2: ...kmanship Sears will NOT pay for 1 Cracks in a ceramic glass cooktop that are not a result of thermal shock 2 Stains and scratches on a ceramic glass cooktop resulting from accident or improper operation or maintenance 3 Expendable items that can wear out from normal use including but not limited to filters belts light bulbs and bags 4 A service technician to instruct the user in correct product in...

Page 3: ... the range at the circuit breaker or fuse box in case of an emergency User servicing Do not repair or replace any part of the appliance unless specifically recommended in the manuals All other servicing should be done only by a qualified technician this may reduce the risk of personal injury and damage to the range Never modify or alter the construction of a range by removing leveling legs panels ...

Page 4: ... extend over adjacent surface units To reduce the risk of burns ignition of flammable materials and spillage due to unintentional contact with the utensil The handle of the utensil should be positioned so that it is turned inward and does not extend over adjacent surface units Never leave surface units unattended at high heat settings Boilovers cause smoking and greasy spillovers that may ignite o...

Page 5: ...ions Do not clean door gasket The door gasket is essential for a good seal Care should be taken not to rub damage or move the gasket Remove oven racks Oven racks color will change if left in the oven during a self cleaning cycle The health of some birds is extremely sensitive to the fumes given off during the self cleaning cycle of any range Move birds to another well ventilated room iMPORTANT SAF...

Page 6: ...an one half inch or 12mm o Heavy handle tilts pan o Pan is smaller or larger than element Figure 2 Specialty pans such as lobster pots griddles and pressure cookers may be used but must conform to the above recommended cookware requirements Cookware Material types The cookware material determines how evenly and quickly heat is transferred from the surface element to the pan bottom The most popular...

Page 7: ...e caution to prevent burns Always raise the lid to vent steam away from you 1 Use tested recipes and follow instructions carefully Check with the manufacturer of glass jars for the latest canning information 2 Use flat bottomed canners only Heat is spread more evenly when the bottom surface is flat 3 Center canner on the burner grate 4 Start with hot water and a high heat setting to reduce the tim...

Page 8: ... Electronic Oven Controls i i Surface Control Knobs Broil __ Element __ Convection Element Cover Oven Light Self Cleaning Oven Adjustable Oven Racks 3 Door Handle Glass Front Oven Door Drawer Drawe r Handle Side Oven Vent Cooktop Dual Element Main Oven Vent Bridge Element Element Dual Element Hot Surface Indi cator Lights Ceramic Glass Cooktop ...

Page 9: ...nly flat bottom cookware should be used The type and size of cookware the number of surface elements in use and their settings are all factors that will affect the amount of heat that will spread to areas beyond the surface elements The areas surrounding the elements may become hot enough to cause burns About the Radiant Surface Elements The element temperature rises gradually and evenly As the te...

Page 10: ...me during cooking To Operate the Dual Surface Element 1 Place correctly sized cookware on the dual surface element 2 Push in and turn the control knob counterclockwise See Figure 2 for smaller cookware or clockwise See Figure 7 for larger cookware 3 Turn the knob to adjust the setting if needed Start most cooking operations on a higher setting and then turn to a lower setting to finish cooking Eac...

Page 11: ...turn to a lower setting to finish cooking Each surface element provides a constant amount of heat at each setting A glowing red surface heating area extending beyond the bottom edge of the cookware indicates the cookware is too small Please note that not all cookware will fit the Bridge element correctly 4 When cooking has completed turn the surface control knob to OFF before removing the cookware...

Page 12: ... OPERATING THE OVEN Always use oven mitts when using the oven To remove an oven rack pull the rack forward until it stops Lift up front of rack and slide out To replace an oven rack fit the rack onto the guides on the oven walls Tilt the front of the rack upward and slide the rack back into place Main Oven Side Oven 1 Oven Rack Air Circulation in the Oven For best air circulation and baking result...

Page 13: ...lower position Rack Position From Top Food 1 Rare steaks 2 Ham slices fish hamburgers and medium steaks and chops 3 Well done foods such as chicken and lobster 2 Turn the Temperature Control Knob to BROIL To sear rare steaks allow the element to become red hot about 2 minutes before placing food in ove n 3 Obtain a properly sized side oven broiler pan and grid not supplied with purchase of this un...

Page 14: ...oking features WARM HOLD PAD Us_ to select the Warm Hold feature CONVECTION BAKE Use to select the Convection Bake feature PREHEAT Use to raise oven to cooking temperature CLOCK SET Use to set the time of day also controls the Cooktop Lockout featu re STOP Use to cancel any oven mode previously entered except the time of day and minute timer Press STOP to stop cooking STOP also controls the Oven L...

Page 15: ...disappear and the clock will start Figure 4 Changing between 12 or 24 hour time of day display 1 Press and hold _ for 7 seconds CLO will appear in the display After 3 seconds I_1will appear in the display indicating that the cooktop lockout is active Figure 5 CONTINUE holding the pad until 12h Figure 6 or 24h Figure 7 appears in the display and the control beeps once 2 Press _ to switch between th...

Page 16: ...tchen Timer serves as an extra timer in the kitchen that will beep when the set time has run out It does not start or stop cooking The Kitchen Timer feature can be used during any of the other oven control functions Refer to Minimum and Maximum Control Pad Settings for time amount settings INSTRUCTIONS PRESS DISPLAY To set the Kitchen Timer example for 5 minutes 1 Press _ will appear and TIMER wil...

Page 17: ...Q for 3 _ seconds _ _ _ Figure 2 _ Setting Silent Control Operation The DELAYTIME _ and FLEX CLEAN _ pads control the Silent Control operation feature The Silent Control operation feature allows the oven control to be operated without sounds or beeps whenever necessary If desired the control can be programmed for silent operation and later returned to operating with all the normal sounds and beeps...

Page 18: ...it to Celsius or Celsius to Fahrenheit 1 PRESS To tell if the display is set for Fahrenheit or Celsius press Br iU Figure 1 and hold for 7 seconds 550 will appear and BROIL will flash in the display and a beep will sound If F appears the display is set to show temperatures in for7seconds DISPLAY Figure 1 Fahrenheit Figure 2 If C appears the display is set to show temperatures in Celsius Figure 3 2...

Page 19: ...nd the PRE light will turn off and oven temperature will be displayed Figure 4 If you missed hearing the beep you can tell that the oven has reached preheat temperature if you see the oven temperature showing in the oven display Once the oven has preheated PLACE FOOD IN THE OVEN The BAKE light will stay on Press _ when baking is complete or to cancel the preheat feature To change Preheat temperatu...

Page 20: ...n the display 4 Press A beep will sound once the oven temperature reaches 375 F and the display will show 375 and BAKE Figure 3 Pressing 1_ will cancel the Bake feature at any time To change the Bake Temperature example changing from 375 F to 425 F 1 After the oven has already been set to bake at 375 F and the Bake oven temperature needs to be changed to 425 F press _ _ Figure 4 and 375 will appea...

Page 21: ...too close to oven wall or Choose pan sizes that will permit 2 to 4 5 1 cm to 10 2 cm of air space on all sides when placed in the ove n Use a medium weight aluminum baking sheet Allow oven to preheat to the selected temperature before placing food in the oven Use proper rack position for baking needs Set oven temperature 25 F 12 C lower than recom mended Set oven temperature 25 F 12 C lower than r...

Page 22: ...food Food baked on pans with a dark finish will cook faster 2 Preheating is not necessary when cooking casseroles with Convection Bake 3 When using Convection Bake with a single rack place oven rack in position 2 or 3 If cooking on multiple racks place the oven racks in positions 2 and 4 INSTRUCTIONS Air circulation during Convection Bake Figure 1 _ 4th Rack _ _ _ position _ _0 _ 2nd Rack _ _ _ po...

Page 23: ... reached the desired temperature the control will beep and CONV ROAST light will stay on Note The Bake Broil and Convection elements will cycle for a better heat distribution When convection roasting is complete press _ _ s_f _ Figure 1 Figure 2 Z c Figure 3 _ Figure 4 Figure 5 Setting Convection Convert The Co_ver_ CONV CONVERT pad is used to automatically convert a standard baking recipe for con...

Page 24: ...le racks to accommodate size of cooking utensils when cooking multiple food items Do not open the oven door often or leave the door open when checking foods If the oven heat escapes often the Slow Cook time may need to be extended Cover the foods to keep them moist or use a loose or vented type cover to allow foods to turn crisp or brown Cook times will vary depending on the weight fat content bon...

Page 25: ...ain on in the display Figure 5 Once the Timed Bake feature has started the current time of day will appear in the display Timed Oven Timed Oven Note After the Timed Bake feature has activated press _ to display the bake time remaining in the Timed Bake mode Once Timed Bake has started baking a beep will sound when the oven temperature reaches the set temperature Press _ when baking has finished or...

Page 26: ...ppear and BAKE and 350 will remain in the display Figure 3 6 Enter the desired baking time using the number pads by pressing in the display Figure 4 Note Baking time can be set for any amount of time from 1 minute to 11 hours and 59 minutes BAKE 350 7 Press TIMED and will remain in the display Figure 5 8 Press _ DELAY will flash in the display Enter the desired start time using the number pads Fig...

Page 27: ...ch category iNSTRUCTiONS PRESS DISPLAY To set the Food Categories feature example for Cakes to cook at 375 F 1 Arrange interior oven racks and place food in oven 2 Press _ CAKE will flash and 350 will be displayed See Figure 1 Note that if a bake temperature of 350 F is needed simply press 3 Press _ _ _ CAKE will flash and 375 will appear in the display See Figure 2 4 Press CAKE will stop flashing...

Page 28: ...SPLAY Arrange interior oven racks and place food in oven Press _ HLd will appear in the display Figure 1 Note if no pad is touched within 25 seconds the request to turn ON Warm Hold feature will be cancelled TART Press The oven icon will appear in the display Figure 2 To turn arm Hold OFF at any time press _ _ _ Note The Warm Hold feature will automatically turn OFF after 3 hours Figure 1 Figure 2...

Page 29: ...ement but on the thickness and age of meat fat content and doneness preferred The first side usually requires a few minutes longer than the second Frozen meats also require additional time Broiling Tips Broiler pan and its grid allow dripping grease to drain and be kept away from the high heat of the broiler DO NOT use a pan without its grid DO NOT cover the grid with foil The exposed grease could...

Page 30: ...ture is desired minimum broil temperature setting is 400 F press the desired temperature before continuing to step 6 Q Figure 1 Figure 2 Figure 3 6 Press The oven will begin to broil BROIL and 500 will appear in the display Figure 2 7 Broil on one side until food is browned turn and cook on the second side Season and serve Note Always pull the rack out to the stop position before turning or removi...

Page 31: ...ing Immediately activate the Sabbath feature example baking at 350 F 1 Be sure that the clock is set with the correct time of day 2 Place the food in the oven 4 h 3soo 3 Press appears in the display 5 Figure 1 Press Figure 1 If you desire to set the oven control for a Timed Bake or Delayed Figure 2 Start Bake do so at this time If not skip this step and continue to step 7 Refer to the Timed Bake c...

Page 32: ... work with any other function including a Delayed Timed Bake a Clean Cycle or a Broil setting iNSTRUCTiONS PRESS DISPLAY To Program the Oven to Begin Baking immediately and record a Recipe example for a Bake mode at 375 C 1 Place the food in the oven 2 Press _ke 350 appears and BAKE will flash in the display Figure 1 3 Enter the desired roasting temperature using the number pads ZoTure 4 Press and...

Page 33: ...any cleaning materials on the oven door gasket Doing so could cause damage Remove the broiler par and insert all utensils and any aluminum foil These items cannot withstand high cleaning temperatures Porcelain oven racks do not have to be removed After the cycle is complete and the oven has cooled rub the sides of the oven racks with wax paper or a cloth containing a small amount of salad oil this...

Page 34: ...leaning cycle has completed The oven may still be VERY HOT DISPLAY To set the controls for a 3 hour Self Cleaning cycle to start immediately and shut off automatically 1 Be sure the clock is set with the correct time of day and the oven door is closed 2 Press _ CLEAN will flash and 3 00 HR will show in the display Figure 1 The control will automatically clean for a 3 hour period default self clean...

Page 35: ...me based on the amount of soil light medium or heaw See previous page i A i The 3 Press DOOR LOCKED icon will flash CLEAN icon and the letters CLn will remain on in the display Figure 2 4 Press _ Enter the desired start time using the number 5 Press DELAY DOOR LOCKED and CLEAN icons will remain on Figure 4 6 As soon as the control is set the motor driven oven door lock will begin to close automati...

Page 36: ...The baking results should help you to decide how much of an adjustment is needed INSTRUCTIONS PRESS Note The oven temperature adjustments made with this feature will not change the Self Clean cycle temperature DISPLAY To adjust the oven temperature higher j _ Bake 1 Press for 6 seconds Figure 2 2 To increase the temperature use the number pads to enter the desired change Example 30 F _ _ Figure 3 ...

Page 37: ... an oven cleaner following manufacturer s instructions DO NOT mix ammonia with other cleaners Adhere to the following precautions when using oven cleaners 1 DO NOT spray on the electrical controls or switches because it could cause _ t a short circuit and result in sparking or fire 2 DO NOT allow a film from the cleaner to build up on the temperature sensing O bulb located at the top left rear cor...

Page 38: ... COOL j DO NOT use a cooktop cleaner on a hot cooktop The fumes can be hazardous to your health and can age the ceramic glass surface J Cleaning Recommendations for the Ceramic Glass Cooktop For light to moderate soil Apply a few drops of Cleaning Creme directly to the cooktop Use a paper towel or a Multi Purpose No Scratch Scrub Sponge to clean the entire cooktop surface Make sure the cooktop is ...

Page 39: ... Aluminum Foil and Aluminum Cooking Utensils Aluminum foil Use of aluminum foil will damage the cooktop Do not use under any circum stances Aluminum utensils Since the melting point of aluminum is much lower than that of other metals care must be taken when aluminum pots or pans are used Pans that boil dry may permanently damage cooktop by marking breaking or fusing to it Care and Cleaning of Stai...

Page 40: ...f the racks with wax paper or a cloth containing a small amount of baby oil or salad oil this will make the i racks glide easier into the rack positions Cooktop under Cooktop Broiler Pan and Insert some models Door Liner Small Oven Oven Door DO HAND CLEAN FRAME DO HAND W qK __ _ _ CLEAN DOOR _ I I _ _ _ DO NOT l_ _ CLEAN GASKET Glass Paint and Plastic Control Knobs Body Parts and Decorative Trim G...

Page 41: ... opened position 2 Pull up the lock located on both hinge supports and engage it in the hinge levers You may have to apply a little downward pressure on the door to pull the locks fully over the hooks 3 Grab the door by the sides pull the bottom of the door up and toward you to disengage the hinge supports Keep pulling the bottom of the door toward you while rotating the top of the door toward the...

Page 42: ...ram oven again If fault recurs record fault number Push CLEAR and contact or F90 Sears or another qualified service dealer Oven lights does not Replace or tighten bulb See To Change the Oven Light in this Guide for instructions work Surface unit does not No power to the appliance Check steps under Entire Range or Oven Does Not Operate in heat this Before you call Checklist Incorrect control settin...

Page 43: ...ssively during broiling Make sure oven door is opened to the Broil Stop Position Meat too close to the element Reposition the rack to provide proper clearance between the meat and the element Preheat broil element Preheat broil element for searing Grid on broiler pan wrong side up and grease not draining Always place grid on broiler pan with ribs up and slots down to allow grease to drip into pan ...

Page 44: ...other major home items in the U S A or Canada call 1 800 4 MY HOME Piezas y mano de obra necesarias para contribuir a mantener el funcionamiento adecuado de los productos utilizados en condiciones normales de uso no s61o en caso de defectos de los productos Nuestra cobertura va mucho m_is alibi que la garantia del producto No se aplican deducibles ni exclusiones por fallas del funcionamiento es de...

Page 45: ...Notes 45 ...

Page 46: ...rry in items like vacuums lawn equipment and electronics call anytime for the location of your nearest Sears Parts Repair Service Center 1 800 488 1222 U S A 1 800 469 4663 Canada www sears com www sears ca To purchase a protection agreement on a product serviced by Sears 1 800 827 6655 U S A 1 800 361 6665 Canada Para pedir servicio de reparaci6n a domicilio y para ordenar piezas 1 888 SU HOGAR 1...

Reviews: