background image

Summary of Contents for OVERLOCK 385. 564180

Page 1: ...OWNER S MANUAL OVERLOCK 3j4 MODEL 385 564180 ...

Page 2: ...wall outlet when changing needles presser foot or needle plate or when leaving the machine unattended This efiminates the possibility of sta_ing the machine by accidentally pressing the foot control e All covers must be closed when operating the machine e Do not pull the fabric while you are stitching as this may deflect the needle causing it to break e Before cleaning your machine disconnect the ...

Page 3: ... Starting Sewing 18 Finishing Sewing 8 Sewing Continuously 18 Securing Ends 19_20 Thread Tension 4 threads 21 _23 Threading the Machine 3 threads 24 Thread Tension 3 threads 24_25 Adjustment of Stitch Length 26 Adjustment of Foot Pressure 26 Removing the Presser Foot 27 Attaching the Presser Foot 27 Changing Needle 28 To Disengage the Upper Knife 29 To Engage the Upper Knife 29 Types of Needle Pla...

Page 4: ...r thread guide t Upper looper thread tension dial Lower looper thread gude 1 Lower looper thread tension dial Carrying handle Right needle thread tension dial Looper cover Stitch tength dial Plug connector Power switch Looper thread guide Hand wheel Foot control Thread guide bar Thread guide Spool pin Spool holder Spool stand NomencLature plate ...

Page 5: ...le clamp Foot holder Upper looper Upper looper thread guide Lower looper Upper looper thread guide 2 _ Lower looper thread guide 2 Thread cutter Presser foot lifter Presser bar Foot holder set screw Lower looper thread gutde 5 Upper knife knob Needle bar Screwdr _vers Tweezers QQ QQ Spool caps Set of need les Nets Looper threader Rolled hemming needle plate 0 Lint brush Accessory box ...

Page 6: ...itch J 4 Push the light and power switch to turn on the power and sewing light SAFETY FEATURE Your machine will not operate unless the light power switch Is turned on If you are interrupted or stop sewing turn off the light power switch to prevent injury to children Foot control The foot control regulates the speed at which you sew To increase speed gently press down with the ball of your foot To ...

Page 7: ...tly toward the mach ne body Looper cover To open While pushing with the thumb to the right as far as it will go pull looper cover toward you To close Lift looper cover and push against the machine The looper cover snaps into the position auto matically For Your Safety Always close both side and looper covers when the machine is in use ...

Page 8: ...the thread guide bar so that the thread gutdes are right above the spool pins u Spool cap N o Spool pin _ When you use a small thread spool remove the spool holder from the spool pin Then place the spool with its slit side up and put spool cap on top 2_ If the thread slips down from the spool during threading and or sewing put a net on the spool as illustrated for preventing ammlng The nets are su...

Page 9: ...ifter By raising or lowering the presser foot lifter the presser foot goes up and down While in operation keep the presser foot lowered except for testing stitches threading the machine or sewing heavy weight fabrics NOTE Thread tension will not be released if the presser foot is raised ...

Page 10: ...ide bar BLUE Pull thread guiding knot through tension disc and thread guides Before reaching needle remove presser foot Page 27 n owner s manual Clip thread on both sides of knot Pull old thread out of right needle and thread new thread through needle Use looper threader or tweezers to make threading easier Knife may be lowered to give you more room to work Page 29 in owner s manual Place a fourth...

Page 11: ...ead through the right side thread guide from back to front How to Thread the Lower Looper 1 Thread guide plate Looper thread gutde 4 _ Pass the thread through _ Pass the thread through the holes on the right side of right side of thread guide thread guide plate as iliu sliding the thread from left strated to right Cut the both needle threads as shown in the figure and remove them from the needles ...

Page 12: ...e lower looper thread guide 5 between tension discs threader through hole on lower Remove the thread from the _ Pass the thread through the thread guides tooperthread guide 5 threader and draw the thread _ Pass the thread through lower f3 and I4 Hook the end of thread on the through the hole on lower looper thread guide 1 threader looper 10 cm 4 or more with a pair of tweezers Thread _ Tension dis...

Page 13: ... the right of thread sliding the thread from right front guide plate as illustrated to left Place the spool of thread on the spool pm second from the right I Points to thread for upper Iooper are marked in red 12 How to Thread the Upper Looper Lower looper threa Upper looper Turn the hand wheel toward you until the upper looper comes to the middle point of its travel and unhook the thread of the l...

Page 14: ...per thread guJde 2 _ Pass the thread through the looper thread take up lever upper Loope_ threader_ Uppe_ fooper lhread _ Pass the thread through upper looper thread gu _de Pass the threader through the hole on the upper looper Then hook the end of thread on the threader Pull out the threader to pass the thread through the hole Remove the thread from threader and draw the free end of thread 10 cm ...

Page 15: ...thread guide second from the left from back to front _ Pass the thread through the holes n the second row from the left of thread guide plate as illustrated 14 Place the spool of thread on the spool pin second from the left Points to thread for needle on the right are marked in blue ...

Page 16: ...ght needle thread guide and thread take up leverthread guide Needie thread _ guide _ Needte bar thread guide Pass the thread through the thread gwde sliding the thread from teft to right _ Pass through needle bar thread guide from left to right _ Thread the right needle from the front to the back and pull the thread about 10 cm 4 from the eye of the needle to the back under the foot NOTE Needle ma...

Page 17: ...e left side spool pin Points to thread for needle on the teft are marked in orange Thread guide _ Draw the thread through the thread guide on the le t from back to front Thread gutde plate _ Pass the thread through the holes on the left of thread guide plate as illustrated ...

Page 18: ...eft Pass through needle bar thread guide from left to right _ Thread the left needle from the front to the back and pull the thread about 10 cm 4 from the eye ot the needle to the back under the foot NOTE Needle may be easier to thread if you remove presser toot See page 27 and lower knife See page 29 Gently pull all four thread ends towards back of machine Replace presser foot See page 27 Return ...

Page 19: ...ted continue to run the machine slowly to produce a thread chain for about 12 cm 5 while pulling the thread chain slightly to the back Thread culler J _ Cut the threads with the thread cutter as illustrated leaving about 5 cm 2 thread chain from the end of fabric 3rio Insert next fabric under the toe of foot then start sewing It is not necessary to raise the presser foot for ordinary fabric For he...

Page 20: ...apply a small amount of seam sealant Fray Check TM or Fray No More TM on the end of the threads D Backstitchmg t Before putting your fabric in the machine sew a thread chain about 5 cm 2 tong behind the needle 2 Put your fabnc in the machine Then serge a few stitches and stop 3 Raise the presser foot and bring the thread chain to the left around and under the presser foot 4 Place the thread chain ...

Page 21: ...eam except Backstttching or the methods shown below _ Serge one stitch off the end of seam _ Rinse the needle and presser foot and gently pull the threads off the prong Turn the fabric over so that the under sIde is up _ Serge about 2 5 cm 1 over stitching and angle off the fabric 20 ...

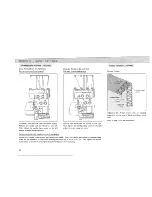
Page 22: ...e thread tension L tension R Upper looper Lower looper thread tension thread tension The line below the setting of 3 on each of the dials indicates normal tension for 4 threads or 3 threads sergmg however an aiternate adjust ment of the thread tension may be required depending on the type of fabric and thread being used Refer to pages 22 and 23 for the adjustment 21 ...

Page 23: ...per Lower looper thread tenslotl lhreed tenslon It is easier to adjust by using 4 different colors of thread Then sew and check the thread tensions Wrong Tension n the is loose looper thread looper thread Tighten needle thread tension on the right Needle thread Needle thread tens on L tension R Upper looper Lower looper thread tension thread tensior_ Correct Tension _ i7 of fab_tc _ upp _ _thread ...

Page 24: ...e tt_read Needle tl_tead tens_o_ ILl _enslon R Uppe looper Lower looper the cad tenSlO_ _ lt_read tension Wrong Tension thread is tlght and or is loose looper thread Loosen upper looper thread tension and or ttghten lower looper thread tension Needle thread Needle thread Ieos_on L _ens_on RI Upper leaper Lower looper thE ead leas on lhrearJ tension 23 ...

Page 25: ...dle clamp screw on the right slightly to avoid losing the screw To change to the other needle in three thread serging Loosen both needle ciamp screws and remove the needle Insert the needle and tighten the needle clamp screw for the needle to be used while pushing the needle up as far as it will go Then tighten the needle clamp screw on the other side slightIy to prevent the screw from dropping Co...

Page 26: ...ng Tenston thread is tight and or ep_ gqp_j_bread ts loose Upper _ looper i i ii _ thread of fabric Loosen lower looper thread tension and or t_ghten upper looper thread tension Needle thread Needle threed t_nsion L tension R Upper looper thread tension Lower looper lhread tens On Wrong Tension er thread is t_ght and or read is loose tooper 1hread Loosen upper looper thread tension andlor tighten ...

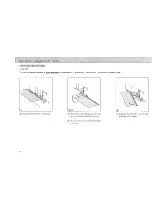
Page 27: ...ngs To increase L decrease scrsw Standard Setting Position Top of the machine View trom A It iS not necessary to adjust the pressure for normal sewing When you sew heavy or lightweight fabrics turn the adjusting screw to clockwise for heavyweight fabric counter clockwise for lightweight fabric For normal sewing leave the adjusting screw even with the top surface of the machine as illustrated 26 ...

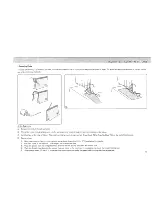
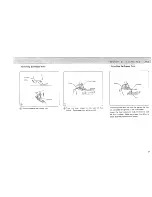
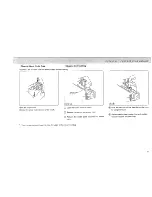
Page 28: ...lever located on the back holder The presser foot will drop off of foot f _foove Pin Place the presser foot so that the pin on the foot ties just under the groove of the foot holder Lower the foot holder and push the lever to lock the foot in place Raise the presser foot lifter to check that the presser foot is secure 27 ...

Page 29: ...dle on the right Insert new needle into the needle clamp with the flat side to the back until the top of needle touches the stopper pro then tighten the needle clamp screw on the right To attach the needle on the left Insert new needle into the needle clamp with the fiat side to the back until the top of needle touches the edge of needle bar then tighten the needle clamp screw on the left When the...

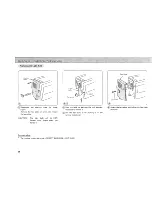
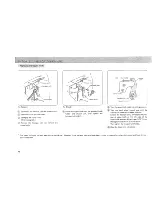
Page 30: ...knife knob toward you while pushing it m to the right then guide the hole on upper knife to the pin to lock the upper knife m down position _ Ctose the looper and side covers J _ Disconnect the machine from the power supply _ Open the looper and side covers _ Turn the upper knife knob away from you while pushing It to the right then guide the groove on upper knife to the pin to lock upper knife m ...

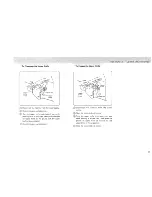
Page 31: ...t the machine is discon nected from the power supply 30 Tighten NeedIe Be Screw _ Turn the hand wheel toward you until the needle comes above the needle plate Then remove the presser foot _ Open the side and looper covers Refer to page 6 Set the upper knife to down posrtion Refer to page 29 Remove the needle plate set screw and lift the needle plate Attach the needle plate you require with the nee...

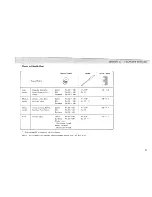
Page 32: ...otton No 60 Silk No 50 Synthetic No 60 _ Cotton No 50 Silk No 50 Synthetic No 50 Cotton No 60 Synthetic No 60 Woolly ny on For looper thread Woolly polyester For looper thread 100 lO0 10o 100 100 100 60 6O 60 8O 9O Needle HA t SP No 1t HA t SP No 1 t _ 4 HA t SP No t4 HA t SP No 1t _ 14 Refer to page 26 for adjusting the stitch length Your overtock uses standard Kenmore sewing needles HA 1 SP 11 1...

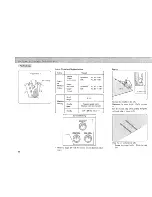
Page 33: ...e Setting f Roiled Hemming Picot Edging Narrow Hemming Stitch Length a Needle Remove the left needle Needle Plate Rolled hemming needle plate Marked R on reverse side Refer to page 30 tot changing the needle plate R J 32 ...

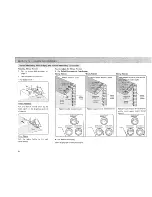
Page 34: ... 100 Woolly polyester threads Needle HA 1 SP No 11 Lfghtwetgh t fabric such as organdy crepe de chine lawn and georgette Standard setting of tenslon dials Correct thread tension Needle thread tension R Upper looper Lower looper thread ens_on thread tension jLowe Rigt_t side L_ Upper of fabric _ _ _ looper N ie_ _ breed Thread _i i Need le thread tension R Upper looper Lower looper thread tension t...

Page 35: ... _ Upper _htead _ Tighten needle thread tension Wrong Tension _Upper looper thread is loose i _ _ i AlO s kl lilgi_ _ _ 4t i_iisliIi Upper i i i i i iii ilildi i_ Tighten upper looper thread tension Wrong Tension _i_ we r looper thread Is loose and or _ _ B_g thread is tight _ _ 14 _IQi l d_ _ Y_ll l t_fead _ Tighten lower looper thread tension Needle thread _ tension R Upper looper Lower looper t...

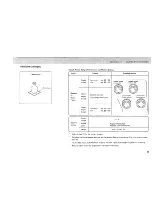
Page 36: ...lk No 50_80 Standard Setting i _ oo_ _o t o LO r Stitch tength Machine Needle Settmg plate Needle Refer to page 21 for the correct tension 3_4 Regular needle plate Marked S on reverse side HA 1 SPNo 14 To adjust the thread tension balance set the tension dials as shown above first then refer to pages 22 _ 23 For the best result pull the thread chain to the back lightly at the beginning and end of ...

Page 37: ...edle pfate plate Marked S on reverse side Needle HA 1 SP No 11 or 14 Standard Setting Needle lhread _ens_on R Q Upper looper Lower looper thread tenslon thread tension Refer to pages 24 _ 25 for thread tension balance adjust ment Sewing i i Folded edge J Remove the needle on the left Disengage the upper knife Refer to page 29 Sew the folded edge while guiding along the right side edge of lower kni...

Page 38: ...reW _ Open the looper and side covers _ Remove the needles and presser foot Remove the needle ptate set screw and needle plate _ Push the lint around the feed dog to the front by using iint brush _ Replace needle plate presser foot and needles Close the looper and side covers You may use vacuum cleaner to clean the upper knife area or teed dog 37 ...

Page 39: ...ate CAUTION The light bulb will be HOT Protect your fingers when you handle it bulb _ Put the new bulb in by pushing it up and turning it clockwise Face plate Set screw Attach the face plate and tighten the face plate set screw For your safety The mach ne is designed to use a 15 WATT MAXIMUM LIGHT BULB 38 ...

Page 40: ...power supply before oiling Open the looper cover end apply Apply a few drops of fine quality sewing machine oil to the parts indicated with arrows Oiling is recommended once a week in normal use once in ten hours m continuous use J 39 ...

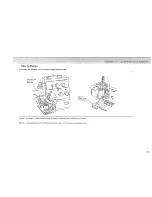
Page 41: ...n the upper knife holder to cutting position _ Turn the hand wheel toward you until the upper knife comes to its lowest position Loosen the hexagon bolt and adjust the posi tion of upper knife so that the edge of the upper knife overlaps 0 5 to 1 mm 1 32 from the edge of lower knife as shown above Then tighten the hexagon bolt firmly _ Close the looper and side covers The lower knife wilt last ove...

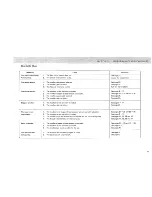
Page 42: ... inserted See The needle _sbent or blunt See The machine _snot correctly threaded See The needle ts bent or blunt See pages 9 _ 17 pages 2t v 25 and 33 36 page 28 page 28 page 9 _ 17 page 28 1 The needle and or looper thread tensions are not correctly adiusted 2 The machine Js not correctly threaded 3 The needle and or the thread are not suitable for the fabric being sewn 4 The thread is not betwe...

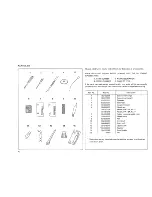
Page 43: ...on Center for expedited handling Ref No 1 2 3 4 5 6 7 8 9 10 1 12 13 14 15 Part No 762402009 366413003 624801001 822020307 784806005 784860OO7 784157004 784157015 784626009 785609009 624806006 802424004 0000098O3 784045019 784809008 784223002 6890 Description Screw driver large Screw driver small Tweezers Spool cap Looper threader Needle set Needle HA 1 SP No tl Needle HA 1 SP No 14 Rolled hemming...

Page 44: ...6 21_25 33_36 Needle thread guide 3 15 17 Needle thread tenston dial 3 15 17 21_25 33_36 Net 4 7 42 O Oiling 39 Performance problems chart 41 Picot edging 32_34 Pin tucking 36 Plug connector 3 5 Power switch 3 5 Pressure adjusting screw 3 26 Presser bar 4 Presser foot 4 8 27 Presser foot lifter 4 8 27 R Right needle thread guide 3 15 Rolled hemming 32 Rolled hemming needle plate 4 32 42 S Screwdri...

Page 45: ...the date of purchase Sears will free of charge repair defects in material or workmanship which _ appear in the electrical equipment of the overlock machine _ 0 including electronic components motor wiring switch and speed control FULL 90 DAY WARRANTY ON ALL PARTS AND MECHANICAL ADJUSTMENTS For 90 days from the date of purchase Sears will free of charge replace any parts and provide mechanical serv...

Page 46: ...lock will be shown on your nomenclature plate on the back of your Over ock See page 3 for location WHEN ORDERING REPAIR PARTS ALWAYS GIVE THE FOLLOWING INFORMATION MODEL NUMBER NAME OF ITEM PART DESCRIPTION If the parts you need are not stocked locally your order will be electronically transmitted to a Sears Repair Parts Distribution Center for handling SEARS ROEBUCK AND CO Chicago IL 60684 U S A ...

Reviews: