background image

8

TROUBLESHOOTING

First try the solutions suggested here and possibly avoid the cost of a service call...

Dryer Operation

Dryer will not run 

Has a household fuse blown, or has a circuit breaker 
tripped?
 
There may be 2 fuses or circuit breakers for the dryer. Check 
that both fuses are intact and tight, or that both circuit 
breakers have not tripped. Replace the fuse or reset the 
circuit breaker. If the problem continues, call an electrician.

Is the correct power supply available?
Electric dryers require 240-volt power supply. Check with a 
qualified electrician.

Was a regular fuse used? 
Use a time-delay fuse.

Is the dryer door firmly closed?

Was the Start button firmly pressed?

Is a cycle selected?
The dryer will not start in the Wrinkle Guard

®

 position. Move 

the dial past OFF.

No heat

Has a household fuse blown, or has a circuit breaker 
tripped?
 
Electric dryers use 2 household fuses or circuit breakers. The 
drum may be turning, but you may not have heat. Replace the 
fuse or reset the circuit breaker. If the problem continues, call 
an electrician.

For gas dryers, is the valve open on the supply line?

Unusual sounds

Has the dryer had a period of non-use? 
If the dryer hasn’t been used for a while, there may be a 
thumping sound during the first few minutes of operation. 

Is a coin, button, or paper clip caught between the drum 
and front or rear of the dryer?
 
Check the front and rear edges of the drum for small objects. 
Clean out pockets before laundering.

Is it a gas dryer?
The gas valve clicking is a normal operating sound.

Are the four legs installed, and is the dryer level front to 
back and side to side?
 
The dryer may vibrate if not properly installed. See the 
Installation Instructions.

Is the clothing knotted or balled up? 
When balled up, the load will bounce, causing the dryer to 
vibrate. Separate the load items and restart the dryer.

Timer does not noticeably advance

Is the dryer set to Timed or Air Dry?
The timer moves slowly and continuously for the time setting.

Is the dryer set to Automatic Drying? 
The timer moves only when the clothing is mostly dry. See 
“How Automatic Drying Works” in “Dryer Use.”

Dryer Results

Clothes are not drying satisfactorily, drying times are too 
long, or load is too hot

Is the lint screen clogged with lint?
Lint screen should be cleaned before each load.

Is the exhaust vent or outside exhaust hood clogged with 
lint, restricting air movement? 
Run the dryer for 5-10 minutes. Hold your hand under the 
outside exhaust hood to check air movement. If you do not 
feel air movement, clean exhaust system of lint or replace 
exhaust vent with heavy metal or flexible metal vent. See the 
Installation Instructions.

Are fabric softener sheets blocking the grille? 
Use only one fabric softener sheet, and use it only once.

Is the exhaust vent the correct length? 
Check that the exhaust vent is not too long or has too many 
turns. Long venting will increase drying times. See the 
Installation Instructions. 

Is the exhaust vent diameter the correct size? 
Use 4" (10.2 cm) diameter vent material.

Is the dryer located in a room with temperature below
45ºF (7ºC)?
 
Proper operation of dryer cycles requires temperatures above 
45ºF (7ºC).

WARNING

Fire Hazard

Use a heavy metal vent.

Do not use a plastic vent.

Do not use a metal foil vent.

Failure to follow these instructions can result in death 
or fire.

WARNING

Explosion Hazard

Keep flammable materials and vapors, such as 
gasoline, away from dryer.

Place dryer at least 18 inches (46 cm) above the floor 
for a garage installation.

Failure to do so can result in death, explosion, or fire.

Summary of Contents for W10034970B

Page 1: ...Dryer User Instructions Sécheuse Instructions pour l utilisateur Table of Contents Table des matières 2 W10034970B Sears Canada Inc Toronto Ontario Canada M5B 2B8 www sears ca ...

Page 2: ... NUMBERS BACK COVER SÉCURITÉ DE LA SÉCHEUSE 11 UTILISATION DE LA SÉCHEUSE 14 ENTRETIEN DE LA SÉCHEUSE 15 DÉPANNAGE 17 CONTRATS DE PROTECTION 19 GARANTIE 19 NUMÉROS DE SERVICE COUVERTURE ARRIÈRE You can be killed or seriously injured if you don t immediately You can be killed or seriously injured if you don t follow All safety messages will tell you what the potential hazard is tell you how to redu...

Page 3: ...e static unless recommended by the manufacturer of the fabric softener or product Do not use heat to dry articles containing foam rubber or similarly textured rubber like materials Clean lint screen before or after each load Keep area around the exhaust opening and adjacent surrounding areas free from the accumulation of lint dust and dirt SAVE THESE INSTRUCTIONS The interior of the dryer and exha...

Page 4: ...ble metal vent Do not kink or crush flexible metal vent It must be completely extended to allow adequate exhaust air to flow Check vent after installation Refer to the Installation Instructions for proper length requirements of vent 2 Use a 4 10 2 cm exhaust hood 3 Use the straightest path possible when routing the vent 4 Use clamps to seal all joints Do not use duct tape screws or other fastening...

Page 5: ...ryer as soon as it stops 7 If desired add a fabric softener sheet Follow package instructions 8 Press PUSH TO START Stopping and Restarting You can stop your dryer anytime during a cycle To stop your dryer Open the dryer door or turn the Cycle Selector Control to OFF NOTE The Cycle Selector Control should point to an Off area when the dryer is not in use To restart your dryer 1 Close the door 2 Se...

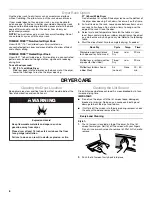
Page 6: ...Select cycle and temperature to match the fabrics in your load Items containing foam rubber or plastic must be dried on a clothesline or by using an air cycle Refer to the following table 4 Start the dryer Reset time to complete drying if needed DRYER CARE CleaningtheDryerLocation Keep dryer area clear and free from items that would obstruct the flow of combustion and ventilation air CleaningtheLi...

Page 7: ...hould be removed every 2 years or more often depending on dryer usage Cleaning should be done by a qualified person From Inside the Exhaust Vent Lint should be removed every 2 years or more often depending on dryer usage VacationandMovingCare Vacation care Operate your dryer only when you are at home If you will be on vacation or not using your dryer for an extended period of time you should 1 Unp...

Page 8: ...lation Instructions Is the clothing knotted or balled up When balled up the load will bounce causing the dryer to vibrate Separate the load items and restart the dryer Timer does not noticeably advance Is the dryer set to Timed or Air Dry The timer moves slowly and continuously for the time setting Is the dryer set to Automatic Drying The timer moves only when the clothing is mostly dry See How Au...

Page 9: ... life of your new product Here s what the Agreement includes Parts and labor needed to help keep products operating properly under normal use not just defects Our coverage goes well beyond the product warranty No deductibles no functional failure excluded from coverage real protection Expert service by a force of more than 10 000 authorized Sears service technicians which means someone you can tru...

Page 10: ...ts intended purpose 6 Damage to or failure of this product caused by the use of detergents cleaners chemicals or utensils other than those recommended in all instructions supplied with the product 7 Damage to or failure of parts or systems resulting from unauthorized modifications made to this product DISCLAIMER OF IMPLIED WARRANTIES LIMITATION OF REMEDIES Customer s sole and exclusive remedy unde...

Page 11: ...SEMENT DANGER Voici le symbole d alerte de sécurité Ce symbole d alerte de sécurité vous signale les dangers potentiels de décès et de blessures graves à vous et à d autres Tous les messages de sécurité suivront le symbole d alerte de sécurité et le mot DANGER ou AVERTISSEMENT Ces mots signifient IMPORTANTES INSTRUCTIONS DE SÉCURITÉ Pour réduire le risque d incendie de choc électrique ou de blessu...

Page 12: ...térieur de la sécheuse et du conduit d évacuation doit être effectué par une personne qualifiée Voir les instructions d installation pour les exigences de liaison de l appareil à la terre AVERTISSEMENT Pour votre sécurité les renseignements dans ce manuel doivent être observés pour réduire au minimum les risques d incendie ou d explosion ou pour éviter des dommages au produit des blessures ou un d...

Page 13: ...éformer ni écraser le conduit d évacuation en métal flexible Il doit être complètement déployé pour permettre l évacuation adéquate de l air Vérifier le système d évacuation après l installation Se référer aux Instructions d installation pour la bonne longueur du conduit d évacuation 2 Utiliser un clapet d évacuation de 4 10 2 cm 3 Utiliser l acheminement le plus rectiligne possible lors de l inst...

Page 14: ...e 7 Si désiré ajouter une feuille d assouplissant de tissu Suivre les instructions sur l emballage 8 Appuyer sur PUSH TO START enfoncer pour mettre en marche Arrêt et remise en marche On peut arrêter la sécheuse à tout moment au cours d un programme Pour arrêter la sécheuse Ouvrir la porte de la sécheuse ou tourner la commande de sélection de programme à arrêt OFF REMARQUE Le bouton de commande de...

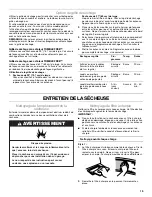
Page 15: ...rature correspondant aux tissus de la charge Les articles contenant mousse caoutchouc ou plastique doivent être séchés sur une corde à linge ou par le programme de séchage à l air Consulter le tableau suivant 4 Mettre la sécheuse en marche Régler de nouveau la durée pour compléter le séchage si nécessaire ENTRETIEN DE LA SÉCHEUSE Nettoyagedel emplacementdela sécheuse Éviter de laisser des éléments...

Page 16: ...ur du conduit d évacuation La charpie devrait être enlevée tous les 2 ans ou plus souvent selon l utilisation de la sécheuse Précautionsàprendrepourlesvacanceset avantundéménagement Entretien avant les vacances On ne doit faire fonctionner la sécheuse que lorsqu on est présent Si l utilisateur doit partir en vacances ou n utilise pas la sécheuse pendant une période prolongée il convient d exécuter...

Page 17: ...e est elle d aplomb de l avant vers l arrière et transversalement La sécheuse peut vibrer si elle n est pas correctement installée Voir les Instructions d installation Les vêtements sont ils emmêlés ou en boule Une charge en boule rebondit ce qui fait vibrer la sécheuse Séparer les articles de la charge et remettre la sécheuse en marche La minuterie ne progresse pas visiblement Séchage minuté ou s...

Page 18: ...ches sur la charge ou sur le tambour L assouplissant de tissus pour sécheuse a t il été utilisé correctement Ajouter les feuilles d assouplissant de tissus au début du programme Les feuilles d assouplissant de tissus ajoutées à une charge partiellement sèche peuvent tacher les vêtements Les taches sur le tambour sont dues aux teintures contenues dans les vêtements les jeans en général Il n y aura ...

Page 19: ...llées appelez Sears Canada au 1 800 361 6665 Service d installation Sears Pour l installation professionnelle garantie par Sears d appareils ménagers et d articles tels que les ouvre portes de garage chauffe eau et autres gros appareils ménagers aux É U ou au Canada composez le 1 800 4 MY HOME GARANTIE DES APPAREILS MÉNAGERS KENMORE GARANTIE LIMITÉE DE UN AN Lorsqu il est installé utilisé et entre...

Page 20: ...0B 2007 Sears Brands LLC Registered Trademark TM Trademark SM Service Mark of Sears Brands LLC Marque déposée TM Marque de commerce SM Marque de service de Sears Brands LLC 3 07 Printed in U S A Imprimé aux É U ...

Reviews: