background image


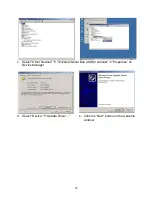
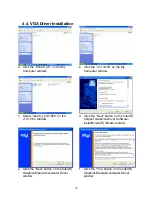
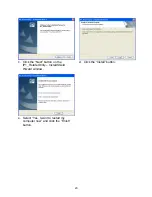
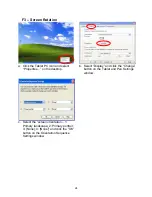
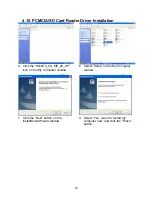
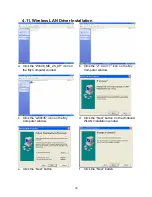
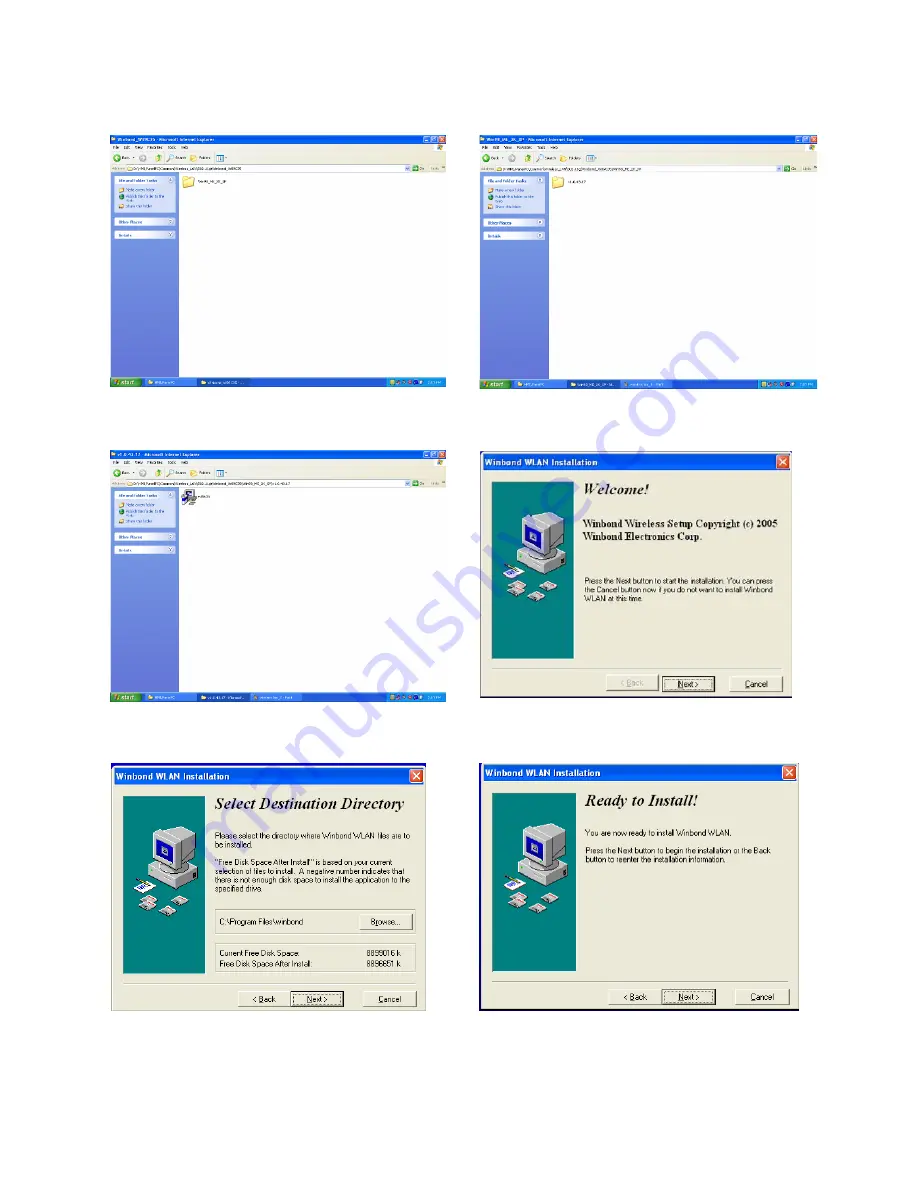
4.11. Wireless LAN Driver Installation 

a.  Click the “Win98_ME_2K_XP” icon on 

the My Computer window. 

b.  Click the “v1.0.43.17” icon on the My 

Computer window. 


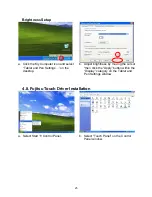
c.  Click the “w89c35” icon on the My 

Computer window. 

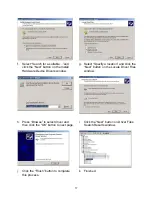
d.  Click the “Next” button on the Winbond 

WLAN Installation window. 


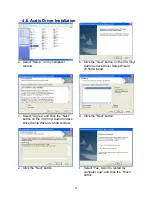
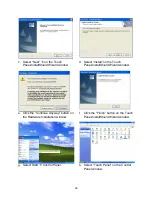
e.  Click the “Next” button. 

f.  Click the “Next” button. 


 30

Summary of Contents for MT-1200

Page 1: ...MT 1200 User Manual 2007 January V0 9j 0...

Page 2: ...errors contained herein or for incidental or consequential damages in connection with the furnishing performance or use of this material This document contains proprietary information that is protect...

Page 3: ...ject to the following two conditions 1 This device may not cause harmful interference 2 This device must accept any interference received including interference that may cause undesired operation CAUT...

Page 4: ...n recycling and disposal procedure To prevent possible harm to the environment or human health from uncontrolled waste disposal please separate this from other types of wastes and recycle it responsib...

Page 5: ...MT 1200 using a clean cellulose sponge or chamois cloth dampened with a solution of nonabrasive detergent and a few drops of warm water and remove any extra moisture with a dry cloth 1 DO NOT place or...

Page 6: ...Pen 12 4 Drivers Installation 13 4 1 Driver List 13 4 2 Chipset Driver Installation 13 4 3 USB Driver Installation 15 4 4 VGA Driver Installation 18 4 5 Rotation Application Driver Installation 19 4...

Page 7: ...it by carefully clutching the foam inserts and remove slowly to protect the system The following contents should be found in the carton a System b Power Cord c Power Adapter d Stylus Pen e Hand Strap...

Page 8: ...lor Connected to Access Point Flash Searching Access Point 2 Charge Indicator Green Color Battery Mode Orange color Charging Battery Flash Low Battery 3 Drive Activity Indicator Flash Access the stora...

Page 9: ...2 2 Side View 2 2 1 Left Side View Lock Port PCMCIA SD HDD or CF 2 2 2 Right Side View Power Switch LAN VGA USB 2 Headphone MIC Power Input 8...

Page 10: ...2 3 Bottom View VESA Holes Air Vents Holder Memory Compartment Battery Lock Battery Lock Battery Pack 9...

Page 11: ...asten them with the screws 2 one on each side b Place the strap rings on the holders on each side and press toward the direction as shown by the arrow 3 2 Installing the Kick Stand option a Place the...

Page 12: ...pter IMPORTANT Damage may occur if you use a different adapter to power the MT 1200 or use the MT 1200 s adapter to power other electrical devices You may damage both your battery pack s and the MT 12...

Page 13: ...n demand These modes are referred to as Stand by or Suspend to RAM and Hibernation mode or Suspend to Disk STD Recover from suspend mode by pressing the power ON button 3 7 Using the Stylus Pen IMPORT...

Page 14: ...K292 Button_Driver Button Driver CD COMMON Fujitsu_Touch Fujitsu Touch Screen Driver CD COMMON Lan_driver Intel_PRO_1000 10 100 1000Mb LAN Driver CD COMMON PCMCIA O2Micro_OZ711Mx PCMCIA SD Card Reade...

Page 15: ...c Click the Yes button on the Setup window d Click the Next button on the Setup window e Select Yes I want to restart my computer now and click the Finish button on the Setup window 14...

Page 16: ...eveloper site Windows 98 Retail Developers and OEMs should contact Orange Ware For end users if your device does not ship with Windows 98 drivers contact your device or system manufacturer If USB 2 0...

Page 17: ...c Select Other Devices Universal Serial Bus USB Controller Properties on Device Manager d Select Device Update Driver e Click the Next button on the welcome window 16...

Page 18: ...window g Select Specify a location and click the Next button on the Locate Driver Files window h Press Browse to select driver and then click the OK button to next page i Click the Next button on Driv...

Page 19: ...indow c Select win2K_xp141950 on the v14 19 50 window d Click the Next button on the Intel R Chipset Graphics Driver Software InstallShield R Wizard window e Click the Next button on the Intel R Graph...

Page 20: ...my computer now and click the Finish button on the Intel R Graphics Media Accelerator Driver window 4 5 Rotation Application Driver Installation a Select Disk 1 on the My Computer window b Select Setu...

Page 21: ...c Click the Next button on the IP1_Rotate Utility InstallShield Wizard window d Click the Install button e Select Yes I want to restart my computer now and click the Finish button 20...

Page 22: ...the VIA Vinyl Audio Codecs Driver Setup Wizard v6 50d window c Select I Agree and click the Next button on the VIA Vinyl Audio Codecs Driver Setup Wizard v6 50d window d Click the Next button e Click...

Page 23: ...Driver InstallShield Wizard window c Click the Install button on the Button Driver InstallShield Wizard window d Click the Continue Anyway button on the Hardware Installation window e Select Yes I wa...

Page 24: ...t PC icon and select Properties on the desktop b Select Tablet Buttons and click the Change button on the Tablet and Pen Settings window c Select the Action Launch an application and Program location...

Page 25: ...erties on the desktop b Select Display and click the Change button on the Tablet and Pen Settings window c Select the screen orientation 1 Primary landscape 2 Primary portrait 3 None 4 None and click...

Page 26: ...tings on the desktop b Adjust brightness by moving the cursor then click the Apply button within the Display category on the Tablet and Pen Settings window 4 8 Fujitsu Touch Driver Installation a Sele...

Page 27: ...ll on the Touch Panel InstallShield Wizard window e Click the Continue Anyway button on the Hardware Installation window f Click the Finish button on the Touch Panel InstallShield Wizard window g Sele...

Page 28: ...store calibration result Apply Calibration Now on the Touch Panel Settings j After calibration select Update on the calibration window 4 9 LAN Driver Installation a Select Win2K_XP on the My Computer...

Page 29: ...c Select I accept the terms in the license agreement and click the Next button on the DriverInstaller InstallShield Wizard window d Click the Next button e Select Install Base Driver 28...

Page 30: ...ion a Click the WinNT4_9X_ME_2K_XP icon on the My Computer window b Select Setup on the My Computer window c Click the Next button on the InstallShield Wizard window d Select Yes I want to restart my...

Page 31: ...E_2K_XP icon on the My Computer window b Click the v1 0 43 17 icon on the My Computer window c Click the w89c35 icon on the My Computer window d Click the Next button on the Winbond WLAN Installation...

Page 32: ...g Select Continue Anyway on the Hardware Installation window h Click the OK button on the Winbond Wireless Utility window i Click the Finish button 31...

Page 33: ...ta a Slide both battery release tabs to the unlock position b Pull the battery pack away from the body 5 2 Replacing the Memory Module IMPORTANT DO NOT touch the gold colored contacts as this can dama...

Page 34: ...c Remove the memory module from the slot 5 3 Replacing the HDD a Remove the screws 2 that secure the HDD cover b Slide the HDD towards you c Disconnect the HDD cable carefully d Replace the 1 8 HDD 33...

Page 35: ...Bay or Type II C F Card Memory Card Reader SD Type Card Reader PCMCIA PC CardBus Type II slot Input Output USB 2 x USB 2 0 LAN 1 10 100 Mbps Headphone 1 MIC 1 x External Jack 1 x Built in MIC Speakers...

Page 36: ...only Wireless Wi Fi 802 11 b g Dimension W x H x D 313 x 235 x 35 7 mm Net Weight 1 7 kgs With Battery Operating System Windows XP P XP embedded Options Carry Case With shoulder strap stylus pen holde...

Reviews: