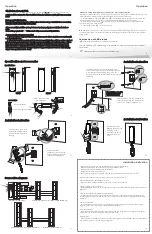
Manually setup room number (suitable for more indoor units)
When the room numbers have well setup,but if you want to change the room numbers (except the
main indoor unit which connect with outdoor units), You can do it like this:
a. Under standby mode, hold "
" then "
" , till it sound "DI", means the unit enter into the
room number setup mode, the intercom and unlock LED flashing in the meanwhile.
b. Under setup mode, touch "
" to setup the room number. The times you touch means the
room number you wish to setup.
c. After setup, touch "
" to reserve and exit.
Remark:
Under setup mode, if the intercom and unlock LED is flashing, means the unit is under
room number setup mode. When the LED stop flashing, means the unit has exited room number
setup mode.
Instr uction of LED status
"
" LED flash, means the unit is under no bother mode.
Intercom LED and
"
“
LED flashing in the meantime, means the unit is under room number
setup mode.
"
"
LED flash, means the unit is under be called mode.
13.Extension switch
"
"
switch would be activated 3s. If you hold the button, the extension switch will keep connecting
for 8s.
Indoor unit initialization
Remark: If the system is properly working, please don't re-setup or initialize the room number,
otherwise it will make trouble to the system.
After successfully install the system, but cannot work properly, please initialize the indoor
units:
Connect the power, hold "
" till it sounds "DI", means successfully initialize.
Automatically setup room number
a. When the system only have 1 indoor unit, after connect outdoor unit, the room number will
be automatically setup.
b. When there are 2 indoor units, initialize the indoor unit first, then call from outdoor. Both of
indoor units ring, stop it after 2-3s. Then the room number will be automatically setup. c. When
there are more than 2 indoor units, initialize all indoor units first, then connect the power of
main unit and No. 2 unit you wish to setup, and call from outdoor. After 2-3s ringing, stop it.
Then connect the power of No. 3 unit you wish to setup, and calls from outdoor. After ringing,
stop it. Same operation for No. 4 unit.
Under any mode, the unit will sound "DI" by touching
button, means the extension
E
101
F
E
100
F
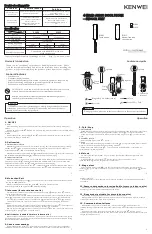
Installation instruction
Installation instruction
Installation instruction
Connection diagram
Specification and accessories
Operation
Operation
1.Install the connection box in the wall, as the
picture showing, drill 2 holes with 6mm into the
wall, insert 2 expansion plug, then screw the
tapping screw (keep 4mm distance between screw
and wall).
2.As the picture showing, pull the wire
out of the connection box, and peel the
wire cover with the length 4.5mm.
3.Connect the wire to each
connection terminal, then
check it the wires are fixed
enough.
5.After connection,
hang up the unit to the
2 tapping screws,
make sure the unit is
firmly fixed on the
wall.
4.Then insert the
connection terminal to the
needle stand of unit (refer
to connection diagram).
Specification :
Accessories:
Output: DC13.5V/1.5A
power adaptor
Screw:=F4*25TP1
Expansion plug: 6 30mm
Installation instruction
1
Keep sufficient space for ventilation and easy communication.
Keep sufficient space to adjust while installing.
Not put hot resource under the unit.
The socket outlet shall be installed near the equipment and shall be easily accessible.
2 Do not expose the unit to sunshine or rain
even
if you don’t use it
.
3 Do not disassemble the unit by yourself:
Improper disassembly may damage the unit or cause electric shock.
4 Do not splash water on the unit:
Install the unit in dry place. In case that the unit gets wet, turn off the unit and contact with your
supplier.
5
Check the ambient temperature and humidity:
Avoid using the unit where the temperature is hotter or colder than specified, otherwise the
internal parts may get affected. Special care is required to use the unit at high temperature and
humidity.
6 In case of trouble:
If any trouble occurs while you are using the unit, turn off the power and contact with
your
supplier to avoid worse problem or unpredictable accident.
7About operation:
Keep the unit away from magnetic equipments such as microwave oven or big speaker. If the
unit will not be used for a long time, please switch it off.
8About clean:
Use soft cloth to clean the unit. Do not use any impregnant, such as alcohol, benzene. If you have
any problem, please contact with your
supplier.
When you choose the place to install the unit, please pay attention to:
7
8
9
10
11
12
13
14
E
100
F
/
E
101
F(madin
unit
)
electronic lock
electronic
lock powe
outer device
E
100
F
/
E
101
F(sub
unit 1
)
S
W
DATA
8
9
10
S
1
S
2
E
100
F
/
E
101
F(sub
unit N,N
≦ 3)
S
W
DATA
8
9
10
S
1
S
2
E
X
T
E
N
S
IO
N
S
W
DATA
S
1
S
2
8
9
10
E
X
T
E
N
S
IO
N
E
X
T
E
N
S
IO
N
E
100
F
/
E
101
F(sub
unit 1
)
main
indoor
monitor
E
100
F
/
E
101
F(sub
unit N,N
≦ 3)
S
W
DATA
8
9
10
S
1
S
2
S
W
DATA
8
9
10
S
1
S
2
AF
i
/
o
GND
i
/
o
DAT
i
/
o
VD
i
/
o
AF
1
GND
1
VCC
1
VD
1
+
VCC
-
GND
AF
2
GND
2
VCC
2
VD
2
S
1
S
2
1
2
3
4
5
6
7
8
9
10
11
12
13
14
15
16
S
W
E
X
T
E
N
S
IO
N
D
O
O
R
2
D
O
O
R
1
E
X
T
E
N
S
IO
N
E
X
T
E
N
S
IO
N


