background image

AT503 for use on
Kitchen Machine Chef

AT504 for use on
Kitchen Machine Major
and Cooking Chef

Before using your Kenwood

attachment

Remove all packaging.

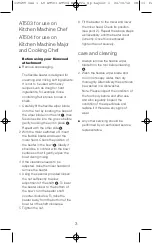
The flexible beater is designed for
creaming and mixing soft ingredients.
It is not to be used with heavy
recipes such as dough or hard
ingredients, for example those
containing fruit stones, bones or
shells.

1 Carefully fit the flexible wiper blade

onto the tool by locating the base of
the wiper blade into the slot

, then

feed one side into the groove before
gently hooking the end in place

.

Repeat with the other side

.

2 With the mixer switched off, insert

the flexible beater and lower the
mixer head. Check the position of
the beater in the bowl

. Ideally it

should be in contact with the bowl
surface so that it gently wipes the
bowl during mixing.

3 If the clearance needs to be

adjusted, raise the mixer head and
remove the beater.

4 Using the spanner provided loosen

the nut sufficiently to allow
adjustment of the shaft

. To lower

the beater closer to the bottom of
the bowl, turn the beater shaft
counter-clockwise. To raise the
beater away from the bottom of the
bowl turn the shaft clockwise.

5 Tighten the nut.

6 Fit the beater to the mixer and lower

the mixer head. Check its position
(see point 2). Repeat the above steps
as necessary until the beater is set
correctly. Once this is achieved
tighten the nut securely.

care and cleaning

1 Always remove the flexible wiper

blade from the tool before cleaning

.

2 Wash the flexible wiper blade and

tool in hot soapy water, then dry
thoroughly. Alternatively the parts can
be washed in a dishwasher.

Note: Please inspect the condition of
the tool body before and after use
and also regularly inspect the
condition of the wiper blade and
replace it if there are any signs of
wear.

Any other servicing should be
performed by an authorized service
representative.

3

119699 Iss 1 LV AT503-AT504 Eng_Fre_Sp:Layout 1  24/10/12  08:11  Page 3

Summary of Contents for AT503

Page 1: ... 4 6 Español 7 9 instructions instrucciones AT503 AT504 HEAD OFFICE Kenwood Limited 1 3 Kenwood Business Park New Lane Havant Hampshire PO9 2NH 119699 1 119699 Iss 1 LV AT503 AT504 6 pg multi Layout 1 24 10 12 08 08 Page 1 ...

Page 2: ...jars not recommended by the manufacturer may cause a risk of injury to persons Do not use more than one attachment at a time Do not use attachment for other than intended use Never leave your Food Preparation Machine unattended while it is operating Keep hands hair clothing as well as spatulas and other utensils away from beaters during operation to reduce the risk of injury to persons and or dama...

Page 3: ...ad and remove the beater 4 Using the spanner provided loosen the nut sufficiently to allow adjustment of the shaft To lower the beater closer to the bottom of the bowl turn the beater shaft counter clockwise To raise the beater away from the bottom of the bowl turn the shaft clockwise 5 Tighten the nut 6 Fit the beater to the mixer and lower the mixer head Check its position see point 2 Repeat the...

Page 4: ... L utilisation d accessoires non recommandés par le fabricant notamment les bocaux en verre peut provoquer un risque de blessures corporelles N utilisez pas plus d un accessoire à la fois N utilisez pas l accessoire pour un usage autre que l usage prévu Ne laissez jamais votre appareil pour préparations alimentaires sans surveillance lorsqu il fonctionne Veillez maintenir vos mains cheveux vêtemen...

Page 5: ...nérales de votre Mélangeur sur socle multi fonctions pour les mises en garde de sécurité supplémentaires VEUILLEZ CONSERVER CE MODE D EMPLOI Pour une utilisation domestique uniquement 5 119699 Iss 1 LV AT503 AT504 Eng_Fre_Sp Layout 1 24 10 12 08 11 Pa ...

Page 6: ...ez la tête du batteur et retirez ce dernier 4 Utilisez la clé pour desserrer suffisamment l écrou afin de pouvoir ajuster l axe Pour rapprocher le batteur du fond du bol tournez l axe du batteur dans le sens inverse des aiguilles d une montre Pour le lever par rapport au fond du bol tournez l axe dans le sens des aiguilles d une montre 5 Resserrez l écrou 6 Fixez le batteur au robot et baissez la ...

Page 7: ...so de accesorios incluidos los botes de productos enlatados no recomendados por el fabricante puede suponer el riesgo de lesiones para las personas No utilice varios accesorios a la vez No utilice los accesorios para un uso diferente al previsto Nunca deje desatendido el Procesador de alimentos mientras esté funcionando Mantenga las manos el cabello la ropa al igual que las espátulas y otros utens...

Page 8: ...el Aparato de cocina principal para obtener más información sobre los avisos de seguridad adicionales GUARDE LAS SIGUIENTES INSTRUCCIONES Exclusivamente para uso doméstico 8 119699 Iss 1 LV AT503 AT504 Eng_Fre_Sp Layout 1 24 10 12 08 11 Pa ...

Page 9: ...ire el batidor 4 Con la llave inglesa facilitada afloje la tuerca lo bastante para permitir el ajuste del eje Para bajar el batidor más cerca del fondo del bol gire el eje del batidor en sentido contrario a las agujas del reloj Para subir el batidor hacia arriba y alejarlo del fondo del bol gire el eje en el sentido de las agujas del reloj 5 Apriete la tuerca 6 Acople el batidor a la mezcladora y ...

Page 10: ...10 119699 Iss 1 LV AT503 AT504 Eng_Fre_Sp Layout 1 24 10 12 08 11 Pa ...

Reviews: