


19
NOTE: Reduce the oven temperature by 10 – 20°C for fan assisted ovens.
For dishes that take over an hour to cook, reduce the cooking time by 10 minutes per
hour.
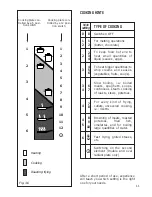
6 - COOKING GUIDE
COOKING CHART
Food
Temperature
Cooking Time (approx)
°C
Gas Mark
CAKES
Victoria Sandwich
180
4
20 – 25 mins
Small cakes/buns
180
4
15 – 20 mins
Rich Fruit Cake
150
2
2 hours
Scones
220
7 – 8
8 – 10 mins
Whisked Sponge
190
5
25 mins
BREAD & PASTRY
Bread Loaf (500g Flour wt)
225
7 – 8
20 – 25 mins
Bread Rolls
225
7 – 8
10 – 15 mins
Pizza Dough
225
8
15 – 20 mins
Shortcrust pastry
200
6
20 – 30 mins
Quiches/Flans
180 - 190
4 - 5
30 – 40mins
ROAST MEATS
Beef – medium joint
190
5
20 – 25 mins/lb + 20mins
Lamb
190
5
25 – 30mins/lb + 25mins
Pork
190
5
30mins/lb + 30mins
Chicken
190
5
20 – 25mins/lb + 30mins
Turkey
180
4
15 – 20mins/lb + 20mins
Stews/Casseroles
170
3
1
1
/
2
- 2hours
Temperature and times given are approximate, as they will vary depending on the
quality and amount of food being cooked.
Remember to use ovenproof dishes and to adjust the oven temperature during cooking
if necessary.
Summary of Contents for CK 408
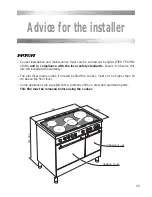
Page 1: ...Instructions for use Installation advice DOUBLE OVEN CERAMIC COOKER CK 408 ...
Page 2: ...2 ...
Page 35: ...35 ...
Page 36: ...code 1103064 ß2 ...