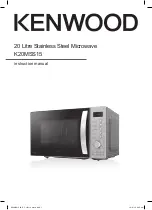
background image

20 Litre Stainless Steel Microwave
K20MSS15

instruction manual 

K20MSS15_IB_RC_151119_grace.indd   1

19/11/15   9:35 am

Summary of Contents for K20MSS15

Page 1: ...20 Litre Stainless Steel Microwave K20MSS15 instruction manual K20MSS15_IB_RC_151119_grace indd 1 19 11 15 9 35 am ...

Page 2: ...K20MSS15_IB_RC_151119_grace indd 2 19 11 15 9 35 am ...

Page 3: ...view 16 the main unit 16 the control panel 16 checking your microwave 17 clock setting 18 setting the child lock 19 microwave cooking 20 two stage cooking 21 delay start cooking programme set in advance 22 auto cooking 23 auto menu table 24 defrosting 25 defrost by weight 25 defrost by time 25 quick start cooking 26 querying the cooking function 26 cleaning your microwave 27 frequently asked quest...

Page 4: ...and above and persons with reduced physical sensory or mental capabilities or lack of experience and knowledge if they have been given supervision or instruction concerning use of the appliance in a safe way and understand the hazards involved Children shall not play with the appliance Cleaning and user maintenance shall not be made by children without supervision Keep the appliance and its cord o...

Page 5: ...e microwave use This microwave is not intended for commercial use The microwave oven is intended for heating food and beverages Drying of food or clothing and heating of warming pads slippers sponges damp cloth and similar may lead to risk of injury ignition or fire This microwave can only be used indoors in a dry well ventilated domestic indoor area Do not place the microwave in a cabinet Install...

Page 6: ...aster than expected Do not leave the microwave unattended during use Take care when cooking food with a high sugar or fat content such as Christmas pudding or fruitcake The sugar or fat can overheat and in some cases catch fire Do not overcook food Remove wire twist ties and metal handles from paper or plastic containers bags before placing them in the oven hazardous materials Keep combustible mat...

Page 7: ...e microwave These include Metal cooking utensils Metal plates or trays Wire twist ties Crockery with metal trims Meat thermometer Never use equipment made of metal except aluminium foil in your microwave The microwave energy cannot pass through metal so it bounces off and sparks against the inside of the microwave Stop the microwave straight away if any equipment is causing sparks Remember that so...

Page 8: ...ombustible containers never leave the microwave unattended when in use delayed boiling Heating of beverages in a microwave can result in delayed eruptive boiling therefore care must be taken when handling the container Take the following precautions Always stir liquids before and after cooking Allow them to stand Use containers that are wider at the top than at the bottom preparing food for babies...

Page 9: ...ank you for purchasing your new Kenwood Microwave We recommend that you spend some time reading this instruction manual so that you fully understand all the operational features it offers You will also find some hints and tips to help you resolve any issues Read all the safety instructions carefully before use and keep this instruction manual for future reference Instruction Manual If items are mi...

Page 10: ...g from the inside of the microwave Please dispose of the plastic wrappings or bags safely and keep out of the reach of babies and young children 3 Plug your microwave into a standard household electrical socket Avoid using a socket that also has an adapter and other equipment plugged in Do not use a multi adapter 4 Put the turntable support inside the microwave and place the glass turntable plate ...

Page 11: ...d for 15 minutes or more will brown lightly in its own fat Anything cooked for a shorter time can be brushed with a browning sauce to give an appetising colour Strips of aluminium foil can be used to cover the thinner pieces of food to stop them from overcooking before the thicker parts of the food have had the chance to cook Use the aluminium foil sparingly and wrap around the food or container c...

Page 12: ...me lids are made of card with an aluminium foil covering these should be removed too Use a microwave safe transparent lid if possible Stir food during cooking if the container has a lid or film cover Always use the glass turntable plate Use shallow containers with a large surface area Do not use containers that are more than 1 25in 3 5cm deep Use gloves when handling any aluminium foil Do not comp...

Page 13: ...ructions Do not close with metal tie Make slits to allow steam to escape Paper plates and cups Use for short term cooking warming only Do not leave oven unattended while cooking Paper towels Use to cover food for reheating and absorbing fat Use with supervision for short term cooking only Greaseproof paper Use as a cover to prevent splattering or a wrap for steaming Plastic Microwave safe only Fol...

Page 14: ...ou choose the reheating time for pre cooked food E is the heating category for your microwave Check the cooking times for category E on the food s packaging to see how long it should be cooked The category a letter from A to E is designed to help you reheat small quantities of food such as microwave ready meals The label given above and also on the oven door gives the heating category and output p...

Page 15: ...on As the steam cools you may find that condensation gathers in small pools inside your microwave and on the work surface beneath the door and vents Always dry the microwave after cooking foods with a high moisture content Your microwave is designed to let steam escape from the vents and around the door without microwave energy escaping There is no danger of microwave energy escaping with the stea...

Page 16: ...Use this button to stop cooking and clear cooking settings Time Weight Auto Menu dial Turn this dial to set the cooking time food weight or to choose the auto menu programmes Clock Pre Set button Use this button to set the clock and to preset cooking time Start 30 Sec Confirm button Use this button to quick start cooking by increments of 30 seconds Each press adds 30 seconds Use this button to als...

Page 17: ...5 Press the Start 30Sec Confirm 2 button to start a simple 30 second microwave cooking cycle that allows you to check the operation of the microwave 6 When the cooking cycle has finished the water should be hot be careful when you take the cup out of the microwave Press the Stop Clear 1 button to clear any settings For your safety the microwave stops if the door is opened during cooking Close the ...

Page 18: ...the input time has to be within 0 59 minutes 5 Press the Clock Pre Set 1 button again to complete the clock setting will start flashing and the time will illuminate A 1 auto reheat A 5 pasta A 2 vegetables A 6 potatoes A 3 fish A 7 pizza A 4 meat A 8 soup In the process of clock setting if the Stop Clear 2 button is pressed or if there is no operation within 1 minute the microwave will go back to ...

Page 19: ...sound The child lock indicator will illuminate on the LED display to indicate the microwave has set the child lock 2 To release the child lock press the Stop Clear 1 button again for 3 seconds and a long beep will sound The child lock indicator will disappear from the LED display to indicate that the microwave has released the child lock A 1 auto reheat A 5 pasta A 2 vegetables A 6 potatoes A 3 fi...

Page 20: ...to confirm and start cooking 5 Press the Stop Clear 2 button once to stop the cooking Press the Stop Clear 2 button again to cancel the setting Microwave Button Control Order LED Display Microwave Power 1 P100 100 2 P80 80 3 P50 50 4 P30 30 5 P10 10 A 1 auto reheat A 5 pasta A 2 vegetables A 6 potatoes A 3 fish A 7 pizza A 4 meat A 8 soup Alternatively after you press the Microwave 1 button once y...

Page 21: ... 7 00 6 Press the Start 30Sec Confirm 4 button to confirm and start cooking The microwave will sound once to indicate that it has started the defrosting count down The microwave will sound again as it starts the microwave cooking the second stage Upon completion the microwave will sound five times 7 Press the Stop Clear 3 button once to stop the cooking Press the Stop Clear 3 button again to cance...

Page 22: ...ock Pre Set 2 button again The minute digits will flash Turn the Time Weight Auto Menu 5 dial to adjust the minutes 5 Press the Start 30Sec Confirm 4 button to complete the setting The microwave will beep when the count down reaches the starting time and cooking will start automatically 6 Press the Stop Clear 3 button to cancel the setting Ensure the clock is set prior to setting the programme A 1...

Page 23: ...gain to cancel the setting For instance If you want to cook 350g of fish using auto menu prgramme please follow the steps below 1 Turn the Time Weight Auto Menu 3 dial clockwise to select the auto menu programme for fish The LED display will show A 3 2 Press the Start 30Sec Confirm 2 button to confirm 3 Turn the Time Weight Auto Menu 3 dial to select the weight of your fish until the LED display s...

Page 24: ...of Cold Water Only use suitable microwavable containers and cling film in the microwave Pierce the film with a fork before cooking Check the cooking regularly to make sure the water does not boil over 100g 100 21 00 100g of Pasta 800ml of Cold Water A 6 potatoes 200g 200 5 00 For best results pierce the potatoes skin before cooking Once the potatoes are cooked wrap them in aluminium foil for at le...

Page 25: ...Press the Start 30Sec Confirm 3 button to start defrosting 4 Press the Stop Clear 2 button once to stop the defrosting Press the Stop Clear 2 button again to cancel the setting Large items may be frozen in the centre To ensure even thawing turn them over from time to time and break them into smaller pieces during defrosting You will need to press the Stop Clear 2 button once to hold the defrosting...

Page 26: ... Weight Auto Menu 4 dial anti clockwise to set the cooking time with 100 microwave power Then press the Start 30Sec Confirm 3 button to start cooking This feature is also applicable during microwave cooking and defrosting by time querying the cooking function This feature allows you to check and view the current cooking settings Press the Microwave 1 button once and the LED display will show the c...

Page 27: ...ont of the microwave clean so that the door can close properly Be careful not to spill water into the vents Keep the inside of the door clean with a damp cloth Use warm soapy water for stubborn marks and dry thoroughly The inside of the door has a special coating and must not be cleaned with abrasive pads or cleaning powders Clean behind the door ledge Wipe with a damp cloth to clean the outside o...

Page 28: ...n the inside of the door Condensation is perfectly normal especially when you are cooking food with a high moisture content such as potatoes Does the microwave energy get through the window on the door No The door has a special metal screen with holes that lets you see inside but stops microwave energy from getting out Steam comes out of the side of the door and vents Can microwave energy get out ...

Page 29: ...00 Watts Microwave Frequency 2450 MHz Outside Dimensions height x width x depth 258 mm x 440 mm x 358 mm Power consumption Microwave Input 1200 1270 Watts Features and specifications are subject to change without prior notice K20MSS15_IB_RC_151119_grace indd 29 19 11 15 9 35 am ...

Page 30: ...K20MSS15_IB_RC_151119_grace indd 30 19 11 15 9 35 am ...

Page 31: ...K20MSS15_IB_RC_151119_grace indd 31 19 11 15 9 35 am ...

Page 32: ... help conserve natural resources and ensure that it is recycled in a manner that protects human health and the environment For more information about where you can drop off your waste for recycling please contact your local authority or where you purchased your product DSG Retail Ltd co no 504877 1 Portal Way London W3 6RS UK Manufactured for DSG Retail Limited under a Trademark License from Kenwo...

Reviews: