background image

16


|


KDC-3047/ KDC-3047GY/ KDC-3047M/ KDC-3247/ KDC-3347/ KDC-314

Accessories/Installation Procedure

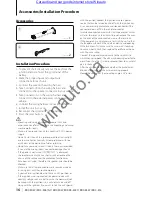
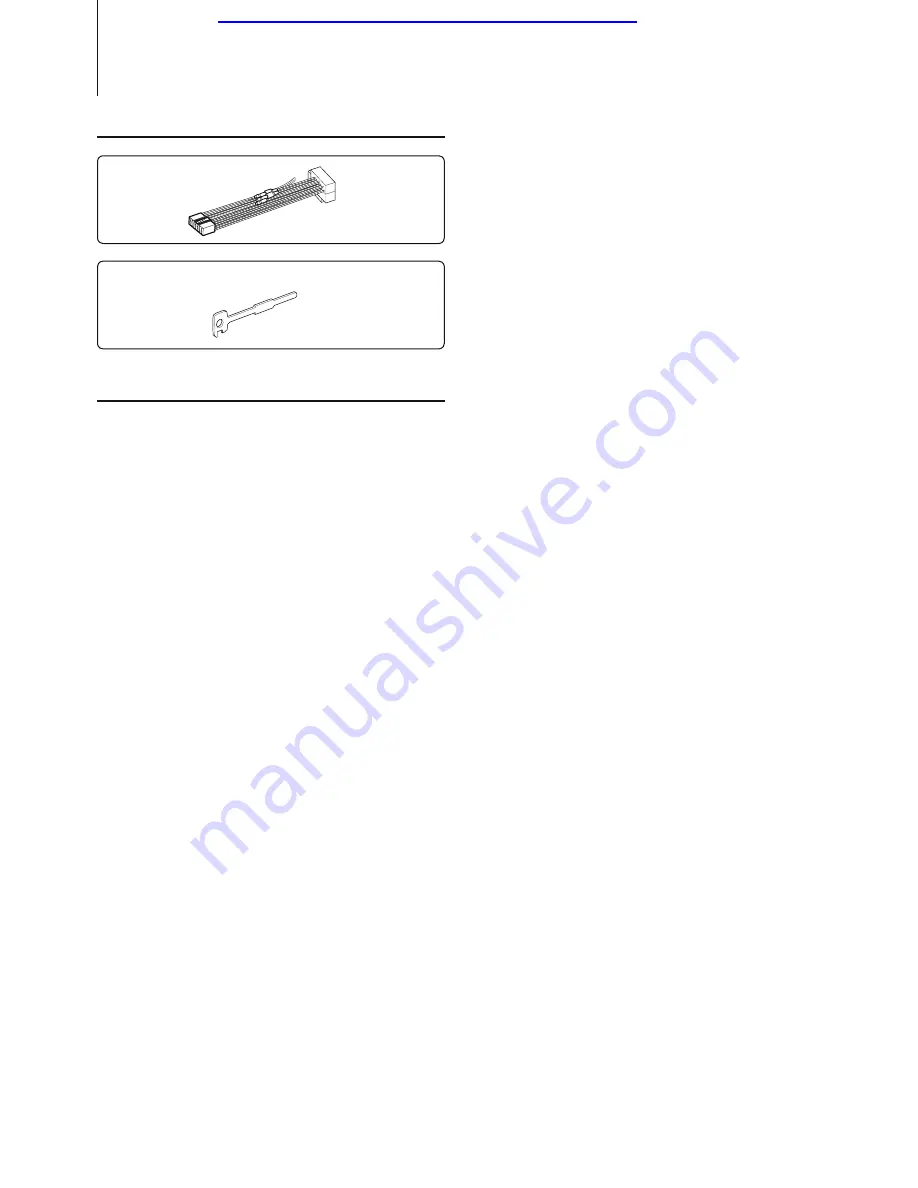
Accessories

1

..........1

2

..........2

Installation Procedure

1.  To prevent short circuits, remove the key from the 

ignition and disconnect the 

-

 terminal of the 

battery.

2.  Make the proper input and output wire 

connections for each unit.

3.  Connect the wire on the wiring harness.
4.  Take Connector B on the wiring harness and 

connect it to the speaker connector in your vehicle.

5.  Take Connector A on the wiring harness and 

connect it to the external power connector on your 
vehicle.

6.  Connect the wiring harness connector to the unit.
7.  Install the unit in your car.
8. Reconnect the 

-

 terminal of the battery.

9.  Press the reset button.

¤

•  Mounting and wiring this product requires skills and 

experience. For safety’s sake, leave the mounting and wiring 
work to professionals.

•  Make sure to ground the unit to a negative 12V DC power 

supply.

•  Do not install the unit in a spot exposed to direct sunlight 

or excessive heat or humidity. Also avoid places with too 
much dust or the possibility of water splashing.

•  Do not use your own screws. Use only the screws provided. 

If you use the wrong screws, you could damage the unit.

•  If the power is not turned ON (“PROTECT” is displayed), 

the speaker wire may have a short-circuit or touched the 
chassis of the vehicle and the protection function may 
have been activated. Therefore, the speaker wire should be 
checked.

•  Make sure that all wire connections are securely made by 

inserting jacks until they lock completely.

•  If your vehicle’s ignition does not have an ACC position, or 

if the ignition wire is connected to a power source with 
constant voltage such as a battery wire, the power will not 
be linked with the ignition (i.e., it will not turn on and off 
along with the ignition). If you want to link the unit’s power 

with the ignition, connect the ignition wire to a power 
source that can be turned on and off with the ignition key.

•  Use a commercially available conversion connector if the 

connector does not fit in the vehicle connector.

•  Insulate unconnected wires with vinyl tape or other similar 

material. To prevent a short circuit, do not remove the caps 
on the ends of the unconnected wires or the terminals.

•  If the console has a lid, make sure to install the unit so that 

the faceplate will not hit the lid when closing and opening.

•  If the fuse blows, first make sure the wires aren’t touching 

to cause a short circuit, then replace the old fuse with one 
with the same rating.

•  Connect the speaker wires correctly to the terminals to 

which they correspond. The unit may be damaged or fail to 
work if you share the 

-

 wires or ground them to any metal 

part in the car. 

•  After the unit is installed, check whether the brake lamps, 

blinkers, wipers, etc. on the car are working properly.

•  Mount the unit so that the mounting angle is 30° or less.

B64-4591-00_00_en.indd   16

09.10.8   10:54:09 AM

Car audio and car goods internet store Winauto

winauto.ua

Summary of Contents for KDC-3047

Page 1: ...Delivery in Kiev and throughout Ukraine with payment upon receipt http winauto ua Car Receivers Facia Plates Head Units TV and Monitors Car Antennas Car Audio Car DVRs GPS Navigation Trip Computers Security Systems Mechanical Locking Car Park Systems Cameras Optic and Light Car Tuning Car Heating Marine Audio and Electronics Car Accessories Car Isolation Car Installation Components Car Batteries L...
Page 2: ...CD RECEIVER KDC 3047 KDC 3047GY KDC 3047M KDC 3247 KDC 3347 KDC 314 INSTRUCTION MANUAL B64 4591 00 00 EW E2W E0 E20 M20 M20 Car audio and car goods internet store Winauto w i n a u t o u a ...

Page 3: ...6 Connecting Wires to Terminals 17 Installation Removing the Unit 19 Troubleshooting Guide 20 Specifications 22 Declaration of Conformity with regard to the EMC Directive 2004 108 EC Manufacturer Kenwood Corporation 2967 3 Ishikawa machi Hachioji shi Tokyo 192 8525 Japan EU Representative s Kenwood Electronics Europe BV Amsterdamseweg 37 1422 AC UITHOORN The Netherlands For Turkey Bu ürün 26891say...

Page 4: ... CDs to play In such a situation remove the disc and wait for the condensation to evaporate If the unit still does not operate normally after a while consult your Kenwood dealer Notes If you experience problems during installation consult your Kenwood dealer When you purchase optional accessories check with your Kenwood dealer to make sure that they work with your model and in your area The charac...

Page 5: ...djust the minute 6 Press the VOL knob to finish the minute adjusting You can do this adjustment when TIME SYNC in Function Setting page 8 is set to OFF Common Operation Power and source select Turns the power ON by pressing the SRC button When power is ON pressing the SRC button switches among playable sources in the following order Tuner TUNER CD CD Auxiliary Input AUX Standby STANDBY Tuner TUNER...

Page 6: ...orized station Keeping pressing the 1 6 button for at least 2 seconds memorizes the station currently selected Traffic information Press the button for at least 1 second Turns ON or OFF the Traffic Information function When the function is turned ON TI indicator is ON If traffic bulletin starts when the function is ON TRAFFIC is displayed and traffic information is received Details of the station ...

Page 7: ... place the faceplate and the faceplate case in areas exposed to direct sunlight excessive heat or humidity Also avoid places with too much dust or the possibility of water splashing Muting Volume upon Reception of Phone Call The audio system automatically mutes when a call comes in When a call comes in CALL is displayed The audio system pauses Listening to the audio during a call Press the SRC but...

Page 8: ...ary input source Information Display Source name SOURCE NAME Clock CLOCK Select the text Press the DISP button When you select the clock display the display setting of each source will be changed to the clock display If the selected display item does not have any information alternative information is displayed Display Indicator r q p s t 1 ST indicator Lights when a stereo broadcast is received 2...

Page 9: ...izing the RDS station time data and this unit s clock π Dimmer DIMMER SET ON OFF Adjusts the brightness of the display according to the surrounding illumination Text Scroll TEXT SCROLL AUTO MANUAL Scrolls the text display of CD audio file and Radio text Local Seek LOCAL SEEK ON OFF Only stations whose reception is good are searched in auto seek tuning FM only Seek Mode SEEK MODE AUTO1 AUTO2 MANUAL...

Page 10: ...inutes Ò Built in AUX BUILTIN AUX ON1 ON2 OFF When this is set to ON AUX source can be selected ON1 Outputs the sound of external unit connected to the AUX terminal when switched to AUX source ON2 Activates the attenuator function when turning on the power with AUX source selected Turn off the attenuator function when listening to output from external unit This prevents the noise when no external ...

Page 11: ...Top 40 Jazz Game User setting USER This appears when Bass level Middle level and Treble level are adjusted When the System Q setting is changed the Bass Middle and Treble set replace the System Q values Bass level adjust BASS LEVEL 8 8 Δ Middle level adjust MID LEVEL 8 8 Treble level adjust TRE LEVEL 8 8 Source tone memory Puts the set up value in the memory per source Balance BALANCE L 15 R 15 Fa...

Page 12: ...MER SET π TEXT SCROLL RDS SET NEWS SET AF SET Å RDS REG Í ATP SEEK Î DEMO MODE ß Function items appearing when an AUX source is selected AUDIO CTRL SUB W SET BASS BOOST ƒ SYSTEM Q BASS LEVEL MID LEVEL Δ TRE LEVEL BALANCE FADER SUB W LEVEL DETAIL SET LPF SUB W æ SUB W PHASE Z VOL OFFSET X SETTINGS AUX NAME Ó CLOCK CLOCK ADJ TIME SYNC ø DISPLAY DIMMER SET π TEXT SCROLL RDS SET NEWS SET AF SET Å RDS ...

Page 13: ...sc or folder When Random Play is turned on DISC RANDOM FOLD RANDOM is displayed Pressing this button again cancels the Random play Scan play Press the 2 button Successively plays the intro of the music in the disc or folder When Scan Play is turned on TRAC SCAN FILE SCAN is displayed Pressing this button again plays songs in the normal mode starting with the song being played now CD source Operati...

Page 14: ...one In PHONE IN Travel TRAVEL Leisure LEISURE Jazz Music JAZZ Country Music COUNTRY National Music NATION M Oldies Music OLDIES Folk Music FOLK M Documentary DOCUMENT Speech and Music include the Program type shown below Music Black character item Speech White character item 1 Enter PTY mode Press the button 2 Select the Program Type Turn the VOL knob 3 Search for the selected Program Type station...

Page 15: ...direction of the arrow Changing the battery of the remote control unit Use a commercially available button battery CR2025 Insert something narrow like a paperclip into the hole 1 and pull out the battery tray Insert the battery with the and poles aligned properly following the illustration inside the case Keep on slide Pull out CR2025 side Not used page 12 Accessory of KDC 3347 CAUTION Do not set ...

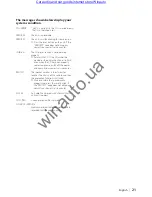
Page 16: ... Old Electrical and Electronic Equipment and Batteries applicable for EU countries that have adopted separate waste collection systems Products and batteries with the symbol crossed out wheeled bin cannot be disposed as household waste Old electrical and electronic equipment and batteries should be recycled at a facility capable of handling these items and their waste byproducts Contact your local...

Page 17: ...have been activated Therefore the speaker wire should be checked Make sure that all wire connections are securely made by inserting jacks until they lock completely If your vehicle s ignition does not have an ACC position or if the ignition wire is connected to a power source with constant voltage such as a battery wire the power will not be linked with the ignition i e it will not turn on and off...

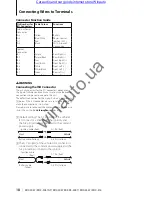
Page 18: ...nector A Connector B Fuse 10A See next page FM AM antenna input JASO Connect to the terminal that is grounded when either the telephone rings or during conversation To connect the Kenwood navigation system consult your navigation manual Front side AUX input Stereo Use the mini plug cable which is stereo type and does not have any resistance Rear output Sub Woofer output KDC 3047 KDC 3047M KDC 3347...

Page 19: ... prevent damage to the unit The default connection for the wiring harness is described in 1 below If the ISO connector pins are set as described in 2 make the connection as illustrated Please be sure to reconnect the cable as shown 2 below to install this unit to the Volkswagen vehicles etc 1 Default setting The A 7 pin red of the vehicle s ISO connector is linked with the ignition and the A 4 pin...

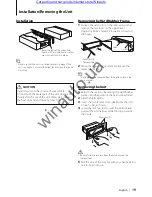
Page 20: ...moved from the bottom side in the same manner Removing the Unit 1 Refer to the section Removing the Hard Rubber Frame and then remove the hard rubber frame 2 Detach the faceplate 3 Insert the two removal tools deeply into the slots on each side as shown 4 Lower the removal tool toward the bottom and pull out the unit halfway while pressing towards the inside Accessory2 Be careful to avoid injury f...

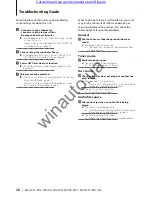
Page 21: ... to be a malfunction in your unit may just be the result of slight misoperation or miswiring Before calling service first check the following table for possible problems General The Touch Sensor Tone beep sound does not sound The preout jack is being used The Touch Sensor Tone cannot be output from the preout jack Tuner source Radio reception is poor The car antenna is not extended Pull the antenn...

Page 22: ...to flash even when the CD has been properly reinserted please switch off the power and consult your nearest service center PROTECT The speaker wire has a short circuit or touches the chassis of the vehicle and then the protection function is activated Wire or insulate the speaker cable properly and press the reset button If the PROTECT code does not disappear consult your nearest service center NA...

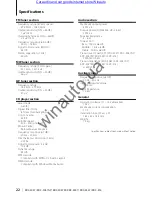
Page 23: ...able Limit Frequency response 1 dB 20 Hz 20 kHz Total harmonic distortion 1 kHz 0 01 Signal to Noise ratio 1 kHz 105 dB Dynamic range 93 dB MP3 decode Compliant with MPEG 1 2 Audio Layer 3 WMA decode Compliant with Windows Media Audio Audio section Maximum output power 50 W x 4 Output power DIN 45324 B 14 4V 22 W x 4 Speaker Impedance 4 8 Ω Tone action Bass 100 Hz 8 dB Middle 1 kHz 8 dB Treble 10 ...

Page 24: ...Car audio and car goods internet store Winauto w i n a u t o u a ...

Page 25: ...mbol mark indicates that Kenwood manufactured this product so as to decrease harmful influence on the environment Car audio and car goods internet store Winauto w i n a u t o u a Powered by TCPDF www tcpdf org ...

Reviews: