background image

26   

English

English

   27

CONTENTS

Installation/connection

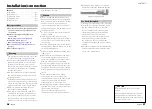
Part list:

A

 Faceplate ...................................................................(×1)

B

 Escutcheon ..............................................................(×1)

C

 Mounting sleeve ...................................................(×1)

D

 Wiring harness .......................................................(×1)

E

 Removal tool .......................................................... (×2)

Basic procedure

Remove the key from the ignition switch, 
then disconnect the 

·

 terminal of the 

car battery.

Make proper input and output wire 
connections.

\


<Wiring connection> (page 28)

Install the unit to your car.

\


<Installing the unit> (page 29)

Reconnect the 

·

 terminal of the car 

battery.

Reset the unit. (

page 3

)

¤

Warning

The unit can only be installed in a car with a 
12 V DC power supply, negative ground.

If you connect the ignition wire (red) and 
the battery wire (yellow) to the car chassis 
(ground), you may cause a short circuit, 
that in turn may start a fire. Always connect 
those wires to the power source running 
through the fuse box.

Disconnect the battery’s negative terminal 
and make all electrical connections before 
installing the unit.

Insulate unconnected wires with vinyl tape 
or other similar material. To prevent a short 
circuit, do not remove the caps on the ends 
of the unconnected wires or the terminals.

Be sure to ground this unit to the car’s 
chassis again after mounting.

If the power is not turned ON (“PROTECT” 
is displayed), the speaker wire may have a 
short-circuit or touched the chassis of the 
vehicle and the protection function may 
have been activated. Therefore, the speaker 

wire should be checked.

¤

Caution

If your car’s ignition key switch does not 
have an ACC position, connect the ignition 
wires to a power source that can be turned 
on and off with the ignition key. If you 
connect the ignition wires to a constant-
voltage power source, as with battery wires, 
the battery may die.

Do not use your own screws. Use only the 
screws provided.

Install this unit in the console of your 
vehicle. Make sure the faceplate will not hit 
the lid of the console (if any) when closing 
and opening.

After the installing the unit, check whether 
the brake lamps, blinkers, wipers, etc. on the 
car are working properly.

Mount the unit so that the mounting angle 
is 30° or less.

If the fuse blows, first make sure the wires 
are not touching other parts to cause a 
short circuit, and then replace the old fuse 
with one with a new the same rating.

Connect the speaker wires correctly to the 
corresponding terminals. The unit may be 
damaged or fail to work if you share the 

·


wires or ground them to any metal part in 
the car.

When only two speakers are being 
connected to the system, connect the 
connectors either to both the front output 
terminals or to both the rear output 
terminals (do not mix front and rear).

Mounting and wiring this product requires 
skills and experience. For safety’s sake, leave 
this work to professionals. 
If you experience problems during 
installation, consult your Kenwood dealer.

Reception may become poor if there are 
metal objects near the Bluetooth antenna.

Bluetooth antenna unit  

PAR

iPod

VOICE

For Good Reception

To assure good reception, note the following:

Communicate with the cell-phone within 
the line-of-sight distance of 10 m (30 
ft). The communication range becomes 
shorter depending on the surrounding 
environment. The communication 
range also becomes shorter when there 
is an obstacle between this unit and 
the cell-phone. The above maximum 
communication range (10 m) is not always 
assured. 

A broadcast station or walkie-talkie located 
nearby can interfere with communication 
due to a too strong signal. 

¤

 CAUTION

Install this unit in the console of your 
vehicle. 
Do not touch the metal part of this unit 
during and shortly after the use of the 
unit. Metal part such as the heat sink and 
enclosure become hot. 

Summary of Contents for KDC-BT32U

Page 1: ...Random Play All Random Play Selecting a folder track file Alphabet Search for iPod Selecting App iPod Control Mode Adjust SETTINGS mode settings Getting Started of Bluetooth 14 Registering your Bluetooth device with this unit Pairing Registering from Bluetooth devices Pairing Operation of Hands Free Phoning16 Making a Call Make a Voice Dialing Call Receiving a Call During a Call Switching between ...

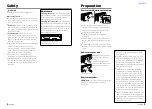
Page 2: ... Safety Preparation How to attach detach the faceplate 1 2 1 2 Do not expose the faceplate to direct sunlight excessive heat or humidity Also avoid places with too much dust or the possibility of water splashing Keep the faceplate in its casing while detached The faceplate is a precision component of the unit and can be damaged by shocks or jolts To prevent deterioration do not touch the terminals...

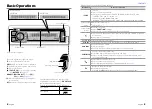
Page 3: ...ilable sources TUNER BT AUDIO USB or iPod CD AUX STANDBY if the power is turned on If the source is ready playback also starts iPod and CD are selectable only when an iPod is connected or a disc is loaded Volume knob turn Adjusts the volume level Selects items Volume knob press Confirms selection Enters FUNCTION settings Start voice recognize of cell phone if pressed and held Selects the FM bands ...

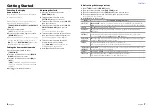
Page 4: ...gs before operations 1 Press SRC to enter STANDBY mode 2 Press the volume knob to enter FUNCTION mode 3 Turn the volume knob to select INITIAL SET then press to enter 4 Turn the volume knob to make a selection then press to confirm See table below for selection 5 Hold to finish the procedure Item Selectable setting Preset PRESET TYPE NORMAL NORM Memorizes one station for each preset button in each...

Page 5: ...System network with better reception when the current reception is poor OFF Cancels REGIONAL ON Switches to another station only in the specific region using the AF control OFF Cancels PAR iPod VOICE Press and hold to memorize the current station Press briefly to recall memorized station Item Selectable setting Preset AUTO TP SEEK ATP SEEK ON Automatically searches for a station with better recept...

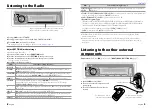
Page 6: ...lder track file 1 Press to enter Music Search mode SEARCH appears then the current file name appears on the display 2 Turn the volume knob to select a folder track file then press to confirm To skips songs press 4 Holding 4 skips songs at 10 regardless of the setting made page 12 This operation is effective only for the iPod or KENWOOD Music Editor media To return to the root folder audio file top...

Page 7: ...ng a folder name etc Changing the browse item will display a correct title etc You cannot operate the iPod if KENWOOD or displayed on the iPod About KENWOOD Music Editor This unit supports the PC application KENWOOD Music Editor Light ver1 1 or later When you use the audio file with database information added by the KENWOOD Music Editor Light ver1 1 you can search for a file by title album or arti...

Page 8: ...e device is can be connected using both hands free and audio profiles 6 Press the volume knob to set up the Bluetooth device H A device name The selected Bluetooth device is busy H A device name The selected Bluetooth device is on standby blank device name The Bluetooth device is deselected If two cell phones or an audio player have already been selected deselect one device before selecting a new ...

Page 9: ...sound is not output during voice recognition Receiving a Call Answering a Phone Call Press or the volume knob The following operations disconnect the line Insert a CD Connect a USB device The name of the calling party is displayed if it has already been registered in the Phone Book Rejecting an Incoming Call Press SRC During a Call Disconnecting a Call Press or SRC Switching to the Private Mode Pr...

Page 10: ...data automatic downloading function In this case try downloading manually To download from the cell phone manually Use this procedure when your cell phone does not support the Phone Book Access Property PBAP 1 Press to enter Bluetooth mode 2 Turn the volume knob to select SETTINGS then press to enter 3 Turn the volume knob to select TRANSFER PB then press to enter DL PB is displayed 4 By operating...

Page 11: ...ooth mode 2 Turn the volume knob to select SETTINGS then press to enter 3 Turn the volume knob to make a selection then press to confirm See table below for selection Repeat step 3 until the desired item is selected activated Press to return to the previous item 4 Hold to finish the procedure To cancel the Bluetooth mode press Bluetooth Setup Item Selectable setting Preset PAIRING PHONE SELECT PHO...

Page 12: ... Selectable setting Preset DETAILED SET DETAIL SET LPF SUBWOOFER LPF SUB W THROUGH All signals are sent to the subwoofer 85 120 160 HZ Frequencies higher than the specified value are cut off SUB W PHASE REVERSE REV 180 NORMAL NORM 0 Selects the phase angle of the subwoofer output to be in line with the speaker output for optimum performance Selectable only if a setting other than THROUGH is select...

Page 13: ...neral operation SRC Selects the available sources TUNER BT AUDIO USB or iPod CD AUX STANDBY if the power is turned on If the source is ready playback also starts iPod or CD is selectable only when an iPod is connected or a disc is loaded VOLu d Adjusts the volume level 5 Selects items Enters Music Search mode page 11 ENT 38 Pauses resumes playback of a disc USB device iPod Confirms selection AM FM...

Page 14: ... the screws provided Install this unit in the console of your vehicle Make sure the faceplate will not hit the lid of the console if any when closing and opening After the installing the unit check whether the brake lamps blinkers wipers etc on the car are working properly Mount the unit so that the mounting angle is 30 or less If the fuse blows first make sure the wires are not touching other par...

Page 15: ...enwood navigation system consult your navigation manual Connect either to the power control terminal when using the optional power amplifier or to the antenna control terminal in the vehicle Max 300mA 12V If no connections are made do not let the wire come out from the tab Wiring harness D Fuse 10A Connecting the ISO connectors on some VW Audi or Opel Vauxhall automobiles You may need to modify th...

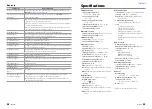
Page 16: ...nd is sometimes interrupted Stop playback while driving on rough roads Change the disc Check the cords and connections NA FILE appears The unit is playing an unsupported audio file NO DISC appears Insert a playable disc into the loading slot TOC ERROR appears The CD is quite dirty The CD is upside down The CD is scratched a lot Try another disc instead ERROR 99 appears The unit is malfunctioning f...

Page 17: ...d from the Bluetooth audio player is discontinuous Another Bluetooth device is affecting the Bluetooth communication Turn off another Bluetooth device Move another Bluetooth device away from this unit Another Bluetooth device or profile is used for communication The downloading of the Phone book disconnects the sound Specifications FM tuner section Frequency range 50 kHz space 87 5 MHz 108 0 MHz U...

Page 18: ...posizioni pertinenti stabilite dalla direttiva 1999 5 CE Español Por medio de la presente Kenwood declara que el KDC BT42U KDC BT32U cumple con los requisitos esenciales y cualesquiera otras disposiciones aplicables o exigibles de la Directiva 1999 5 CE Português Kenwood declara que este KDC BT42U KDC BT32U está conforme com os requisitos essenciais e outras disposições da Directiva 1999 5 CE Pols...

Reviews: