KR-897/KR-797 (En)
14
Playing music
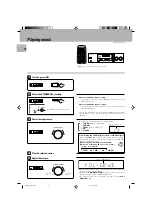
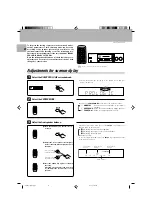
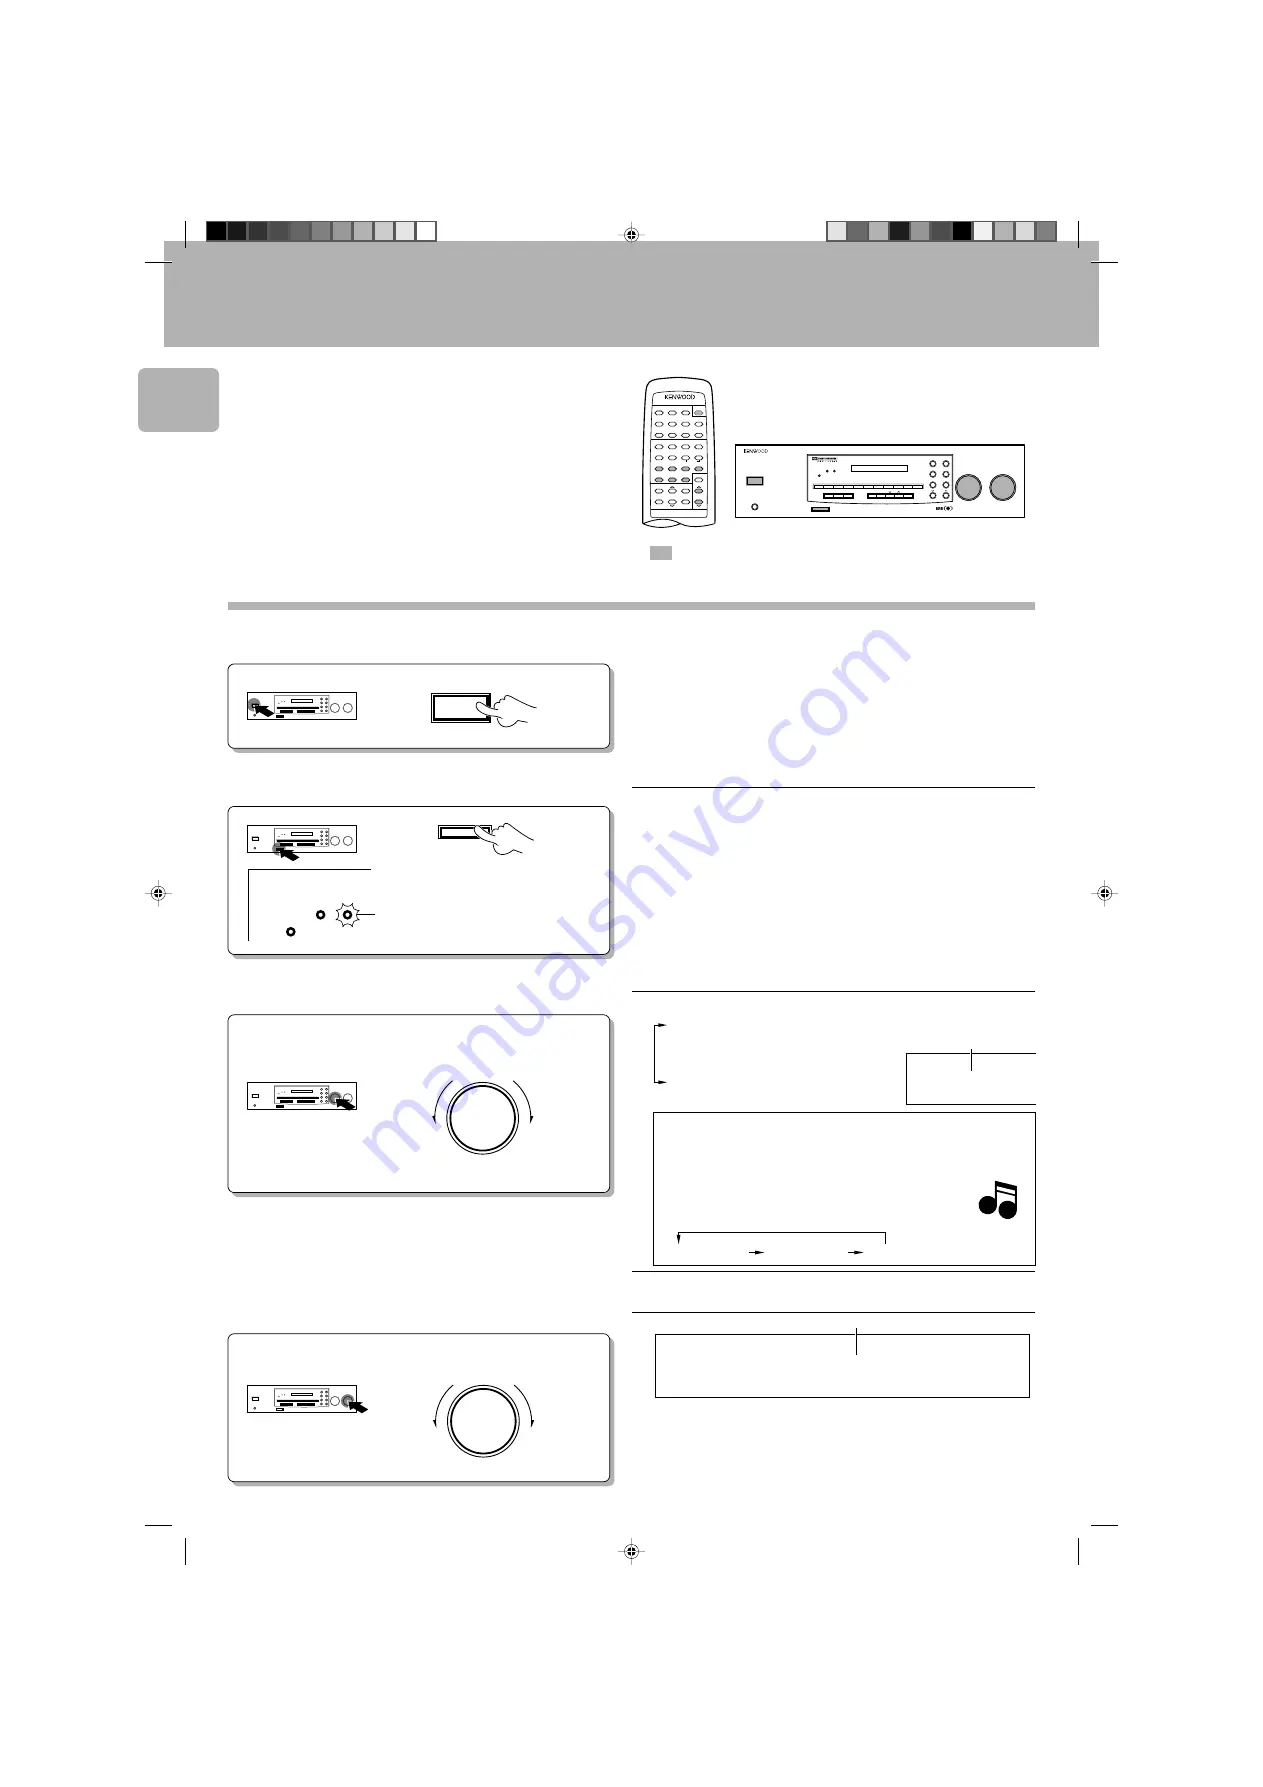
Adjust the volume.
1
POWER
ON/STANDBY
Turn the power ON.
Select the SPEAKERS key setting.
2
SPEAKERS
Select the input source.
3
Play the selected source.
4
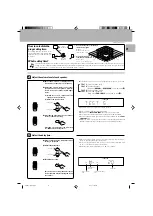
The input sources are switched in the following order:
÷
The time taken till the volume level is displayed is variable depending
on the current operating condition.
÷
Rotating the
VOLUME CONTROL
at a higher speed increases the
amount of volume change (AI VOLUME function).
÷
The sound of input source cannot be listened to while
TAPE 2
MONITOR
is ON.
1
TUNER
(frequency display)
2
PHONO
3
TAPE1
(MD or VIDEO1)*1
4
CD
5
VIDEO2
*
1
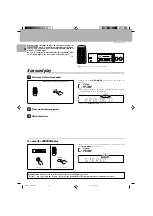
: Switching the TAPE1 display to MD or VIDEO1 display
When a KENWOOD MD recorder is connected in the [SL 16] system
control mode, the TAPE 1 input should be switched to the MD input
using the following procedure.
1
Select TAPE1 with the INPUT SELECTOR.
2
Press and hold the AUTO key for more than 2
seconds to select MD.
Volume level is displayed.
When the SPEAKERS indicator is ON:
The speakers connected to the SPEAKERS terminals on the rear
panel output sound.
When the SPEAKERS indicator is OFF:
The speakers do not output sound. Use this setting when listening
through headphones.
The SPEAKERS indicator should light up.
3
VIDEO1
2
MD
1
TAPE1
5
VOLUME CONTROL
DOWN
UP
To decrease
volume
To increase
volume
INPUT SELECTOR
C D
The selected source is
displayed.
Note
Note
: Keys or controls to be used in this operation
V O L - 6 8 d B
STANDBY
SRS
3D
SPEAKERS
POWER
PHONES
ON/STANDBY
INPUT SELECTOR
VOLUME CONTROL
UP
DOWN
1
2
3
4
5
6
7
8
9
0
+10
AUTO
DIRECT MEMORY
AUDIO-VIDEO SURROUND RECEIVER KR-897
PRO LOGIC
STEREO
SRS 3D
N.B.
SOURCE
DIRECT
P.CALL
3 STEREO
TUNING
BAND DIMMER
TAPE2
MONITOR
POWER
1
2
3
4
5
6
7
8
9
DISK SKIP
0
+10
SOUND
CENTER
MODE
A/B +100
TUNER
CD
PHONO
VIDEO2
MUTE
1
¡
7
6
AV AUX
REMOTE CONTROL UNIT
RC-R0505
4 ¢
2
AUTO
BAND
P.CALL
VOLUME
CONTROL
STANDBY
SPEAKERS
SRS
3D
SPEAKERS
VIDEO1
TAPE1
SETUP
TAPE2
MONITOR
LEVEL
CONTROL
LISTEN
MODE
÷
For the operation when the power amplifier (KM-897) is connected to
the KR-897, see
7
and refer to the instruction manual of the
KM-897.
KR-897̲797(En).pm5
07.6.11, 5:06 PM
14


