background image

Summary of Contents for KRC-535

Page 1: ...liarity with installation and operation procedures will help you obtain the best performance from your new cassette receiver For your records Record the serial number found on the back of the unit in the spaces designated on the warranty card and in the space provided below Refer to the model and serial numbers whenever you call upon your KENWOOD dealer for information or service on the product Mo...

Page 2: ...isc control features 15 Playing External Disc Fast Forwarding and Reversing Track Search Album Search Direct Track Search Direct Album Search Track Album Repeat Track Scan Random Play Magazine Random Play Text Title Scroll DNPP Disc Name Preset Play Menu system 16 Menu System Security Code Touch Sensor Tone Manual Clock Adjustment Selectable Illumination Switching Graphic Display Contrast Adjustme...

Page 3: ...l When replacing a fuse only use a new one with the prescribed ratrng Using a fuse with the wrong rating may cause your unit to malfunction l To prevent a short circuit when replacing a fuse first disconnect the wiring harness l Do not place any object between the faceplate and the unit l Do not use your own screws Use only the screws provided If you use the wrong screws you could damage the unrt ...

Page 4: ... and some of the illustrations on the display may represent something impossible in actual operation Cleaning the cap ate Terminals If the terminals on the unit or faceplate get drrty wipe them with a dry soft cloth Cleaning the Unit If the faceplate of this unit is stained wipe it with a dry soft cloth such as a silicon cloth If the faceplate is stained badly wipe the stain off with a cloth moist...

Page 5: ...SRCI button for at least 1 second Clockindicator SpeakerSettingindicator Press the SRCI button Source required Tuner Tape Display TUNER TAPE External disc Auxiliary input Standby Illumination only mode DISC AUX ALL OFF For Auxlllary Input one of the below optional accessones IS necessary KCA S2 1OA CA C1AX CD changer with an Auxlllary input function mstalled 5 ...

Page 6: ... SpeakersettW Press the LOUD button for at least 1 second Each time the button is pressed for at least 1 second the Loudness turns ON or OFF When it s ON LOUD ON is displayed You can recall the best sound setting preset for different types off the music 1 Select the source to set Press the SKI button 2 Select the Sound type 6 1 Select the source for adjustment Press the KSRCI button 2 Enter Audio ...

Page 7: ...ker type Press the I or H button Each time the button IS pressed the setting switches as shown below Speaker type Display OFF SP OFF For 6 6x9 in speaker SP 6 9 6inch For 5 4 in speaker For the OEM speaker SP 5 4inch SP O E M 4 Exit Speaker Setting mode Press the QI button Switching the information displayed Press the DISPI button Each time the button is pressed the display switches as shown below...

Page 8: ...acters Accent characters 5 Select the characters Press the FM or AM button Characters can be entered by using a remote wth a number buttons Example If DANCE IS entered Character Button Times pressed D 1 31 1 A 21 1 N Ml 2 C Pa 3 E I 31 2 6 Repeat steps 3 through 5 and enter the name 7 Exit name set mode Press the NAME SI button l When operation stops for 10 seconds the name at that time IS reglste...

Page 9: ... the Faceplate 1 Turn the ignition OFF or press the SRCI button for at least 1 second The power turns OFF and the faceplate slides open 2 Holding the center part of the faceplate pull it out A l When the faceplate IS kept remove open according to the OFF Walt Time Setting page 21 setting the feceplate IS hldden and the power turns OFF l The faceplate IS a precision piece of equipment and can be da...

Page 10: ...cond The faceplate slides open When the time set In OFF Walt Time Setting page 21 lapses the faceplate is hidden and the power turns OFF Showing the control panel Press the left part at the upper side of the faceplate The faceplate WIII open and show the control panel AM FM SRC i 6 AUTO MENU AME Banddisplay I Frequency display Presetstationnumber I I STindicator lO ...

Page 11: ...n During reception of stereo statlons the ST Indicator IS ON Entering the frequency and tuning 1 Select the band Press the FM or AM button 2 Enter Direct Access Tuning mode Press the DIRECT button on the remote The display 3 Enter the frequency Press the number buttons on the remote Example Desired frequency Press button 92 1 MHz FM WOI 91 WI II 810 kHz AM WOI W81 II HOI Canceling Direct Access Tu...

Page 12: ... Auto Memory Entry Press the AME button for at least 2 seconds When 6 statlons that can be received are put in the memory Auto Memory Entry closes Cassette p a yer features PROG AM FM Calling up the stations in the memory 1 Select the band Press the FM or AM button 2 Call up the station Press the II 61 button KS REP MTL SRC P ay side Taperunningdisplay 12 ...

Page 13: ...nserted Press the SRCI button Select the TAPE drsplay When you want to listen to the reverse side Press the PROGI button Eject the Cassette Tape 1 Eject the Cassette Tape Press the Al button 2 Close the faceplate Press the Al button Press the AMI button When it s stopped press the IPROGI button Press the B NR button Each time the button is pressed the Dolby B NR turns ON or OFF When it s ON B NR O...

Page 14: ...ith the remote control number buttons 1 Designate the song to skip Press number buttons on the remote 2 Skipping to a later song Press the HII button Skipping to a previous song Press the MI button Canceling DPSS Press the MI button l During the songs first 5 seconds there may be a times when the previous track IS recognized as the current track l As many as 9 songs can be skipped Fast forwarding ...

Page 15: ...y Press the b111button Each time the button IS pressed it pauses and plays l DISC I 0 IS displayed as 0 l The functions that can be used and the InformatIon that can be displayed WIII differ depending on the external disc players being connected I Discnumber Fast Forwarding Hold down on the bb11 button Release your finger to play the disc at that point Reversing 1 Hold down on the I button Release...

Page 16: ...buttons on the remote 2 Do Track Search Press the IHI or WI button Canceling Direct Track Search Press the b111button Doing Disc Search by entering the disc number Replaying the track disc you re listening to Press the REPI button Each time the button is pressed the Repeat Play switches as shown below Repeat play Display Track Repeat T Repeat ON Repeat ON Album Repeat Function of disc changer D Re...

Page 17: ...d the Magazrne Random Play turns ON or OFF When it s ON M Random ON is displayed When the 1 1 button IS pressed the next song select starts Scrolling the displayed CD text or MD title Press the DISPI button for at least 1 second Selecting the CD displayed in the DNPS of the CDs set in the Disc changer 1 Enter DNPP mode Press the DNPPI button on the remote When DNPP is drsplayed the DNPS display in...

Page 18: ... item Press the WI or w button Example When Beep is selected each time the button IS pressed it switches Beep ON or Beep OFF Select 1 of them as the setting You can continue by returning to step 2 and setting other items 4 Exit Menu mode Press the MENU button When other Items that are applicable to the basic operation method above are displayed afterwards their setting content chart 1s entered Nor...

Page 19: ...nter the Security Code Press the II 41 button Example If the Security Code is 3510 Step Button Times pressed Display 1 HI 4 3 2 WI 6 5 3 w31 2 II I 1 4 M41 1 0 5 Confirm the Security Code Press the DISPI button for at least 3 seconds When RE ENTER is drsplayed CODE IS drsplayed 6 Do the step 4 and 5 step operation and reenter the security code APPROVED IS drsplayed The Security Code function activ...

Page 20: ...e graphic part display ON OFF Display Graphic ON Graphic OFF Setting The graphrc part is displayed The graphic part Isn t displayed Adjusting the display contrast Display and Setting Contrast 0 Contrast 5 Original settrng Contrast IO Selecting the button illumination color as green or red Display Setting Button Green The illumination color is green Button Red The illumination color IS red Dimming ...

Page 21: ...roll Auto Repeats scroll Scroll MANU Scrolls when the display changes The text scrolled IS shown below l CD text l MD title Temporarily have reception switched from stereo to mono to 1 reduce multi path noise when listening to the FM station Display Setting CRSC ON The CRSC is ON CRSC OFF The CRSC IS OFF Strong electrical fields such as from power lknes may cause unstable sound quality when CRSC i...

Page 22: ...he reach of children Contact a doctor lmmedlately if the battery ISaccidentally swallowed A Do not set the remote on hot places such as above the dashboard VOL buttons Adjusting the volume SRCI button Each time the button is pressed the source switches For the source switching order refer to electing the Source page 5 ATT button Turning the volume down quickly When it is pressed again it returns t...

Page 23: ...he button is pressed the song pauses and plays DNPPII OKI button Enters and cancels the DNPP Disc Name Preset Play page 17 mode Ol I91buttons When in Direct Track Search page 16 and Direct Album Search page 16 enter the track disc number rrl WI buttons Do DPSS Direct Program Search System page 14 a button Plays the reverse srde of the tape FM 1button Fast forwards the tape When the HI button is pr...

Page 24: ...ll the unit so that the faceplate will not hit the lid when closing and opening l If the fuse blows first make sure the wires aren t touching to cause a short circuit then replace the old fuse with one with the same rating l insulate unconnected wires with vinyl tape or other similar material To prevent a short circuit do not remove the caps on the ends of the unconnected wires or the terminals l ...

Page 25: ...en usrng the optronal power amplifier Accessory connect to Its power control termtnal i 1 PCoNT 1Power control wrre Blue White Depending on what antenna you are usrng connect j erther to the control terminal of the motor antenna or j i to the power terminal for the booster amplrfrer of the j 1 AN C0N 1Motor antenna control we Blue film type antenna i WhrtelBlack To front left FRONT L1 ge speaker T...

Page 26: ...he four comers of the hard rubber frame at the same time Do not apply strong pressure to other sections than the corners otherwrse troubles such as the impossibility of opening or closing the panel may result Factory installed Radro Bracket Accessory J Car Bracket follow Indications for L R For Toyota Car After aligning the factory installed radio bracket tighten the screws 4 mm Accessory i for To...

Page 27: ...erng careful not to drop it Screw M4X8 tcommercrally If you want to lock the faceplate to the unit so that it does not fall off follow the directions below Refer to the function Removing the faceplate page 9 and remove the faceplate Insert the provided screw into the hole at the center of the bottom side of the faceplate which you have removed from the unit Accessory Refer to the section Removing ...

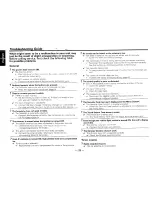
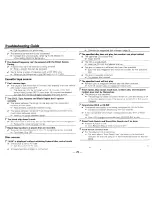
Page 28: ...s turned ON high pitched tone isn t compensated for Tuner source IS selected w High pitched tone Isn t compensated for when rn Tuner source No sound can be heard or the volume is low The fader or balance settrngs are set all the way to one side no Center the fader and balance settings The Input output wires or wrnng harness are connected rncorrectly rn Reconnect the input output wares or the wirin...

Page 29: ... is displayed without achieving External disc control mode I O N switch is set to 0 side m Set the switch to N side Unsupported disc changer 1sconnected 29 Connect the supported disc changer page 3 The specified disc does not play but another one plays instead fl The specrfred CD IS quite drrty Clean the CD I The CD IS upside down Load the CD with the labeled side up The disc IS loaded In a differ...

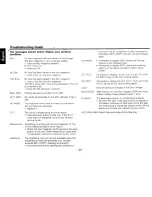
Page 30: ... the MD Load Discs are being exchanged in the Disc changer NO ACCESS After setting it rn the Disc Changer DNPP was done without having it been played at least 1 time No Tr DISC No tracks are recorded on the MD although it has a title IN Blink The tape player section is not operating properly 13 Reinsert the Tape If the tape cannot be ejected or NO PANEL The faceplate of the slave unit being connec...

Page 31: ... 20dB 28 dBp 25 pV Cassette player section Tape Speed 4 76 cm set Wow Flutter WRMS 0 08 Frequency response 3 dB 70 us 30 Hz 20 kHz Separation 1 kHz 43 dB Signal to Noise ratio Dolby NR OFF 57 dB Dolby B NR ON 65 dB Audio section Maximum output power 50 W x 4 Full Bandwidth Power at less than 1 THD 22 W x 4 Tone action Bass 100 Hz I0 dB Middle 1 kHz lOdB Treble _ 10 kHz I0 dB Preout level Load duri...

Page 32: ...KENWOOD ...

Page 33: ...sloten moet u het toestel Ben keer uit en trybu irodta jeieli zmieniacz piyt jest podiqczony prosi sic o wyiaczenie oonieuw inschakelen i wtaczenie zasilania jeszcz raz AlTENZIONE Nel case in cui DISC non possa venire selezionato con il modo dell in terruttore di fonte quando il commutatore di dischi e collegato accendete UPOZORNCNi Jestliie pomoci piepinace reiimu vstupu nelze zvolit DISC piestoi...

Page 34: ...umem di matricola Model1 og serienummer Modelo e numevz de s e Apparat typ serenummer ldentiflcatie van het produkt MOdeI heitl og raantimer II Mudell u s serial number Model number serial number Stempel und Unterschrift des HBndlers Revendeur cachet Forhandler Dlstribuldor y sello JBlleenmyyj2 lemma n pu lsu Eralpiaj Tlmbro del wendltore Forhandlerens a Og Stempel Agente e carimbo AterforsQare st...

Page 35: ...scription of the problem if you are uncertain as to whether a Service Center is authorlred please call I 800 KENWOOD for the nearest Service Center t 800 536 96631 2 Although you must pay any shipping charges If it is necessary to ship the product for warranty service we will pay the return shipping charges If the repairs are covered by the warranty withln the Un ted States 3 Whenever your units a...

Page 36: ......

Page 37: ......

Page 38: ...native you ve got it Period SQUNDSB ClJ3R YOUcwraHEARw GUITAR PICKBRCRWe retaking digital quality sound here broadcast by satellite coast to coast Enough to slam your woofers and tingle your tweeters DON TMISSBUT For your radio to receive Sirius st itellite signals you l8need to purchase a Sirius tuner module It activates your stereo for satellite signals and can be tucked away in the trunk Sign i...

Page 39: ......

Page 40: ......

Page 41: ......

Reviews: