background image

English


|


7

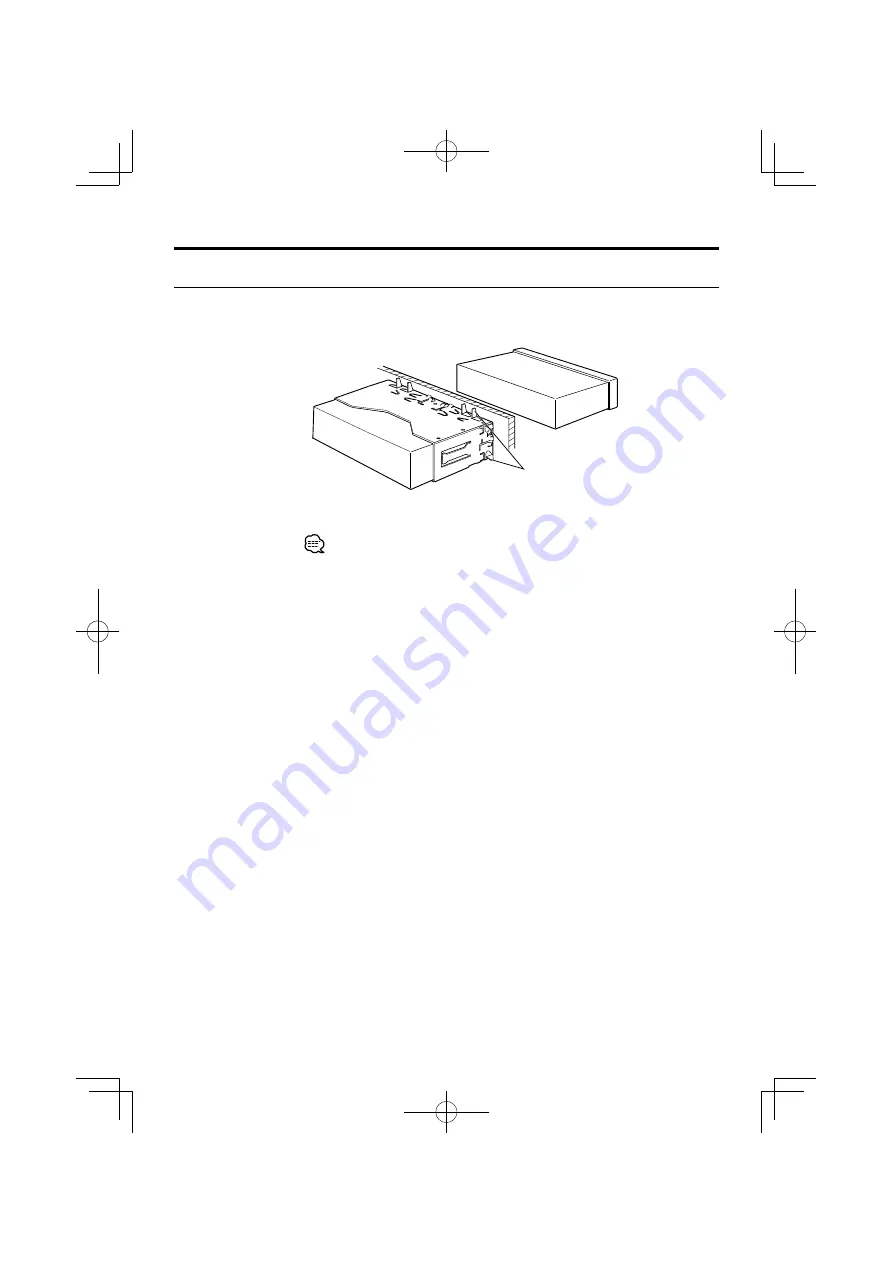
Installation/Removing the Unit

Installation

Bend the tabs of the mounting 
sleeve with a screwdriver or similar 
utensil and attach it in place.

Make sure that the unit is installed securely in place. If the unit is unstable, 
it may malfunction (eg, the sound may skip).

B54-4749-00̲00̲KVT-526DVD̲En.indd   7

B54-4749-00̲00̲KVT-526DVD̲En.indd   7

09.10.26   4:06:34 PM

09.10.26   4:06:34 PM

Summary of Contents for KVT-526DVD

Page 1: ... B54 4749 00 00 EW QW MONITOR WITH DVD RECEIVER KVT 526DVD KVT 556DVD INSTALLATION MANUAL B54 4749 00 00 KVT 526DVD En indd 1 B54 4749 00 00 KVT 526DVD En indd 1 09 10 26 4 06 27 PM 09 10 26 4 06 27 PM ...

Page 2: ...n function may have been activated Therefore the speaker wire should be checked Make sure that all wire connections are securely made by inserting jacks until they lock completely If your vehicle s ignition does not have an ACC position or if the ignition wire is connected to a power source with constant voltage such as a battery wire the power will not be linked with the ignition i e it will not ...

Page 3: ...pin of the vehicle s ISO connector is linked with the ignition and the A 4 pin is connected to the constant power supply Unit Vehicle A 7 Pin A 4 Pin Ignition cable Red Battery cable Yellow 2The A 7 pin of the vehicle s ISO connector is connected to the constant power supply and the A 4 pin is linked to the ignition Unit Vehicle A 7 Pin A 4 Pin Ignition cable Red Battery cable Yellow 3The A 4 pin ...

Page 4: ...g remote control input Light Blue Yellow To steering remote If no connections are made do not let the cable come out from the tab Connect to the terminal that is grounded when either the telephone rings or during conversation Mute wire Brown Connect either to the power control terminal when using the optional power amplifier or to the antenna control terminal in the vehicle Power control Motor ant...

Page 5: ...tput White Audio right output Red Rear Subwoofer Preout Audio left output White Audio right output Red Audio Visual Output Visual output Yellow Audio left output White Audio right output Red Audio Visual input Rear View Camera Input Visual input Yellow Audio left input White Audio right input Red Wiring harness Accessory 2 B54 4749 00 00 KVT 526DVD En indd 5 B54 4749 00 00 KVT 526DVD En indd 5 09 ...

Page 6: ...ellow Audio Input Resistance free stereo type mini plug 3 5Ф USB terminal USB terminal Navigation System Optional Accessory Connection cable Included in the Navigation System Optional Accessory Connection To KCA BT200 Optional Accessory Navigation units that can be connected to this unit As of December 2009 KNA G620T For latest information access the www kenwood com cs ce B54 4749 00 00 KVT 526DVD...

Page 7: ...with a screwdriver or similar utensil and attach it in place Make sure that the unit is installed securely in place If the unit is unstable it may malfunction eg the sound may skip B54 4749 00 00 KVT 526DVD En indd 7 B54 4749 00 00 KVT 526DVD En indd 7 09 10 26 4 06 34 PM 09 10 26 4 06 34 PM ...

Page 8: ...per two locations Removing the Unit 1 Remove the hard rubber frame by referring to the removal procedure in the section Removing the Hard Rubber Frame 2 Insert the two removal tools 3 deeply into the slots on each side as shown Removal Tool Accessory 3 3 Lower the removal tool toward the bottom and pull out the unit halfway while pressing towards the inside Be careful to avoid injury from the catc...

Reviews: