background image

5

RC-R0508 (En/T)

Remote Control

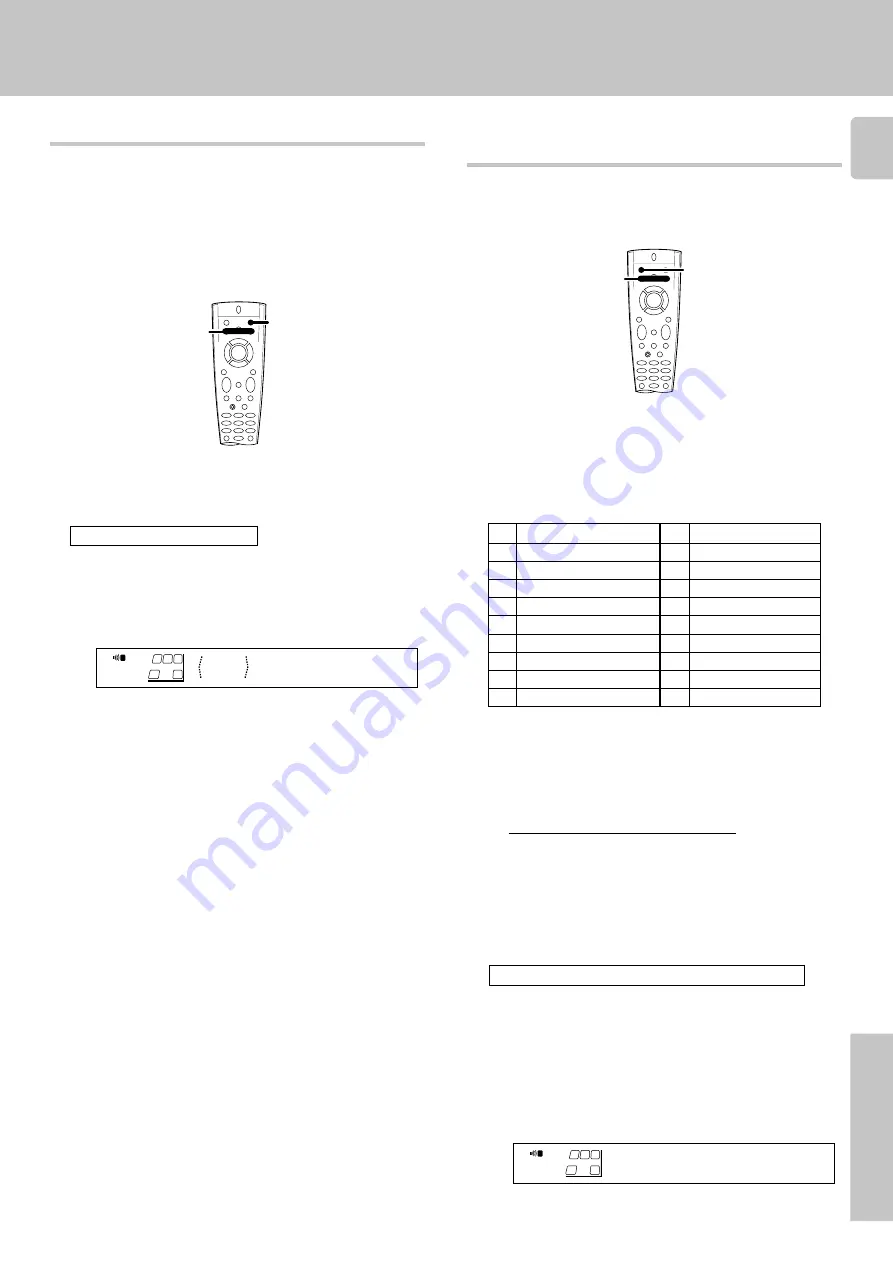
The macro play function allows you to set the remote to control several
components in succession. After completing this setup, you can
perform a series of operations automatically. Enter the setup codes for
the components you want to control beforehand.

Preparing for automatic operations
(MACRO play)

Getting the most from your remote control

1

Make a plan of the macro play you want to Setup.

The order of the operations may be fairly complex and you may
not be remember all of the necessary commands during the
setup procedure.
Use the space provided below to write down the operations in
the order you are going to enter them.

1

!

2

@

3

#

4

$

5

%

6

^

7

&

8

*

9

(

0

)

• Up to 20 steps can be memorized for each macro.
• The example below shows the plan for step 

4

 (which occupies a

total of 9 steps) :

1 TV + SHIFT + POWER

3 steps

2 FUNCTION SHIFT + 4

2 steps

3 VIDEO + VIDEO

2 steps

4 SHIFT + POWER

2 steps

Total

9 steps

• If you attempt to store more than 20 steps, the remote will output

one long blink and exit the macro programming mode.

• Enter channel numbers (for the monitor TV, etc.) exactly as you

would using the original remote.

2

Press and hold the MACRO key until the light flashes twice.

Perform each of the following steps within 5 seconds.

• To operate a TV, start from step 

2

.

Go to step 

2

 within 3 seconds.

1

2

Press the SHIFT key.

Press the VIDEO, AUDIO or TV key repeatedly to display
the remote control mode for the component you want to
control.

Changing (confirming) the operation mode

3

Execute the desired operations.

• See "Remote operation of other components" for a list of keys

available with each component.

RC

$

The operation mode remains set at the component specified in
step 

2

.

To return control to the original component, press SHIFT and
then press the VIDEO or AUDIO key to return to the original
control mode.

• Pressing any other keys after the 

SHIFT

 key cancels the shift

function and sends the normal code associated with the respective
key.

• The input selector does not change during this operation.
• If you press  

VIDEO

 or 

AUDIO

 key more than 3 seconds after

pressing the 

SHIFT

 key, the input selector changes together with

the operation mode.

The component to be controlled is displayed in parenthesis

This operation lets you change the remote control operation mode
without changing the input selector.
You may find this useful when you want to control one component while
using another. (For example, if you want to rewind the tape deck while
listening to a CD.)
This operation is also useful if you don't know the which mode the
remote control is set to. Executing this operation allows you to change
or reconfirm the operation mode you desire.

SHIFT

VIDEO, AUDIO, TV

MACRO

VIDEO, AUDIO, TV

3

• You can store up to 3 different macros, one at each key:

VIDEO 

=


"MACRO 1", AUDIO


=


"MACRO 2", TV


=


"MACRO 3"

• The light flashes once when you select the macro location.
• Pressing a key other than 

VIDEO

AUDIO

, or 

TV

 cancels the macro

program mode.

When VIDEO is pressed

Press the VIDEO, AUDIO, or TV key to select the macro
location. (MACRO1, 2, and 3 respectively)

CD

A

SP

SW

R

L

MACRO1

A

SP

SW

R

L

Continued to next page

Summary of Contents for RC-R0508

Page 1: ...ing keys 1 ENT key Gets you into and out of the preset code registration mode 2 VIDEO AUDIO and TV keys Use these keys to select the input you want to register 3 Numeric keys In the preset code registration mode you use these keys to enter the code numbers that let you control your components 4 POWER key Once you have entered the setup code for another component you can press this key to turn powe...

Page 2: ...he PLAY key or the TUNING SKIP key to test it If the component does not respond when you try to control it return to step 4 and enter the next setup code on the list Repeat this procedure until you find the code that matches the component ENT Step 6 Press the ENT key to store the code Step7 Repeat steps 3 through 6 to enter the codes for each component you want to control ENT Step8 Once you have f...

Page 3: ...he remote control will operate or if the remote control blinks 5 times when you press a key The remote control is designed to retain setup codes in memory while you change batteries 4Use the numeric keys to enter the setup code 5Press the POWER key and check to see that the compo nent you want to control turns on 7Repeat steps 3 to 6 to register additional components until all components have been...

Page 4: ...cally with the receiver via the system control connections Operating other components Use the VIDEO AUDIO or TV keys to select the compo nent you desire Pressing the VIDEO or AUDIO key also changes the input selector on the receiver If you do not want to change the current input press the SHIFT key before step 1 RC5 Note Be sure to point the remote control at the remote sensor on the receiver when...

Page 5: ...l Changing confirming the operation mode 3Execute the desired operations See Remote operation of other components for a list of keys available with each component RC The operation mode remains set at the component specified in step 2 To return control to the original component press SHIFT and then press the VIDEO or AUDIO key to return to the original control mode Pressing any other keys after the...

Page 6: ...he receiver s input also changes ENT VIDEO AUDIO TV 1 0 MACRO VIDEO AUDIO TV Setup code correlation 1 Hold down the ENT key until the light flashes twice Deleting a setup code At this time all inputs become available regardless of any earlier registration 1 Hold down the ENT key until the light flashes twice 2 Select the component with setup code you want to check Press the VIDEO AUDIO or TV key r...

Page 7: ... 4006 4037 4081 4162 Logik 4004 4240 Luxor 4043 4046 4048 4104 4106 M Electronic 4000 Manesth 4045 4072 Marantz 4006 4081 Matsui 4004 4209 Memorex 4000 4037 4046 4104 Memphis 4072 Metz 4006 4162 4195 4227 4347 Minerva 4006 4195 Mitsubishi 4043 4067 4081 Multitech 4000 4072 Murphy 4000 NEC 4041 4067 Neckermann 4081 Nesco 4072 Nokia 4041 4046 4104 4106 4240 Nordmende 4041 4321 Oceanic 4000 4041 Okan...

Page 8: ...1343 Fidelity 1216 1361 Finlandia 1208 Finlux 1037 1070 1072 Firstline 1009 1216 1217 1247 1294 1321 Fisher 1208 1217 1370 Formenti 1037 1320 Frontech 1163 1247 1264 Fujitsu 1072 1206 Funai 1264 1294 GEC 1037 1072 1217 Geloso 1009 Genexxa 1163 1218 GoldStar 1037 1109 1217 Goodmans 1037 1072 1217 1343 1371 1374 Gorenje 1370 GPM 1218 Graetz 1163 1361 Granada 1037 1072 1208 1217 Grandin 1282 Grundig ...

Page 9: ...eer 1109 1163 1287 Profex 1009 1361 Proline 1321 Protech 1009 1037 1102 1217 1247 1264 Quelle 1010 1011 1037 1070 1200 1327 1328 1361 1512 R Line 1037 Maker Setup codes Radiola 1037 RBM 1070 Rediffusion 1361 Revox 1037 Rex 1163 1206 1264 Roadstar 1009 1218 1264 Saba 1075 1109 1163 1287 1335 1343 Saccs 1238 Saisho 1009 1011 1264 Salora 1163 1349 1361 Sambers 1102 Samsung 1009 1037 1090 1217 1264 13...

Page 10: ...rtner 2421 Schwaiger 2183 2504 Seemann 2396 SEG 2369 2421 Siemens 2173 Skymaster 2288 2628 Sunstar 2513 Tantec 2336 2455 TechniSat 2262 2501 Telefunken 2421 Teleka 2243 Thomson 2455 Triad 2351 Triasat 2501 Universum 2173 2571 Ventana 2200 Vortec 2421 Vtech 2351 Wisi 2173 2351 2372 2396 2455 2638 LD player Setup codes Maker Setup codes Kenwood 5258 Marantz 5064 5194 Philips 5064 5194 Maker Setup co...

Page 11: ...emorex 7099 Onkyo 7135 Panasonic 7229 Philips 7029 Pioneer 7027 7099 Revox 7029 Maker Setup codes Sharp 7205 Sony 7170 Teac 7308 7309 Technics 7229 Yamaha 7205 Cassete deck Setup codes Maker Setup codes Birgmingham Cable 0276 Communications British Telecom 0003 0105 Cable Setup codes Maker Setup codes Decsat 0423 Jerrold 0003 0276 PVP Stereo Visual Matrix 0003 Maker Setup codes Scientific Atlanta ...

Page 12: ...12 RC R0508 En T Remote Control ...

Page 13: ...ITOR Remedy Replace with new batteries to preserve the currently registered setup information Turn the subwoofer ON Register a Setup code or Non IR code at the respective input s RC3 Press VIDEO AUDIO or TV to select the appro priate operation mode Replace with new batteries Operate the remote control unit within the con trollable range Connect properly referring to Setting up the system Place sof...

Page 14: ...earch 6 3 Play 8 Pause 7 Stop 4 Skip back Skip forward FUNCTION SHIFT commands 100 100 REPEAT Repeat RANDOM Random THEME FAV MENU INFO ALT AUD TV SAT VID REPEAT RANDOM 100 DISPLAY 2 3 1 5 6 4 8 9 7 0 FUNCTION SHIFT 8 7 4 6 BAND P CALL P CALL 1 Use the AUDIO VIDEO or TV keys to select the component you want to control 2 Press the keys corresponding to the operations you desire Refer to the followin...

Page 15: ...Y 2 3 1 5 6 4 8 9 7 0 ENT 10 Numeric keys FUNCTION SHIFT commands TV SAT VID Input selector THEME FAV MENU INFO ALT AUD TV SAT VID REPEAT RANDOM 100 DISPLAY 2 3 1 5 6 4 8 9 7 0 FUNCTION SHIFT REC GUIDE OSD menu Record TV operations 8 7 4 6 BAND P CALL P CALL TUNING SKIP THEME FAV MENU INFO ALT AUD TV SAT VID REPEAT RANDOM 100 DISPLAY 2 3 1 5 6 4 8 9 7 0 ENT 10 THEME FAV MENU INFO ALT AUD TV SAT VI...

Page 16: ...Menu THEME Theme FAV Favorite TV SAT VID Input selector INFO Page ALT AUDIO Alternate audio 100 100 8 7 4 6 BAND P CALL P CALL DVD player operations 6 3 Play 8 Pause 7 Stop 4 Skip back Skip forward TUNING SKIP Search 1 Search THEME FAV MENU INFO ALT AUD TV SAT VID REPEAT RANDOM 100 DISPLAY 2 3 1 5 6 4 8 9 7 0 ENT 10 Numeric keys THEME FAV MENU INFO ALT AUD TV SAT VID REPEAT RANDOM 100 DISPLAY 2 3 ...

Reviews: