background image

ENGLISH

3

 EN

SW-508  1223/02-0

9

/EN

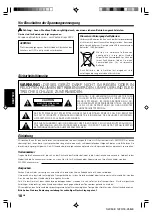
 Caution: Read this page carefully to ensure safe operation.

IMPORTANT SAFEGUARDS

10. Lightning 


For added protection for this appliance during

a lightning storm, or when it is left unattended and unused for
long periods of time, unplug it from the wall outlet and disconnect
the antenna or cable system. This will prevent damage to the
appliance due to lightning and power-line surges.

11. Abnormal smell

  – If an abnormal smell or smoke is

detected, immediately turn the power OFF and unplug the
appliance from the wall outlet. Contact your dealer or nearest
service center.

12. Damage requiring service

  – The appliance should be

serviced by qualified service personnel when:

A.

The power-supply cord or the plug has been damaged.

B.

Objects have fallen, or liquid has been spilled into the

appliance.

C.

The appliance has been exposed to rain or water.

D.

The appliance does not appear to operate normally by

following the instruction manual. Adjust only those controls
that are covered by the instruction manual as an improper
adjustment of other controls may result in damage and will
often require extensive work by a qualified technician to restore
the appliance to its normal operation.

E.

The appliance has been dropped, or the enclosure damaged.

F.

The appliance exhibits a marked change in performance.

13. Servicing 

 –  The user should not attempt to service the

appliance beyond that described in the instruction manual. All
other servicing should be referred to qualified service personnel.

14. Power lines

 – An outside antenna system should not be

located in the vicinity of overhead power lines or other electric
light or power circuits, or where it can fall into such power lines
or circuits. When installing an outside antenna system, extreme
care should be taken to keep from touching such power lines
or circuits as contact with them might be fatal.

15. AC outlets

 – Do not connect other audio equipment with

a power consumption larger than that specified to the AC outlet
on the rear panel.  Never connect other electrical appliances,
such as an iron or toaster, to it to prevent fire or electric shock.

16. Overloading

  – Do not overload wall outlets, extension

cords, or integral convenience receptacles as this can result in
a risk of fire or electric shock.

17. Attachment

 – Do not use attachments not recommended

by the appliance manufacturer as they may cause hazards.

18. Replacement parts

 – When replacement parts are required,

be sure the service technician has used replacement parts
specified by the manufacturer or have the same characteristics
as the original parts. Unauthorized substitutions may result in
fire, electric shock, or other hazards.

19. Safety check

 – Upon completion of any service or repairs

to this appliance, ask the service technician to perform safety
checks to determine that the appliance is in proper operating
condition.

Please read all of the safety and operating instructions before
operating this appliance. Adhere to all warnings on the appliance
and in the instruction manual. Follow all the safety and operating
instructions.  These safety and operating instructions should be
retained for future reference.

1.

Power sources

 – The appliance should be connected to a

power supply only of the type described in the instruction
manual or as marked on the appliance.  If you are not sure of the
type of power supply to your home, consult your appliance
dealer or local power company. For appliances intended to
operate from battery power, or other sources, refer to the
instruction manual.

2.

Power-cord protection

 – Power-supply cords should be

routed so that they are not likely to be walked on or pinched by
items placed upon or against them, pay particular attention to
cords at plugs, convenience receptacles, and the point where
they exit from the appliance.

3.

Ventilation

 – Slots and openings in the cabinet are provided

for ventilation and to ensure reliable operation of the appliance
and to protect it from overheating, and these openings must
not be blocked or covered. The appliance should be situated so
that its location or position does not interfere with its proper
ventilation. To maintain good ventilation, do not put records or
a table-cloth on the appliance. Place the appliance at least 10 cm
away from the walls. Do not use the appliance on a bed, sofa,
rug or similar surface that may block the ventilation openings.
This appliance should not be placed in a built-in installation such
as a bookcase or rack unless proper ventilation is provided or
the manufacturer’s instructions have been adhered to.

4.

Water and moisture

 – The appliance shall not be exposed

to dripping and splashing - for example, near a bathtub,
washbowl, kitchen sink, laundry tub, in a wet basement, or near
a swimming pool, etc. Do not place an object containing liquid,
such as a flower vase, on the appliance.

5.

Temperature

 – The appliance may not function properly if

used at extremely low, or freezing temperatures. The ideal
ambient temperature is above +5°C (41°F).

6.

Heat

 – The appliance should be situated away from heat

sources such as radiators, heat registers, stoves, or other
appliances (including amplifiers) that produce heat. Do not
place a flaming object, such as a candle or lantern, on or near
the appliance.

7.

Electric shock

 – Care should be taken so that objects do

not fall and liquid is not spilled into the enclosure through
openings.  If a metal objects, such as a hair pin or a needle,
comes into contact with the inside of this appliance, a dangerous
electric shock may result. For families with children, never
permit children to put anything, especially metal, inside this
appliance.

8.

Enclosure removal

 – Never remove the enclosure. If the

internal parts are touched accidentally, a serious electric shock
might occur.

9.

Cleaning

  – Unplug this appliance from the wall outlet

before cleaning.  Do not use volatile solvents such as alcohol,
paint thinner, gasoline, or benzine, etc. to clean the cabinet.
Use a clean dry cloth.

Summary of Contents for SW-508

Page 1: ...ENGLISH FRANÇAIS DEUTSCH NEDERLANDS ITALIANO SUBWOOFER MIT EINGEBAUTEN VERSTÄRKER BEDIENUNGSANLEITUNG SUBWOOFER CON AMPLIFICATORE INCORPORATO ISTRUZIONI PER L USO LA DICHIARAZIONE DI CONFORMITA CE DI QUESTO PRODOTTO E DEPOSITATA PRESSO KENWOOD ELECTRONICS EUROPE B V AMSTERDAMSEWEG 37 1422 AC UITHOORN THE NETHERLANDS ESPAÑOL SUBWOOFER MET INGEBOUWDE VERSTERKER GEBRUIKSAANWIJZING SW 508 1223 01 ...

Page 2: ...e completely cut off from the AC wall outlet when the main switch is turned OFF Introduction Thank you for selecting our speakers as part of your high fidelity system We at KENWOOD are confident that your choice will bring you years of rich listening pleasure Please take the time to read through this booklet carefully It will help you to obtain the peak performance for which the speakers were desi...

Page 3: ...Please read all of the safety and operating instructions before operatingthisappliance Adheretoallwarningsontheappliance andintheinstructionmanual Followallthesafetyandoperating instructions These safety and operating instructions should be retained for future reference 1 Power sources The appliance should be connected to a power supply only of the type described in the instruction manual or as ma...

Page 4: ...table a howling sound may be generated If this occurs place the Subwoofer farther away from the turntable or reduce the Subwoofer volume By rotating the VOLUME control counterclock wise The howling phenomenon may also occur due to cross interference with a cassette deck compact disc player or Laserdisc player although this is very rare If sound or picture seems to be distorted due to this reason p...

Page 5: ...r to the indicated page for connection instructions If your amplifier or receiver includes a Subwoofer Preout jack For connection instructions see Connecting to Amp s Subwoofer Preout jack 6 If your amplifier or receiver does not include a Subwoofer Preout jack In this case you can connect to the speaker output terminals on your amplifier or receiver For connection instructions see Connecting to A...

Page 6: ...mplifier or receiver to the LINE INPUT jack on the subwoofer Connect the SPEAKER INPUT terminals on the subwoofer to the speaker output terminals on your amplifier or receiver Connect the SPEAKER OUTPUT terminals on the subwoofer to your front speakers Pin plug cord Amplifier or Receiver Speaker terminals Speaker cord Commercially available parts Speaker cord Commercially available parts Front spe...

Page 7: ... line level signal this position cuts the other components than the low frequency component so that only the bass sound is repro duced through the Subwoofer OFF The subwoofer output signals from these amplifier or receiver are customized to cut other components than the required low frequency component in an optimum manner according to the current sound mode in use When the Subwoofer is combined w...

Page 8: ...Hz 200 Hz TURNOVER OFF 15 Hz 3 5 kHz Rated Power Consumption 100 W Notes 1 Kenwood follows a policy of continuous advancements in development For this reason specifications may be changed without notice 2 Full performance may not be exhibited in extremely cold locations below 0 deg C Speaker Enclosure Bass Reflex Floor Standing Type Speaker Units 160 mm 6 5 16 Cone type x 2 Nominal Impedance 6 Ω D...

Page 9: ...ENGLISH 9EN SW 508 1223 02 09 EN ...

Page 10: ...nt de la prise murale n est pas entièrement interrompue lorsque le commutateur de marche arrêt est enfoncé Introduction Nous vous remercions d avoir bien voulu intégrer nos enceintes à votre chaîne KENWOOD a la certitude que ce choix vous réserve des années de plaisir musical Prenez le temps de lire attentivement ce livret Il vous permettra d obtenir le meilleur de ces enceintes Pour votre référen...

Page 11: ... touchées une électrocution séreuse risque de se produire 9 Nettoyage Débrancher la prise murale de l appareil avant d entreprendre son nettoyage Ne pas utiliser de solvants volatiles tels que de l alcool du diluant à peinture de l essence ou de la benzine etc pour nettoyer le coffret Utiliser un chiffon propre et sec 10 Foudre Pour assurer la protection de cet appareil par temps d orage ainsi que...

Page 12: ... extrêmes graves Subwoofer est installée près d un téléviseur la réception peut être perturbée et les couleurs altérées Si vous notez l un ou l autre de ces phénomènes éloignez l enceinte d extrêmes graves Subwoofer du téléviseur jusqu à ce que la réception redevienne normale Attention Pour permettre la ventilation de l appareil installez le en te nant compte de ce qui suit Ménagez une distance de...

Page 13: ...t le raccordement Si votre amplificateur ou ampli syntoniseur est équipé d une prise SUBWOOFER PREOUT Pour les instructions concernant la connexion voir Raccordement à la prise SUBWOOFER PREOUT de l ampli Si votre amplificateur ou ampli syntoniseur n est pas équipé d une prise SUBWOOFER PREOUT Dans ce cas vous pouvez raccorder le système aux bornes de sortie haut parleurs de votre amplificateur ou...

Page 14: ...PUT et les bornes SPEAKER INPUT en même temps ATTENTION Les enceintes avant utilisées en même temps que le subwoofer doivent présenter l impédance exigée par l amplificateur ou l ampli syntoniseur utilisé En raccordant le Subwoofer à l amplificateur ou ampli syntoniseur res pecter la polarité relier les bornes aux bornes et les bornes aux bornes L amplificateur ou ampli syntoniseur risque d être e...

Page 15: ...signal ordinaire de sortie vers subwoofer au niveau préamplificateur ou au niveau ligne Cette position supprime les composantes autres que les composan tes graves de telle sorte que seule les fréquences basses sont reproduites par le Subwoofer OFF Les signaux de sortie de ces amplificateur ou ampli syn toniseur et destinés au subwoofer sont tels que les compo santes autres que les composantes grav...

Page 16: ...rformances Haut parleur Coffret Bass reflex type à poser sur le sol Haut parleur Type à cône de 160 mm x 2 Impédance nominale 6 Ω Dimensions Largeur 219 mm Hauteur 439 mm Profondeur 392 mm Poids net 14 5 kg Caractéristiques techniques Amplificateur Puissance dynamique 75 W 75 W 6Ω Puissance nominale de sortie 60 W 60 W RMS 100 Hz 6Ω Sensibilité et Impédance d entrée LINE INPUT 230 mV 22 kΩ SPEAKER...

Page 17: ...17FR SW 508 1223 10 17 FR FRANÇAIS ...

Page 18: ... Batterien unentgeltlich in die beim Handel aufgestellten Sammelbehälter Auch bei Ihrem Fachhändler finden Sie einen Sammelbehälter für verbrauchte Batterien Auch Batterien die in Geräten fest eingebaut sind unterliegen diesen gesetzlichen Vorschriften Einleitung Wir danken lhnen für den Kauf dieses Lautsprechers der einen wichtigen Teil lhres Hi Fi Systems darstellt KENWOOD ist davon überzeugt da...

Page 19: ...es bei einem Gewitter oder wenn es über längere Zeit nicht beaufsichtigt und benutzt WICHTIGE SICHERHEITSHINWEISE Achtung Lesen Sie diese Seite sorgfältig durch um einen sicheren Betrieb zu gewährleisten wird sollte der Netzstecker gezogen und die Antenne oder das Kabelsystem abgetrennt werden Dies verhindert Schäden am Gerät aufgrund von Blitzschlag und Spannungsstößen im Wechselstromnetz 11 Unge...

Page 20: ...lt wird kann der Fernsehempfang beeinträchtigt werden und Farbverfälschungen auftreten Im Falle von Farbveränderungen am Bildschirm muß der Subwoofer weit genug vom Fernsehgerät entfernt aufgestellt werden damit sich der Empfang normalisiert Achtung Um gute Belüftung sicherzustellen die folgenden Punkte beim Einbau des Gerätes beachten Einen Abstand von mindestens 10 cm zwischen dem Subwoofer zurü...

Page 21: ... Seiten Wenn Ihr Verstärker oder Receiver einen SUBWOOFER PREOUT Ausgang aufweist Weitere Hinweise hierzu finden Sie unter Anschließen an die SUBWOOFER PREOUT Buchse Wenn Ihr Verstärker oder Receiver keinen SUBWOOFER PREOUT Ausgang aufweist In dem Fall können Sie den Subwoofer an die Lautsprecherausgänge des Verstärkers oder Receivers anschließen Siehe auch Anschließen an die Lautsprecherklemmen d...

Page 22: ...UNG Die mit dem Subwoofer verbundenen Frontlautsprecher müssen die für den verwendeten Verstärker oder Receiver Empfänger vorgeschriebene Impe danz aufweisen Beim Anschließen des mitgelieferten Adapters an den Verstärker oder Re ceiver muß darauf geachtet werden die Klemmen mit den Klemmen und die Klemmen mit den Klemmen zu verbinden Wenn eine Klemme mit eine Klemme oder umgekehrt verbunden wird i...

Page 23: ...n Signal eingegeben wurde Wenn der Bereitschaftsmodus durch die automatische Ausschaltfunktion aktiviert wird Das Gerät schaltet sich einige Sekunden nach dem Empfang eines Signals erneut ein Betriebsstatus 0 Netzkabel 1 on standby Anzeige Diese Anzeige zeigt den Betriebsmodus durch Leuchten in Grün oder den Bereitschafts modus durch Leuchten in rot an 2 POWER Schalter Diesen Schalter drücken um d...

Page 24: ... 15 Hz 200 Hz TURNOVER OFF 15 Hz 3 5 kHz Nenn Leistungsaufnahme 100 W Hinweise 1 Im Sinne ständigerVerbesserung aller Erzeugnisse von KENWOOD behalten wir uns Änderungen im Design und den technischen Daten ohne vorhergehende Bekanntgabe vor 2 Bei sehr niedrigenTemperaturen unter dem Gefrierpunkt wird unter Umständen keine ausreichende Leistung erhalten Lautsprecher Gehäuse Baßreflexbox Aufstellung...

Page 25: ...25GE SW 508 1223 18 25 GE DEUTSCH ...

Page 26: ...nder spanning staan zelfs wanneer de hoofdschakelaar uitgezet is Inleiding Wij willen u bedanken voor het door u in de ons sprekersysteem gestelde vertrouwen KENWOOD is ervan overtuigd dat uw keuze jarenlang luisterplezier zal verzekeren Neem een moment om deze gebruiksaanwijzing aandachtig door te lezen Dit zal ertoe bijdragen dat u alles uit het systeem haalt dat wij erin gebouwd hebben Voor uw ...

Page 27: ... schoon droog doekje 10 Onweer Haal voor de veiligheid de stekker uit het stopcontact en ontkoppel de antenne of de kabel indien u het apparaat voor langere tijd niet gebruikt of in geval van onweer U voorkomt zo dat het apparaat door lichtflitsen onweer of andere oorzaken wordt beschadigd 11 Vreemde geur Als het apparaat vreemd ruikt of rook uitstoot moet het apparaat onmiddellijk worden uitgesch...

Page 28: ... deTV wordt mogelijk gestoord en de kleuren zullen niet normaal zijn wanneer u de Subwoofer dicht bij de TV installeert U moet de Subwoofer verder van deTV plaatsen indien de kleuren van hetTV scherm niet normaal zijn Let op Om verzekerd te kunnen zijn van een afdoende ventilatie dient u bij de installatie de volgende punten in acht te nemen Laat een ruimte van tenminste 10 cm vrij tussen de subwo...

Page 29: ...e verbinding dan via deze aansluiting Zie voor meer aanwijzingen over deze aansluiting de paragraaf Aansluiting op de SUBWOOFER PREOUT aansluiting van een versterker º Als uw versterker of ontvanger niet is uitgerust met een SUBWOOFER PREOUT aansluiting In dit geval maakt u de verbinding via de luidspreker uitgangsaansluitingen van de versterker of ontvanger Zie voor meer aanwijzingen over deze aa...

Page 30: ...ting met een aansluiting wordt verbonden of omgekeerd kan de versterker of ontvanger beschadigt worden SPEAKERS 6 8 SPEAKERS 6 8Ω LINE INPUT AUTO SHUT OFF SPEAKER INPUT SPEAKER OUTPUT ON OFF L R L R Penstekker snoer Versterker of ontvanger Luidspreker uitgangsaansluitingen Voorluidspreker R Draai de snoerstrengen ineen Voorluidspreker L LET OP Zet de POWER schakelaar van de versterker of ontvanger...

Page 31: ... ontvangen Wanneer de standby stand wordt ingeschakeld via de functie voor het automatisch afslaan Het toestel zal een paar seconden nadat er een ingangssignaal wordt gedetecteerd ingeschakeld worden toestel in bedrijf 0 Netsnoer ª 1 On standby indicator Als deze indicator groen oplicht staat het toestel aan en staat het toestel Standby en wanneer deze indicator rood oplicht 2 POWER schakelaar Dru...

Page 32: ...00 Hz TURNOVER OFF 15 Hz 3 5 kHz Nominaal opgenomen vermogen 100 W Opmerkingen 1 KENWOOD volgt een politiek van voordurende aanpassing aan nieuwe ontwikkelingen Hierdoor kunnen de specifikaties dan ook zonder voorafgaande kennisgeving worden gewijzigd 2 Het toestel werkt mogelijk niet optimaal in een zeer koude ruimte bij temperaturen onder nul Luidspreker Behuizing Basreflex vloer type Luidspreke...

Page 33: ...33NE SW 508 1223 26 33 NE NEDERLANDS ...

Page 34: ...IOGGIA O ALL UMIDITÀ CAUTION RISK OF ELECTRIC SHOCK DO NOT OPEN Introduzione Ci congratuliamo per l ottima decisione di completare il vostro impianto stereo con le casse acustiche KENWOOD Siamo certi che tale acquisto non mancherà di offrirvi molti anni di piacevole ascolto Prima di mettere in funzione le casse acustiche vi consigliamo di leggere attentamente le seguenti istruzioni al fine di otte...

Page 35: ...ettrica molto grave potrebbe avere luogo 9 Pulizia Scollegare l apparecchio dalla presa di rete prima della pulizia Non pulite il mobile con solventi volatili come alcool benzina diluenti ecc Usate solo un panno asciutto 10 Temporali Per un ulteriore protezione di questa apparecchiaturaduranteuntemporaleoppurequandoessanon viene utilizzata per un lungo periodo scollegare la spina dalla presa di re...

Page 36: ...icezione TV potrebbe venire influenzata e l immagine avere una colorazione anormale Se ciò dovesse accadere wallontanare il Subwoofer dal televisore sino a che la ricezione non si normalizza Avvertenza Per garantire la ventilazione nell installare l unità tenere presente i seguenti punti È necessario lasciare una distanza di oltre 10 cm fra il subwoofer indietro e le pareti Fare particolare attenz...

Page 37: ...er le istruzioni sul collegamento Se l amplificatore o il sintoamplificatore prevedono un prese SUBWOOFER PREOUT Procedere al collegamento utilizzando questo prese Per le istruzioni sul collegamento veda Collegamento al prese SUBWOOFER PREOUT dell amplificatore Sel amplificatoreoilsintoamplificatorenonprevedono un prese SUBWOOFER PREOUT In questo caso è possibile collegarsi ai terminali di uscita ...

Page 38: ...lificatore o sintoamplificatore potrebbe venire danneggiato SPEAKERS 6 8 SPEAKERS 6 8Ω LINE INPUT AUTO SHUT OFF SPEAKER INPUT SPEAKER OUTPUT ON OFF L R L R Cavo con spinotti a spillo Amplificatore o sintoamplificatore Terminali di uscita diffusori Diffusore anteriore R Attorcigliare il filo Diffusore anteriore L Cavo del diffusore da acquistare separatamente Note 1 La confezione del subwoofer non ...

Page 39: ...terruttore AUTO SHUTOFF Commuta il modo di AUTO SHUTOFF ON e OFF ON Il subwoofer si porta automaticamente nel modo di attesa luce color rosso se per 10 minuti non viene ricevuto alcun segnale Se il modo di attesa viene iniziato dallo spegnimento automatico L unità si riaccende da sé qualche secondo dopo che un segnale viene ricevuto 0 Cavo di alimentazione 1 Indicatore di on attesa Questo indicato...

Page 40: ...Hz TURNOVER OFF 15 Hz 3 5 kHz Consommation nominale 100 W Note 1 La KENWOOD persegue una politica di continuo sviluppo attraverso attraverso la ricerca Per questa ragione i dati tecnici sono soggetti a modifiche senza preavviso 2 In luoghi estremamente freddi dove l acqua congeli potrebbe non essere possibile ottenere un rendimento sufficiente Diffusore Cassa Bass reflex tipo da pavimento Altoparl...

Page 41: ...41IT SW 508 1223 34 41 IT ITALIANO ...

Page 42: ...siguientes Conmutador selector de tensión alterna Mueva el conmutador selector hasta la posición correspondiente a la tensión de línea con un destornillador u otra herramienta puntiaguda PRECAUCIÓN Aunque el conmutador principal esté en la posición OFF no se cortará completamente el suministro eléctrico procedente de la toma de CA de pared Nota Nuestra garantía no cubre las averías causadas por un...

Page 43: ...ntes de utilizar este aparato Observe todas las advertencias del aparato y del manual de instrucciones Siga todas las instrucciones de seguridad y funcionamiento Estas instrucciones de seguridad y funcionamiento deben guardarse para ser utilizadas en el futuro como referencia 1 Alimentación El aparato debe conectarse solamente a una fuente de alimentación descrita en el manual de instrucciones o i...

Page 44: ...normal Precaución Para asegurar una buena ventilación tenga en cuenta los puntos siguientes cuando instale la unidad Deje una separación de más 10 cm entre el subwoofer detrás y la s pared es circundante s Tenga mucho cuidado para no tapar el sumidero térmico con una cortina etc cuando haga la instalación Asegúrese de instalar verticalmente el subwoofer El subwoofer es un altavoz virtualmente omni...

Page 45: ... abajo Consulte la página indicada para obtener las instrucciones de conexión Si el amplificador o receptor incluye unos tomas SUBWOOFER PREOUT Realice la conexión utilizando este conector Para obtener instrucciones sobre la conexión consulte Conexión al tomas SUBWOOFER PREOUTdel amplificador y Si el amplificador o receptor no incluye unos tomas SUBWOOFER PREOUT En este case puede conectar los ter...

Page 46: ...avoz Nota No utilice el toma LINE INPUT y los terminales SPEAKER INPUT en el mismo tiempo PRECAUCIÓN Asegúrese de que la impedancia de los altavoces delanteros coin cida con la impedancia indicada in su amplificador o receptor Cuando conecte el adaptador suministrado al amplificador o re ceptor no se olvide de conectar los terminales a los terminales y los terminales a los terminales Si conecta un...

Page 47: ...ejor rendimiento con una señal de nivel de línea o con una señal de salida de preamplificador de subwoofer convencional esta posición corta los otros componentes que no son de baja frecuencia para que sólo se reproduzca el sonido grave a través del subwoofer OFF Las señales de salida de subwoofer procedentes de estos amplificador o receptor están personalizadas para cortar de forma óptima otros co...

Page 48: ... ON 15 Hz 200 Hz TURNOVER OFF 15 Hz 3 5 kHz Consumo 100 W Notas 1 KENWOOD sigue una politica de continuos avances en el desarrollo de modelos Por esta razón las especificaciones están sujetas a combios sin previo aviso 2 No podrá mostrarse un rendimiento suficiente en ubicaciones extremadamente frías en donde el agua se congela Altavoces Caja Bass Reflex ubicación vertical sobre el suelo Altavoz T...

Reviews: