background image

28

BACKGROUND OPERATIONS

TIME-OUT TIMER (TOT)

The Time-out Timer prevents you from using a channel for an 

extended duration.  If you continuously transmit for a preset 

time, the transceiver will stop transmitting and an alert tone will 

sound.  Release the 

PTT

 switch.

BATTERY SAVER

When activated by your dealer, the Battery Saver function 

decreases the amount of power used after no signal is present 

and no operations are being performed for 5 seconds.  When a 

signal is received or an operation is performed, Battery Saver 

turns off.

Note:

  While the Battery Saver is operating, the LED may flash 

green when receiving a QT/DQT signal which does not match the 
transceiver QT/DQT setting.

BATTERY POWER INDICATOR

The battery power indicator displays the battery power 

remaining, as illustrated below.

High

Sufficient

Low

Very Low 

(flashing)

When the battery power is very low, replace or recharge the 

battery pack.  If activated by your dealer, an alert tone will 

sound every 30 seconds and the LED indicator will blink red 

when the battery power is low while transmitting.

SIGNAL STRENGTH INDICATOR

The signal strength indicator displays the strength of received 

calls, as illustrated below.

Strong

Medium

Weak

Very Weak

Summary of Contents for TK-2317

Page 1: ...INSTRUCTION MANUAL B62 2377 00 M 09 08 07 06 05 04 03 02 01 00 VHF FM TRANSCEIVER TK 2317 UHF FM TRANSCEIVER TK 3317 ...

Page 2: ......

Page 3: ...ories under government control Illegal operation is punishable by fine and or imprisonment Refer service to qualified technicians only Safety It is important that the operator is aware of and understands hazards common to the operation of any transceiver Firmware Copyrights The title to and ownership of copyrights for firmware embedded in Kenwood product memories are reserved for Kenwood Corporati...

Page 4: ... turning the squelch off Do not place the microphone cable around your neck while near machinery that may catch the cable Do not place the transceiver on unstable surfaces Ensure that the end of the antenna does not touch your eyes When the transceiver is used for transmission for many hours the radiator and chassis will become hot Do not touch these locations when replacing the battery pack Do no...

Page 5: ...xposed from the antenna covering Transmitting at such a time may result in a high frequency burn If an abnormal odor or smoke is detected coming from the transceiver switch the transceiver power off immediately remove the battery pack from the transceiver and contact your Kenwood dealer Use of the transceiver while you are driving may be against traffic laws Please check and observe the vehicle re...

Page 6: ...Do not incinerate or apply heat to the battery If the insulator is melted the gas release vent or safety function is damaged or the electrolyte is ignited the battery may generate heat or smoke rupture or burst into flame Do not leave the battery near fire stoves or other heat generators areas reaching over 80 C 176 F If the polymer separator is melted due to high temperature an internal short cir...

Page 7: ...battery may generate heat or smoke rupture or burst into flame Do not use the battery pack if it is damaged in any way The battery may generate heat or smoke rupture or burst into flame Do not solder directly onto the battery If the insulator is melted or the gas release vent or safety function is damaged the battery may generate heat or smoke rupture or burst into flame Do not reverse the battery...

Page 8: ...he battery pack into a microwave or high pressure container The battery may generate heat or smoke rupture or burst into flame Keep ruptured and leaking battery packs away from fire If the battery pack is leaking or the battery emits a bad odor immediately remove it from flammable areas Electrolyte leaking from the battery can easily catch on fire and may cause the battery to generate smoke or bur...

Page 9: ...THE OPTIONAL SPEAKER MICROPHONE OR HEADSET 4 CHARGING THE BATTERY PACK OPTIONAL BATTERY CHARGER 5 ORIENTATION 6 DISPLAY 8 PROGRAMMABLE AUXILIARY FUNCTIONS 10 BASIC OPERATIONS 11 SWITCHING POWER ON OFF 11 ADJUSTING THE VOLUME 11 SELECTING A ZONE AND CHANNEL 12 TRANSMITTING 12 RECEIVING 12 SCAN 13 PRIORITY SCAN 13 TEMPORARY CHANNEL LOCKOUT 13 SCAN DELETE ADD 14 SCAN REVERT 14 DTMF CALLS 15 MANUAL DI...

Page 10: ...N 22 VOX GAIN LEVEL 22 ADVANCED OPERATIONS 23 TRANSMIT POWER 23 DIRECT CHANNEL ENTRY 23 CALLING ALERT 24 KEY LOCK 24 SEND THE GPS DATA 24 EMERGENCY CALLS 24 TALK AROUND 25 VOICE SCRAMBLER 26 MONITOR SQUELCH OFF 26 TRANSCEIVER BACKLIGHT 27 DIRECT ZONE CHANNEL 27 BACKGROUND OPERATIONS 28 TIME OUT TIMER TOT 28 BATTERY SAVER 28 BATTERY POWER INDICATOR 28 SIGNAL STRENGTH INDICATOR 28 BUSY CHANNEL LOCKO...

Page 11: ... missing or damaged file a claim with the carrier immediately SUPPLIED ACCESSORIES Speaker microphone jack cover 1 Speaker microphone locking bracket 1 Belt clip KBH 10 1 Screw set M2 6 x 7 mm Black 1 M3 x 8 mm 2 Instruction manual 1 Note Refer to PREPARATION page 2 for accessory installation instructions ...

Page 12: ... the battery pack with the back of the transceiver then press the battery pack and transceiver firmly together until the release latch on the base of the transceiver locks 2 To remove the battery pack lift the safety catch on the base of the transceiver then press the release latch underneath the safety catch 3 While pressing the release latch pull the battery pack away from the transceiver ...

Page 13: ... antenna and degrade your transceiver s performance INSTALLING THE BELT CLIP Belt clip If necessary attach the belt clip using the two supplied M3 x 8 mm screws Note If the belt clip is not installed its mounting location may get hot during continuous transmission or when left sitting in a hot environment Do not use glue which is designed to prevent screw loosening when installing the belt clip as...

Page 14: ... the transceiver water resistant you must cover the speaker microphone jacks with the supplied cover INSTALLING THE OPTIONAL SPEAKER MICROPHONE OR HEADSET Speaker microphone locking bracket 1 Insert the speaker microphone or headset plugs into the speaker microphone jacks 2 Attach the locking bracket using the supplied M2 6 x 7 mm screw Note The transceiver is not fully water resistant while using...

Page 15: ...sceiver from the charger It takes approximately 3 hours to charge the battery pack When the charger will not be used for a long time unplug the AC adapter from the AC outlet Charging slot Indicator Note When the indicator blinks red the battery pack is either defective or the battery pack contacts are not properly mated with those of the charger When the indicator flashes green and orange the batt...

Page 16: ...ise to switch the transceiver ON To switch the transceiver OFF turn counterclockwise until a click sounds Rotate to adjust the volume level PTT Push to Talk switch Press and hold then speak into the microphone to transmit Side 1 key Press to activate its programmable function The default setting is Squelch Off Momentary Side 2 key Press to activate its programmable function The default setting is ...

Page 17: ...des The default setting is None no function Speaker Microphone jacks Insert the Speaker Microphone or Headset plug into this jack LED Indicator Status Indicator Color Meaning Lights red Transmitting Lights green Receiving a call Blinks red Battery power is low while transmitting Blinks orange blue Receiving an encoded call FleetSync DTMF signaling etc Your dealer can set the LED to blink either or...

Page 18: ...TMF or QT DQT Optional Signaling Appears while using the Talk Around function Appears while scanning Appears when a message is stored in the transceiver stack memory Blinks when a new message has arrived The selected channel is set as a Priority channel Appears while using low transmit power on the selected channel Appears when the Scrambler function has been activated ...

Page 19: ...ry status page 28 The selected zone is added to the scanning sequence The selected channel is added to the scanning sequence Appears while using the VOX function Displays the zone and channel number or name as well as FleetSync messages and DTMF codes ...

Page 20: ... Selcall FleetSync Status FleetSync Selcall Status or OST Emergency can be programmed only on the Side 1 and Side 2 keys None No function 2 tone Autodial Call 1 Call 2 Call 3 Call Alert MDC 1200 Calling Alert Channel Down Channel Entry Channel Up Direct Zone Channel Display Character Emergency Key Lock Lamp Lone Worker Low Transmit Power Monitor Monitor Momentary OST Operator Selectable Tone Radio...

Page 21: ...ect the first digit of the password 2 Press the C key to accept the entry and move to the next digit Press the A key to delete an incorrect digit 3 Repeat steps 1 and 2 to enter the entire password The password can contain a maximum of 6 digits 4 Press the S key to confirm the entered password If you enter an incorrect password an error tone sounds and the transceiver remains locked ADJUSTING THE ...

Page 22: ...hannel number Press the key programmed as Display Character to toggle between the two displays TRANSMITTING 1 Select your desired zone and channel above 2 Press the key programmed as Monitor or Squelch Off to check whether or not the channel is free If the channel is busy wait until it becomes free 3 Press the PTT switch and speak into the microphone in your normal speaking voice For best sound qu...

Page 23: ...channel has been programmed the transceiver will automatically change to the Priority channel when a call is received on that channel even if call is being received on a normal channel The indicator appears when the selected channel is the Priority channel depending on dealer setting TEMPORARY CHANNEL LOCKOUT During scan you can temporarily remove specific channels from the scanning sequence by mo...

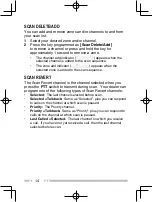
Page 24: ...can sequence SCAN REVERT The Scan Revert channel is the channel selected when you press the PTT switch to transmit during scan Your dealer can program one of the following types of Scan Revert channels Selected The last channel selected before scan Selected Talkback Same as Selected plus you can respond to calls on the channel at which scan is paused Priority The Priority channel Priority Talkback...

Page 25: ... DTMF numbers that have been programmed onto your transceiver 1 Press the key programmed as Autodial The last called number appears 2 Press the B or C key to select your desired Autodial list number 3 Press the PTT switch to make the call Press the S key to exit without making a call Store Send If the Store Send function has been enabled by your dealer you can configure whether or not each DTMF di...

Page 26: ...call containing a stun code the transceiver becomes disabled The stun code is cancelled when the transceiver receives a call with a revive code STUN appears while the transceiver is stunned DTMF NUMBER DISPLAY Note This features can only be activated when DTMF Signaling is turned OFF When you receive a DTMF code containing at least 3 digits it will appear on the display Each successive digit will ...

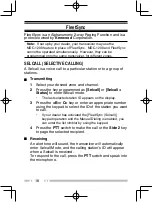
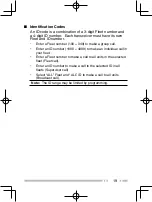
Page 27: ...matching DTMF code FleetSync Signaling Refer to SELCALL SELECTIVE CALLING on page 18 MDC 1200 MDC 1200 signaling opens the squelch only when the transceiver receives a call with a matching MDC 1200 ID code OPERATOR SELECTABLE TONE OST You can change the preset encode and decode tones for the selected channel Up to 40 OST pairs can be pre programmed by your dealer 1 Select your desired channel 2 Pr...

Page 28: ...key programmed as Selcall or Selcall Status to enter Selcall mode The last selected station ID appears on the display 3 Press the B or C key or enter an appropriate number using the keypad to select the ID of the station you want to call If your dealer has activated the FleetSync Selcall keypad operation and the Manual Dialing is enabled you can enter the list nimbler by using the keypad 4 Press t...

Page 29: ...00 349 to make a group call Enter an ID number 1000 4999 to make an individual call in your fleet Enter a Fleet number to make a call to all units in the selected fleet Fleet call Enter an ID number to make a call to the selected ID in all fleets Supervisor call Select ALL Fleet and ALL ID to make a call to all units Broadcast call Note The ID range may be limited by programming ...

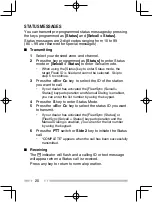
Page 30: ...tation you want to call If your dealer has activated the FleetSync Selcall Status keypad operation and Manual Dialing is enabled you can enter the list number by using the keypad 4 Press the S key to enter Status Mode 5 Press the B or C key to select the status ID you want to transmit If your dealer has activated the FleetSync Status or FleetSync Selcall Status keypad operation and the Manual Dial...

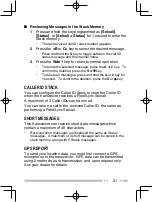
Page 31: ...rm the deletion press the S or key CALLER ID STACK You can configure the Caller ID Stack to store the Caller ID when the transceiver receives a FleetSync Selcall A maximum of 3 Caller IDs can be stored You can return a call to the received Caller ID the same as performing a FleetSync Selcall SHORT MESSAGES This transceiver can receive short data messages which contain a maximum of 48 characters Re...

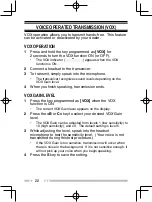
Page 32: ...ansmission ends VOX GAIN LEVEL 1 Press the key programmed as VOX when the VOX function is ON The current VOX Gain level appears on the display 2 Press the B or C key to select your desired VOX Gain level The VOX Gain can be adjusted from levels 1 low sensitivity to 10 high sensitivity and off The default setting is level 5 3 While adjusting the level speak into the headset microphone to test the s...

Page 33: ...eration you can press the keypad keys directly 2 Enter your desired channel number using the keypad If no more than 9 channels have been programmed on your transceiver simply enter a 1 digit channel number For example to select channel 5 enter 5 on your keypad If up to 99 channels have been programmed on your transceiver enter a 2 digit channel number For example to select channel 5 enter 05 on yo...

Page 34: ... following keys and functions when Key Lock is activated Emergency Lamp Monitor Monitor Momentary Squelch Off Squelch Off Momentary Key Lock PTT SEND THE GPS DATA Press the key programmed as Send the GPS Data when the GPS unit has been installed to send your positioning data to the base station EMERGENCY CALLS If your transceiver has been programmed with the Emergency function you can make emergen...

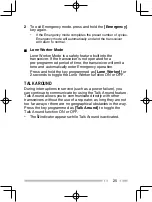
Page 35: ...omatically enter Emergency operation Press and hold the key programmed as Lone Worker for 2 seconds to toggle the Lone Worker function ON or OFF TALK AROUND During interruptions in service such as a power failure you can continue to communicate by using the Talk Around feature Talk Around allows you to communicate directly with other transceivers without the use of a repeater as long they are not ...

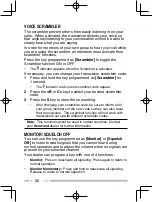
Page 36: ... the B or C key to select your desired scrambler code 3 Press the S key to store the new setting After changing your scrambler code be sure to inform all of your group members of the new code so they can also reset their transceivers The scrambler function will not work with transceivers set up with different scrambler codes Note This function cannot be used in certain countries Contact your Kenwo...

Page 37: ...ired squelch level from 0 open to 9 tight 3 Press the S key to store the new setting TRANSCEIVER BACKLIGHT To turn the transceiver display and front panel key backlight on press the key programmed as Lamp The display and keypad remain lit for 5 seconds Pressing any key other than the PTT switch and the Power switch Volume control while the backlight is on will reset the timer to 5 seconds If Auto ...

Page 38: ...med Battery Saver turns off Note While the Battery Saver is operating the LED may flash green when receiving a QT DQT signal which does not match the transceiver QT DQT setting BATTERY POWER INDICATOR The battery power indicator displays the battery power remaining as illustrated below High Sufficient Low Very Low flashing When the battery power is very low replace or recharge the battery pack If ...

Page 39: ...a different channel or wait until the channel becomes free COMPANDER If programmed by your dealer for a channel the compander will remove excessive noise from transmitted signals to provide higher clarity of signals PTT ID PTT ID is the transceiver unique ID code which is sent each time the PTT switch is pressed and or released ...

Page 40: ......

Reviews: