4
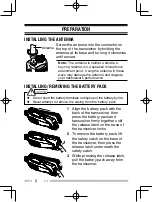
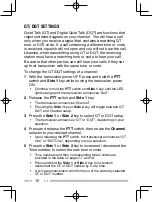
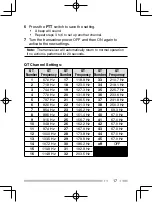
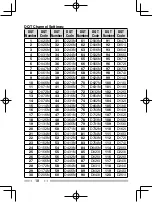
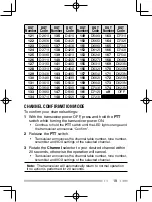
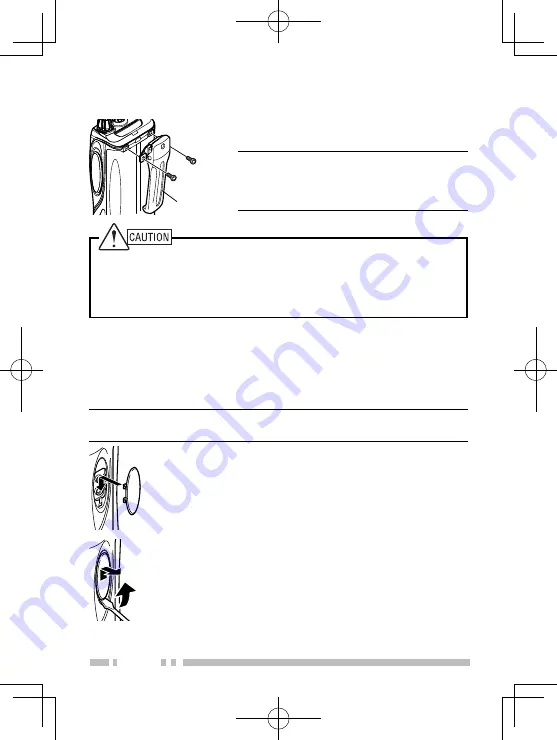
INSTALLING THE BELT CLIP
If necessary, attach the belt clip using
the two supplied M3 x 8 mm screws.
Note:
If the belt clip is not installed, its
mounting location may get hot during
continuous transmission or when left
sitting in a hot environment.
Do not use glue which is designed to prevent screw loosening when
installing the belt clip, as it may cause damage to the transceiver.
Acrylic ester, which is contained in these glues, may crack the
transceiver’s back panel.
INSTALLING THE CAP OVER THE SPEAKER/
MICROPHONE JACKS
Install the cap over the speaker/ microphone jacks when not
using an optional speaker/ microphone.
Note:
To keep the transceiver water resistant, you must cover the
speaker/ microphone jacks with the supplied cap.
1
Place the cap over the jacks so that the locking tabs
insert into the transceiver grooves.
2
While holding the cap in place, push it towards the
bottom of the transceiver until the tabs on the cap click
into place.
• To remove the cap, hold the top of the cap in place
with your fi nger while inserting a
2 mm or smaller fl at blade screwdriver under the
bottom of the cap. Slowly slide the screwdriver
in until its tip touches the tab inside the cap, then
gently pry the cap up (handle of screwdriver
moving away from the transceiver) to remove the
cap.
Belt clip


